Delid My CPU

It’s funny, in that for the current poorly i5, I’ve noticed that I’m using more cores in flight sims recently. For stuff like DCS, it uses 1 and a bit cores pretty much solidly, but now stuff like Discord and SRS running as well seems to be up’ing the heat a tiny bit.

For X-Plane, even though it is pretty single threaded/single core as well, when I’m running Pilot2ATC, Active Sky XP, stuff like AviTab is having PDF viewers and browser instances, and they are using other cores / physical threads - it’s like it is slowly becoming about 3 or 4 core dependent just for the sim, despite them not changing much with core X-Plane.

Hmm, now I’m talking myself away from the i5 9600K, as six real cores might not be enough next year for the things I often run. Windows and virus-checker-du-jour pretty much needs two cores, a couple for a sim (plus hopefully more next year), and then a couple more for all the gubbins I run for things that go with the sims as accessories…

I’m not running VR, but I can play DCS and stream it with OBS doing software based video encoding thanks to the i9-9900k. Just to give an idea of what the core/thread count can do. That’s also with no overclock - just the new TurboBoost which goes to 4.0ghz when it needs it.

Typically now if a program crashes for being “overloaded” it’s a coding limit (like single threaded design) and not a CPU limit.

For anyone that didn’t know, TurboBoost is like a free overclock that doesn’t require an “unlocked” processor which lets you specify clock values. On early generations, this would boost one core’s clock speed as needed. I’m not sure when the switch was done, but the latest generation have a new version of it which will boost ALL cores.

2 Likes

This is also worth a read - buying an i5 is essentially a “partially broken i7” previously and now a half-broken i9:

So if you needed justification (or are a perfectionist) to spend money - anything but the top is “technically” “defective” or intentionally throttled/disabled…:grin:

2 Likes

M.2 SSD installed with out a hitch (but I am pretty sure I lost access to my USB-3 card that was sitting in the PCIEX1_1 slot (as you have to switch that in the BIOS to the M.2 setting). I have not used that card for a while as it was really set aside for the Oculus.

DCS and X-Plane transferred straight over without issue. That was nice.

Installed the AI Tweek 3 utility and it immediately bumped my 3.5 GHz i5 4690K up to 4.3 GHz, which Inicely above the 3.9 GHz Turbo setting for the chip … and I didn’t have to do anything :slight_smile:

I will take a look at these settings after trying it out for a few days with the AI Tweaker 3 default options.

1 Like

Yay, free performance - nice! It looks like the Ai Tweek just did what I was proposing automatically, in change the multiplier from stock 35 to 43.

If your temperatures are all ok (say, always under 80C under 100% load, less in a sim) at a multiplier of 43 (the base clock is 100) then that 4.3GHz is good stuff and I’d be tempted to just leave it. The K chip variants having the unlocked multiplier being changeable take nearly all the old complexity of overclocking out of it. You really now only have to bother with manual values, voltages and the like if you want to push on to 4.5GHz etc, but it’s just now diminishing returns.

If you did want to go beyond AI Tweek, the next bits would be:

  • Turn off all the powersaving features, as a stable manual overclock tends to fight with these. That would be Turbo Boost off, C1 Disable, C3 Disable, C6/C7 Disable, and CPU put to EIST (these are just stages of automatic power adjustments that Intel uses to undervolt the CPU when it’s not doing anything).

  • Set your Manual CPU Ring voltage (for the i5 4690K) to a manual value of 1.050V

  • Multiplier to 44. Measure temps, and then do the logic loop of:

A. If not stable under load (or even posting to the BIOS, it’ll reset if that’s the case), then voltage up a 0.050 value or at a time.
B. If too hot, voltage down.
C. JMP A (never use a Goto :wink: )

So essentially just finding the sweet spot of voltage for stability at a certain end clock speed, which is altered by the multiplier. It’s a trade off of heat, speed, volts. A typical result with a cool cooler and a 7/10 in the CPU chip lottery would be about multiplier 45, Vcore 1.25V. Some people push those i5’s up to about 1.3V to be super stable, but they will run hot at idle, so tends to be a little scary.

Associated side tip. If you are using the H100 block pump to something like the CPU Fan header, then in your BIOS settings make sure that it is always running ‘Full Speed’, i.e. 100% on the water cooler pump at all times. The fans can speed up and down around the radiators, but the pump always does better if going full tilt regardless.

2 Likes

How is the M.2. SSD - much better in terms of load times?

Also, the overclock still working ok at 4.3?

Have not had much of a chance to test it out yet. Hoping to get a Race leg in tonight but it may have to wait until Monday. Isn’t it funny that when you have stuff planned, other things always want to come in a pull you away from it? :slight_smile:

2 Likes

M.2 should be lightning. It’s the best ever.

2 Likes

SATA SSD’s typically rate 450-600 MBps(megabytes) per second, but the user likely doesn’t see that (at least I haven’t on mine) I guess due to overhead. Typically I can push up to 200 on mine with large file transfers. I haven’t really tried to fully “speedtest” it.

M.2’s on PCIE bus are rated ~3,000MBps. My workstation at work has a single M.2 as it’s C drive - with windows and other apps running it happily sits at ~300 steady on a large file transfer. Occasionally it peaks higher and I have to be careful of maxing out the gigabit network connection on everyone.

Hopefully we can get some more numbers! I’d like to see the potential before I buy.

For anyone not tech savvy reading - don’t compare to your internet connection, which is measures in mega (or giga) bits per second. You’d need 8x the MB speed in Mb to be equal.
(1Gb/s = 1,000Mb/s = 125MB/s)

3 Likes

Uh Oh, I’ve now got a vice and a razor blade - what could go wrong? :slight_smile:

Still need to wait for the liquid metal coolant to arrive, so the i5 gets a stay of execution for a little longer.

4 Likes

What if this thread ends with you going to remove the CPU and the heatspreader just falls off? “AHA! There’s the problem!”

6 Likes

The people demand blood. Vive la republique!

5 Likes

My hands start sweating everytime i open this thread. The anxiety is real! :wink:

6 Likes

Bwhaha hah haha - the team is assembled…

5 Likes

Lights…Camera…Surgery!

Good luck!

1 Like

Assemble

2 Likes

One last contribution from my wife - I’ve got to have good nails for this part :wink:

(I’m going to use that over the capacitors surround for extra safety from the liquid metal, under the IHT)

1 Like

grafik

1 Like

butterlies

4 Likes

Ok. That was exciting.

The good news is I am writing this from patient zero!

Here’s the steps I took, to document it for the record (just in case patient zero ever gets a lawyer):

First off, here was my issue. When I stress my PC, like for CPU intensive gaming like flight sims, then my overclock of 4.5 GHz was running too hot. I put it back to defaults of 3.6, with a Turboboost of 3.9 on the single core, but it was (a) still too hot and (b) made me feel sad, because it was slower than I was used to for the last year or so. Here’s a rough temp profile pre-operation:

So the ‘70C+’ spike was the CPUZ plain ‘Stress’ text, to max the CPU cores for 1 minute. It would essentualy just escalate up to about 85C, causing me to stress out.

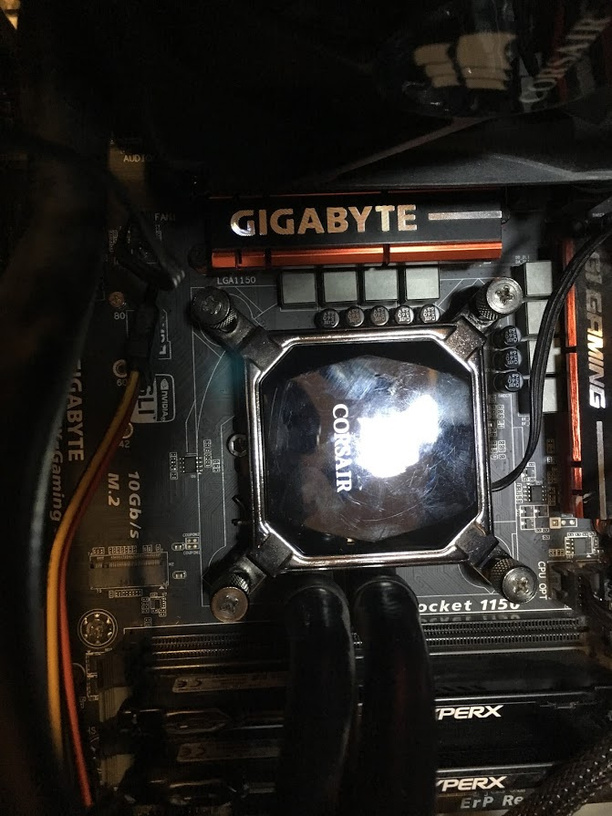
Step 1. Take off the existing cooler. The thermal paste I used last was Arctic Silver 5, and it looks still pretty good here (albeit a bit uneven under the water block when I took it off):

Step 2. Get that puppy prep’d for the op. Here’s the hot boy himself:

Step 3. Off With Their Head! After a quick Isopropyl alcohol 99% rub down refreshing I put it in the Vice of Justice.

Step 4. Looking at it, it seemed wrong. Why would I put all the pressure on those lips sticking out the side. That can’t be right. Using advanced Vulcan logic I managed to figure it out and rotated it to the proper orientation here (flat sides against vice edge):

Step 5. Squeaky Bum Time. I turned the allen key. I turned it some more. Nothing.

I really turned it, like it’s a ‘him or me’ mano a mano fight now. Not budging.

(click).

Ok, something moved. Thank the maker. I think I see and edge come up a bit.

Step 6. The Completely Safe Razor Blade Technique. To cut the glue I edged a blade under a corner, like so:

I still have the vast majority of my fingers, so a win there. Plus if I’m ever lifted for prints then I can just look on the floor for them.

Step 7. The Intel Autopsy. Once some considerable force was used to pry apart the glue on integrated heat panel, I see this:

Hmm. Look at that, the actual chip is as clean as a whistle. The TIM on the IHT is rock hard and more like a plastic resin. I think this stuff was really dried out after all these years.

Step 8. Clean Up and Nails. I removed the bad paste but kept the old glue, as it would act as a guide for me putting this back together, plus I left an outline of the old TIM so I could know the boundary of where to put the new liquid metal. I used an edge of credit card to scrape it, which would come in handy when I need to buy a new computer as well. This might work with VISA or Mastercard, but no guarantees.

I then put a very thin layer of nail varnish on the capacitor pegs on the left of the actual chip (above it in the pic above). I did that because I don’t want the liquid metal squeezing off the chip or IHT and then joining all those circuits up in an hilarious 3 volt explosion. Johnny 5 would not be alive if that happened. I spent a pleasant 15 minutes blowing on my chip to dry my nail vanish. It looks fantastic! :star2:

Step 9. The Terminator 2 Arrives. Using liquid metal is scary, just because even without referring to a valence ions table, I’m pretty sure this stuff conducts electricity. Pouring it over a naked chip sounds bad. I start with the IHT, and use the syringe to put the smallest blob I can on it:

That really really spreads out a lot. I get it so there is no moving liquid, and try to keep the outline of the old TIM, as the chip is not actually symmetrically in the middle of the glued area. I used a ruler to check, being all sciency and whatnot.

Ok, time for a tiny amount on the chip.

This actually spreads out really nicely. I use a fine brush to move the metal around. It felt like painting a small figurine or toy soldier. Fun. I now have a Disco-Intel ™.

Step 10. Reassemble. I didn’t bother getting glue and sticking the IHT and chip back together. The motherboard clamps them pretty tight, and as this was my first time I was just suspecting that (a) it wouldn’t even boot and (b) I’d probably have to do this again and didn’t want to go through that vice bit with better/newer glue.

I put the naked chip back in the motherboard and then place the IHT VERY CAREFULLY on top:

I then locked down the clamp, by keeping a finger firmly on the chip while I pressured the arm down. This bit was fairly risky.

Ok, I was very tempted to use liquid metal on the outside IHT and the water block (I still might actually) but was keen to see if this would actually ever boot up again, so just used a very small amount of artic silver 5 paste and put it back together.

It boots!

It is running cooler!

Time for some experiments, but so far, it is not worse. My hypocritical oath :wink: of “do not so much harm, unless it’s fun and you can get away with it” is working. Will report back later, just now need to finish this 99% alcohol and clean up paste from my fingers.

16 Likes