Too many toys!
9 Likes
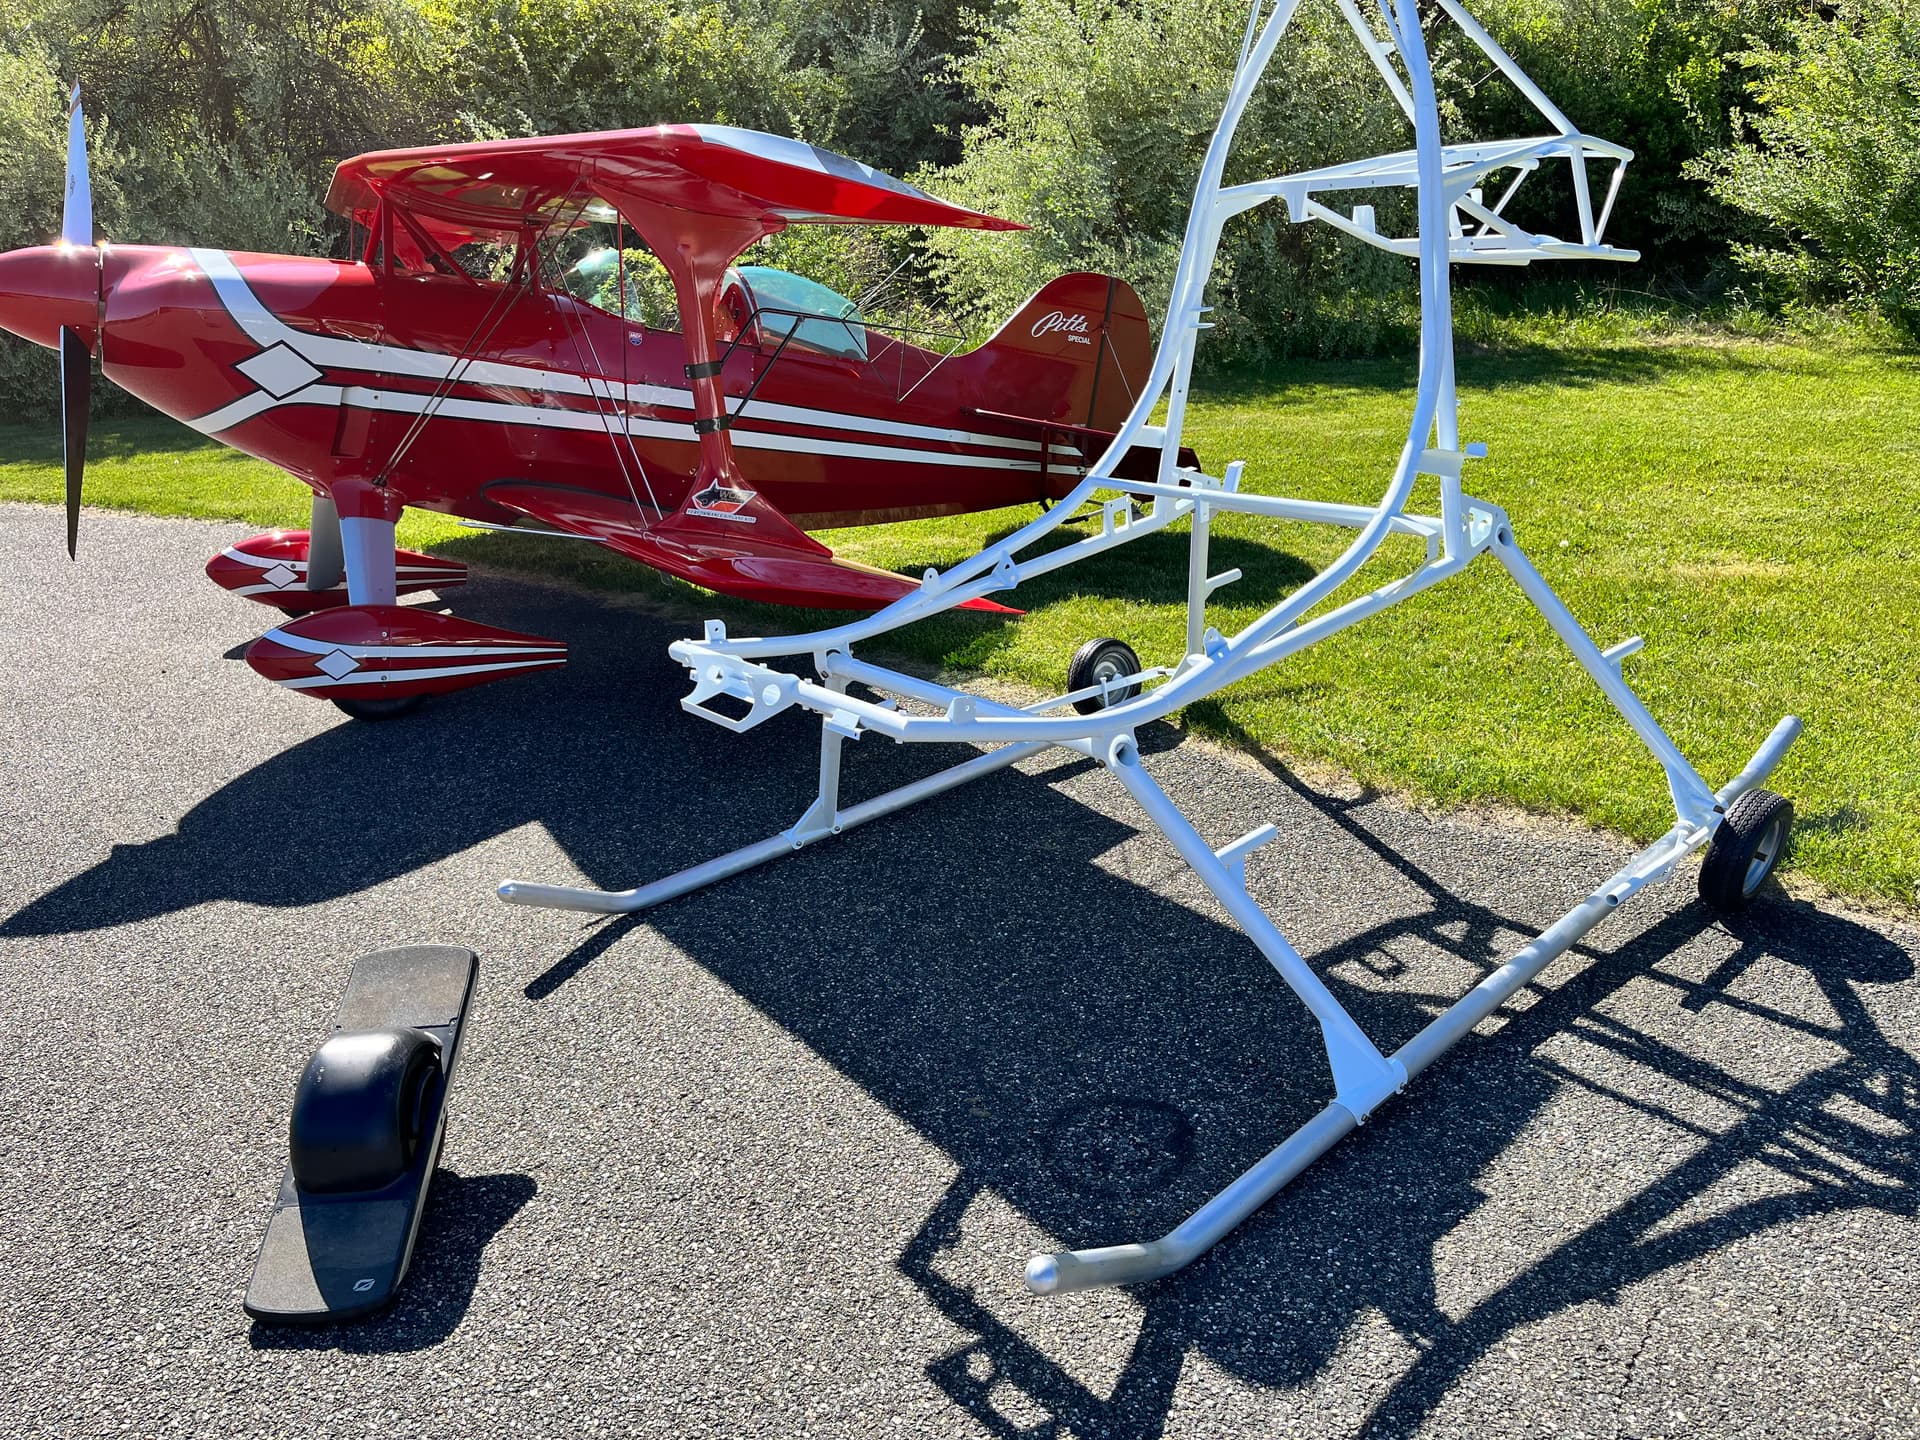
thought that Pitts is bigger ![]()
![]()
1 Like
When I first saw one in real life I was surprised how small that plane is.
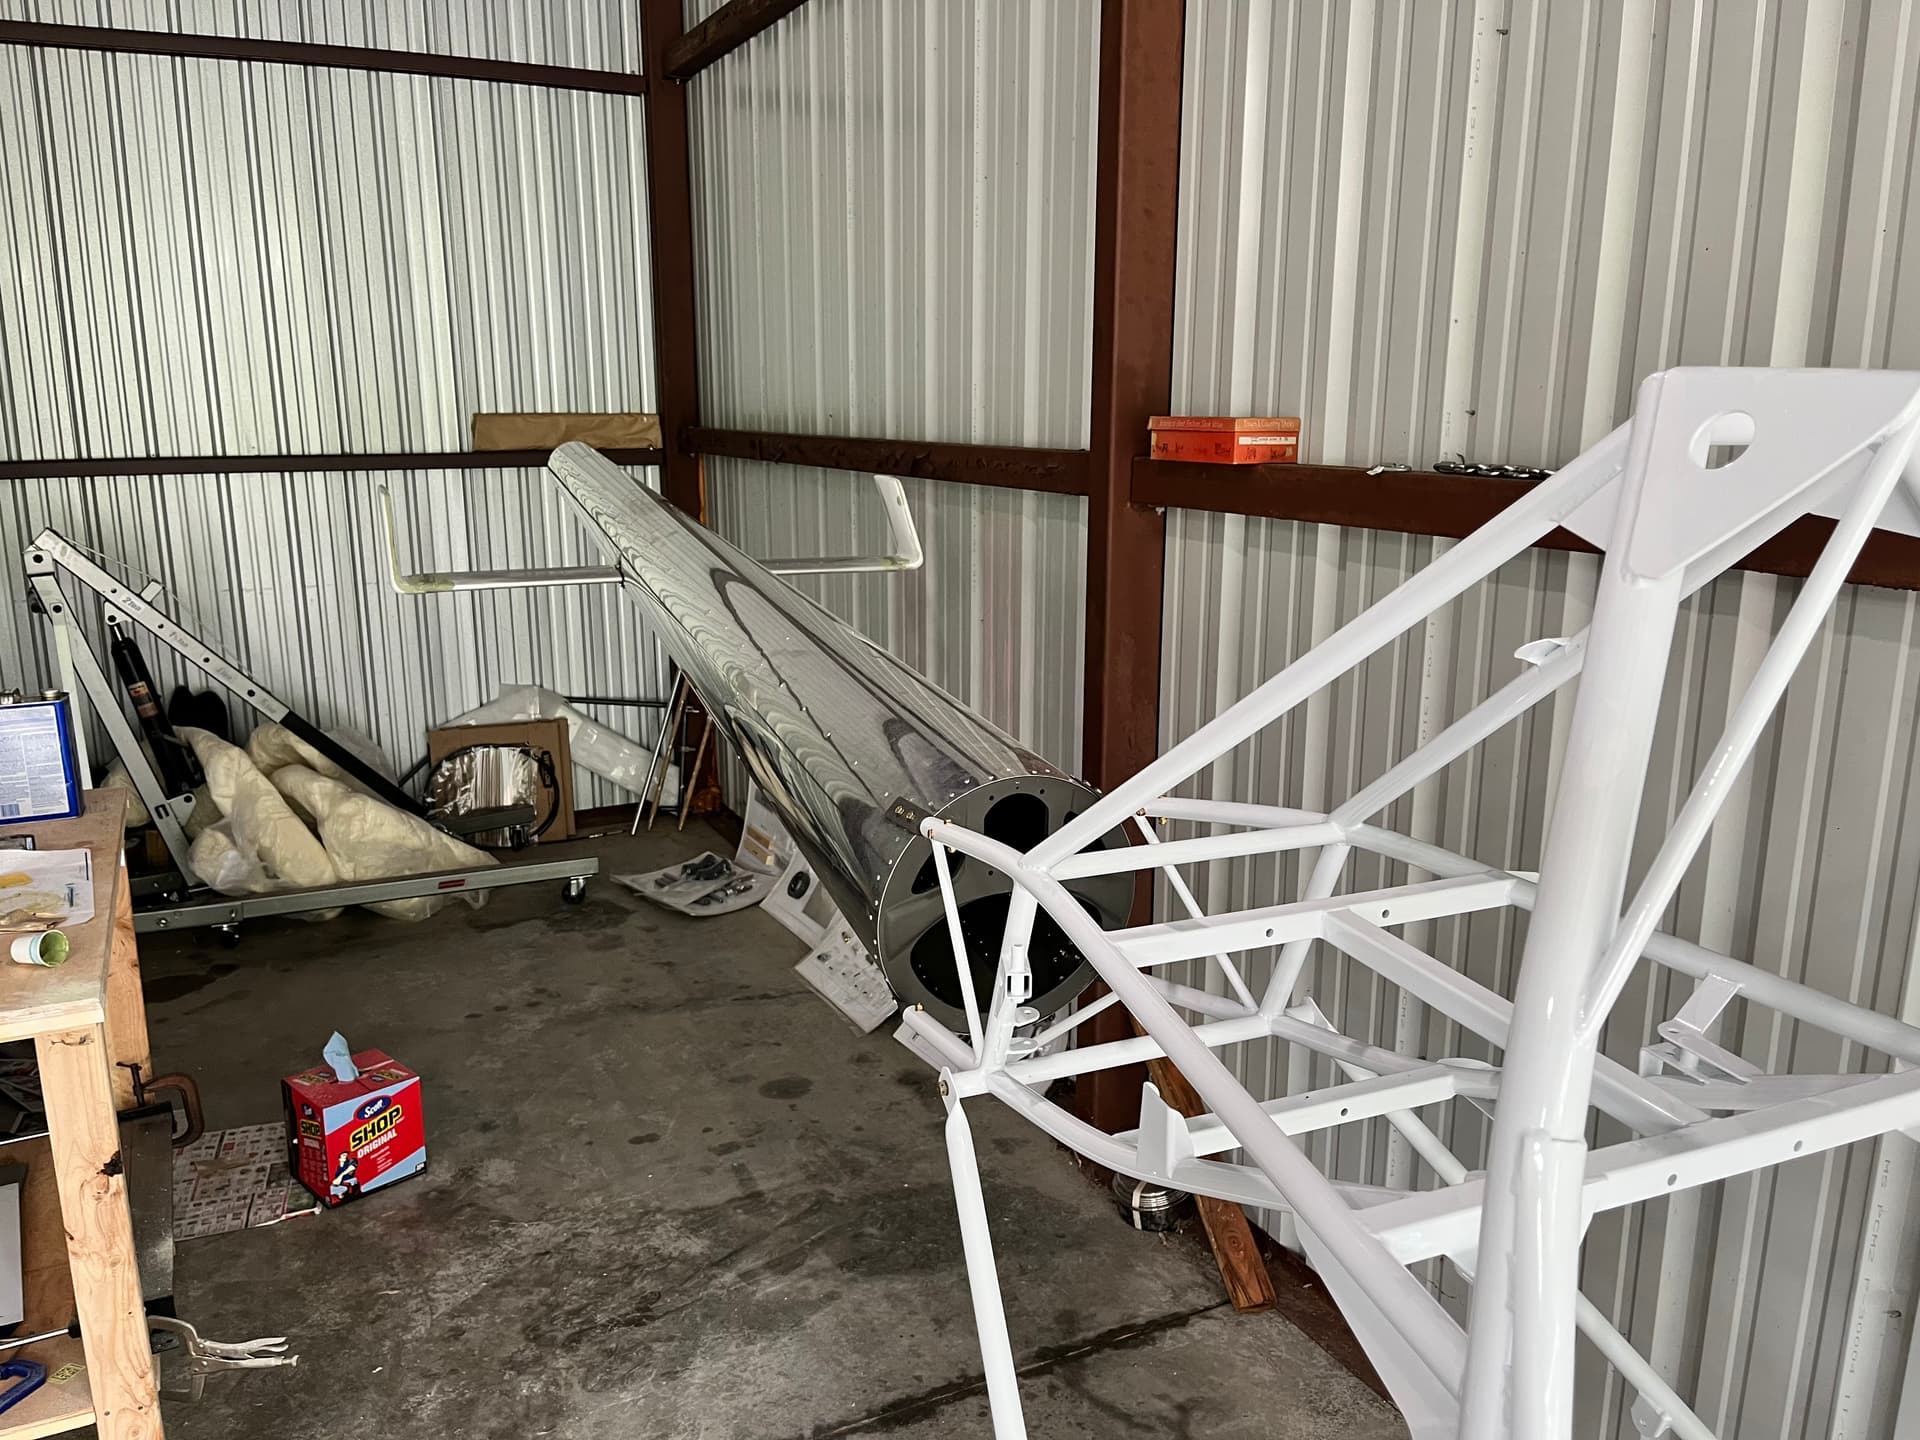
Beautiful! You’ve made a bunch of progress. How is the power coating? Did they plug all the holes for you?
They did a great job. They actually didn’t plug the holes but that was an easy enough hurdle to jump. I found out later that the wax that covered the chrome-moly was harder to remove than we feared. They thought they got it. But once they started baking, the wax liquified and they had to do the whole thing over again. The cool part is, I knew of none of this. They were super gracious for the business. I only found out through a pilot-friend of the owner. What a great little shop!
3 Likes
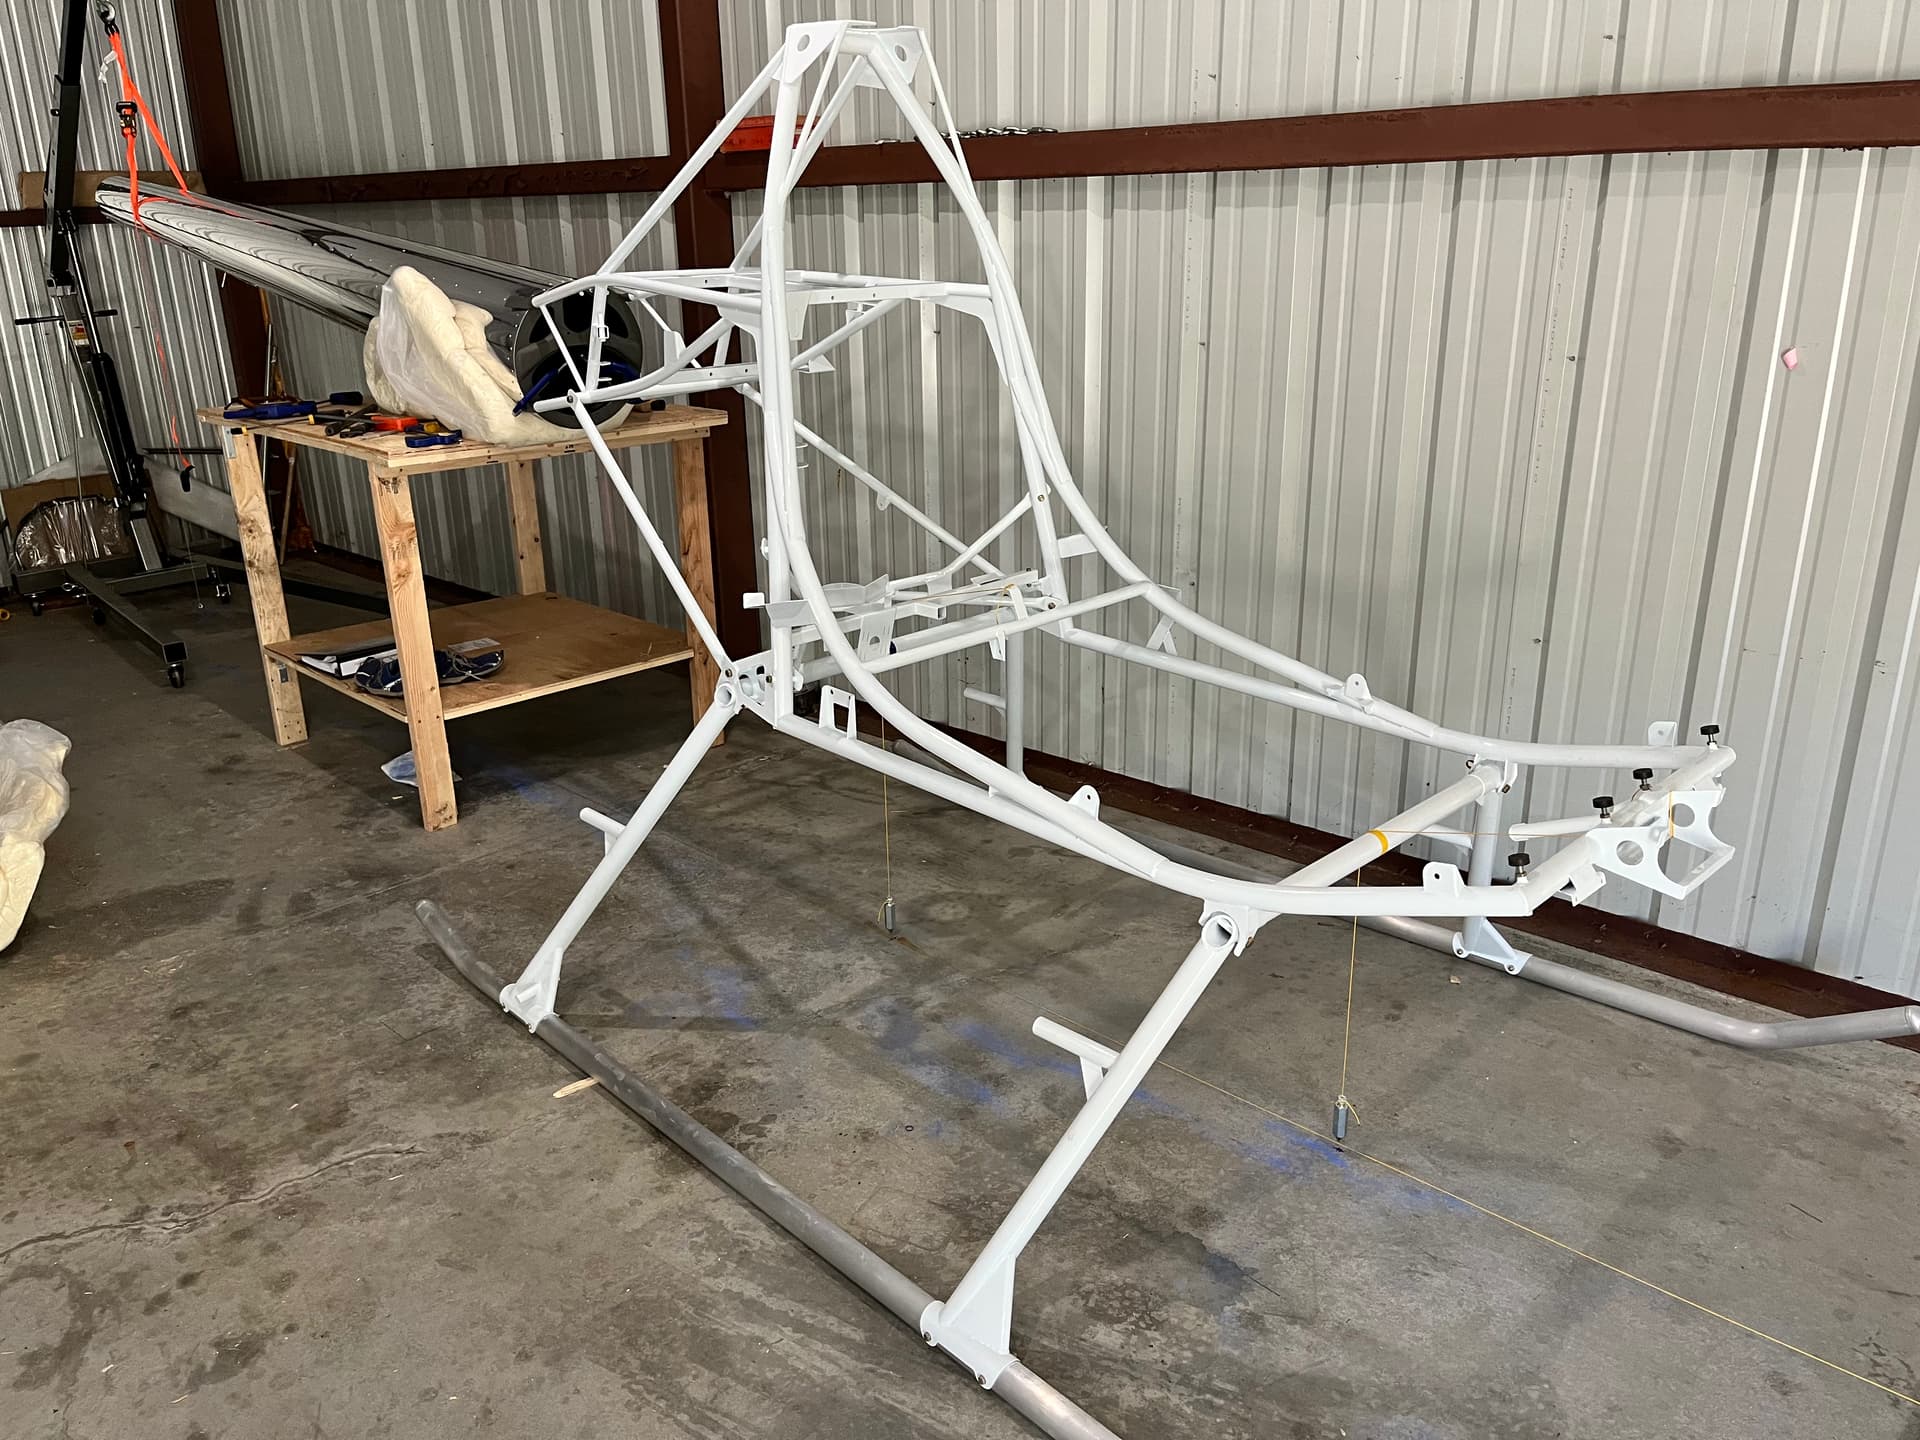

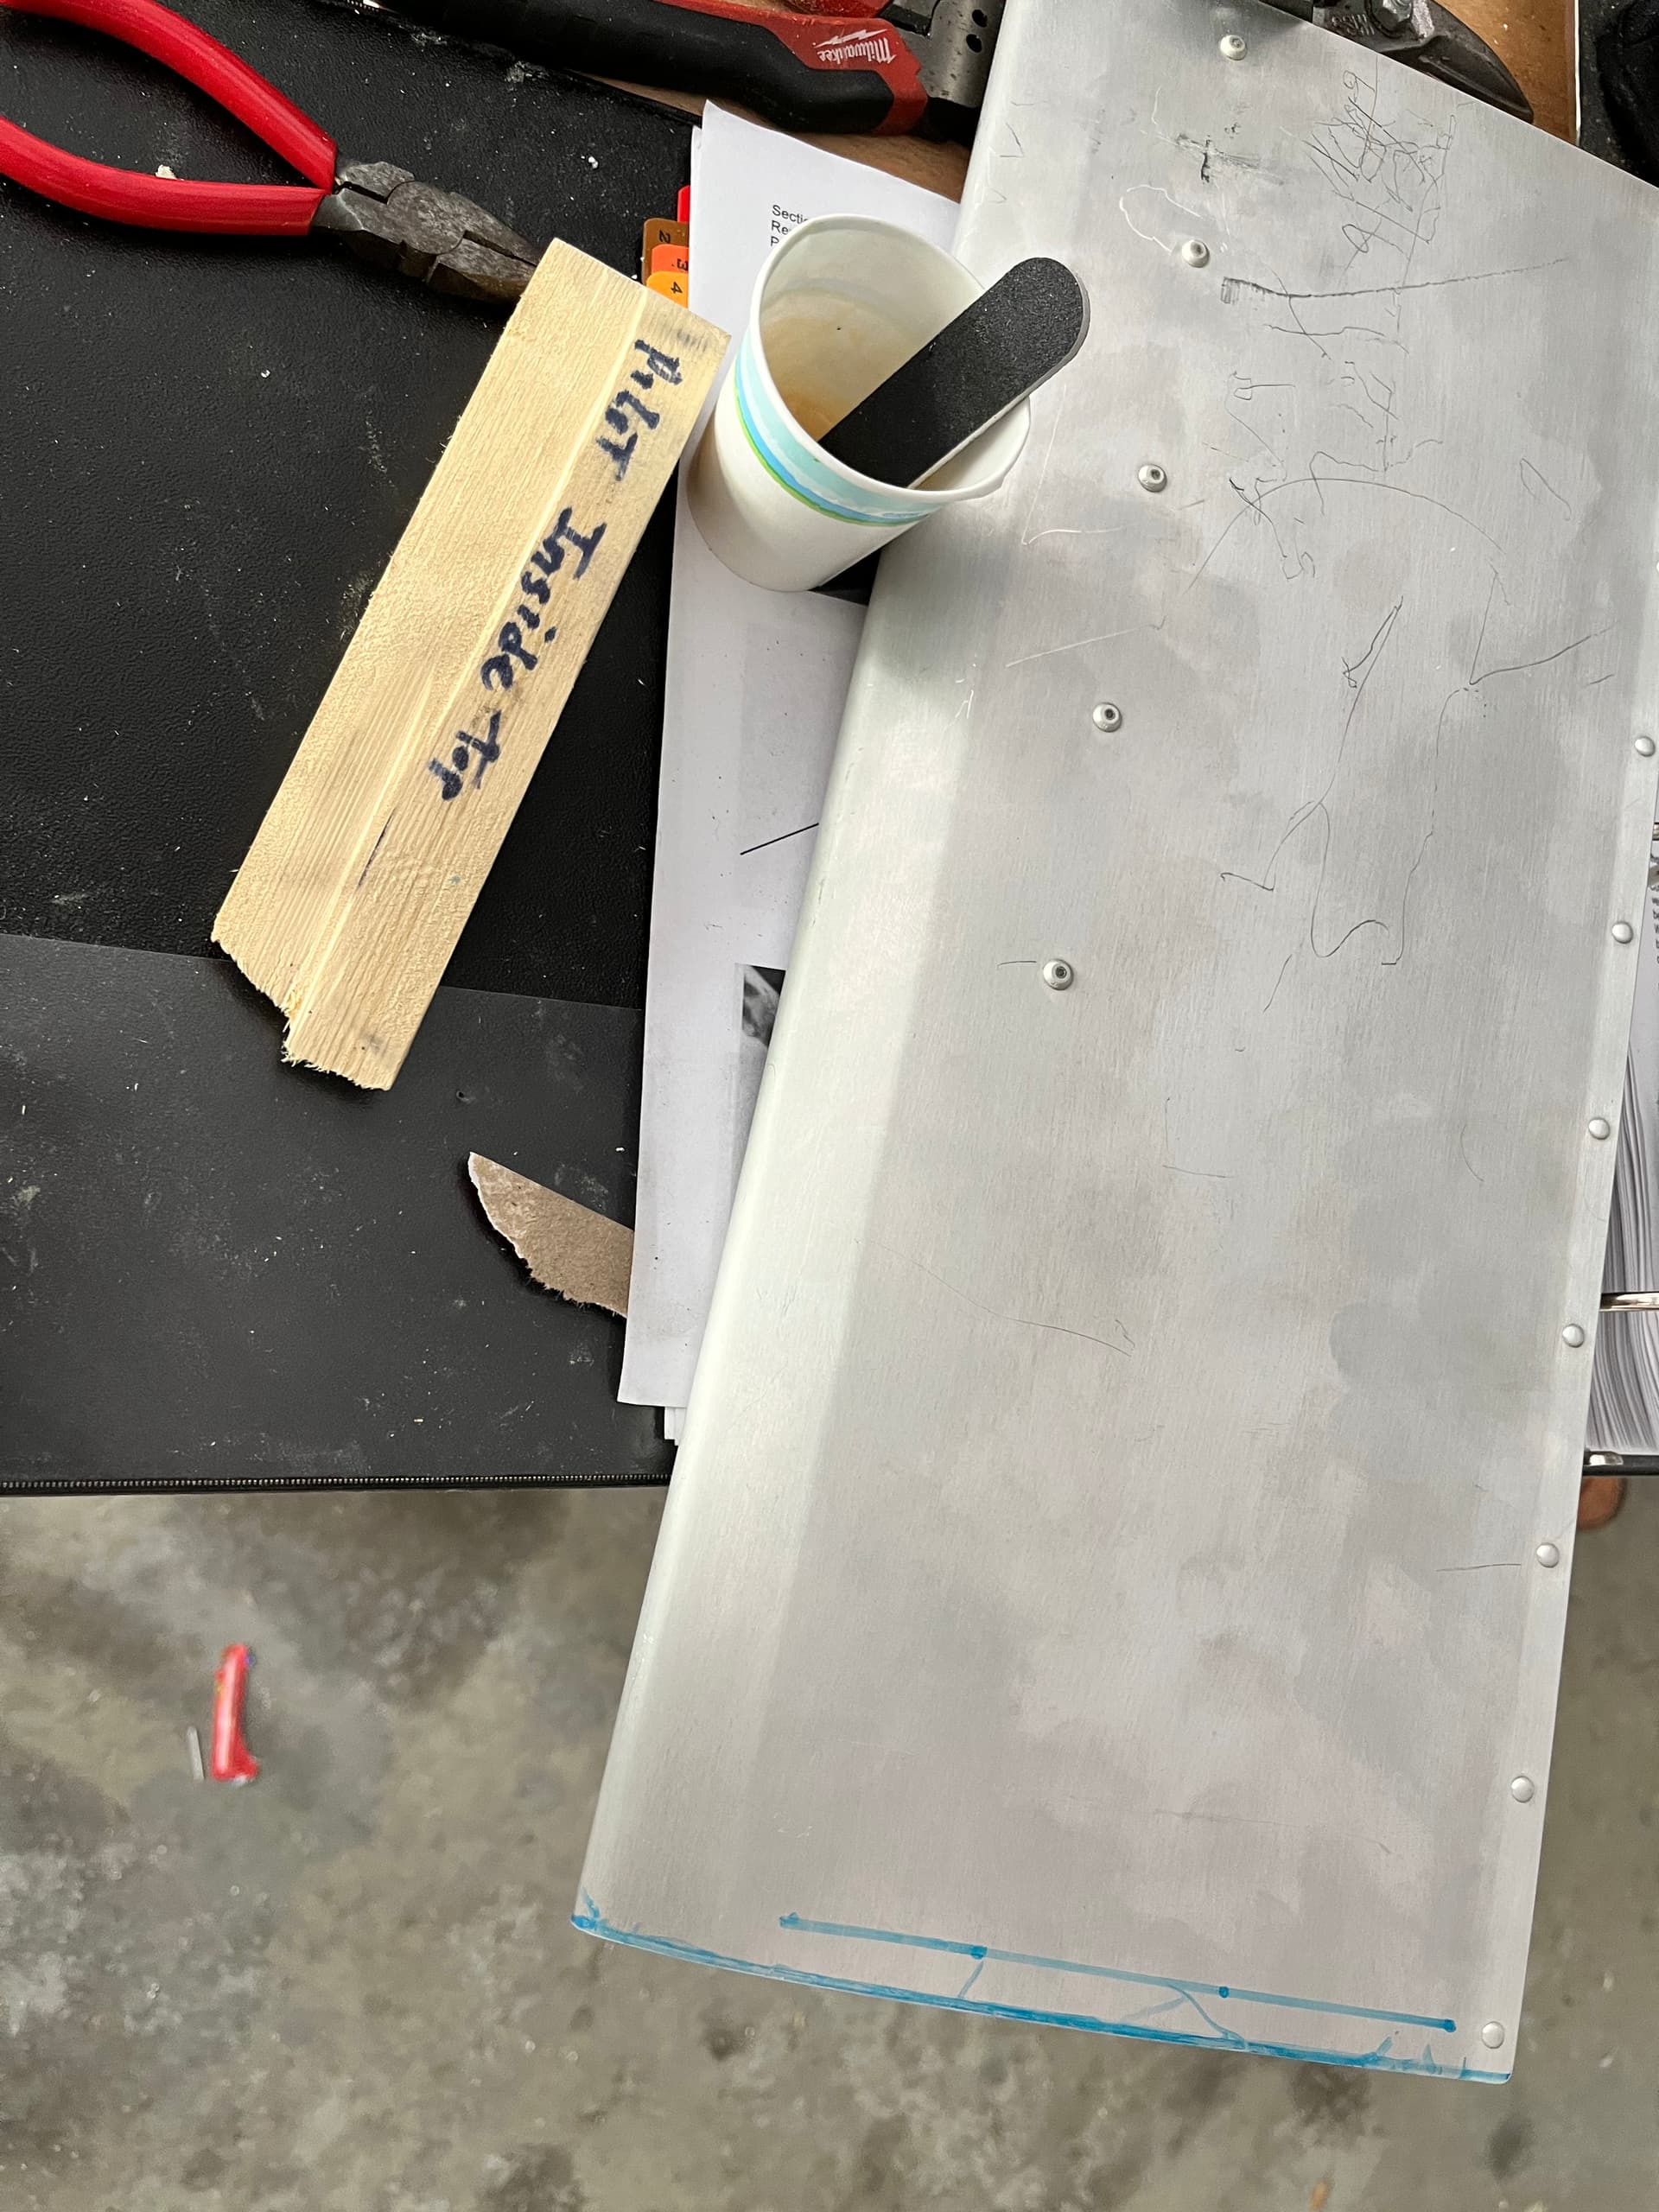
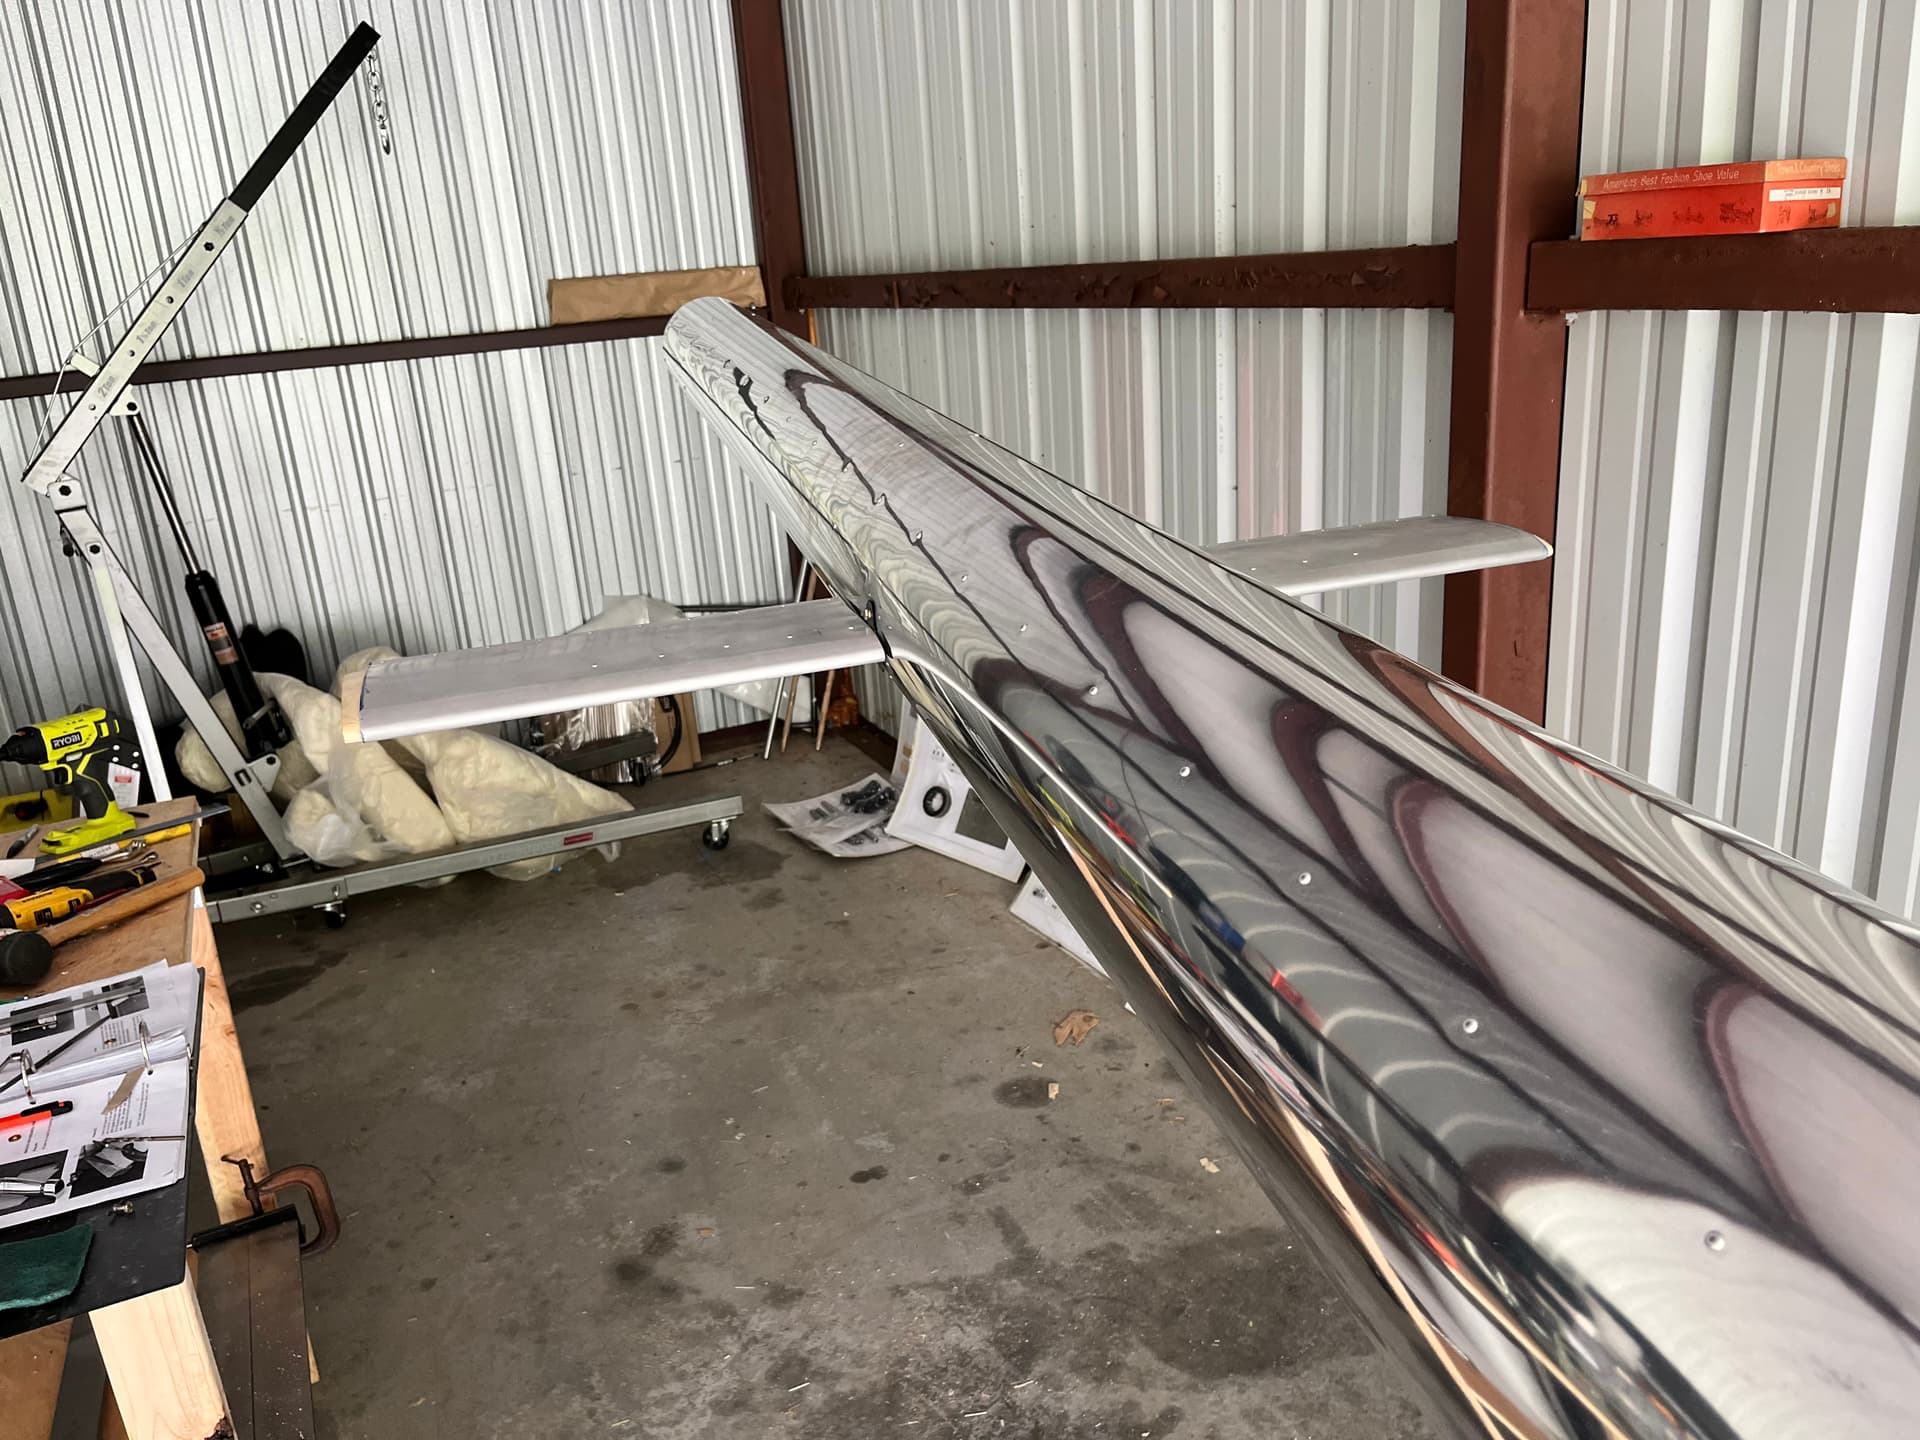
My job has been in the way of meaningful progress this week. The tailboom is now fully secured and the 3rd inspection door is clecoed. I hope to start the trim fins on Thursday.

REPLY TO BELOW: Thanks for the encouragement, guys! It means a lot.
12 Likes
You must be joking. I’d still be reading plans and in the midst of preparation stagnation. You’ve got an airframe already!
3 Likes
I also expexted slower pace, great progress, wtg man !
1 Like
The RotorX build videos total at least 10 hours. The portion that explains the bit that I am describing in this post totals, maybe, two minutes. But I’ve worked 3 days and at least 15 hours to do the equivalent work! At this rate I will be 102 years old when the heli is done.
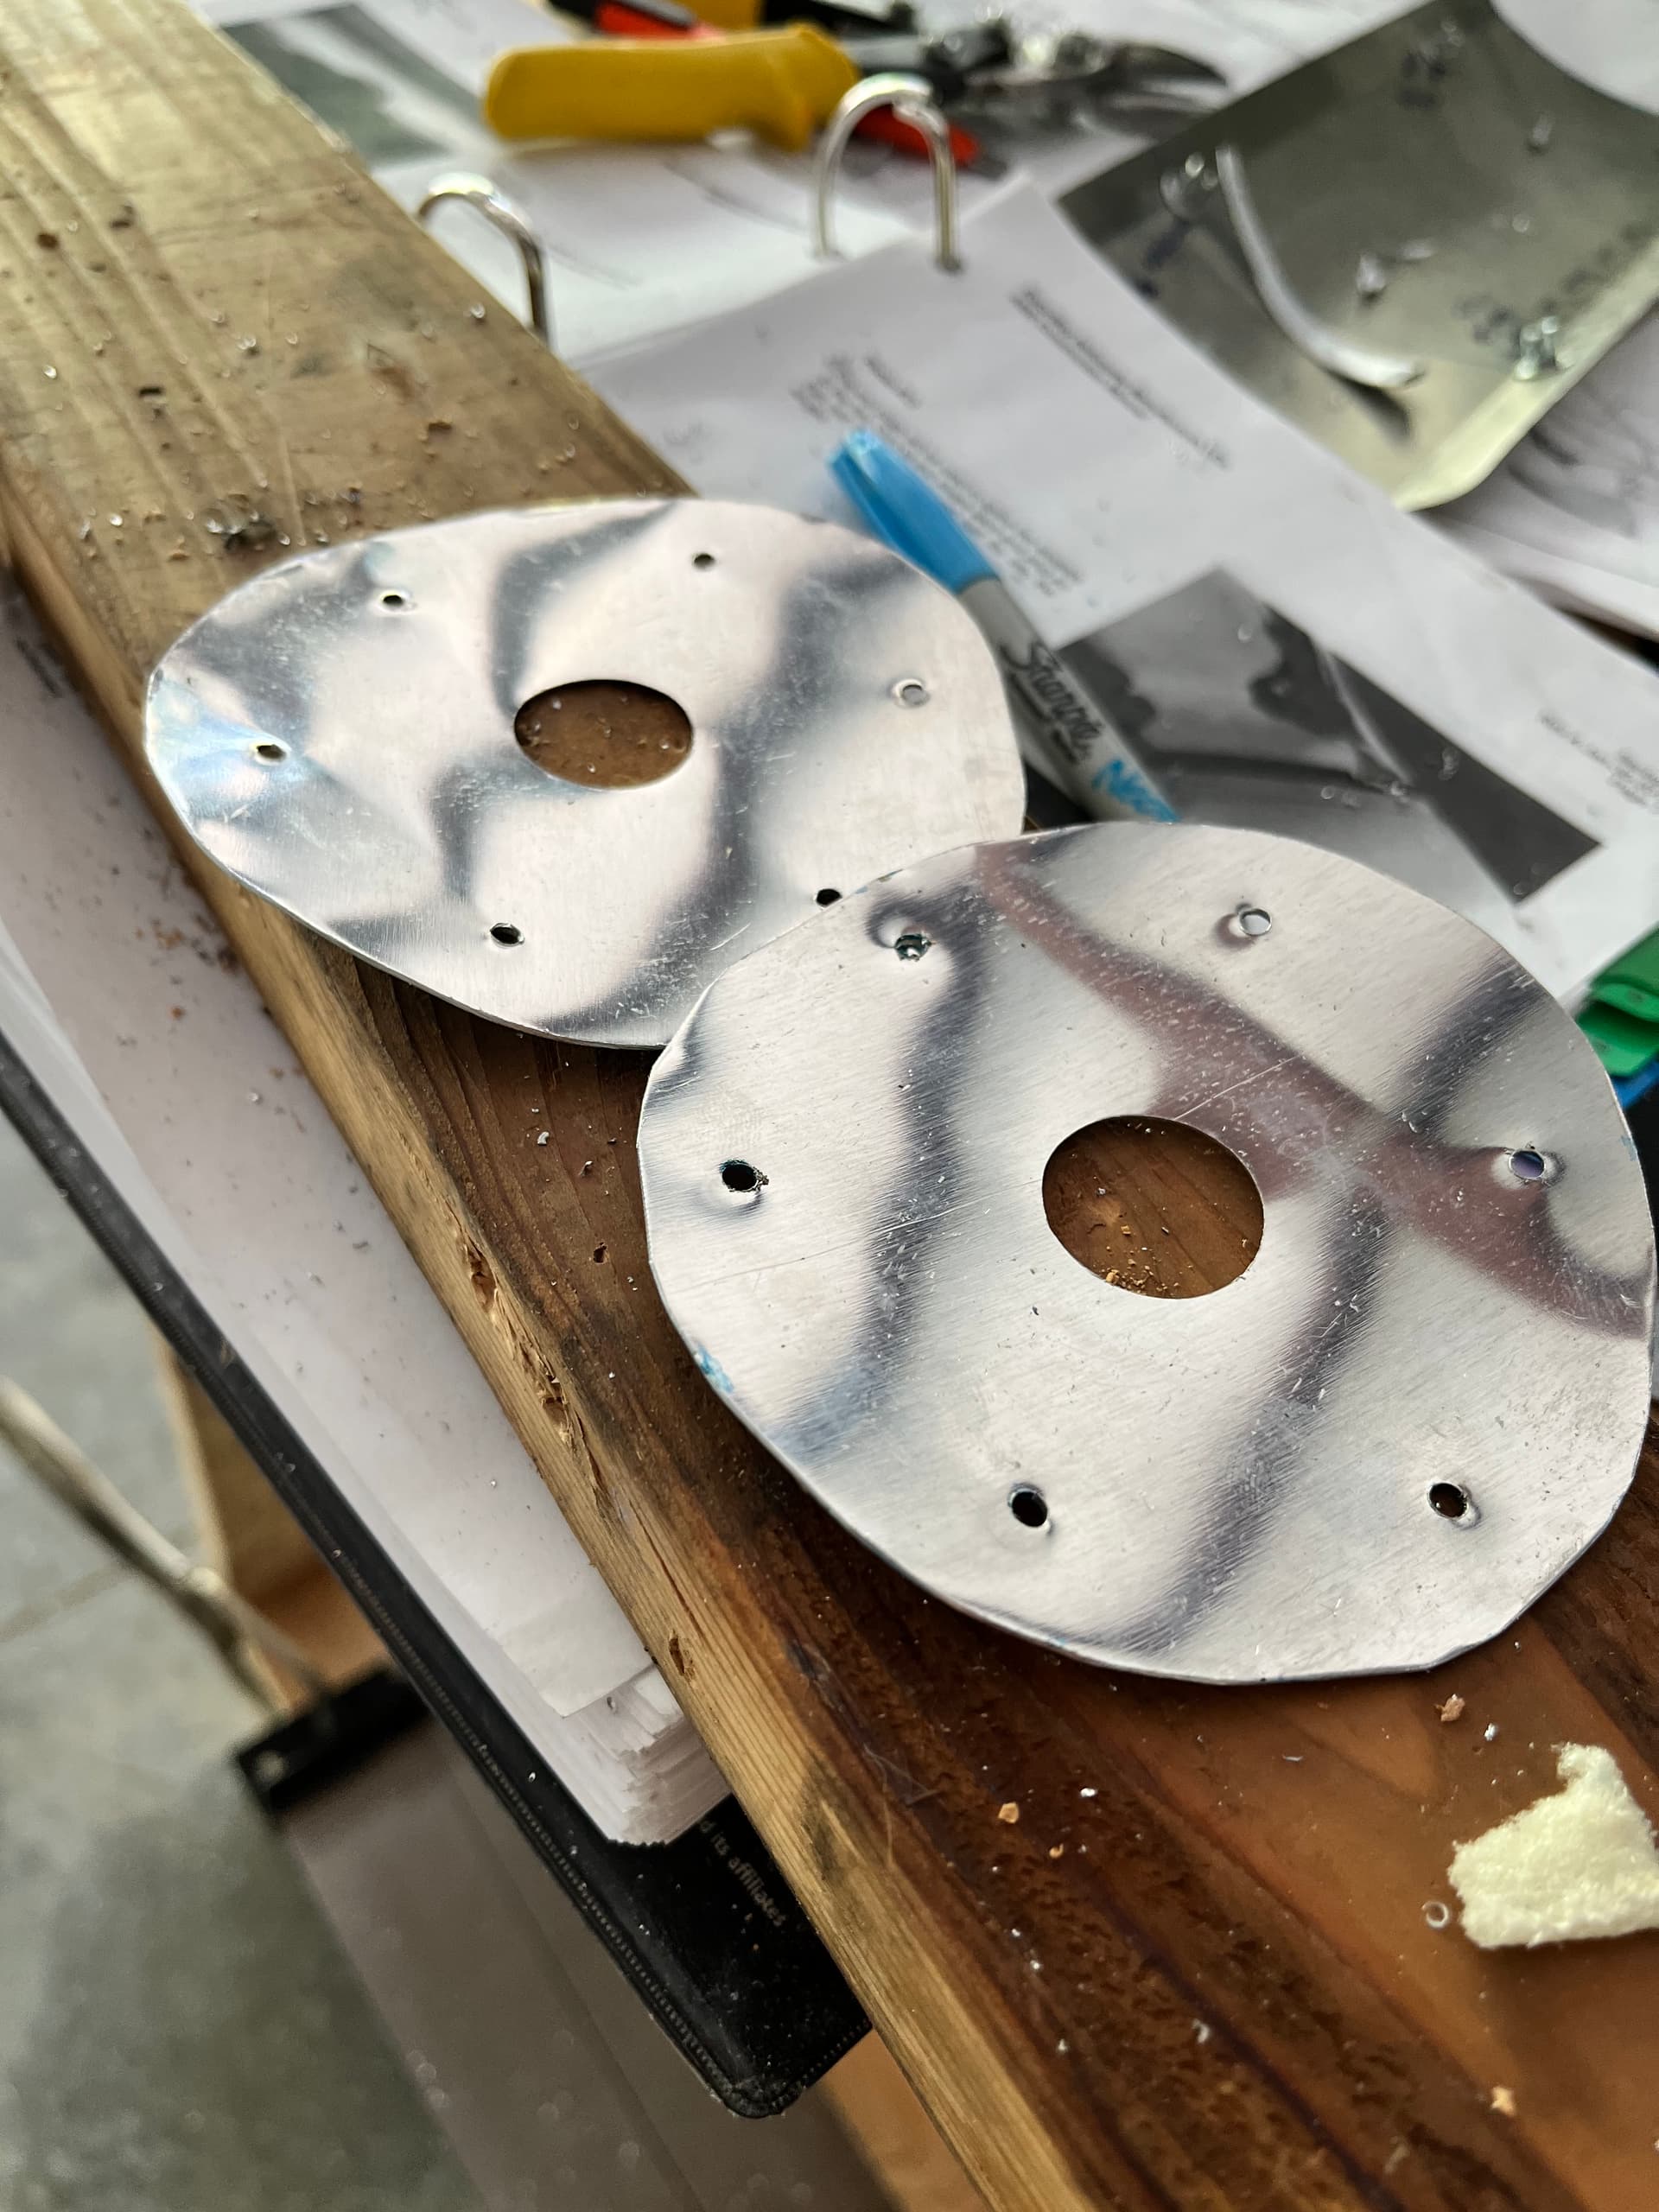
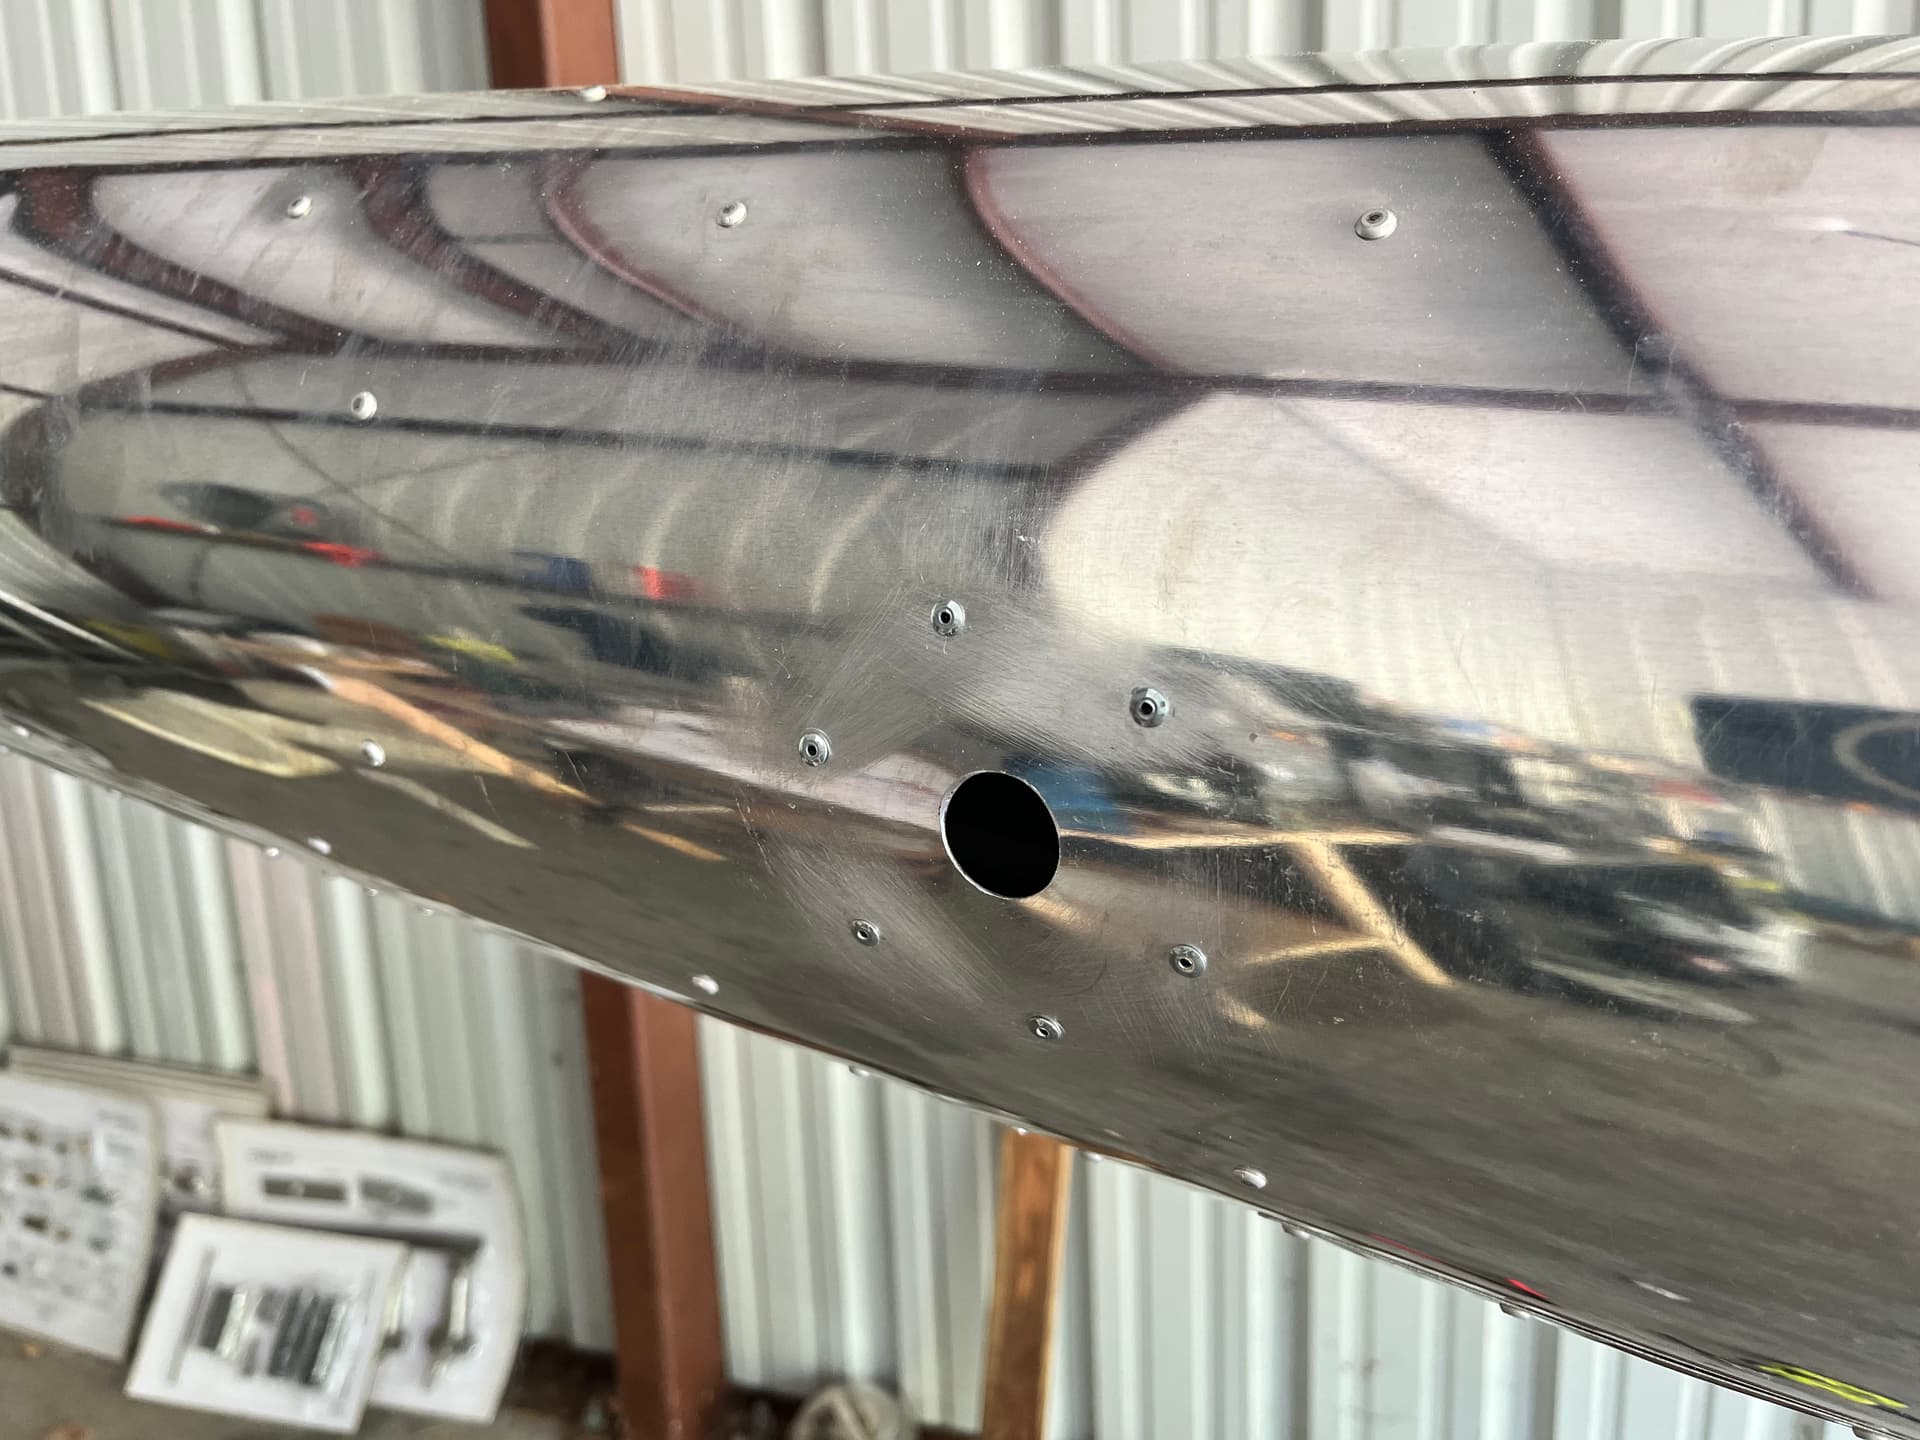
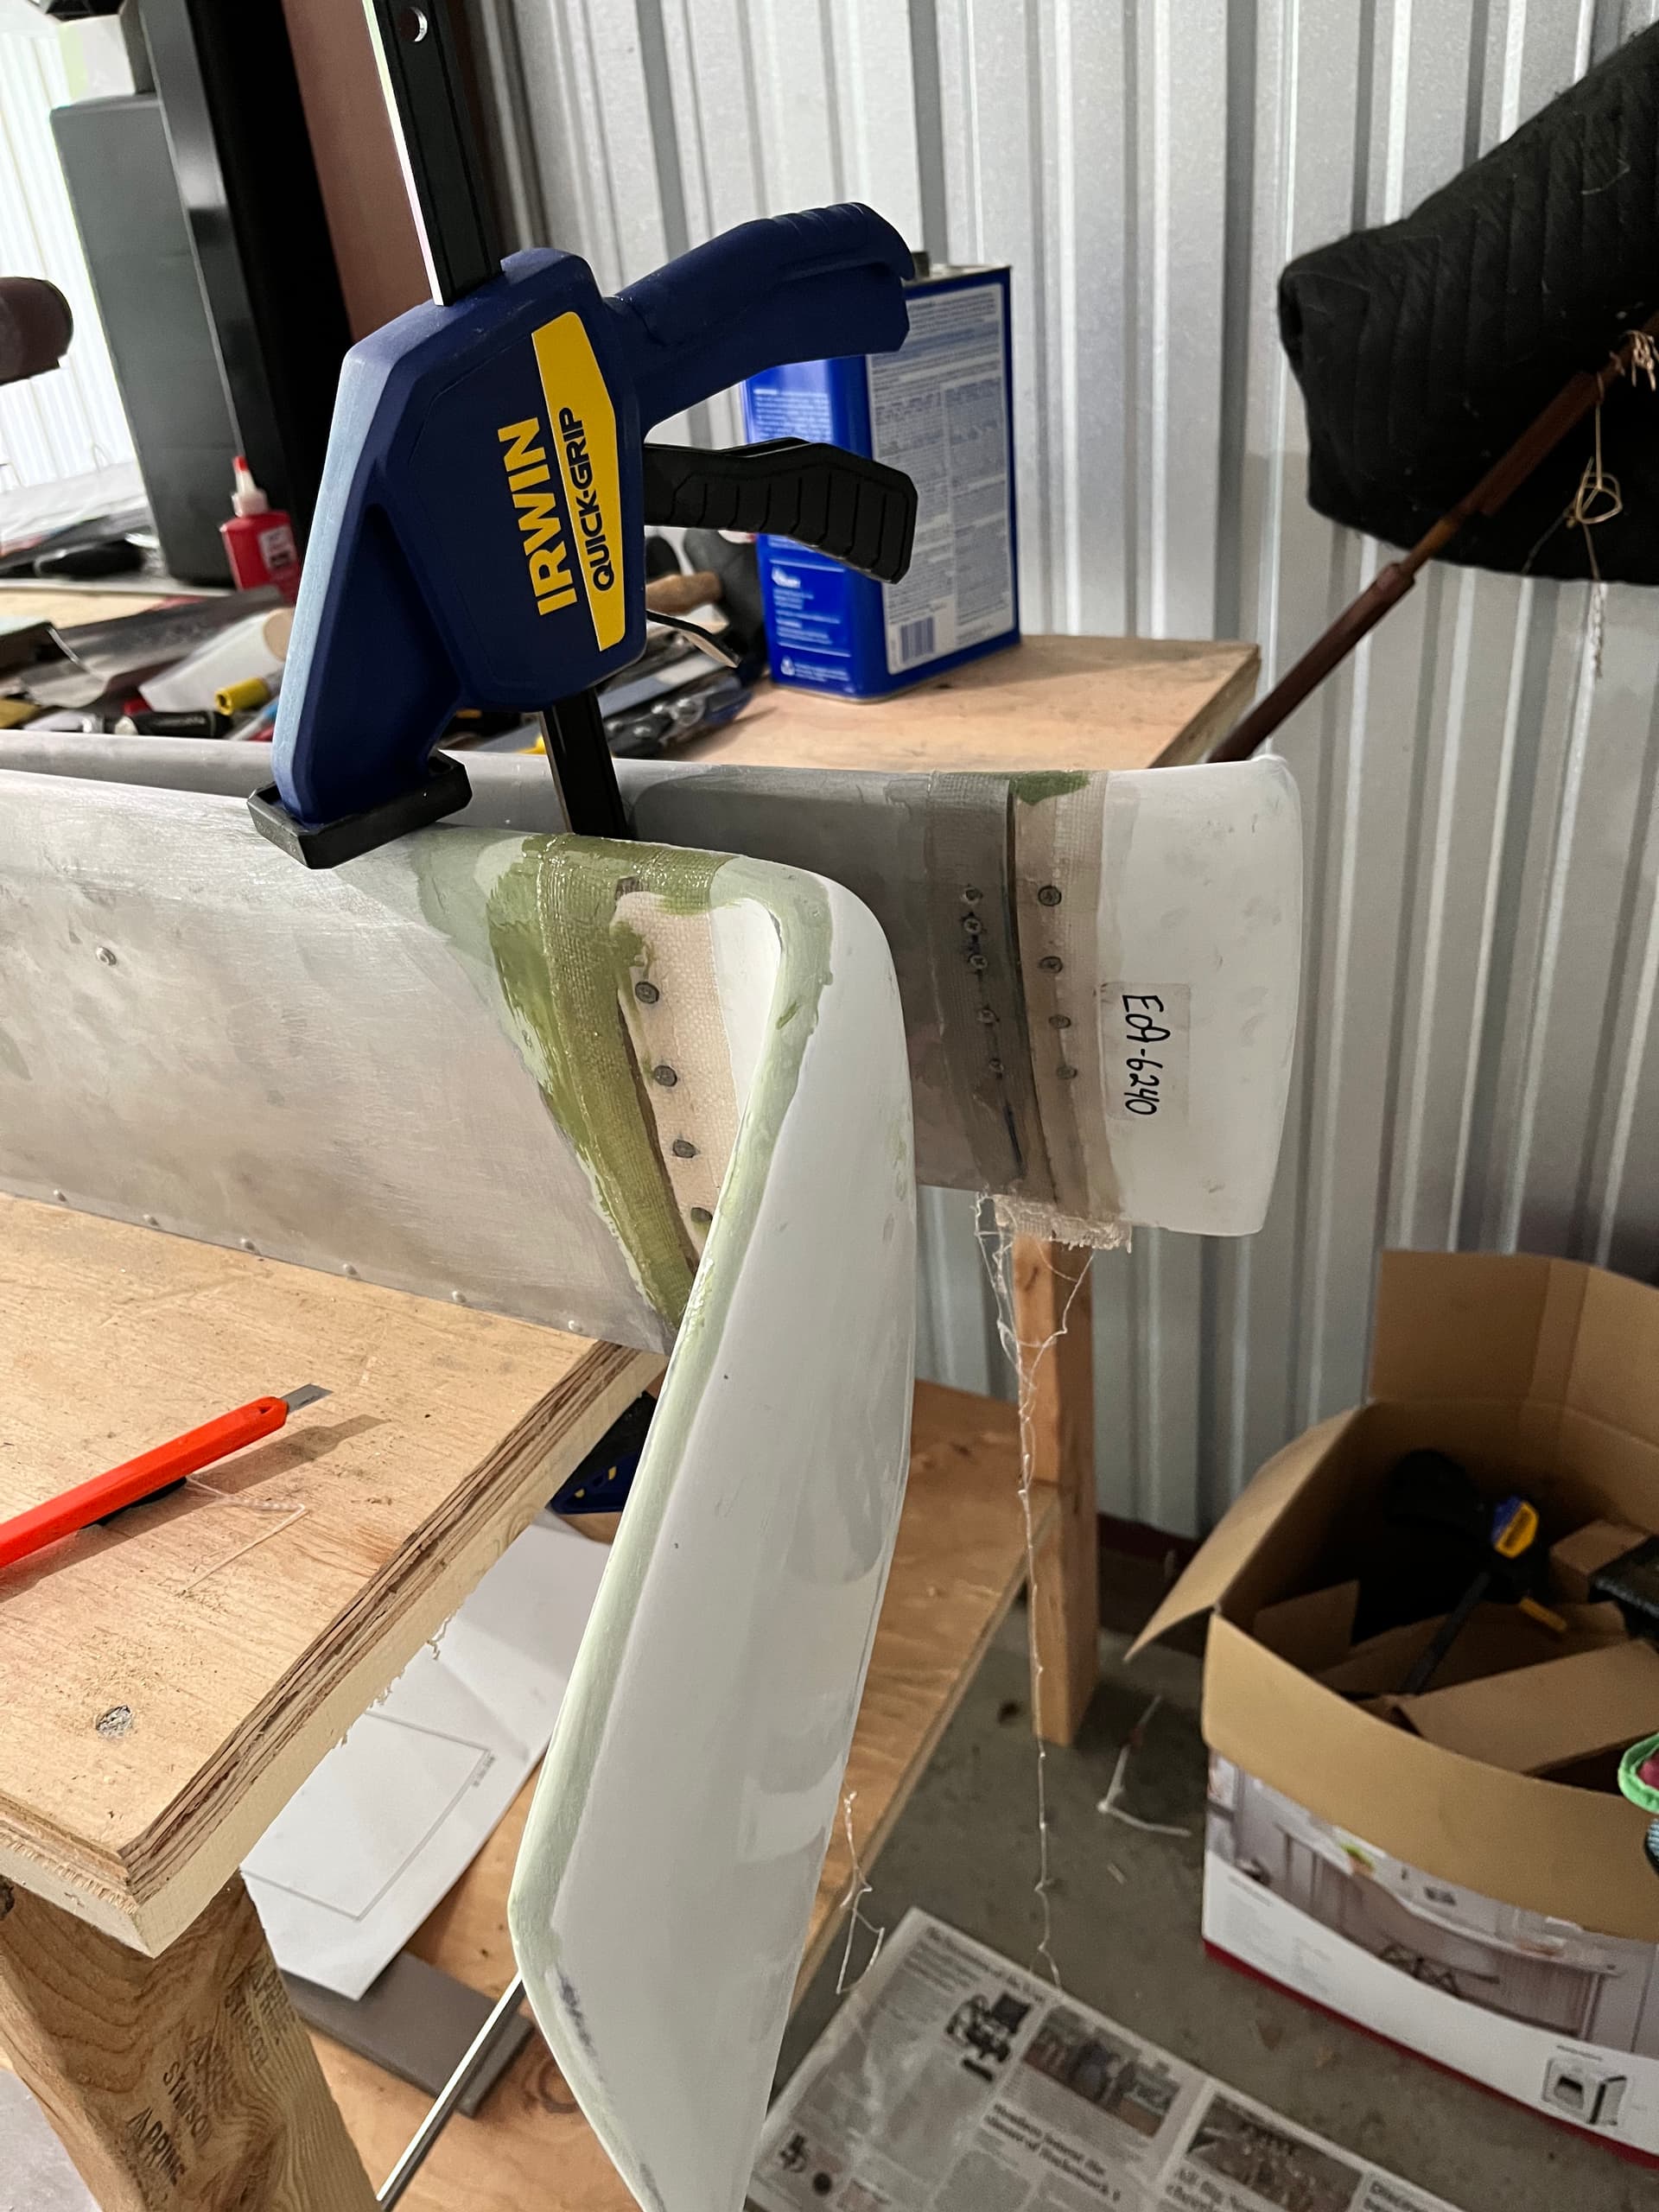
The horizontal trim fins each come in two parts: the aluminum horizontal part and the plastic/fiberglass winglet. The two parts are joined with a wood block that the builder shapes into the form of an airfoil to fit snugly into each part. The joint is then made fast with countersunk wood screws and covered with fiberglass. Meanwhile the holes through which the trim fins attach to the tailboom are located and drilled. Then doublers are made to reinforce the skin at the fin location. Following that, nutplates are installed to fasten each fin. Finally, holes are located and drilled to secure the spars together.
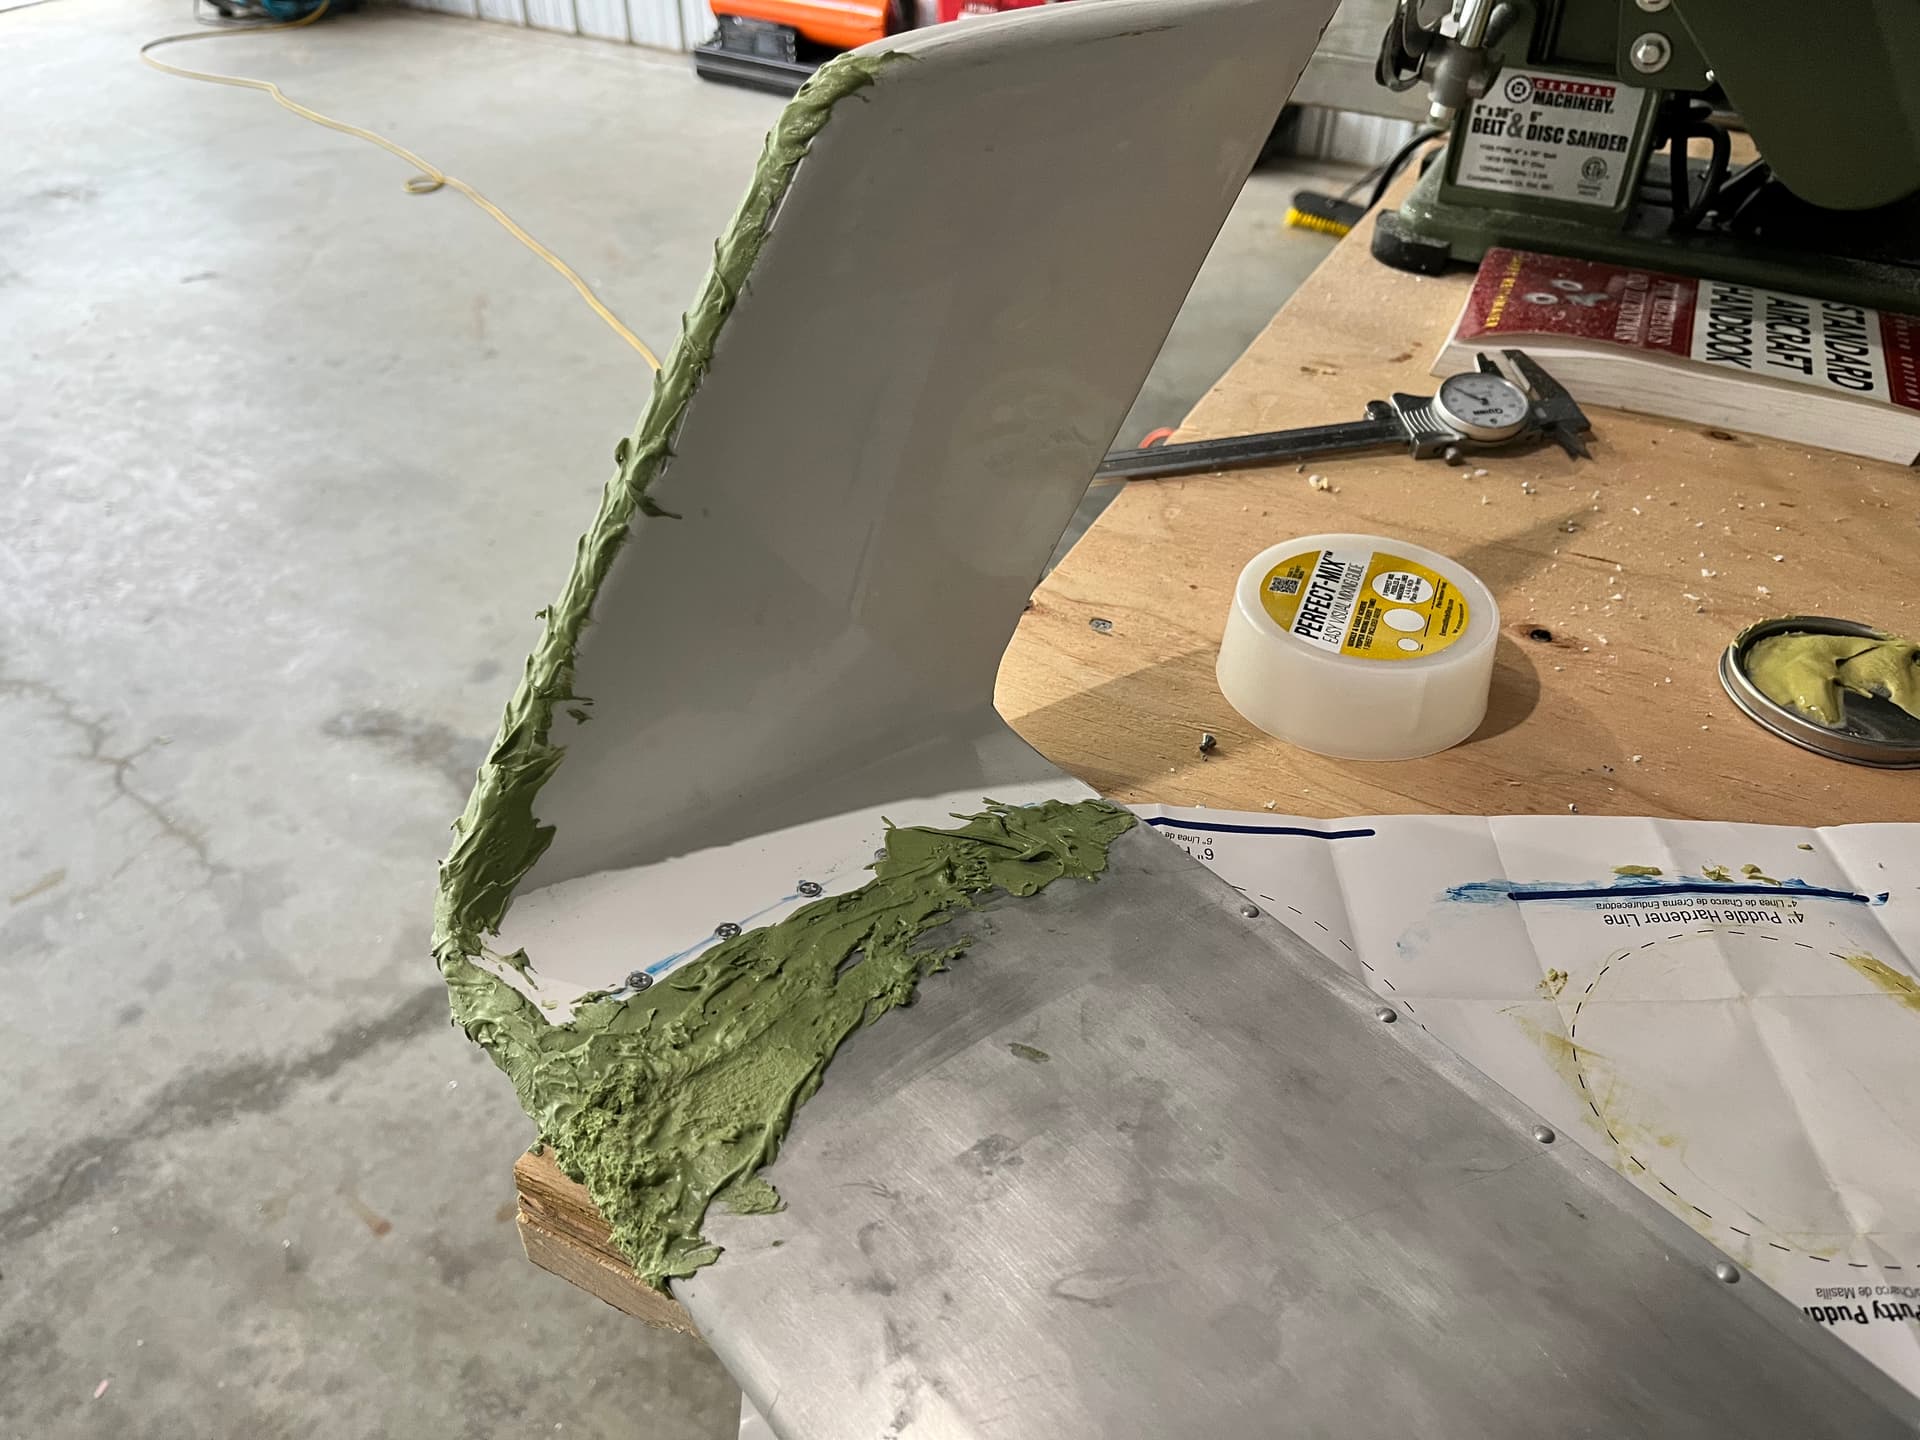

I made a mistake with the first nutplate making it offset enough that it wouldn’t take the bolt at the exact position measured. I made a second nutplate and located that at an angle to the first so that the extra holes wouldn’t weaken the structure. It broke my heart to do something so ugly. I am mostly over it now but I am learning the hurt which must plague every amateur builder: the indelible knowledge of every flaw and mistake.

Bondo is a tool for junkyard mechanics and lazy craftsmen. Or at least this is what I’ve always told myself from the comfort of my own judgement. Now I know how essential it is when plastic joins metal in a bond that must be invisible once painted.
The vertical trim fin is my goal for next week.
9 Likes
Ah, too bad it’s impossible to homebuild without laying up some glass or sanding putty. Your skills are up to the task though SH. She is going to be an awesome ride.
1 Like
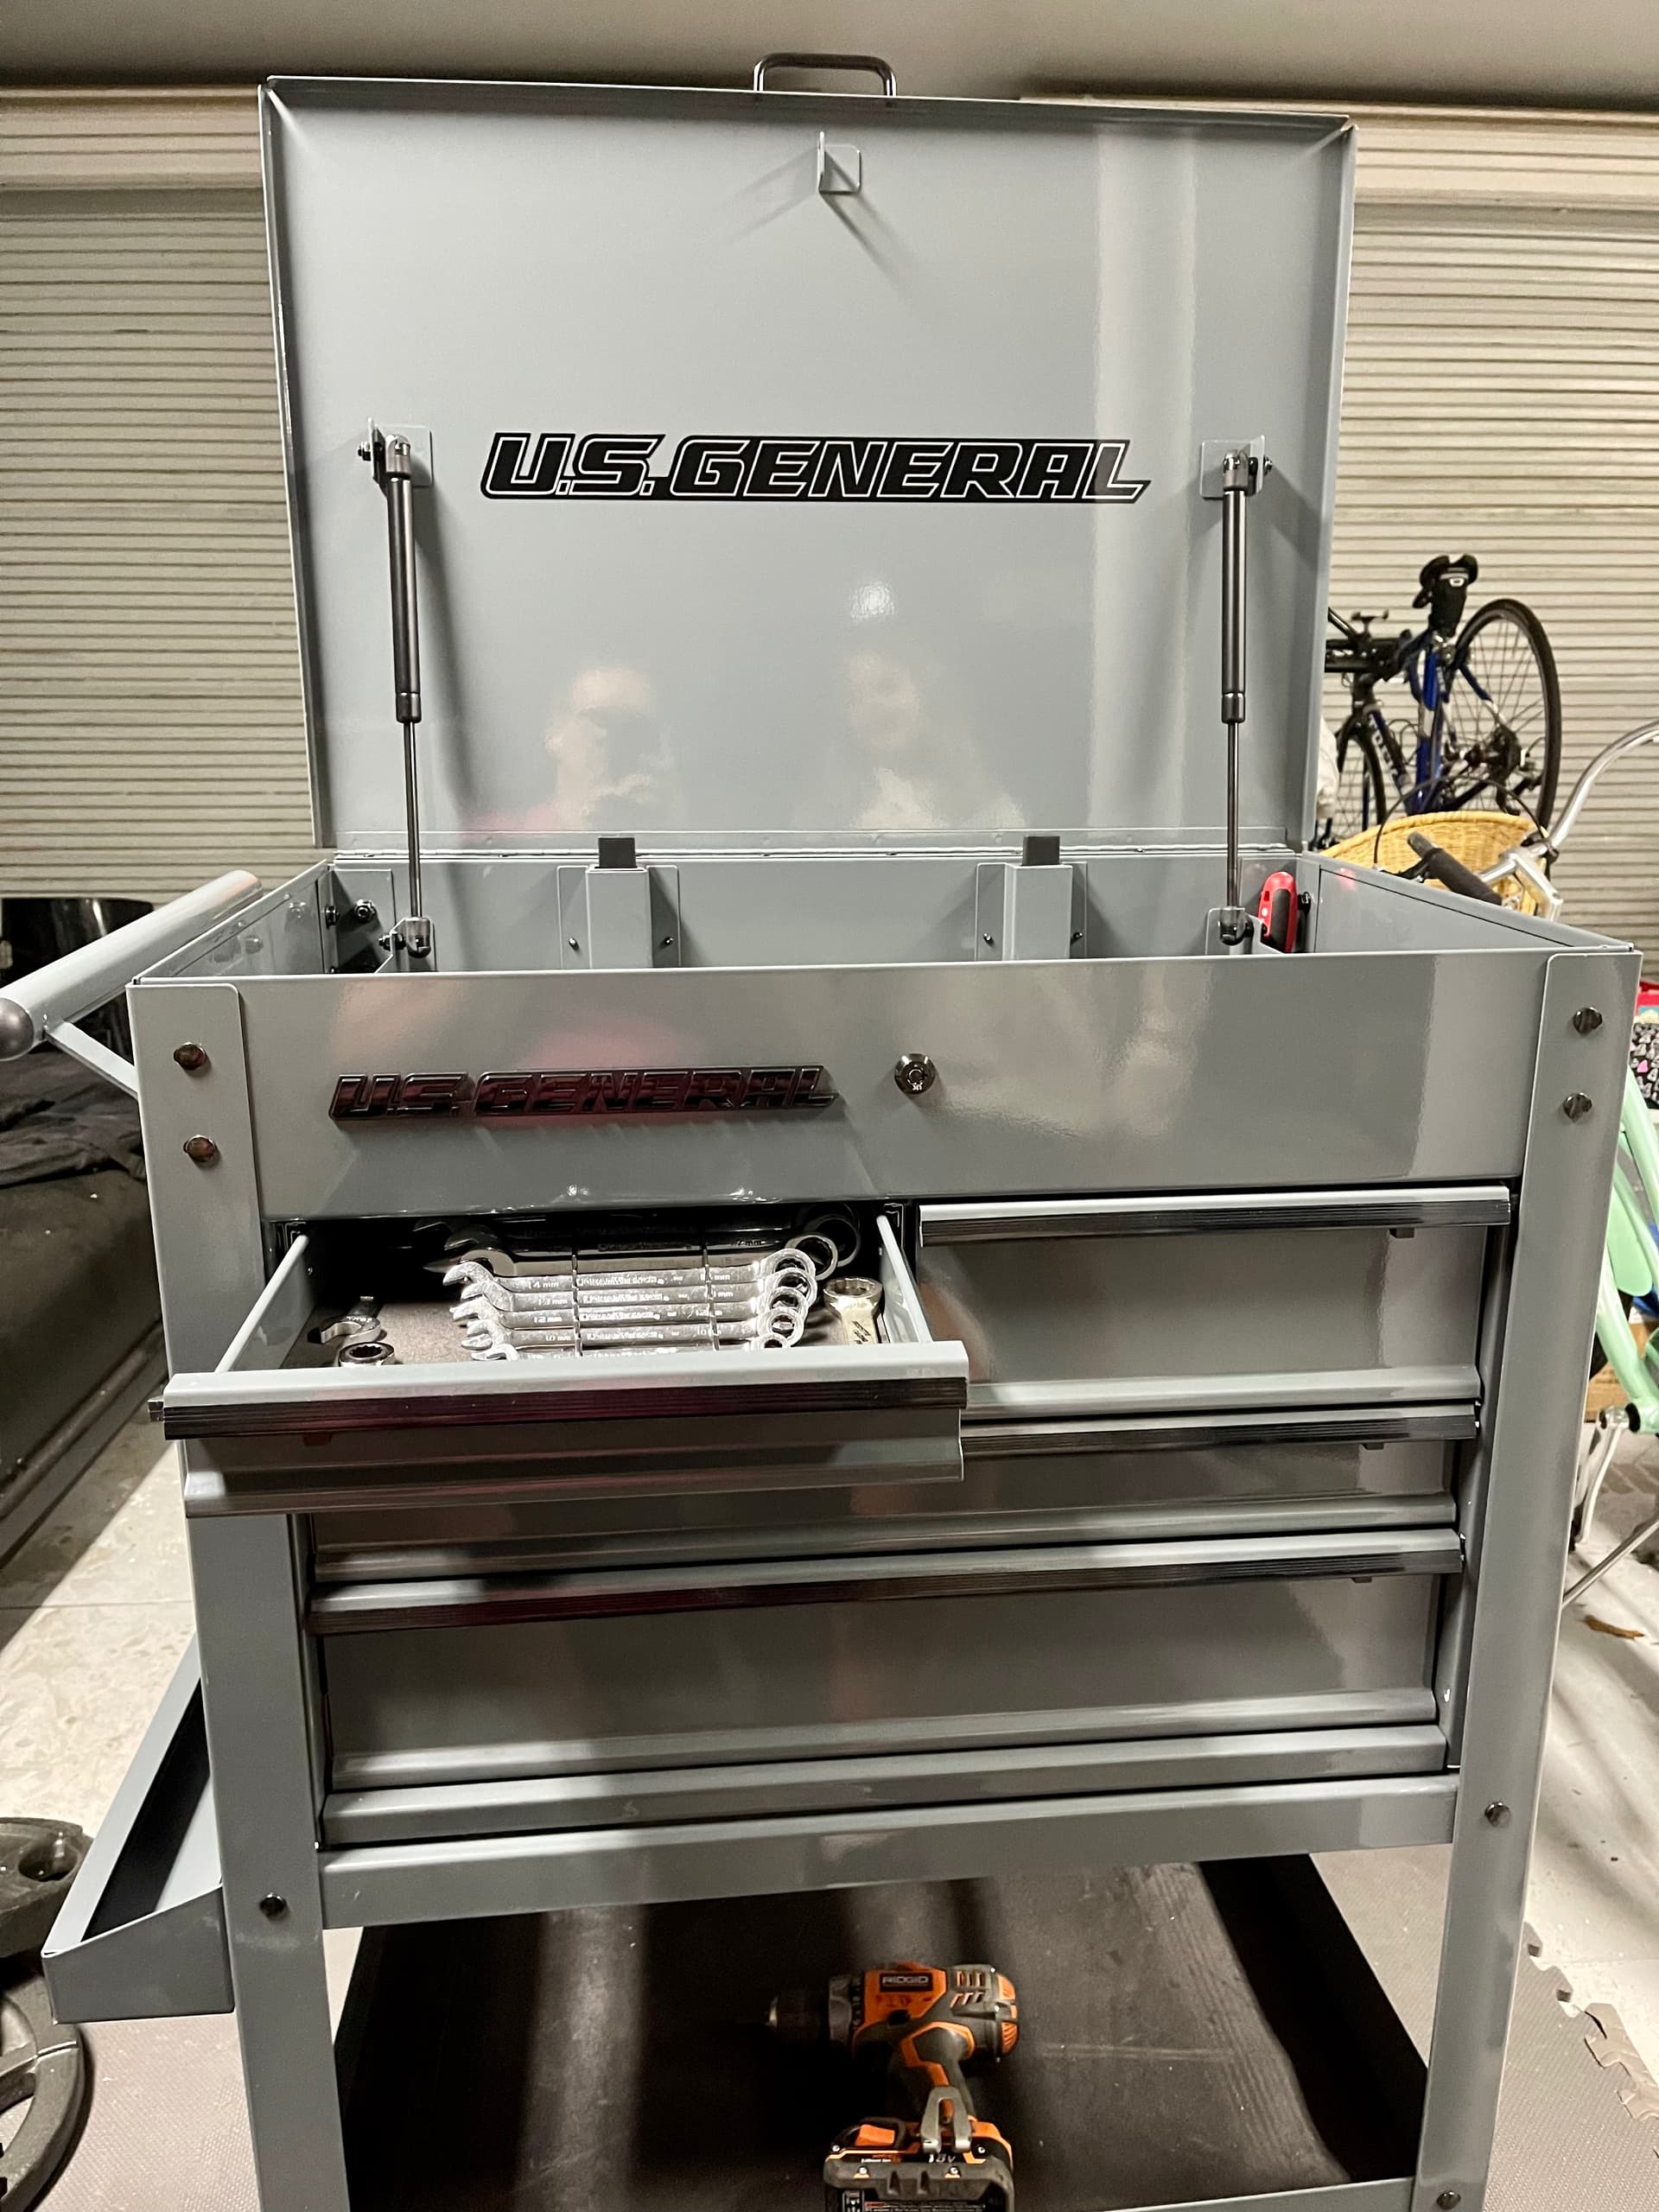
Since this is somewhat a tool thread…I bought this technicians tool cart back in Jan during a sale. Just built it a couple of days ago as inspiration to get the garage renovation underway. They are not nearly as nice as their tig welded competition, but like 10% of the cost and will be enough for this old boy.
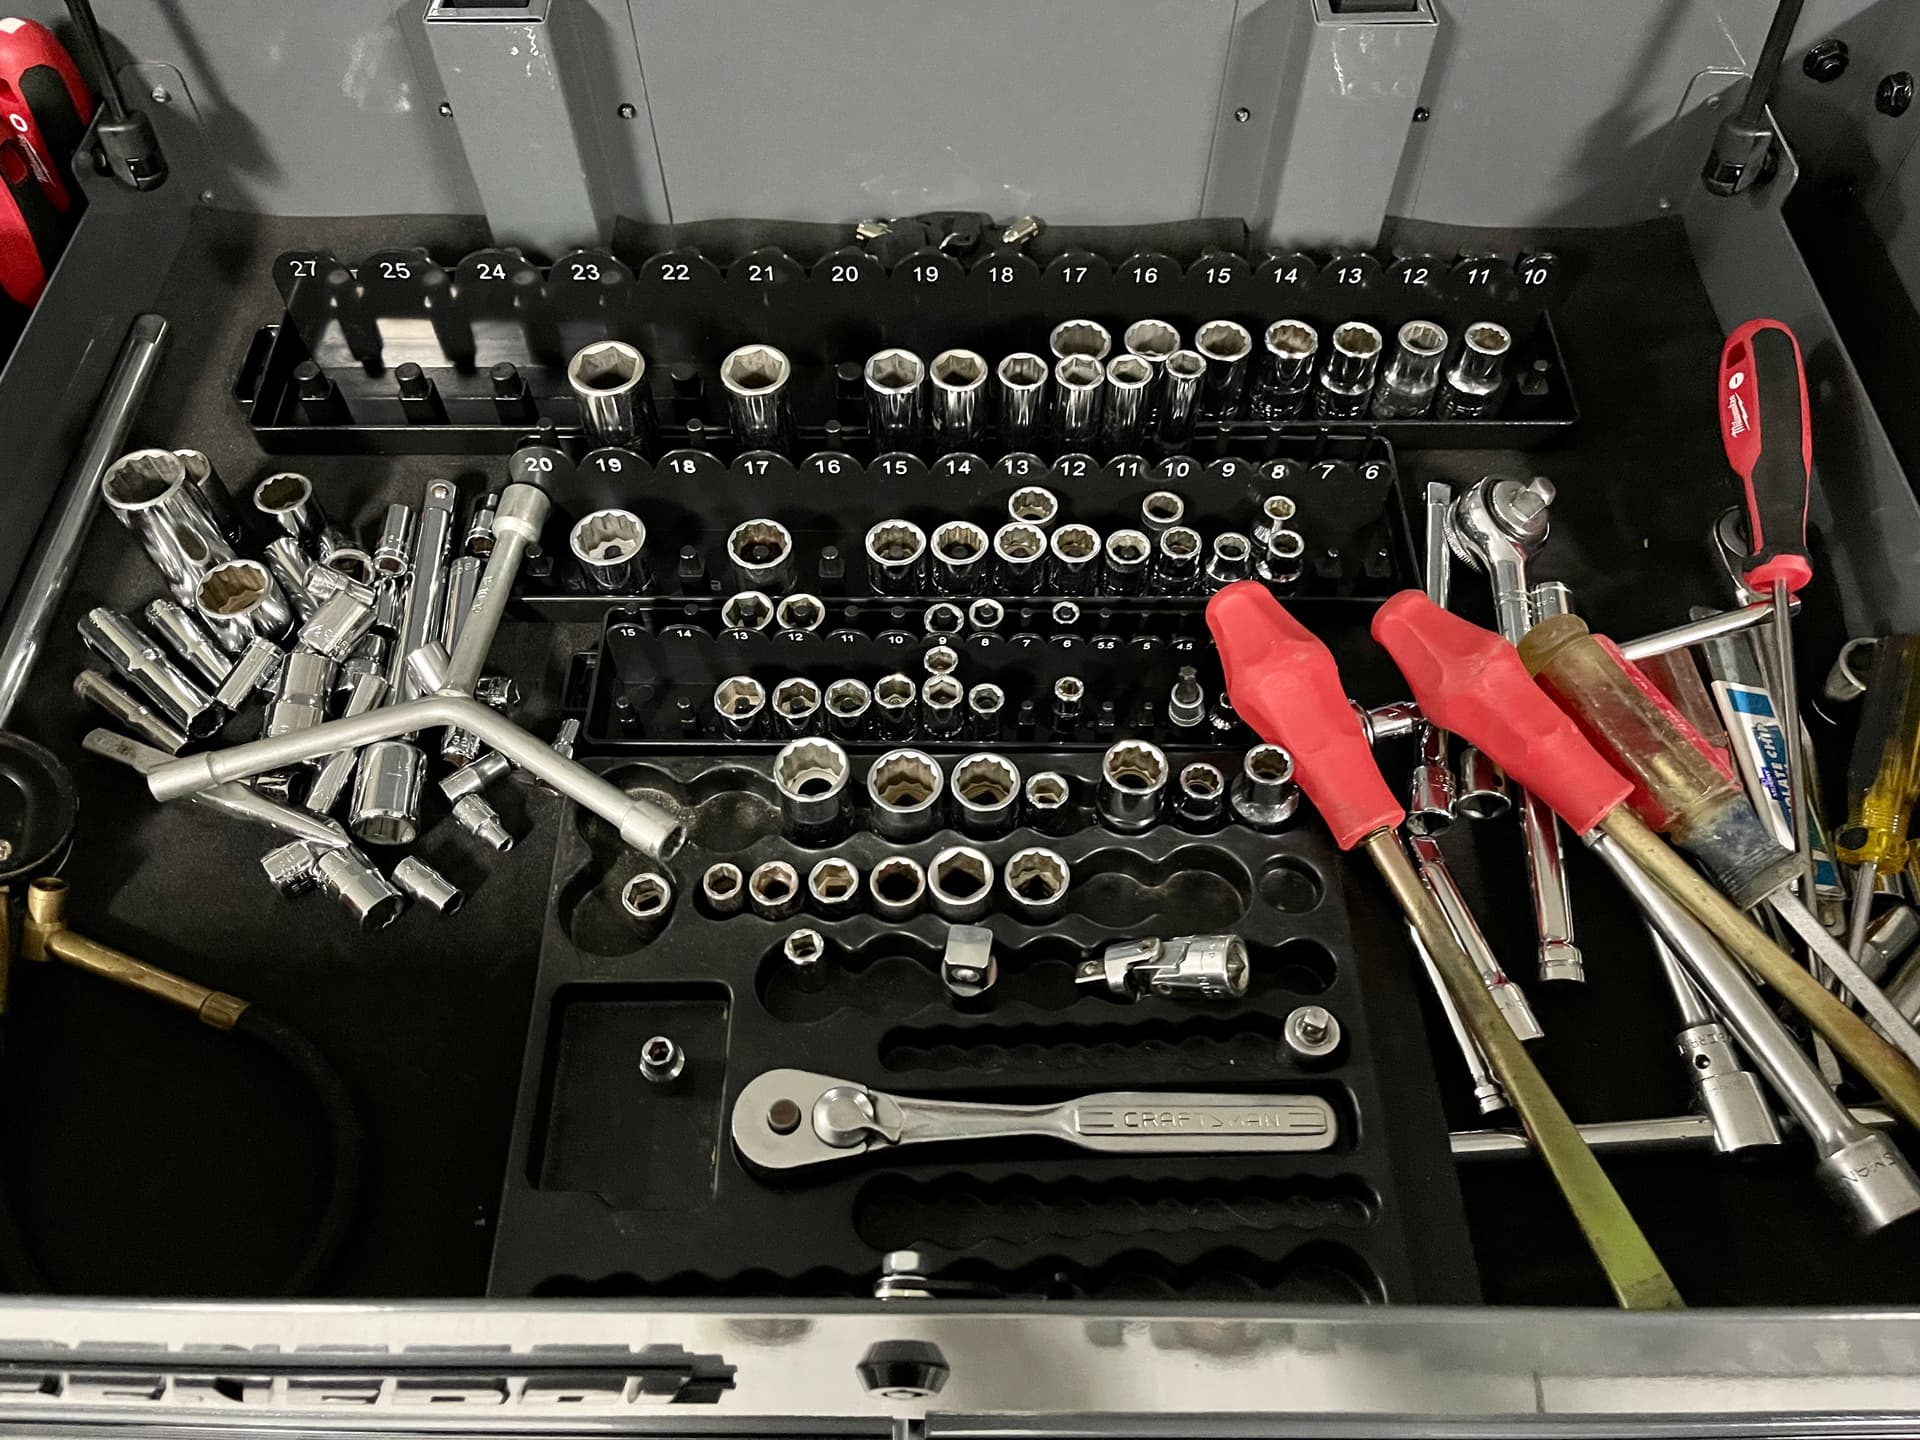
Organizing sockets and ratchets. I picked up and marveled at the Craftsman 3/8” ratchet that I had bought at an Atlanta Sears store in 1983. Through almost 4 decades, 10 cars and SUVs, probably 20 motorcycles, and two wives, it still works perfectly, no lubrication or maintenance needed. No wonder it came with a lifetime warranty. ![]() . The company that designed and manufactured it was confident in their method.
. The company that designed and manufactured it was confident in their method.
11 Likes
Those are nice boxes. My A&P brother has a few of them in addition to his larger boxes.
He removed the emblems on his and replaced them with snap-on ones to troll his coworkers! ![]()
4 Likes
Haha.
2 Likes
That’s been my “next purchase” for two months now.
Oooh, we dont get that brand over here. But that looks a lovely bit of kit.
I am souring on Snap on more and more as i get older
1 Like
Craftsman was an exclusive Sears brand until very recently. Tools were pretty good but the Lifetime warranty made them an excellent buy. Sears even stood behind the warranty. l never had a problem getting a tool that broke, which was not all that often, replaced.
You can buy Craftsman tools at Lowes now but I am not certain if they still come with a Lifetime warranty??
Wheels
4 Likes
Craftsman were the poor man’s Snap-on back in the day. Before there were Milwaukee and Dewalt. Not in the same league, but easily good enough for the backyard mechanic. I’m not sure where they are made now, since Sears has closed most of its retail stores.
Accordingly to Google foo, Craftsman hand tools still carry a lifetime warranty.
Craftsman (Stanley Black & Decker)
Hand Tools continue to have a full lifetime warranty. Some hand tools are considered consumables, or might be categorized differently, but the new Craftsman website breaks it down in an easy-to-understand manner.
All of these tools are covered by the full lifetime warranty:
- Hammers & Demolition Tools
- Finishing Tools
- Hex Key
- Knives & Multi-tools
- Nut Drivers
- Pliers
- Rachets & Sockets
- Screwdrivers
- Wrenches & Wrench Sets
- Mechanics Tool Sets
- Individual Open Stock Tools
- Non-Electric Automotive Tools
4 Likes
It wasn’t just that it was a lifetime warranty. You could literally walk into Sears with the bent ratchet you used to murder your MG, say “I want a new one”, and two minutes later you were out the door with a new one.
5 Likes
That made me laugh. Always a love/hate relationship with that car. But yes, I remember one of the very few times that I ham-fisted a tool enough to bend it, and watch as the sales person would give it a quick frown, as if to show that he was impressed with the amount of force needed to do such damage, then happily fetch you another.
6 Likes