AV8R learning the AV-8B

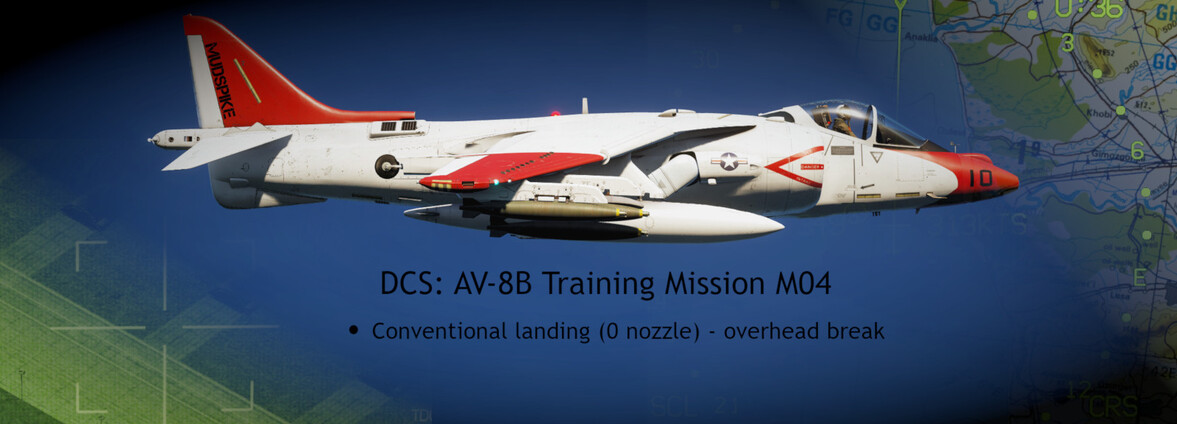
Today we take the Harrier airborne! In this mission we perform a conventional takeoff and go to the practice area for some basic maneuvers.

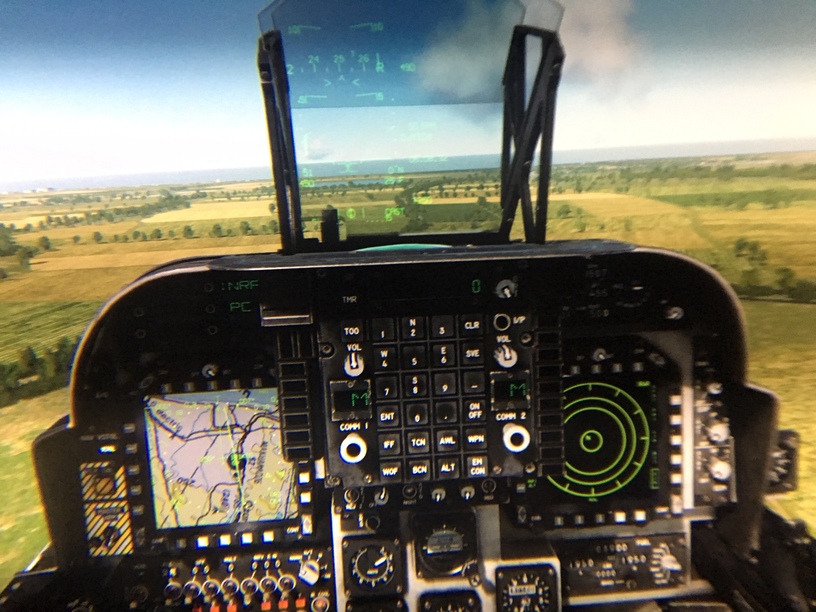
As usual, the mission is chock full of great information provided in non-stop fashion. The UFC is obviously the heart of the airplane as so much of what you want to do is entered through the number pad. Here we are following instructions on setting up the TACAN…

After four or five minutes of checks and setting different systems, we are ready to taxi…

With the anti-skid switch on, nosewheel steering is accomplished by pressing a button on the stick to engage NWS. The Harrier certainly has a very cool ramp presence - as odd as it sounds, the plane looks like the aviation equivalent of a Marine…

Conventional, lightweight takeoff happens at around 130 knots and off we go. I find myself struggling to hold the pitch high enough after the gear retraction to hold the recommended airspeed in the climb…probably due to the light weight.

Turning toward the practice area…

Once at the practice area the instructor walks us through a bunch of maneuvers with recommended airspeeds and configurations for different situations. Economy drills are probably pretty important for conserving fuel for the shipborne vertical landing missions.

We do some steep turns in various flap configurations, as well as some high alpha maneuvers towards stalls and gentle maneuvers in the STOL configuration. Aircraft response feels great…very touchy but it feels great to feel like you are flying an airplane instead of managing it. Fun stuff.

Maneuver profiles and checklists are provided on multiple kneeboard pages…

The lesson ends airborne with the next lesson to cover landing before we move on to STOL/VTOL subject matter. As usual, an awesome mission by @Baltic_Dragon that adds tremendous value to a module. All developers should take note!

10 Likes

I just now got the title of this thread…it takes a while for some of us…:slightly_smiling_face:

4 Likes

Hey…this is a neat mod that should help with that pesky, hard to read AV-8B warning/caution panel. Devrim cautions that it probably fails the MP integrity check though…bummer…but for VR I think this will be useful. I’ll try it in a bit…but here is a 2D screenshot I just took…

7 Likes

So I’m a bit confused on the anti-skid switch. If I have it ON, I have to hit the HOTAS pinky switch to enable NWS…but if I have it in the NWS position, I don’t have to bother with the pinky switch. I’m finding myself wanting to just leave it in NWS while taxiing around the airport because it’s just more convenient…but from what I’m reading, it is really supposed to be in ON during that phase. (?)

It has 3 modes, off, hi and low. Low is the normal NWS mode that you use at an airport, the hi mode allows you to make extremely tight turns on ship decks.

Normally with NWS on it will remain in castor mode unless you press the AG designate switch which will knock up the steering one level. This is what the manual says:

3 Likes

Further to the above (from the NATOPS manual):

If the ANTISKID/NWS switch is selected to NWS, ANTISKID is selected OFF and braking should be done carefully to avoid tire flat spotting. If taxi speed exceeds 16 knots, ANTISKID should be selected ON and nosewheel steering engaged by pressing and holding the NWS switch on the stick grip.

Idle thrust is high and will result in excessive taxi speed unless the brakes are used or nozzles deflected. The brakes are designed for the limited requirements of V/STOL operations andwill overheat easier than onmost conventional aircraft.

Below 8 knots the antiskid is inoperative and care must be used to avoid locking the wheels, particularly at low gross weights. There is no sensation of brake locking which will result in tire skid.

Above 8 knots the antiskid is operative and the characteristic tugging deceleration will be felt during heavy braking as the brake pressure oscillates.

A minimum radius turn can be made only at taxi speeds below 2 to 3 knots ground speed. The radius of turn will increase with speed and a full nose gear steering angle at relatively high speeds will heavily load the outboard wing gear, cause a bank angle of 5° to 7° and may cause a skid as the main wheel tires lose adhesion.

To be honest, I don’t think you need to be very worried about tire flat spotting in DCS…and also the idle thrust statement doesn’t seem to apply to our simulated aircraft: certainly at any combat mission weight configuration, pulling the throttle to idle will result in the aircraft slowing to a stop, even with no nozzle deflection.

So - you can probably NWS taxi all you like without worrying too much :slight_smile:

5 Likes

image

7 Likes

Pffffffft who in their right mind does that? :rofl:

7 Likes

That’s why I have you guys.

Mudspike-ipedia…

2 Likes

What goes up - must come down! This tutorial was really nicely formatted. I was very interested to learn (through the excellent voice-overs) about the landing restrictions and that the conventional landing is actually a somewhat abnormal procedure (with all kinds of attendant restrictions).

Starting out the instructor goes over a lot of the details about the conventional landing and walks us through imputing the TACAN station and inbound course on the left DDI. This provides us a nice course line for terminal TACANs (ones collocated with the airport), but be careful that you don’t use this technique with navaids that aren’t located on the field.

Starting the descent down to the recommended pattern altitude for the overhead break. I find the 800’ pattern/break altitude to be uncomfortably low - as a turbojet/turboprop pilot that is more used to a 1,500’ pattern elevation. I’d be interested to know why the Navy / Marines use such a low pattern - unless there has been a study that shows that gets you under the clouds a larger percentage of the time (probably). Maybe lower = better depth perception with the waves and whitecaps too. I’m sure they have their reasons.

Very nice instructions prior to the break procedure, and then abbreviated instructions once you are going through the process. @Baltic_Dragon is the master of building great trigger points for missions…I don’t know how he does it.

On the break…4G and around 10 units of AOA…

Downwind switching to radar altimeter, VSTOL mode, ensuring flaps AUTO, and gear down…

The one thing I love about the Harrier is it is definitely a pilot’s plane. You want to put it somewhere - move the stick and really move the throttle and make it happen. It does require some planning, but it is also pretty responsive and I do find myself using some occasionally large throttle movements to keep me right where I want to be.

First landing felt a bit high on the pitch and I should have used a burst of throttle to flatten out my AOA (I feel)…

Instructor gives guidance for a touch and go, a second pattern, and finally a third full stop landing - all provided nicely in the tutorial…! Making the turn to the downwind to set up for another overhead break…

Turning back inbound targeting 800’ and 360 knots…

Better second landing…

After another touch and go, time for the final circuit…

This time we deflect the nozzles into the braking realm to help in deceleration after touchdown…

A closeup view of the moving map through my HP Reverb…the cockpit looks awesome!

A bit blurry because I don’t want to hold the lens of the phone too close to avoid scratching my Reverb lens…

Another great mission design…looking forward to continuing!

14 Likes

Great AAR! Really enjoying these - and I’m glad you’re getting into the Harrier!

I definitely agree - it feels crazy low. I guess it feels worse with trees and buildings too, as opposed to just water below.

They must have their reasons but throwing that initial 4G break at 800ft and 350kts feels like there isn’t exactly heaps of room for error.

You can conventionally land a Harrier?

visible confusion

5 Likes

Thanks @BeachAV8R, keep them AARs coming! Also, if you find any bugs or problems, take a note and let me know, I know there still are a few of them to take care of!

1 Like

I will check why this altitude and report back.

EDIT: just learned from @Chicken (who is the SME for the missions and who deserves a huge credit for how much useful info is included there!) this is the normal altitude used for landings on the boat. And USMC tries to emulate more difficult sea landings to the greatest extent during shore landings whenever possible.

12 Likes

Makes sense - cheers! And thanks for all your cool missions, great work. :sunglasses:

2 Likes

Rockin’ it Chris! very nice AAR’ing there :slight_smile:

1 Like

@Baltic_Dragon beat me to it. For conventional USN carriers the 4G break at 350 knots sounds about right, however, I remember the initial altitude being 1,000 ft.

1 Like

Thanks for the info. All that yanking and banking at 800’ is impressive in the flat and sometimes featureless oceanic realm. And night…???

forget1

Training Mission 05 takes us through both a Short Take-Off and several Short Landing configurations including Fixed Nozzle Slow Landings with both STOL and AUTO flap settings.

As usual, there is a nice intro as you orbit out at WP1 giving you the scoop on what you are about to do. It is a lot of information, with highlights around the cockpit to let you know where you will be making configuration changes. This is just a preliminary briefing though, and the instructor uses a shorter series of instructions as you actually fly the patterns.

The left DDI showing the moving map, with the orbit waypoint #1 selected while we receive the brief. Though it hasn’t been included in the training yet, I did flip the autopilot master switch and ALT hold on to allow for a hands off orbit while I looked around the cockpit, followed the briefing, and read the kneeboard instructions…

After the brief, time to head across the airfield at 800’ and 350 knots for the usual break…

On the downwind - gear down, VSTOL mode selected, radar altimeter, nozzles out to 60…

Shallower turns on the base turn and final turn legs…with a much slower groundspeed your turn radius is much smaller, so best to widen out, stay stable, and try to roll out on final…

Always feels weird to try to hit that 2-degree Witch’s hat pitch attitude, it feels like I should be falling out of the sky, but “trust in thrust” and you can move that velocity vector wherever you want…

After the first landing, it is time to do the AUTO flap landing, which feels pretty similar although perhaps a bit faster on the approach speed…

Fun stuff. Can’t wait to try vertical landings to the ship!

14 Likes

Initial and break into the 180 for the LHAs is 800 ft, and 650 ft by the 90.

6 Likes