AH-64D - Tarnished Gold Campaign AAR

AH-64D – Tarnished Gold Campaign AAR

By @BeachAV8R - January 26, 2015

Originally published at: Articles - Mudspike Forums


This campaign series was originally flown back in mid-2014, but it is worth posting for those that missed it. In all my years of flying PC sims, this campaign was one of the most cohesive and well thought out and briefed of any I’ve experienced. It is flown in Arma 2 with the incredible AH-64D mod by Nodunit & Franze: LINK!


Click on banners below to read each AAR!

Some gameplay video showing Nodunit & Franze’s AH-64D and some mission footage from Tarnished Gold

Tarnished Gold – Mission 01 – Easy Glider

The Tarnished Gold campaign starts with a brief series of cut scenes that give a bit of background on the conflict. Our mission is to support the Chernarussian Stability Force (CSFOR) in their bid to prevent a resurgence of the violence that led to last year’s civil war. We’ve been tasked to support the CSFOR (or CDF – which I assume means Chernarussian Defense Force) against the communist revolution forces known as the Chernarussian Movement of the Red Star (ChDKZ) which seeks to reestablish a communist government in Chernarus, rolling back the clock to the Soviet era. The ChDKZ are supported by the Russian Federation. Sounds a bit like current events eh?

The cut scenes include images of executions and terror inflicted upon both CSFOR and civilians alike…

The campaign summary includes the note that Russia has extended a no-fly zone over the northwest portion of the country. No word on whether the no-fly zone is defended by Buk missiles. Our first mission is to perform a simple, routine patrol of our area of operations (AO). Though a second AH-64 will also be going on patrol, our routes are independent and don’t provide for mutual support.

Our base is on the southern coast with Su-25s in the hangar. (Small mission gripe – I’d like to see refueling and maintenance available in all missions – I don’t know if that will change in later missions. Also, it would be nice to have an ammo box at the base so that I could carry a rifle with me since you can actually stow equipment in your Apache.)

** Note – in the following shots you’ll see views from both the Pilot and Co-Pilot/Gunner (CPG) cockpits. Unfortunately, you cannot switch places in flight (that I know of) so the shots are a combination from separately flown missions.*

We walk to our helicopter, climb in, and I refamiliarize myself with the startup procedure (it’s been a couple months). Once again I’m amazed at the work Nodunit & Franze have done on this add-on. Just incredible!

Once the engines are fired up we head off on our assigned patrol route…

It can’t be said enough how awesome the Arma (2 or 3) environments are for low level helicopter flight. Collidable trees, low level detailing, and superb lighting make for an awesome visual experience…

The TSD shows our route along the south coast…

After rounding the southeast prominence, our route takes us inland to the northwest. Flying the AH-64 is a lot of fun and the helo dynamics are good enough, particularly when coupled with the excellent visuals. (Fingers crossed for a more advanced flight model and inclusion of this mod in Arma 3 at some point in the future!)

A few kilometers inland we receive a radio message to turn back to the east coast to investigate reports of a possible insurgent camp…

The point of interest is just north of Olsha near an inlet with high terrain in all quadrants…

As we head northeast the CP/G TADS view shows us the terrain ahead…

Just to the south of the target area is an airbase with no activity present…

I offset a bit toward the coast so that I don’t directly overfly the target area. Sure enough, as we reach the inlet tracer fire arcs up from the trees below and I break off to the east to extend out of range…

As we pass by the inlet CP/G view reveals some AA guns and a T-90 tank sitting in an encampment. A radio message gives us further instructions to disable (but not destroy) the tank…

After gaining some distance to the east I come back around and find a nice hill to settle behind and try to tweak my position to get my optics on the target area. Through the TADS I can see several targets and the AA site is deadly accurate with its defensive fire. I lob a Hellfire at one of the truck mounted AA units and it arcs gracefully around the hill on its trajectory…

A few infantry are also toting MANPADS and the threat from these is significant…

My missile strikes the first AA unit…

My attack position from the east is not very good and I spend quite a while trying to figure out the right geometry to get stand-off distance plus visibility. I finally hit the right spot about 2300 meters to the north-northwest on high ground looking down into the encampment…

Hellfire away!

Insurgents also man tripod mounted machine guns…

I struggle with the Apache avionics and targeting from lack of practice and the fact that Arma has some clunky interfaces. I also suffer from not having a good keyboard and HOTAS assignment setup yet resulting in slow and imprecise targeting and engagements. I finally figure out a way to manually fire the laser to get a range, but despite looking like I’m on target, my canon splashes don’t get a kill on this guy, so I eventually take him out with a Hellfire. Overkill? Most certainly…

I also pour some canon rounds into the T-90 to achieve the desired result of disabling, but not destroying the tank…

Once the tank has been put out of commission a nearby Mi-8 swoops in and inserts troops into the compound to secure it…

Mission accomplished!

—————————————-

  • A few post-mission notes:

This kickoff mission for the campaign was nice, but it was not easy for someone just starting to come to grips with the whole AH-64 / Arma interface. Experienced Arma users will probably have an easier time. Combat flight sim enthusiasts will probably find it fairly frustrating just because there are a LOT of differences in how you do things in the Arma structure as opposed to something like EECH or DCS. I probably flew this mission a dozen times trying to win it without being shot down. Enemy AI on the normal setting is deadly accurate – probably excessively so in my opinion. Being slow on the offensive and hunting and searching for controls certainly didn’t help me however.

I flew the mission a bunch of times from both the pilot and CP/G perspectives and the conclusion I reached is that you have better mission effectiveness flying as the pilot and putting your CP/G in a good position to shoot while using standoff range. The only problem is that the CP/G has a better view through the TADS zoomable optics than you do, so there is a definite tradeoff. From a mission enjoyment standpoint – I love being in the CP/G view because of the ability to see up close and devise a strategy, but the AI pilot is not very good at keeping you hidden from view and he must be micromanaged to a high degree. Obviously, the best solution would be to play cooperative multiplayer. As far as I know, there is no way to hop from the pilot to the CP/G view mid-mission short of landing, ordering your #2 out of the cockpit, and getting in and ordering him back in in the other position.

And finally, as I’ve mentioned before, Arma sure could stand to have a fly-by or drive-by view. I think it is still missing in Arma 3 and it really should be in there. I don’t care if you are flying, driving, or running, gamers love watching themselves run by a camera.

I’m looking forward to mission #2 and hopefully getting more familiar with this amazing add-on.

Tarnished Gold – Mission 02 – Night Owl

In our last mission, we determined that ChDKZ forces were likely being supplied with fresh equipment from Russian interests (black tape over the patches gives plausible deniability!). In order to gather more evidence, our task for tonight is to do a recon in the central area of our AO. Permission has been granted to lightly probe the Russian no-fly zone.

It is a dark night with high cirrus overhead. Perfect conditions for the Apache…

Arma is a map lover’s paradise. Contour maps and strategic use of terrain are what make Arma missions so much fun. I initially plan my route to approach the recon area near Aitor, which will give me a vantage point with cover to look across toward the no-fly zone…

The two hills ahead represent my high ground and the area I’ll start my recon from…

Looking northwest into the no-fly zone I can see the airfield that looks to be inactive…

Next we’ll fly north up toward our recon area near Pobeda Dam. Looking at the topo map I choose an area of high ground to the southeast that will give me a good look down toward the terrain around the dam…

The view from the CP/G position is dark, but you can still make out treelines and structures if you give it a few seconds for the optics to adjust to the light conditions. An initial look down the valley toward the dam shows no movement and no obvious signs of trouble…

I use the CP/G commands to order the pilot to bound forward from cover to cover to allow me closer inspection while trying to remain hidden as much as possible. It is a fun game of cat and mouse (mice?)…

I’m finally able to get a look at the dam itself. I manually lase the dam to get a distance of about 1900 meters. A slow scan all around with the optics reveals nothing threatening…

Sometimes you just have to recon by making yourself vulnerable so I unmask and head down the valley toward the dam, ready to instantly give an order to retreat or break off…

We clear the east side of the dam area and I start an arc around the damn to the north and west intending to widen out my search. With the pre-mission briefing indicating that penetration of the no-fly zone might be warranted, it is a good assumption that the enemy will be west of the dam…

I try to keep to the valleys during transit and hit the peaks for recon opportunities…

As we head north of the dam, a radio message from base redirects us toward grid 0108 with specific instructions to hold weapons tight and we move toward that area…

I take up position to the east of high terrain and climb it just enough to allow a peek over the top toward the no-fly zone. The pilot radios enemy position sightings and I simultaneously spot movement in my TADS optics…

About 2500 meters to the west a small contingent of units occupies the ridgeline. I spot trucks, troops, and tents. Though the optics are very dark, I see a swirling motion that I can’t quite identify until I designate it – 2S6M Tunguska! My trigger finger is ready to send a Hellfire downrange, but the mission orders are not to engage…

I scan the area and build a picture of the compound. After a few minutes I sweep around to the south, keeping high terrain between me and the enemy encampment to get a view from the south. More units come into view and the map gets updated…

As I round a hill my pilot flares a bit too aggressively (a serious problem with AI pilots) and we briefly unmask. A laser like stream of tracers comes flying out of the darkness to our right and bowling ball size rounds zip over the canopy! I quickly order a position change and cringe as more AA fire grazes the canopy. Good to know base confirms my report…I might be able to bring them back evidence embedded in my airframe!

As we bail out to the southeast, HQ aborts our mission and orders us to fly to Krasnostav (which is not our home base)…

Analysis of the mission is obvious, but touches on the complexity of the situation (and very much mirrors delicate situations in Ukraine)…

This mission was a nice mix of night flying, searching, and trying to stay alive under strict rules of engagement. I’m starting to get sucked in and am anxious to fly the next mission already. Nice job to the campaign builders!

Tarnished Gold – Mission 03 – Panic Attack

** Note – This is the hardest flight sim mission I’ve ever flown. It took about fifty tries before I finally figured out the formula!*

With the knowledge that ChDKZ forces, with apparent backing from Russia, are moving anti-aircraft missile systems into the theater, comes the realization that all of the airborne forces (both U.S. and CDF) are under threat. A report has come in that twenty minutes ago, a CDF helicopter was shot down outside of Novy Sobor by a ChDKZ 2S6 Tunguska. We have been tasked to suppress the enemy around the crash site and guide a rescue helicopter in for the rescue. Accompanying us on this mission will be an Mi-24 callsign Gryphon 2-5. A rescue Mi-8, callsign Kestrel 5-4, will be standing by for orders to enter the LZ.

The mission starts off with the Mi-24 heading out rapidly – he actually beats me by about 30 seconds to the AO, but that isn’t helpful…

I climb into the CP/G position of the Apache and order my pilot to give chase to the Mi-24 but he is really moving out. We fall into trail about 2000 meters behind him for the short run to the AO…

The Mi-24 crests the ridgeline near the crash site first and a few second later a flash and a fireball as he is ambushed by forces unseen on the other side of the ridge! Gryphon 2-5 is down!

Instead of blazing over the ridge, we pull up short of it and pop up to take a look at what we are poking our nose into. The smoke from both the Mi-8 and the Mi-24 crash sites wafts up over the valley…

Just past the Mi-8 crash site we spot the biggest threat – a 2S6 Tunguska. I send a Hellfire his way on a direct trajectory at about the same time he fires at me…

The Hellfire is spot on and the 2S6 is out of action…

The valley is a tangle of small arms fire while larger caliber rounds float toward our position. Adding to the deadly mix are a few enemy MANPADS. I’ve activated my radar and IR jammers and I order the pilot to reposition slightly to the southeast. Guarding the east end of the valley is a BRDM and BMP, both of which are throwing up a hail of fire. I order my pilot across the valley and engage them both on the fly with two quick Hellfire shots.

Mission Tips – Learn from my pain. This mission requires constant movement, rapid engagement, use of the jammers, and staying close to the valley. The enemy fire is withering and your Apache will take damage quickly. Even a small amount of damage to the gun or TADS will render you mission ineffective. Kill the 2S6, but keep moving before your jammers overheat and quickly engage the BRDM and BMP. Don’t retreat from the valley or you’ll find they will turn their fire on the crash survivors and they will quickly kill them and you’ll fail the mission.

As we zip across to the south side of the valley I take a scan to the right (west) and can see the survivors from the Mi-8 crash in a clearing near the crash site. I radio Kestrel 5-4 to advise him that the LZ is safe (enough) although that is a bit of a stretch since enemy troops are scattered around the valley and hopefully the MANPADs have shot their bolt…

On the south heading toward the far side of the valley I see tracers float over the top of the canopy. We reach the opposite ridge, wheel around, and spot a T-72 that was buried up against the forest on the north side of the valley. My final Hellfire (of four) is targeted at the T-72 who pops smoke as I fire. My missile hits, but does not kill the T-72, but it is no longer firing…

I head back toward the crash site and switch to my cannon and basically just pray and spray all around the forest and valley floor around the crash site hoping to suppress enemy troops that are moving all over the place. High command comes over the radio and advises another platoon of tanks is moving into the area from the west end of the valley. Oh crap…

Kestrel 5-4 comes into sight over the treetops and he does a slow orbit before settling down near the crashed Mi-8. The survivors scramble aboard as I continue to randomly drop canon fire into the surrounding area and I keep my fingers crossed that I don’t get hit by a MANPAD…

Here you can see the T-90s coming in from the west…

After a moment or two on the ground, the Mi-8 has the rescued crewmembers on board and they climb up and push over toward the south…

We escort the Mi-8 south to Komoravo where the Mi-8 lands and our mission is complete…

image

Notes – This mission actually took me two full days and about fifty retries to pass. Arma has the frustrating feature of wiping all of your mid-mission saves if you get killed or get a mission fail and aren’t quick enough to reload a saved game. Also, you can save a game and the reloaded save puts you into position a half a second before you get hit by a missile or something fun like that. My mistake was not putting the jammers on just prior to cresting the ridge – I was putting them on too early and they were overheating while I was in the valley and probably contributing to me getting shot down a lot. The Arma commands and clunky method of getting your AI pilot to go where you want to is also a bit of a challenge. That said, beating this mission was a great, great accomplishment and I’m looking forward to continued pain as the campaign continues.

Here are some outtakes from the failed missions:

Tarnished Gold – Mission 04 – Tin Can

Apparently the downing of the Mi-8 by the 2S6 encouraged the Russians and ChDKZ to give up all pretenses of a proxy war. Chernerussian intelligence has noted a massive buildup of Russian equipment near the no-fly zone and a large ground incursion has apparently started from the northwest. Our mission is to blunt the attack along three axes of advance.

A pair of Su-25s taxi out to assist against the ChDKZ forces moving south…

The good news is that we will have a pair of Longbow Apaches (radar equipped) for this mission…

Our flight of two heads out loaded for bear with sixteen Hellfires each…

Taking up position south of Stary Sobor, I turn on the FCR and scan for targets. Enemy armor is everywhere, streaming south toward Zelenogrosk, southeast toward Stary Sobor, and east toward Gorka. I cycle through the targets on the FCR and try to pick out the anti-aircraft units first…

T-72s and T-90s stream south. It is interesting to see that sometimes the enemy armor will retreat after getting struck while other times they will continue to push their offensive. The FCR gives a distinct advantage and I’m able to engage from around 3000 meters…

The initial wave of vehicles into Stary Sobor is stopped cold but some armor units heading east toward Gorka are being blocked by trees and a ridgeline. The enemy returns fire and I can also see two attack helos circling further northwest behind the enemy advance…

I order my wingman to take up position overlooking the road coming south into Zelenogrosk. As the enemy armor streams south on that road my wingman starts picking off targets as well…

I head back to rearm after the initial onslaught while my wingman covers to the north…

As soon as I take off to head north again, my FCR picks up a couple units that had leaked through our initial defense. An enemy BMP rolls out of the forest and I take a snap shot, my missile streaks across the field and hits him as he emerges from behind the treeline…

My wingman calls out enemy helos advancing down the road he is guarding. I order my pilot to pivot to the left 90 degrees and start searching with my optics. I don’t have any Stingers mounted, so I have to use the gun. The ChDKZ Mi-24s start spraying bullets our way as we return fire. My rounds start impacting the eastern Mi-24 while my wingman’s take out the western one. Mine goes down trailing smoke and impacts hard, exploding immediately…

My wingman damages the other helo and it manages to land behind us, between us and our base. I again order my wingman to turn around and I lay a few dozen rounds into the Mi-24 as his rotor winds down. Not very sporting, but war is hell!

I rejoin my wingman and we head back into the fray. The advance south toward Zelenogrosk has been stopped and all advancing armor has been destroyed. We take our fight toward Stary Sobor and Gorka…

The terrain between Stary Sobor and Gorka is more difficult to work with since it has a lot of contour to it. Allegedly the most recent update of the AH-64 has given the ability for the CP/G to refine the AI pilot positioning, but I haven’t figured out how to use that yet, so it is a constant challenge to find just the right spot where cover and optics can work together. I consult the FCR to assess the highest threats and send missiles downrange toward the anti-aircraft units…

I’m forced to head back to base to rearm once again, but the base storage has run out of the radar Hellfires so I’m forced to load up C model missiles…

Gorka has been cleared any only Stary Sobor remains. The enemy has stopped advancing and is embedded deeply in the town. I know they are in there, but can’t spot them with my optics to provide guidance for my laser Hellfires…

I send my wingman around to the southwest and put him in a bit closer to draw fire (I owe him a beer for that one). The tactic works and the embedded T-72s start firing at him. He returns fire and I watch as his Hellfire comes in from above behind a building to destroy an unseen tank…

A couple of MANPADs also defend the town and things get a bit dicey for my wingman as he starts to take damage. I order him to retreat…

A couple more missile shots take out the remaining armor and then I move in with my gun to start mopping up the remaining infantry…

The carnage is awesome and we return to base with big kill counts…

** Note – This was an awesome mission. Note the mission length – 1 hour, 27 minutes. A more experienced player could have probably swept up in 20-30 minutes without having to return to base at all and utilizing their wingman more, but I’m still very methodical. Plus, I’m taking screens which takes some time to compose. I did not run this mission straight through without getting killed. It took several tries, loading from saves, but it was not nearly as tough as the last mission. I’ll once again intimate how awesome Arma is for helicopter operations because of the low level detail and graphics. Also a shout out to Blastcore for the excellent explosions and visual effects…*

Tarnished Gold – Mission 05 – Pin Drop

Our previous mission “Tin Can” dealt a severe blow to the ChDKZ and their Russian supporters. The loss of a few dozen armored vehicles and a couple helicopters and air defense units is definitely a setback for the ChDKZ rebels. With the tide turning slightly, we’ve decided to go on the offense, but we’ll need good intelligence to gauge where ChDKZ are massing their forces. As such, we’ve been tasked to escort a recon group deep under the Russian no fly zone where they will be inserted to provide intel.

The SPECOPS UH-60 “Dusk Knight 3-2” awaits our escort…

We fly near each other until we reach the vicinity of the no fly zone and I park Dusk Knight in a safe location while I fly ahead and scope out the area…

Our load consists of rockets, eight Hellfires, and 1200 rounds of gun. As we approach, the first indication of enemy forces is an S26 guarding the south edge of the enemy airfield…

As we scan the area I take note of the array of equipment: two Ka-52s, two fighters, at least two 2S6 Tunguskas, and some assembled infantry. The near Tunguska becomes my first target, followed quickly by striking the two helos, then the fighters. I use LOAL-HI mode to make sure the first missiles clear the treeline…

Boom – the Tunguska is down. Dusk Knight radios the obvious…

Next come the helos, which go up in an impressive ball of flame…

The fighters start to taxi, but they don’t have nearly enough time as the Hellfires rain down…

I change to the DTV mode for a few moments and check out the carnage…which is pretty awesome…

I switch to the black hot FLIR and can see a couple enemy troops running across the base…

I keep Dusk Knight holding south as I move forward to survey the damage at the base and see if additional forces are in the vicinity. I’ve exhausted my eight Hellfires already due to doubling up on accident on some targets, so I switch to the chain gun. An S26 comes roaring down the road spewing dust and bullets and I quickly lay the cannon on him and give a prolonged burst. At such a long range it takes several seconds for the rounds to splash, but I get lucky when the vehicle comes to a stop and I can pour rounds into him…

The airfield is fairly well sanitized except for a couple crews that might be wandering around with small arms. I head for “Point Mango” which is the LZ for the SPECOP insertion. On approach we spot one more truck with troops and a pickup with a bed mounted anti-aircraft gun. We light them up with the gun and soon both trucks are ablaze…

At Point Mango the area appears clear and I call up the UH-60 for the insertion and he comes charging up at low altitude from the south…

The Blackhawk flares hard and drops into the clearing and a squad of troops hops off and moves into the woods…

As Dusk Knight moves off I join up on him to escort him to Krasnotsav…

Just outside of Krasnostav I cringe as I see some tracers arc up toward the Blackhawk. I slave the gun over and lay it on the heat signature coming from the vehicles and pull the trigger and hold it, spraying the whole area with shells. The gunfire from the vehicles stops and several moments later the vehicles are ablaze as my bullets finally arc down onto them…

Dusk Knight drops onto the airfield and thanks us for the escort…

For the flight back to base I turn off the FLIR and watch the beautiful moonlit landscape scroll by below…

The mission is complete – almost an hour long with a good outcome. Another fantastic mission design by Franze and Nodunit – this is an exceptional AH-64 and an exceptional campaign!

Tarnished Gold – Mission 06 – Desperate Measures

In a clear demonstration of how the tide is turning against the ChDKZ rebels, they have turned to the extremes that losing factions often use – suicide bombing. With the CDF out searching for ChDKZ equipment, it is hard to defend against such attacks, so forces are stretched thin.

Intelligence has given us forewarning of another such attack targeting the Chenarussian government building in Chernogorsk. Our task is to fly in the vicinity and attempt to identify and protect the community from the attack…

We start up and I direct the pilot to fly to the east side of Chernogorsk and the high terrain that looks down on the bay and downtown area…

From our high vantage point we have a good look at the city and I cycle between DTO and FLIR imagery to try to spot movement…

I soon realize that the high point is good, but I’m not able to see movement in the immediate vicinity of the government building. I don’t know if the attack is going to be in the form of a car, truck, or a person, so I decide to move down into the town to get a better vantage point on the approaches to the government building. Not long after moving, I see a small pickup truck move and park near the front of the government building. My finger hovers over the trigger. Is this a threat? Do I shoot? What if I’m wrong?? I wait…

The truck just sits there and I continue scanning around the area. From where will the attack occur?

I spot movement coming down the road out of the hills and slew my sensors toward it. Engage? Or is it another neutral?

I orbit the area slowly, scanning, and what about this truck parked on the pier…? Threat? Innocent?

I turn on my FCR and watch the TSD as moving targets fill the screen. I’m concentrating on a target coming out of the hills when my pilot calls out that are under fire!

I hear the impact and our helo shudders, reflexively I open fire on the pickup truck I have my sensor on, but I think he was actually a civilian…and now a casualty of war…

I order the pilot to pivot to the right and then I see the target – a truck moving toward the city along the coast. I lay down some gun rounds and the truck immediately explodes…

Apparently I hit the right truck!

Near the overturned truck a man comes out – I think he shot the air-to-air missile that initially hit me… I put the gun crosshair on him and he disappears in a puff of smoke…

The mission is complete – the threat has been neutralized…

A nice, short mission with a bit of waiting and a limited engagement – a very nice contrast to the massive destruction during the last couple missions. This is a really balanced campaign with a compelling storyline…

Tarnished Gold – Mission 07 – Hollow Anvil

With the successful elimination of at least one suicide bomber threat, we can now turn our attention toward trying to find an end to this war. The CDF has limited intelligence on the location of a ChDKZ headquarters and a mission is going to be launched to “cut the head off the snake” as it were. Our task is to escort a pair of infantry laden Mi-17s that is prepared to take control of the purported HQ.

When we come into the mission – the Mi-17s are already spooled up. Damn…they aren’t even bothering waiting for us!

We climb into our Apache and race after them, but we are still a couple kilometers behind them when I see the smoke trails and flashes ahead. It has been an ambush!

The two helos are down, but at least one of the helos has survivors…

As I slow down and start to try to pick out the enemy threat, the pilot calls out bad news and I see a flash go over our canopy…

We wheel around and I put the TADS on him and lay on the gun trigger. A few hundred rounds spray out at him and I see a few lucky smoke smudges as rounds hit him. I don’t outright kill him, but he circles back around losing altitude and then drops into the trees near us…

I turn on the FCR and head back toward the crash sites…

Through the zoomed in TADS view I can see an image straight out of the movie Lone Survivor as enemy infantry and machine guns line the far ridge. They are only a thousand meters or so from the crash site, so I have to move quickly…

I take out a couple of the enemy machine guns from afar with Hellfires, wary of close in MANPADs…

As we work over the ridge, new threats start approaching the crash site from the valley floor in the form of a truck, a BRDM, and a ZSU-23. All beckon for Hellfires…

The remaining infantry start moving out of the woodline like a pack of wolves, moving steadily toward the crash site and the surviving crew members…

I order my pilot to head for the treeline and start blasting away with rockets. We get close enough to see the whites of their eyes…

As we get closer, I spray the woods indiscriminately with 30mm cannon fire and out of the corner of my eye I spot the surviving crew who have popped smoke…

With the onrushing enemy troops still in the woodline and somewhat blunted by our fire, I figure this is the best moment and order my pilot to set down next to the crash site. As we come in a nearby machine gun in the woods opens up on us and laces us with holes. Fortunately, only avionics and non-critical systems are damaged…

The two Mi-17 crew come running over and strap themselves to the running boards of the Apache. This is an actual rescue technique that has been practiced and utilized by operators of the Apache…

As we lift off the machine gun once again pours lead into us and puffs of black smoke indicate hits on the fuselage and tailboom. Somehow our rotors avoid major damage and we scoot off quickly to the south…

It is a short, five minute flight to base where we drop off the wounded crew. Another fantastic mission concept by Franze and his campaign design team. Superb!

image

Tarnished Gold – Mission 08 – Hallowed Ground

Though our previous mission to insert troops via Mi-17 to seize a suspected HQ was a near total disaster, we have encouraging news from the recon team we inserted in Mission #5 – Pin Drop. Apparently the evidence the team has gathered will provide irrefutable evidence that Russia is directly supply the ChDKZ rebels. Now we must go extract the team and our task it to fly cover over the extraction Blackhawk callsign Dusk Knight.

Since we will be deeply penetrating the Russian “No-Fly” zone, we are outfitted with Stingers for this mission…

We head for the high ground south of the airfield near the huge smoke stack and I park Dusk Knight out of sight below the hill to keep him out of trouble while I recon the forces ahead…

With the TADS FLIR I can see about a dozen vehicles in different groups. Some light AA and infantry in trucks are to the west, a column of heavy T-72s is moving south through the airfield, and about four air defense units including S26 and ZSU-23 vehicles man the perimeter. Since I only have eight Hellfires, my options are limited…

After doing the recon I retreat to the south side of the hill to formulate a plan…

I pull up my TSD and create a PFZ using the map. I upload the PFZ to the artillery battery, then order a fire mission on the most densely defended sector. A few moments later, rounds rain down and several positions go up in smoke as the artillery impacts around the airfield. Awesome!!

I order another artillery strike and a few more units succumb – that evens things up a bit. I retake my position near the crest of the hill and lay my TADS on the most dangerous units that remain: the 2S6 units, and the remaining anti-aircraft guns…

I have a few missiles left and don’t want any surprises from the armor loitering in the airfield so I lob a few Hellfires toward them as well…

As I move in for a closer inspection to make sure the area is clear for Dusk Knight’s extraction, I get an ominous warning from base…

A pair of Su-34s comes screaming in from the northwest across the airfield. I hit my radar and IR jammers and switch to the A2A radar mode and pull up my Stingers…

I get two missiles off at the western aircraft first because he is headed right at me. My missile hits as his missile sails past me. I see a bloom as his aircraft goes down and two smaller blobs are the pilots ejecting…

I order my pilot to turn to the east and send another two missiles toward the Su-34 moving right to left in front of me. Those missiles hit and he plummets into the ground to the east. I pan my TADS down and can see the pilots parachute to the ground and they start running back toward the airfield. I choose not to gun them down…

With the smoke from the downed airplanes still rising in front, I move forward and engage the last few threats at the airfield…

One of the remaining ZSU-23s is deeply embedded in the forest. I expend two missiles trying to kill him but the trees end up taking the brunt of the missiles. Eventually I just use the chain gun to tear the trees down and kill him with a couple hundred gun rounds…

With the area more or less cleared out, I order Dusk Knight to advance toward the extraction LZ. He comes barreling over the ridgeline, swoops in to a hover in a clearing, and before I know it, he is beating a path to the south…

He reaches our home base and radios that the mission is accomplished.

image

This was yet another fantastic mission design by Franze and his team. It pulled on some of the nice features of Arma such as artillery and the ability to direct Dusk Knight means you can take this mission at your own pace. It wasn’t easy, and I had to reload from saves several times, but the completion is very satisfying.

Tarnished Gold – Mission 09 – Emerald Forge

Both the CDF and the ChDKZ are exhausted. Both sides have thrown men and equipment into the breech as the battles have seesawed back and forth. CDF forces have battled back against ChDKZ forces that have been reinforced with Russian equipment time and again. In a last ditch blitz, the ChDKZ are attacking across a wide front in a push south to take Chernogorsk, Zelenogorsk, and Elektrozavodsk, all right in our backyard. Our supplies are low and our helo is all that stands between being rolled over and stopping the ChDKZ cold.

The sun is setting as the ChDKZ offensive pushes south…

Fortunately, for this mission we have a supply truck with weapons, though availability is limited…

We take off and are immediately confronted with a pair of enemy armor units – a T-72 and a ZSU-23 – that were no doubt trying to sneak up on the base to destroy our helo before our arms could be brought to bear. Through multiple attempts at this mission, I found that I need to hold Hellfires in reserve so I slave my cannon toward the vehicles coming down the highway and lay down rounds. The ZSU dies first (thankfully) and the T-72 takes many rounds, but eventually succumbs too…

We head over toward the bay off Chernogorsk and the situation is dire there indeed. A couple enemy units block the eastern approach toward the city and a gaggle of APCs, and trucks are moving down the highway from the mountains to the north toward the city. I hit the far ZSU-23 with a Hellfire and then pivot toward the north to take on the enemy coming out of the mountains. The mission designers were smart and wily by putting MANPADS around the town, making the whole attack very dangerous. Unfortunately, the best tactic is to charge in, fire off a few Hellfires and pray for some kills before switching to the cannon for close in work…

One of the MANPADS along the rim of the hills that surround Chernogorsk…

As vehicles come into view over the hill, I try to pick them off with Hellfires. Eventually you have to go in and gun them down though…

After the battle for Chernogorsk is won, we head back to base to rearm, refuel, and repair damage…

The weapons inventory is severely depleted however, and speed is absolutely critical, so I load up four available Hellfire types and head immediately for Zelenogorsk…

Cresting the hill south of Zelenogorsk there is no time to waste as T-72s and APCs stream down the valley toward the north outskirts of the town. I launch Hellfires in rapid succession, but vehicles remain and I switch to the gun…

Once the attack from the north is blunted, more units stream down a side valley from the east. I’m only left with the gun and I take severe damage as I spray the advancing armor down. Arma is really cool in that when you start getting good hits with the gun on armor, sometimes they abandon their vehicles, making them combat ineffective…

One of my engines is on fire as I destroy the last of the enemy trying to break into Zelenogorsk. I limp back over the ridgeline to base where I get repaired and rearmed with four more Hellfires of a different type and I drag my exhausted bird east toward our final defensive stand at Elektrozavodsk…

I stay offshore to the south and keep my optics panning to the left as the coastal town comes into view. Eventually I get line of sight on a column of vehicles coming down the valley toward the north side of town. This battle is brief with just four missile shots required to destroy the ChDKZ attackers. A big relief compared to the previous two battles…

Suddenly, we are done. The three attacks have been repulsed and we are cleared to return to base.

The 32-minute duration mission takes me two nights to complete. Exhausting!

Notes – This mission is hard. Damn hard due to the time constraints (you have to move fast to blunt the attacks or else you get a mission fail when enemy units reach their objectives. Enemy fire is withering, and the necessity to run back to base to rearm just bites further into your limited response time. This mission will have you throwing things in frustration, but the payoff is ultimately worth it. This is another mission where saving and resaving and reloading and reloading is required. If anyone can play these harder campaign missions straight through – you are a better man than I.

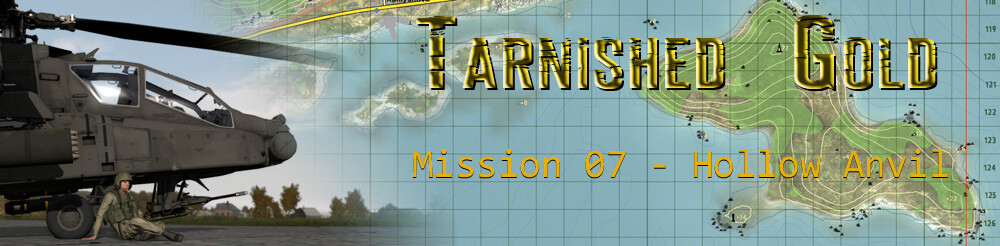
Tarnished Gold – Mission 10 – Amber Sword

All sides are exhausted. Thanks to the intelligence we derived from the Special Forces team we extracted, the CDF has managed to pin down the location of the ChDKZ headquarters. We have been tasked to pave the way for a snatch and grab team to finally take the head off the snake.

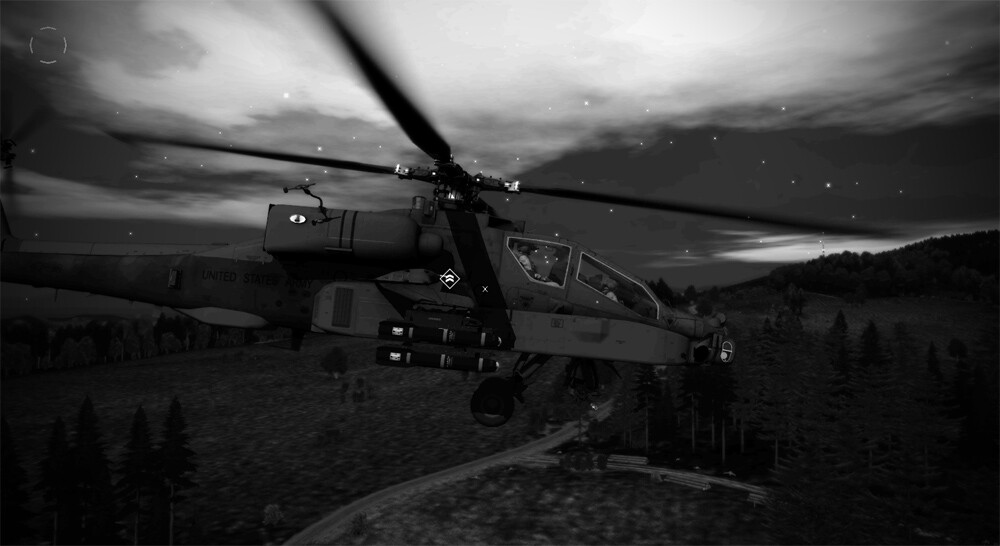
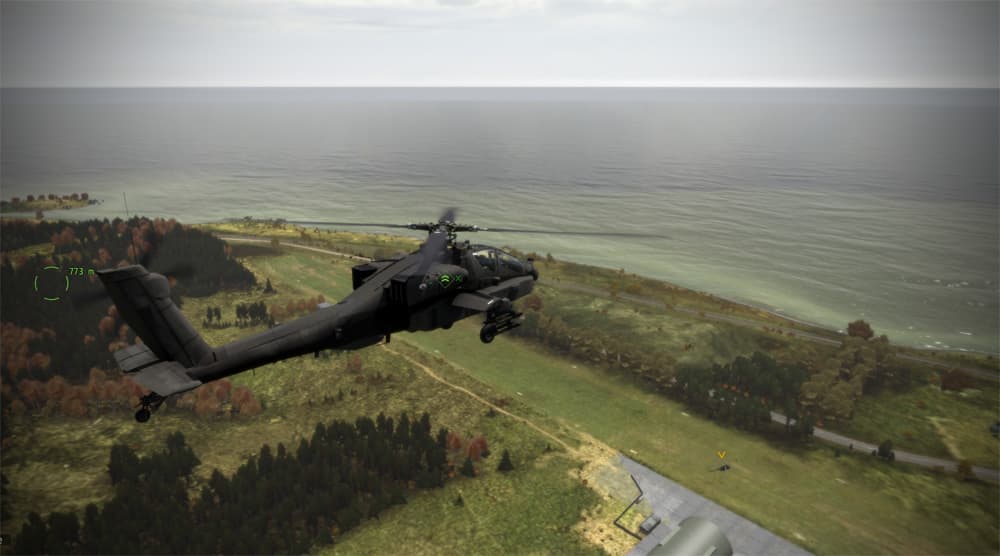
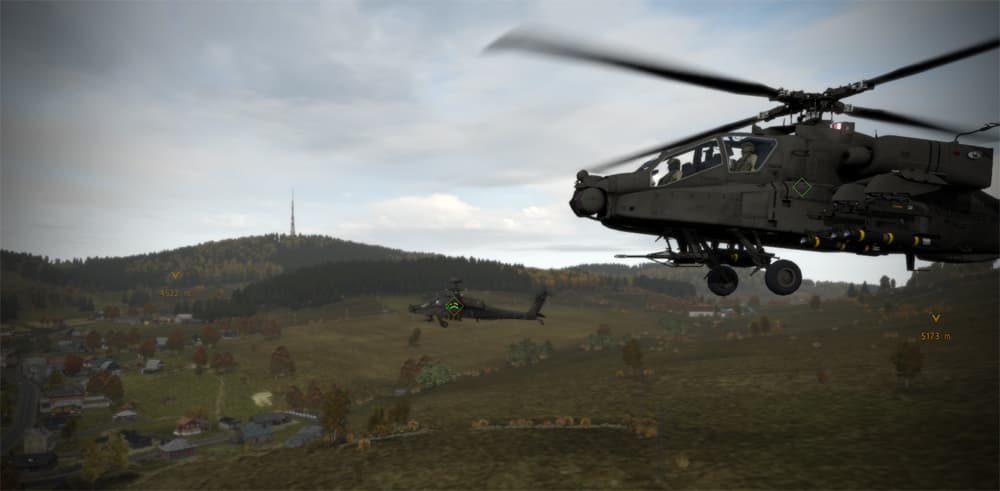
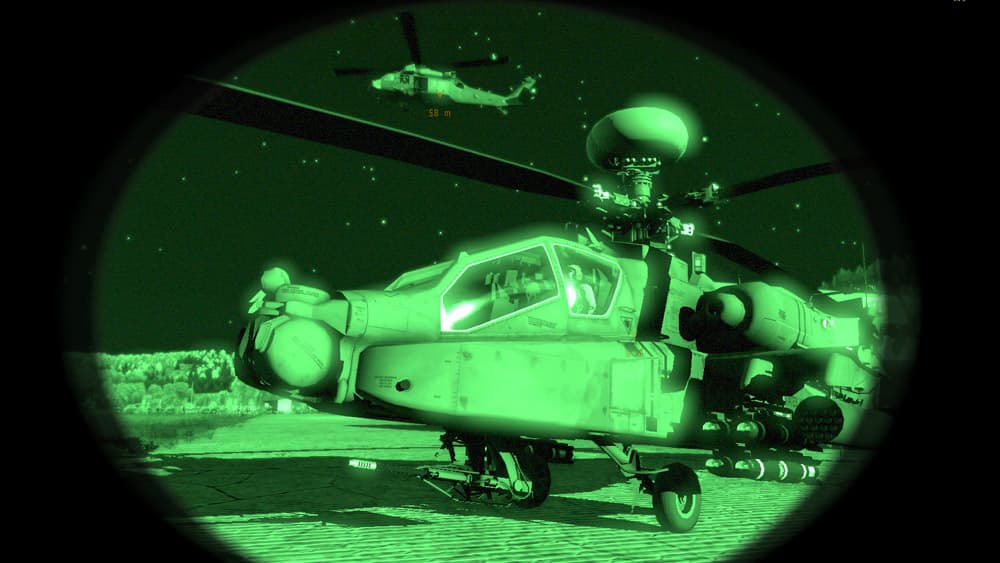
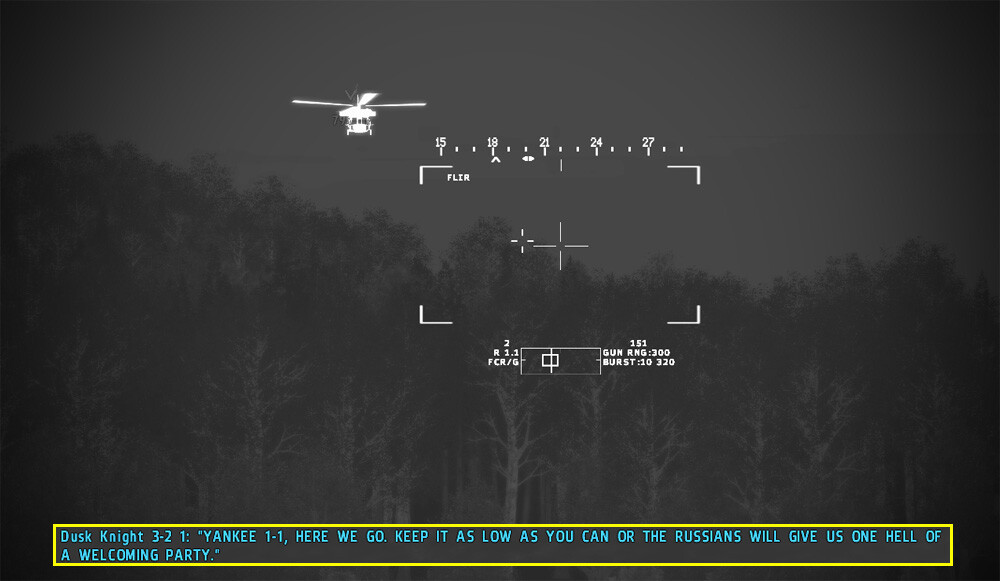
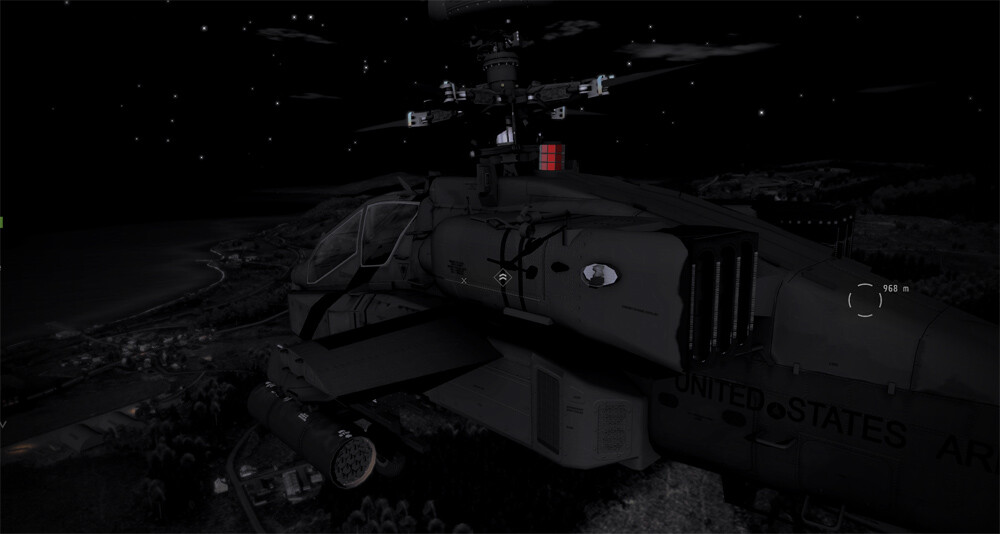
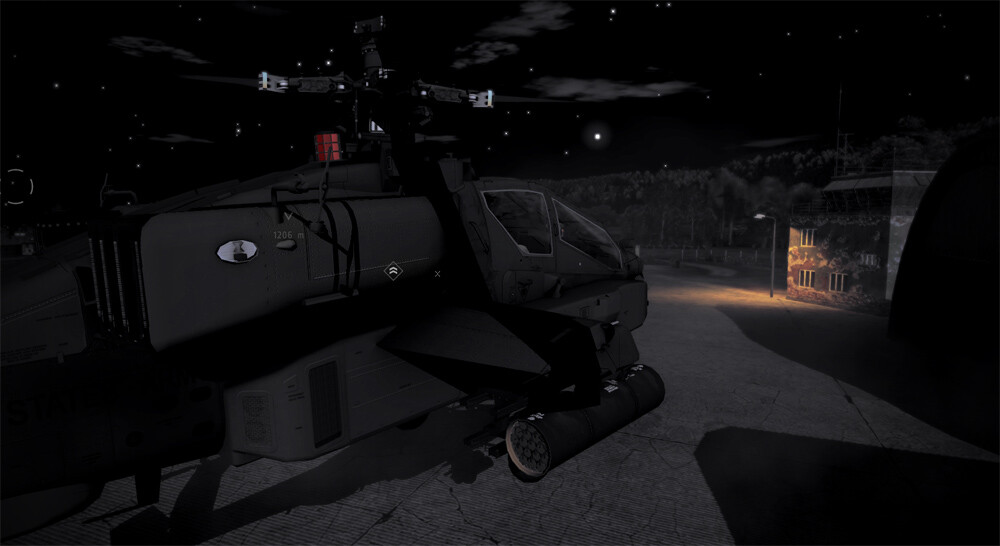
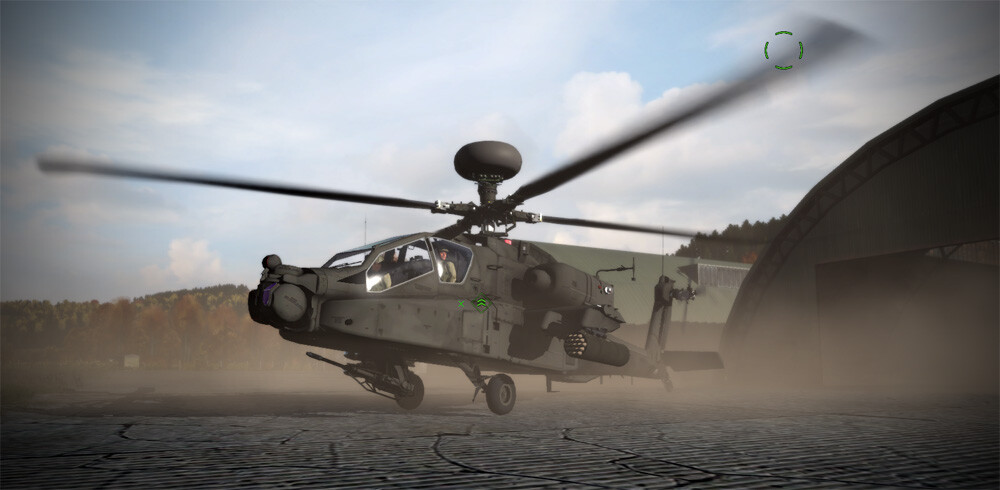
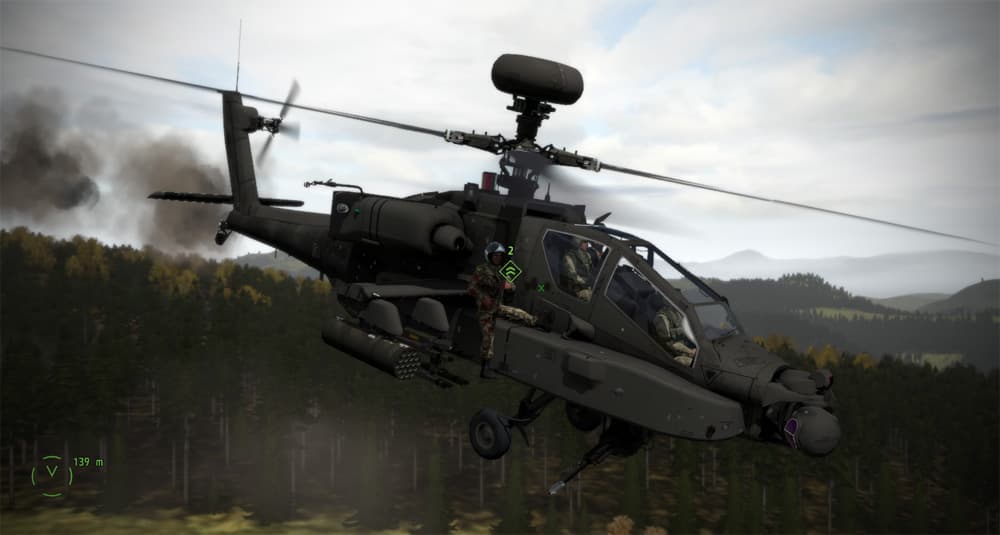
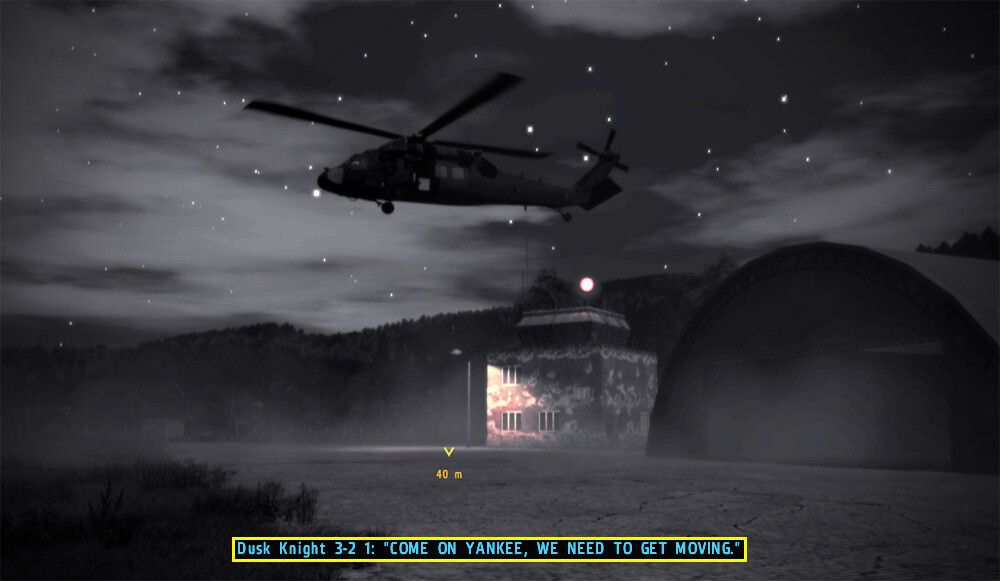
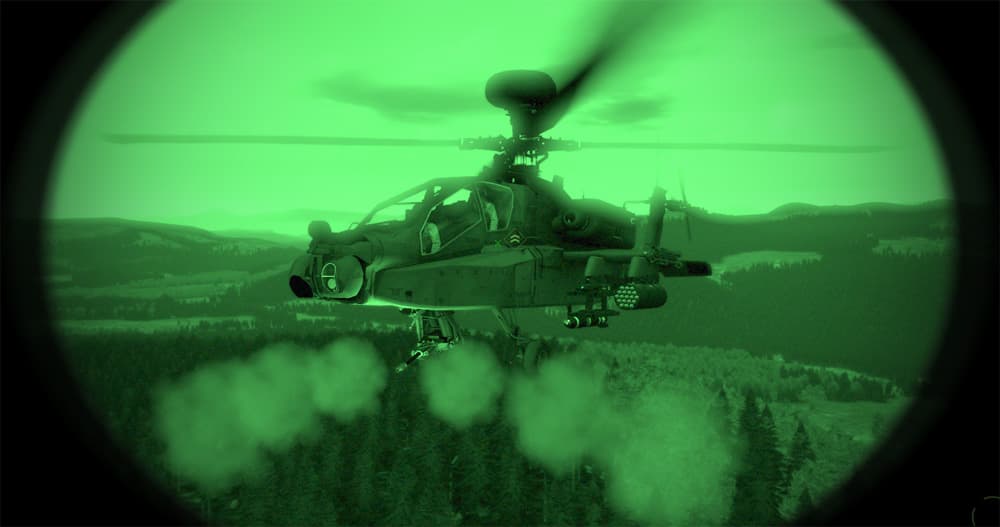
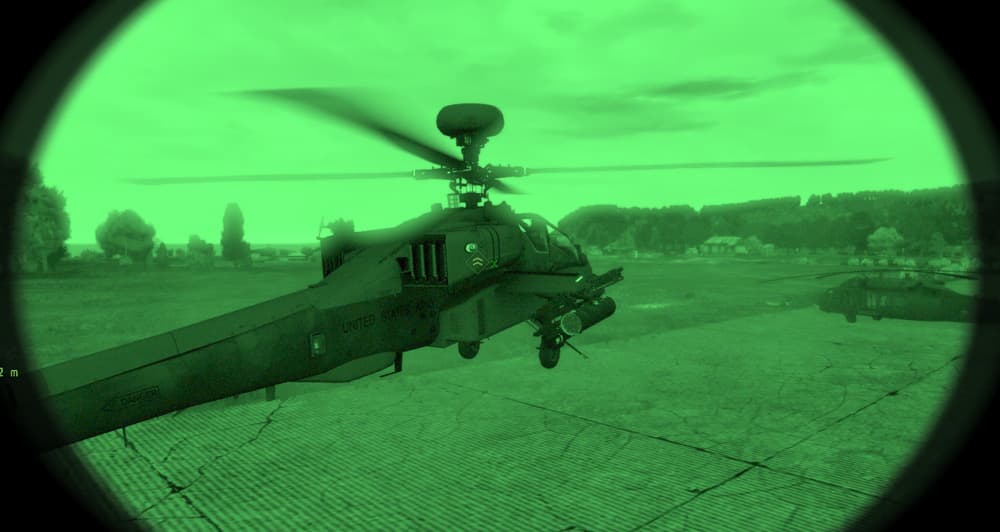
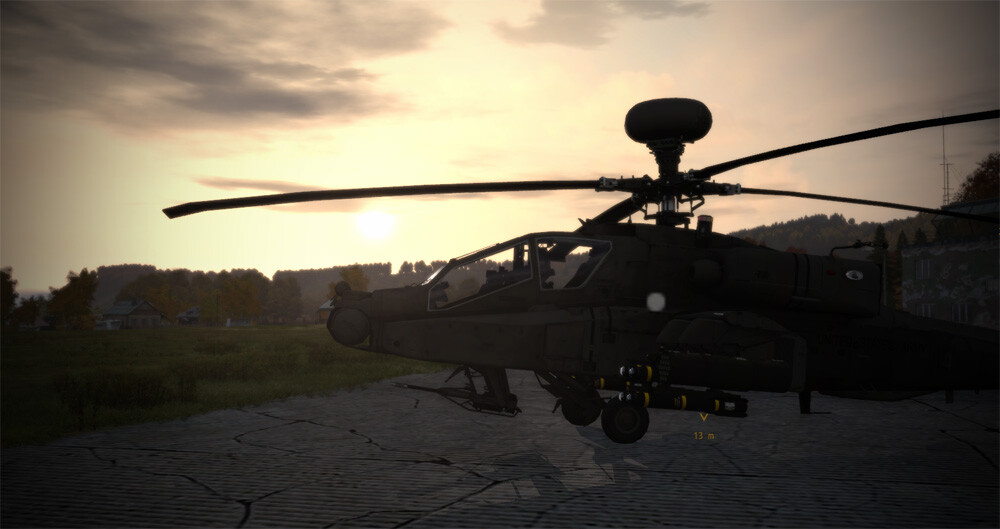
We head out to our Longbow Apache one more time…

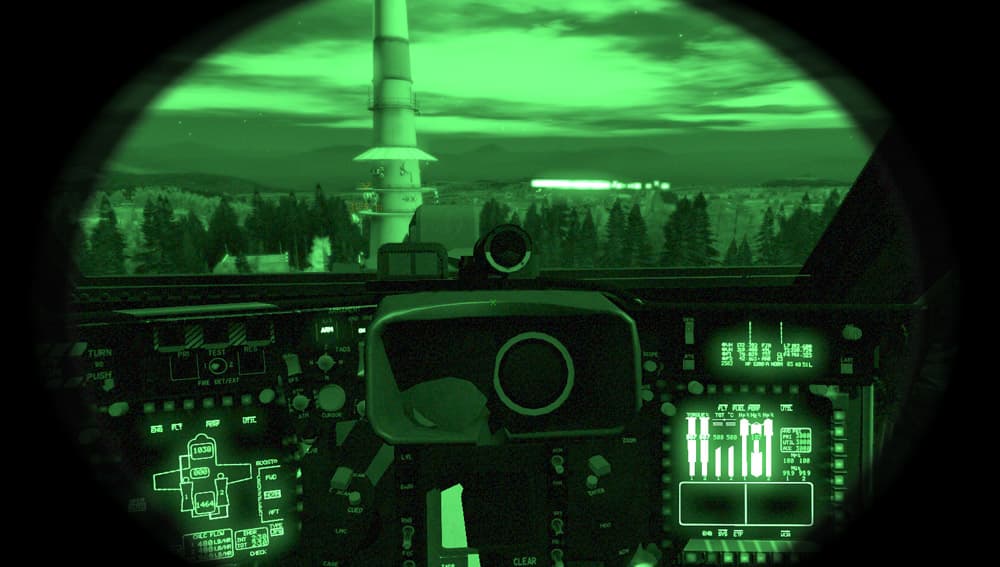
The pilot goes through the engine start quickly…

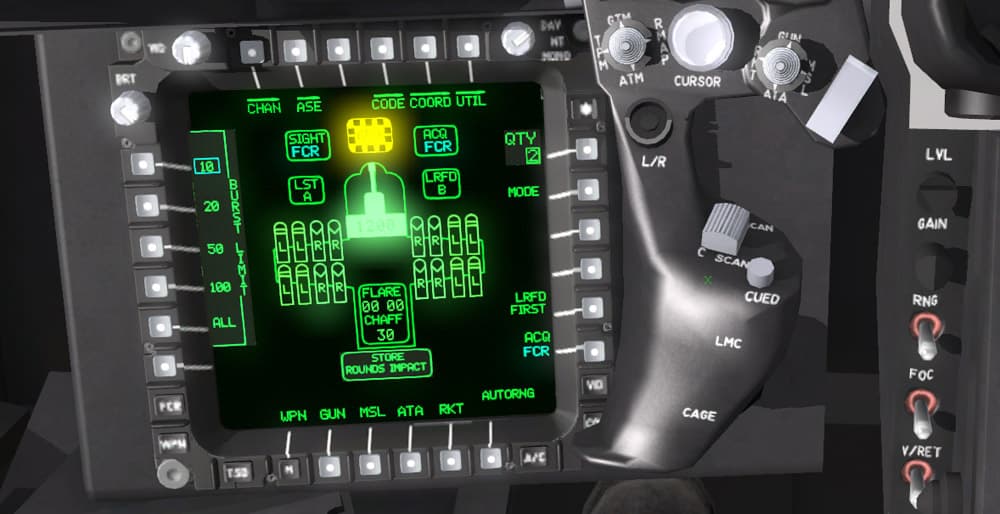
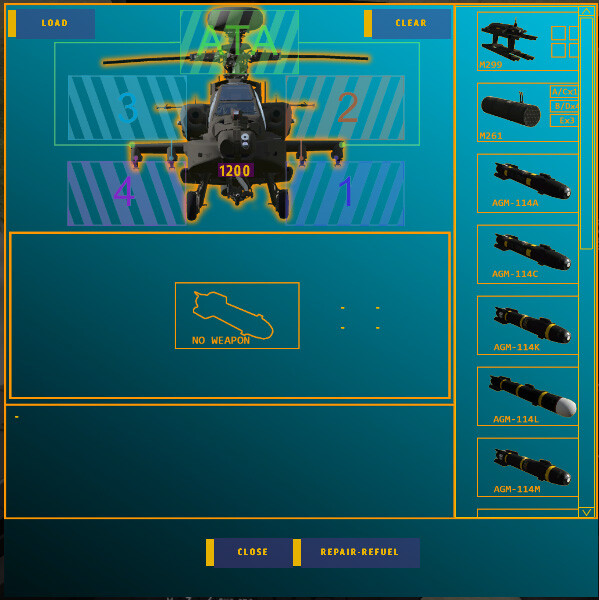
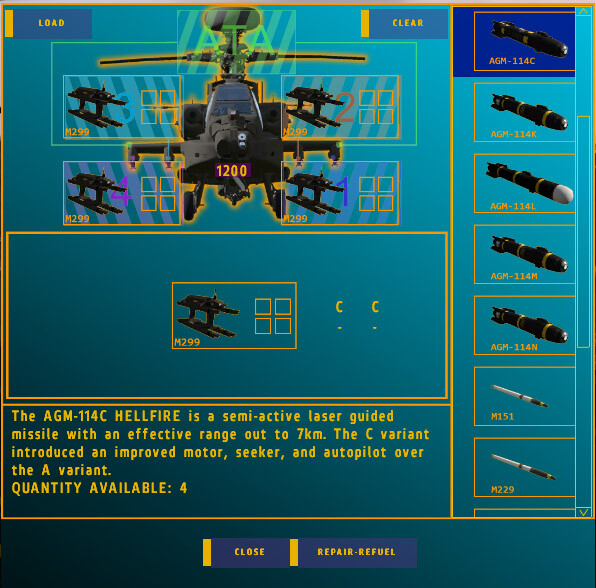
For this mission we’ll be carrying eight Hellfires, 2.75″ rockets, and a full gun loadout…

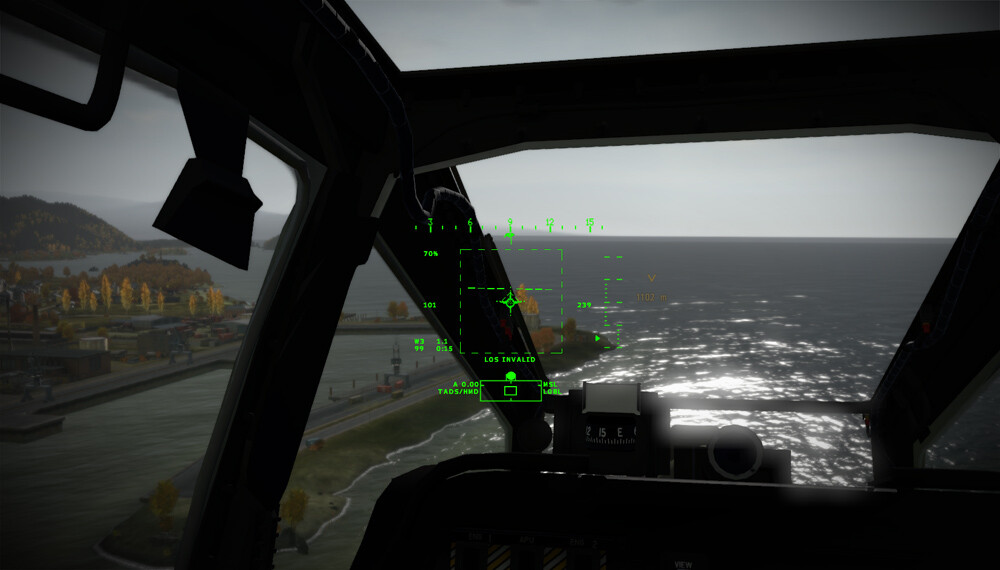
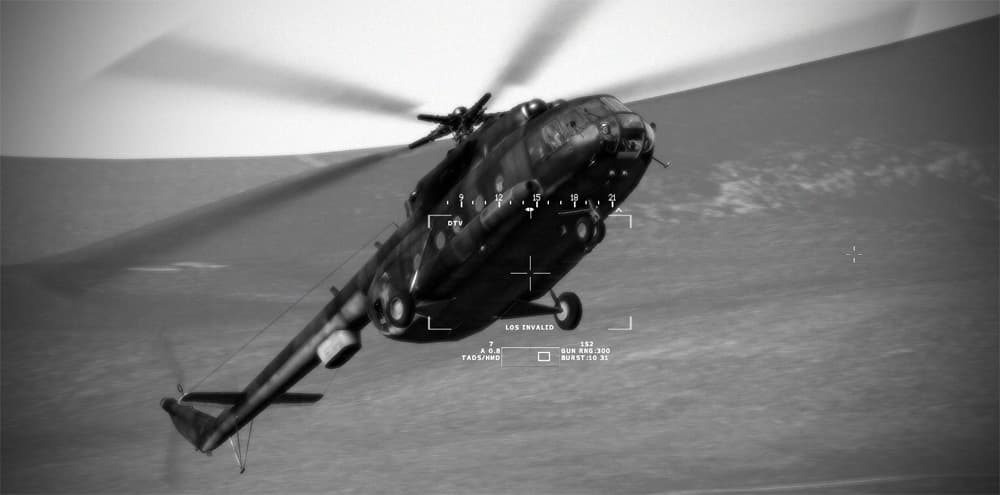
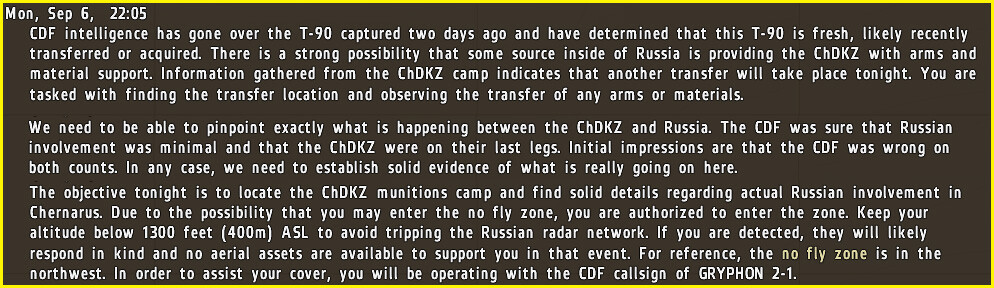
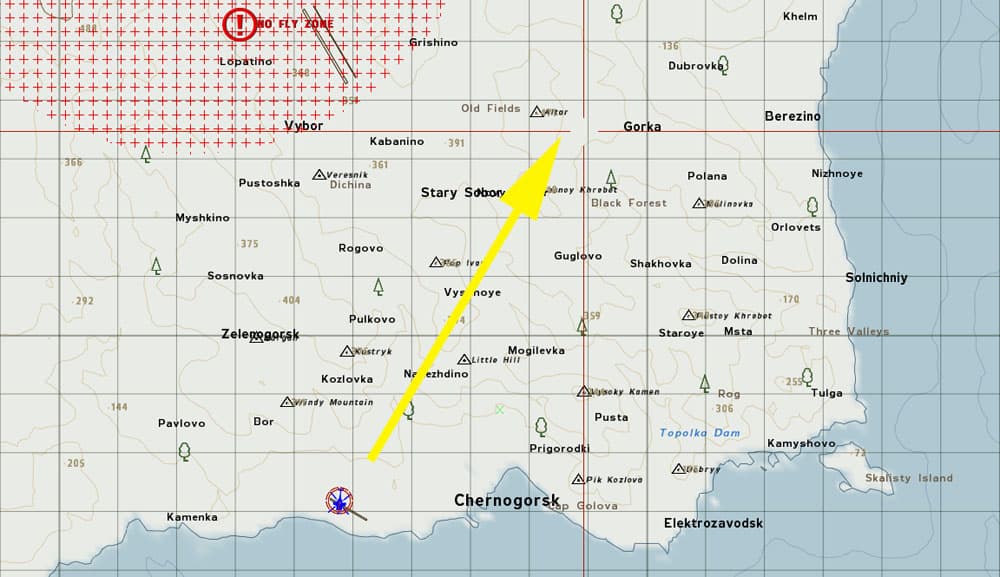
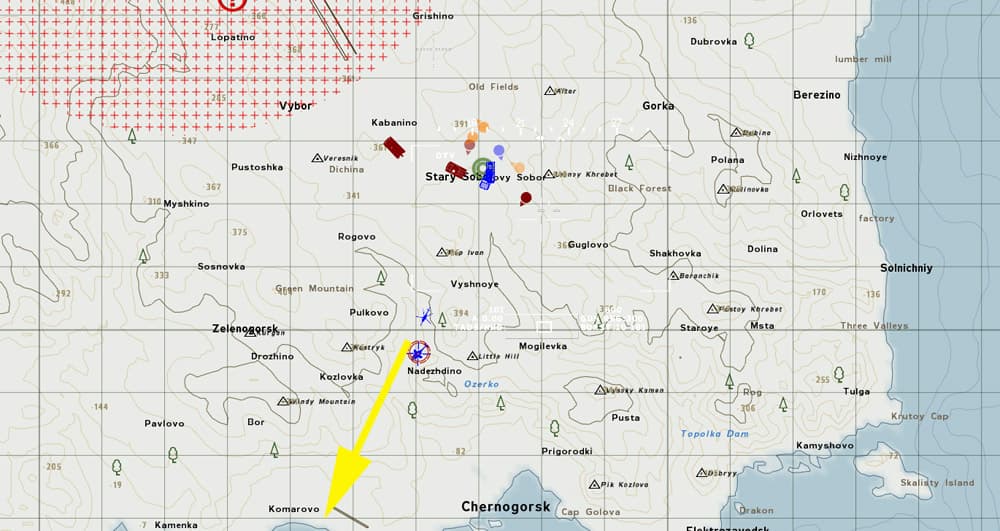
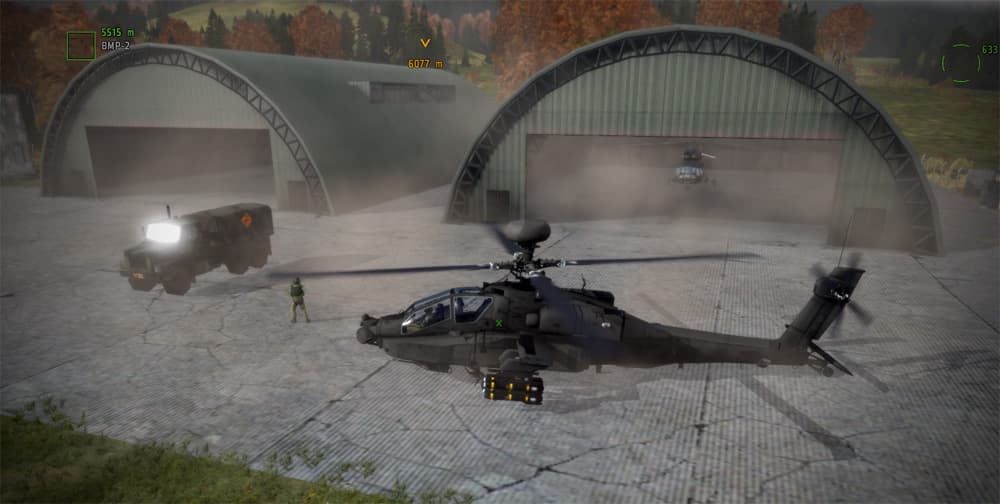
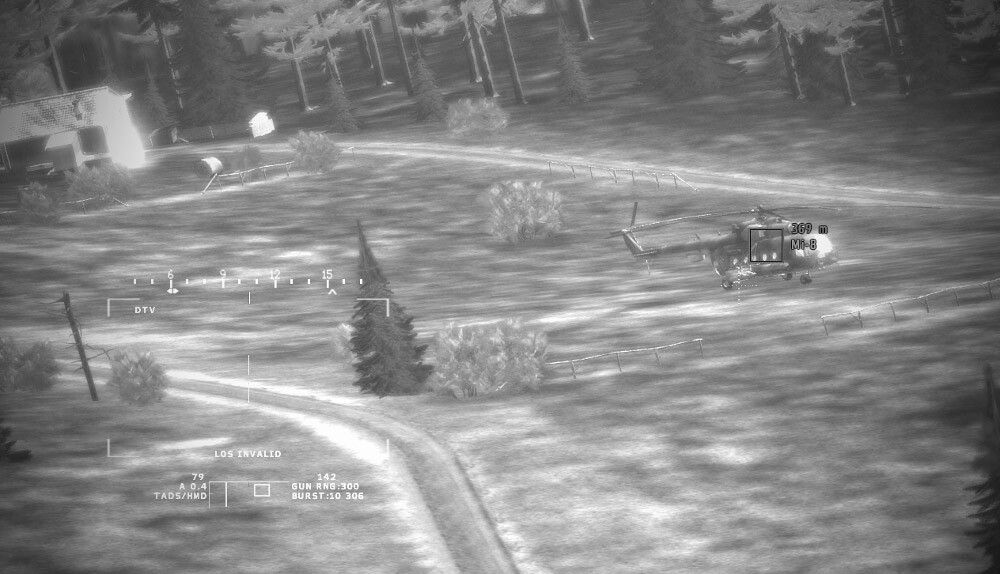
We head out to the north with no actual spot on the map to go, but we have a general sense that the HQ must be under the Russian no-fly umbrella. There are a couple ways to approach this mission and some of them are fool’s errands (as I quickly found out). One of them is approaching the airfield from the east and spotting the juicy targets on the airfield. Note in the mission brief we are told to capture the ChDKZ leaders intact and not kill them. Dropping Hellfires on these Mi-8s is satisfying, but doesn’t help achieve your short term objective. Or maybe it does.

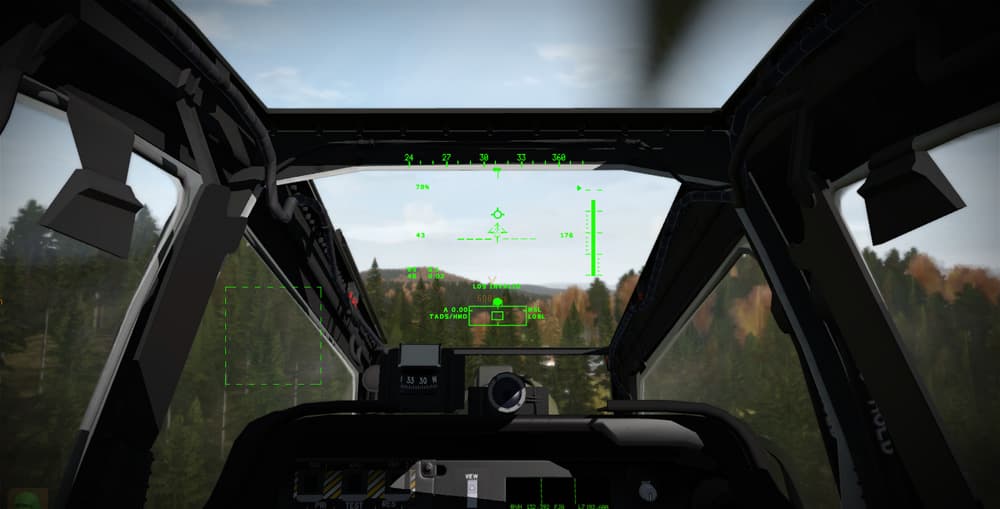
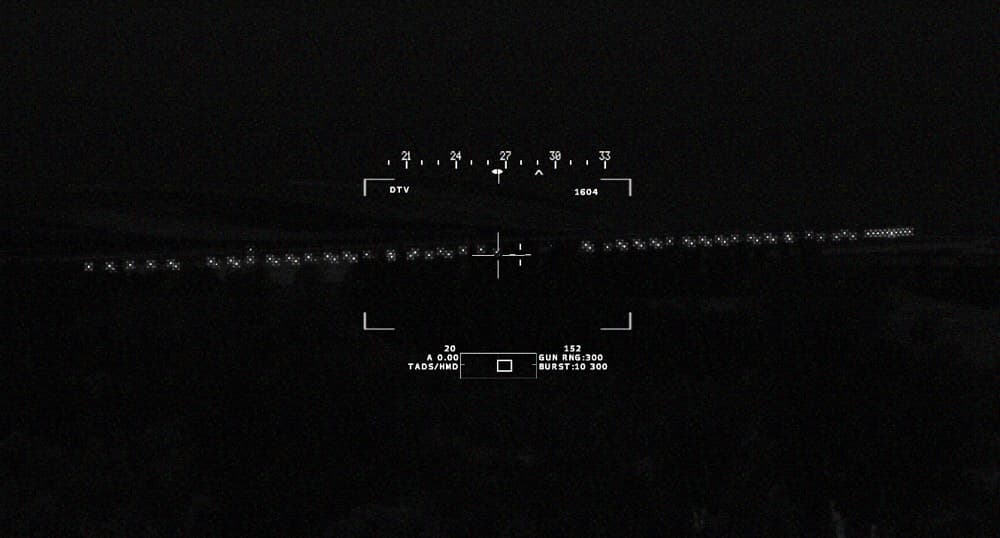
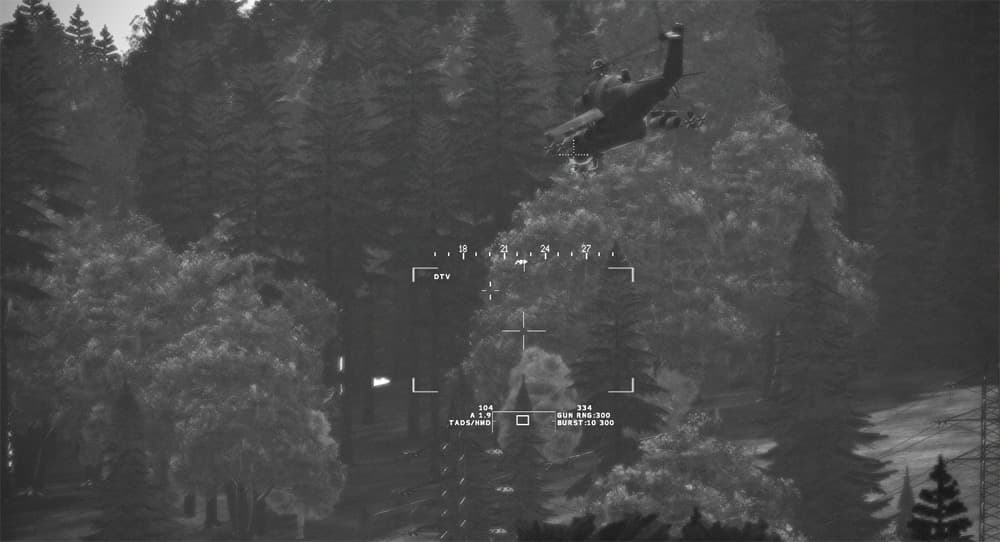
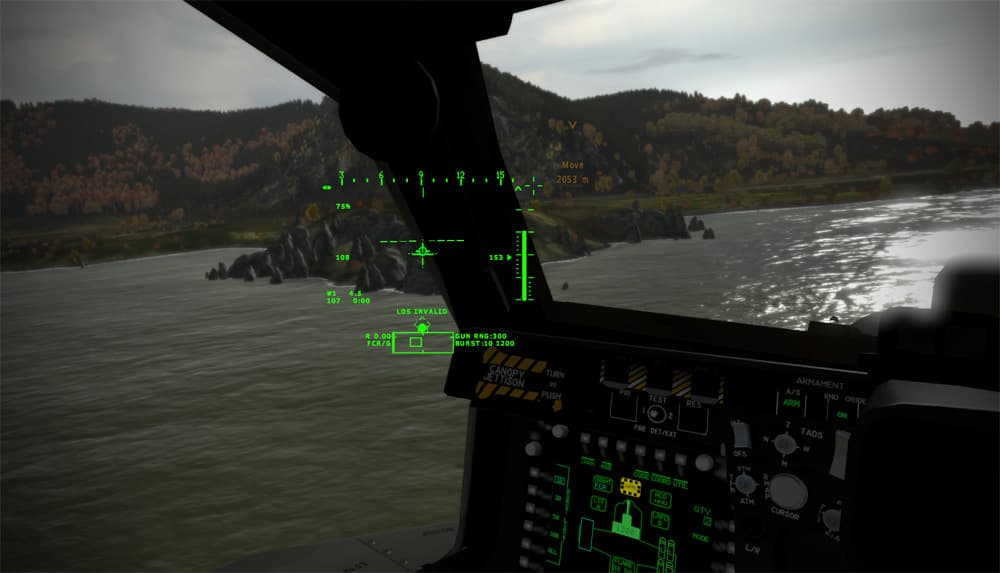
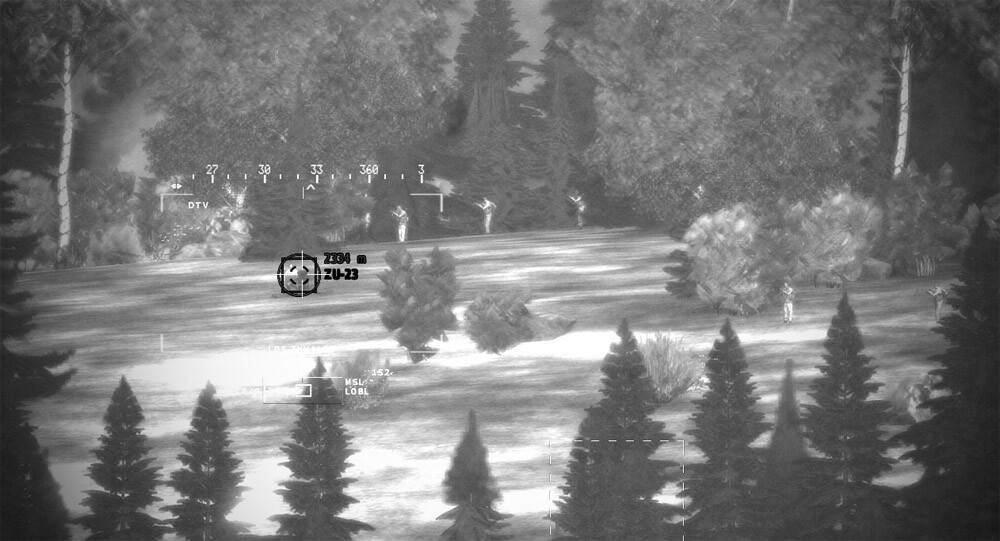
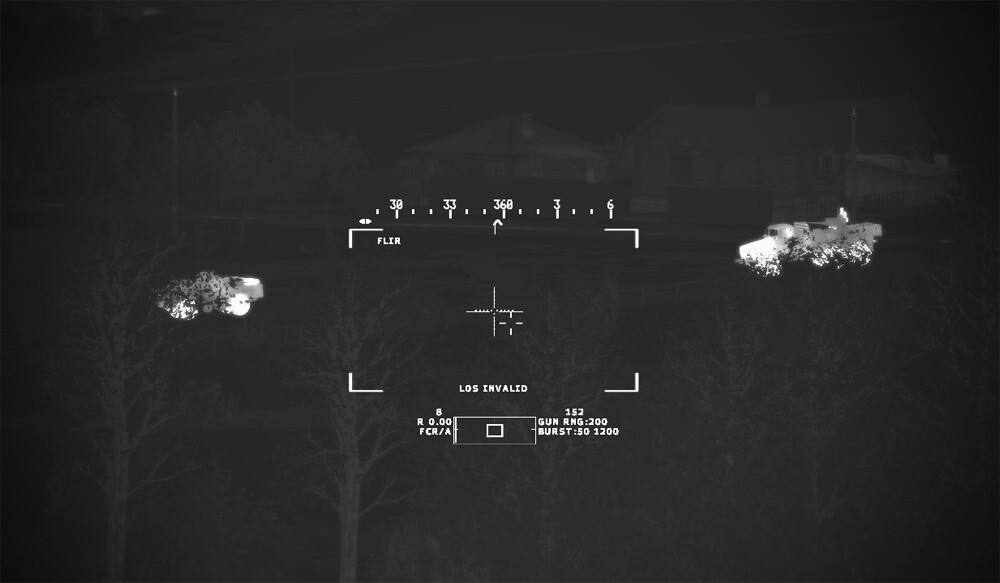
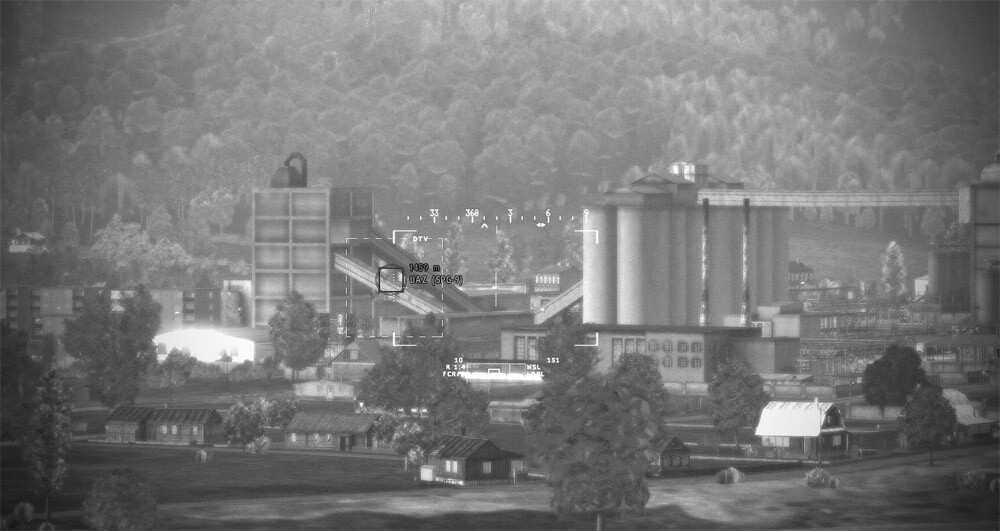
With a bit of a learning curve applied, I head to the southwest side of the airfield because that is where our high value targets (the ChDKZ commanders) are located. They are traveling in an unarmored UAZ but the area is well protected. We take up position on high ground west of the airfield and start building the picture. A pair of 2S6 Tunguskas guard the valley south of the airfield and two light platoons (3 vehicles each) of tanks straddle the main road leading north into the depths of the no-fly zone…

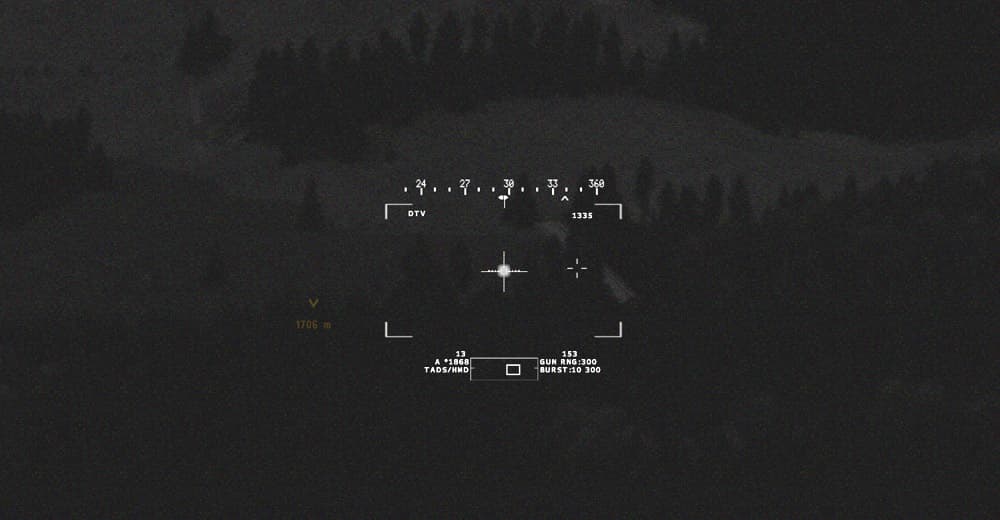
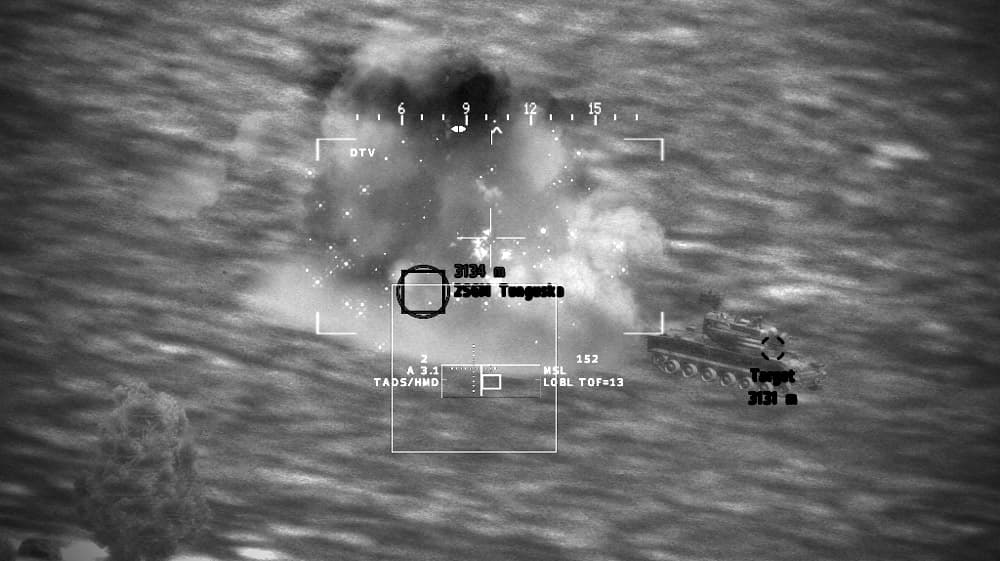
After assessing the situation, we go for the obvious targets first – the pair of 2S6 anti-aircraft vehicles. I’ve found the Apache is capable of ripple firing and redesignating targets while the missiles are airborne, so a quick double tap allows for no time for the Tunguskas to fire back…

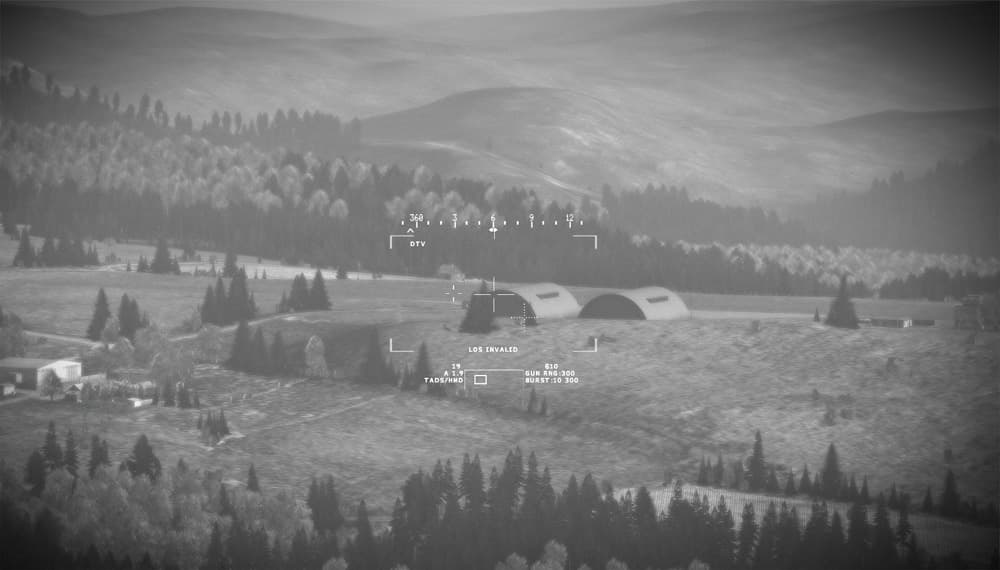
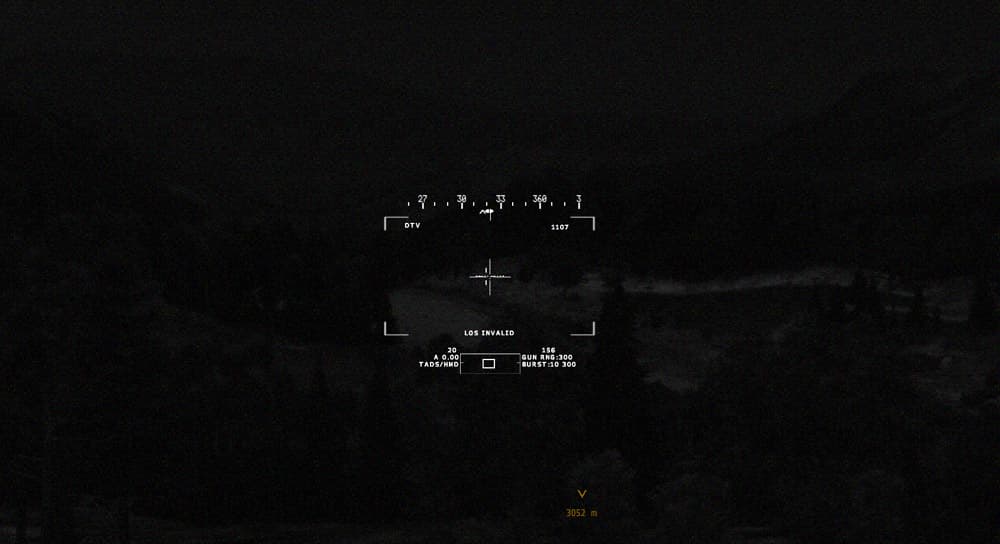
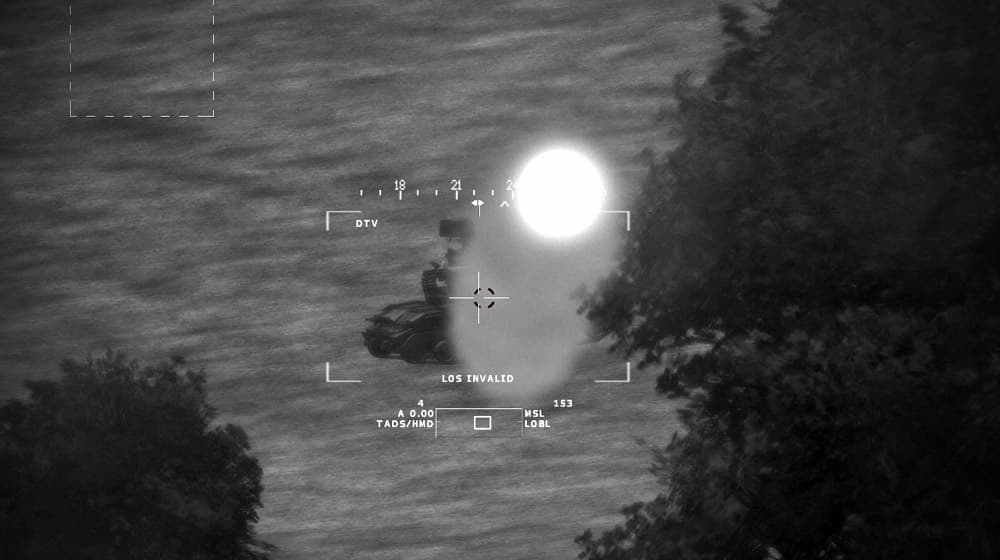
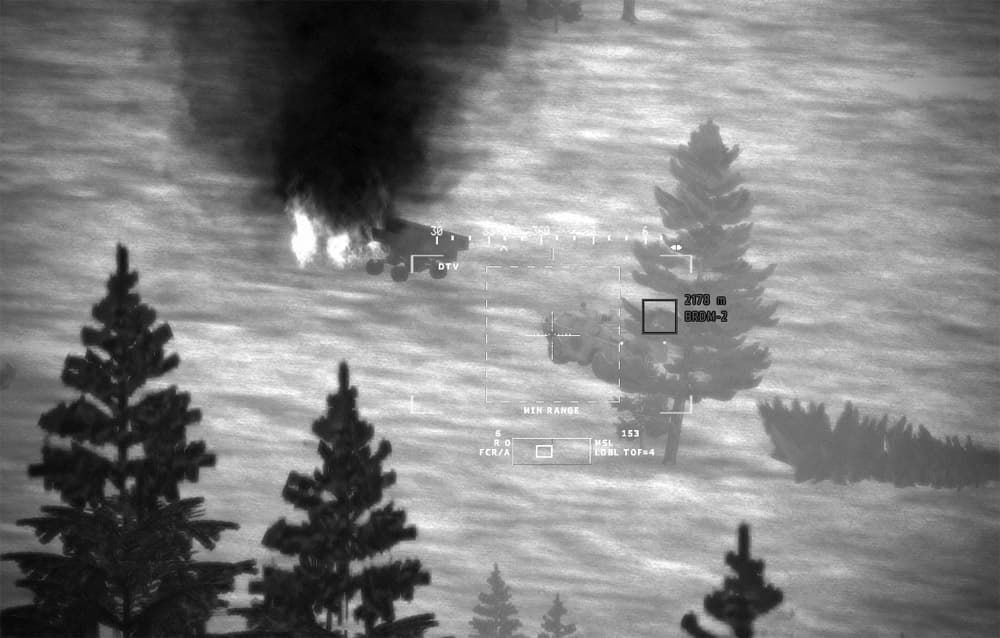
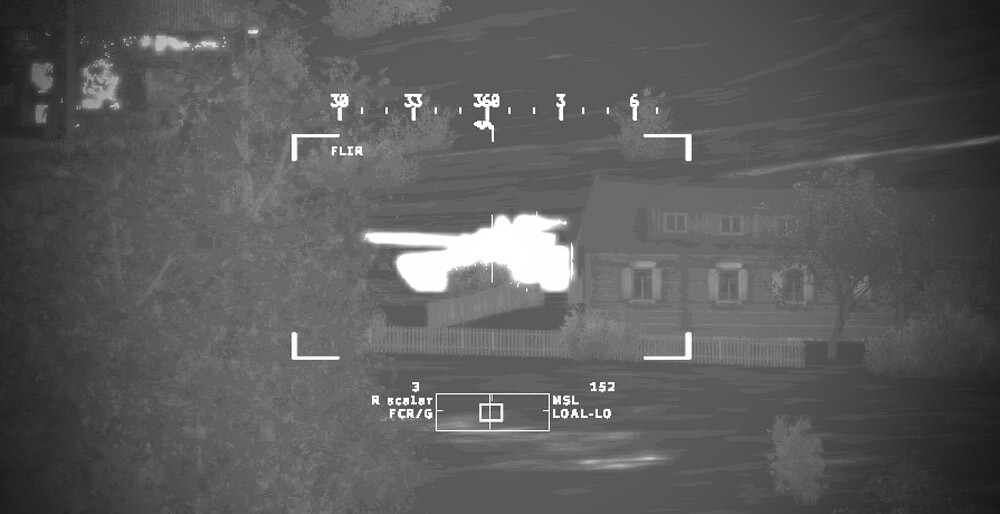
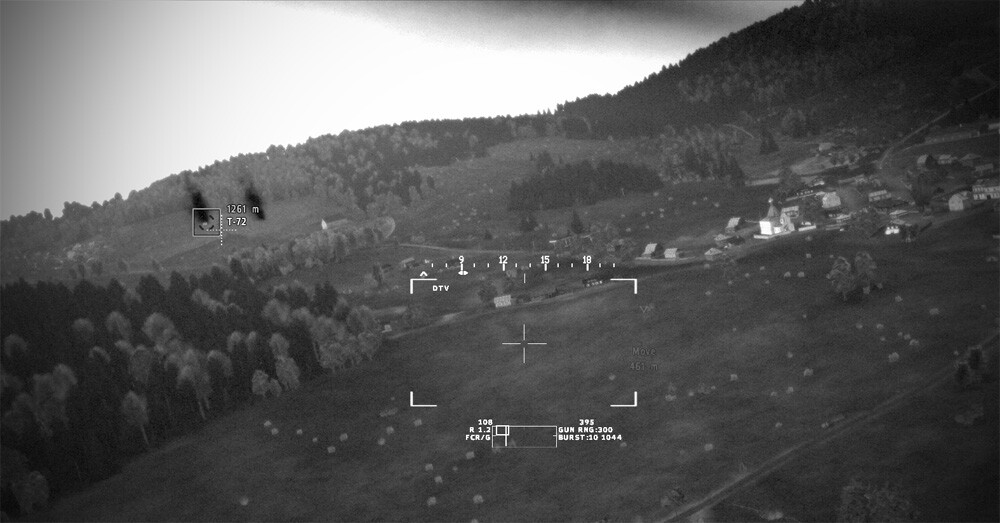
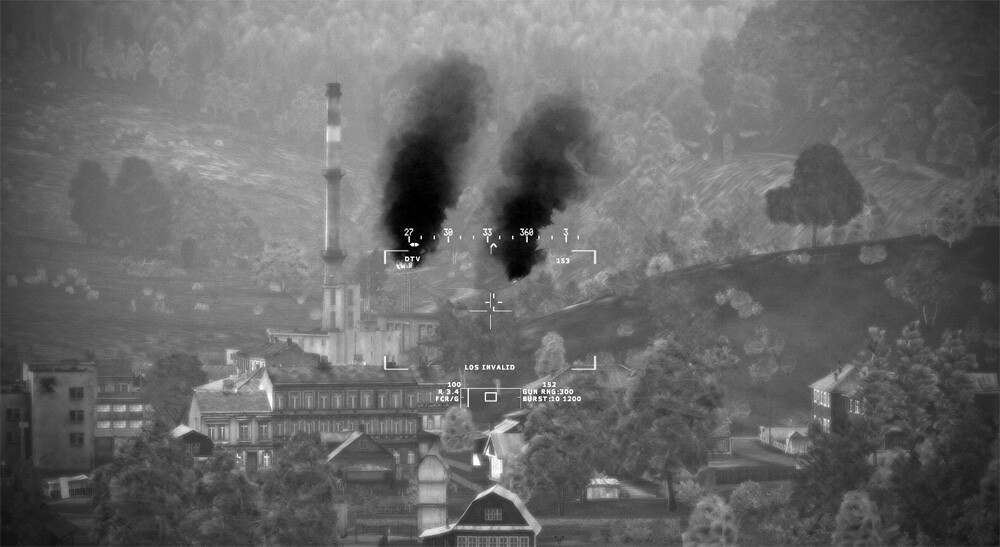
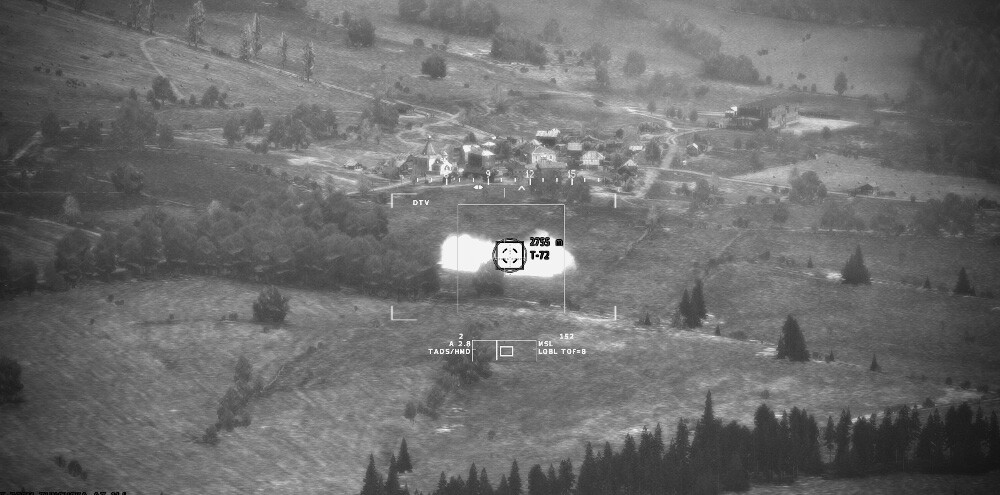
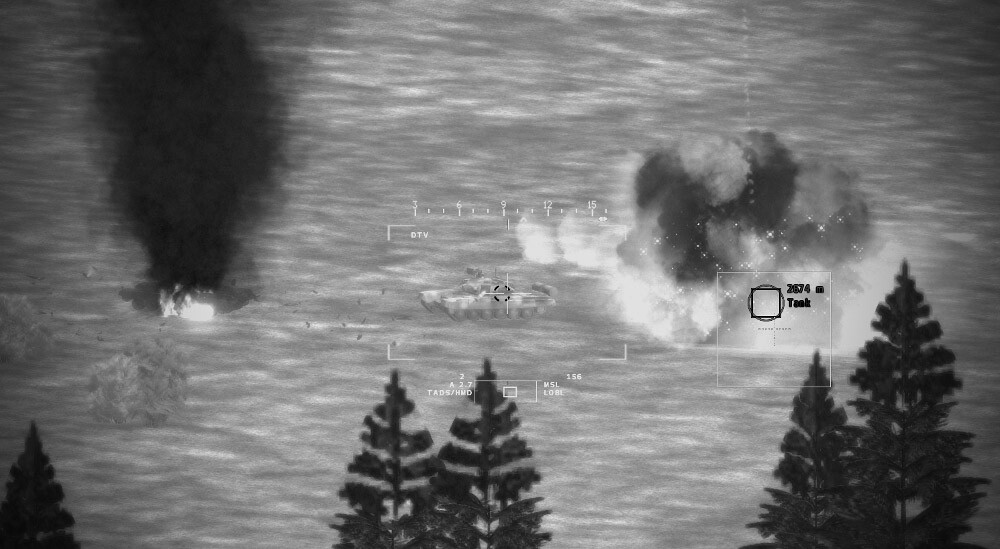
Immediately after hitting the 2S6 vehicles I order the pilot to retreat over the ridge because all of the T-72s and T-90s open fire and they are fairly accurate with their main gun against a hovering target. I move over a few hundred meters and poke up on the side of the hill and designate the tanks for the next hail of Hellfires. Some of the tanks pop smoke to try to obscure our optics, but it doesn’t work…

The guy in the middle might want to get the hint…

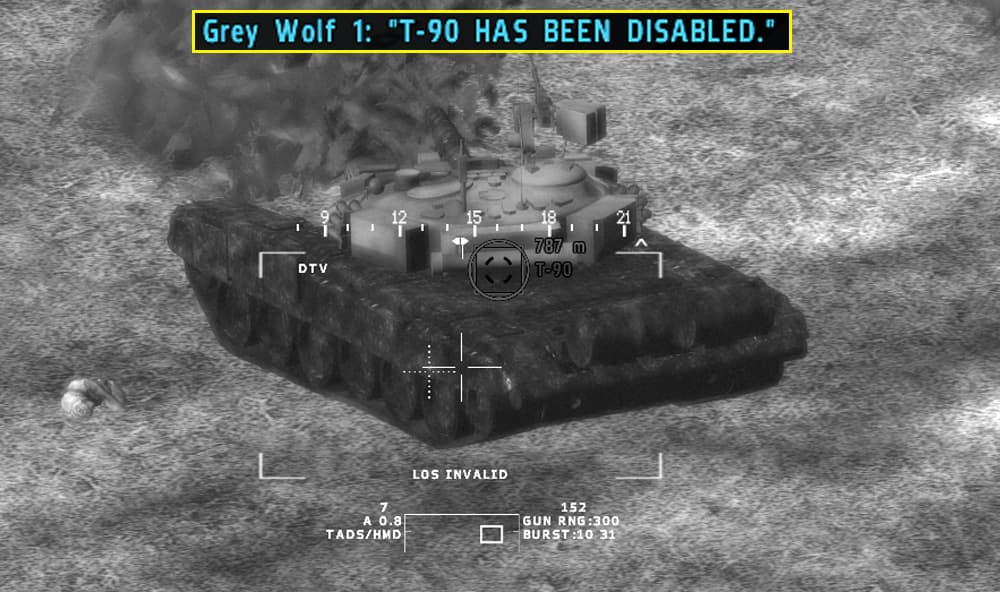
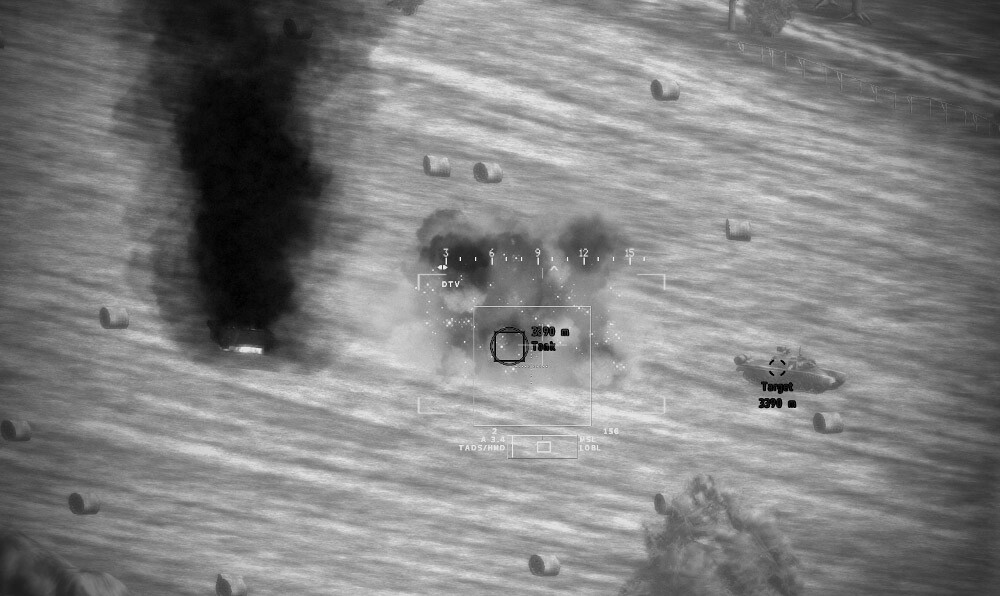
After killing the first three tanks, we switch to the second group of three, but we run out of Hellfires after two are taken out…

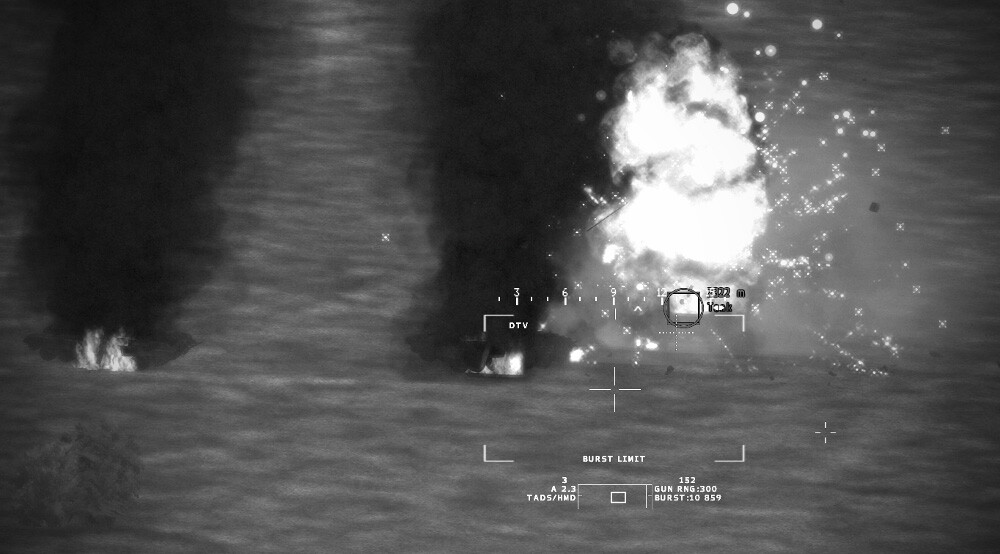
With the 2S6s out of action, it is safe to crest the ridgeline and descend into the valley. I lay the cannon on the remaining tank and it takes a couple hundred rounds, but eventually we destroy it…

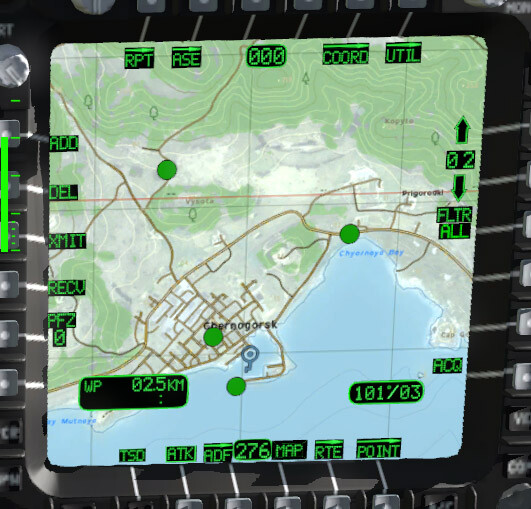
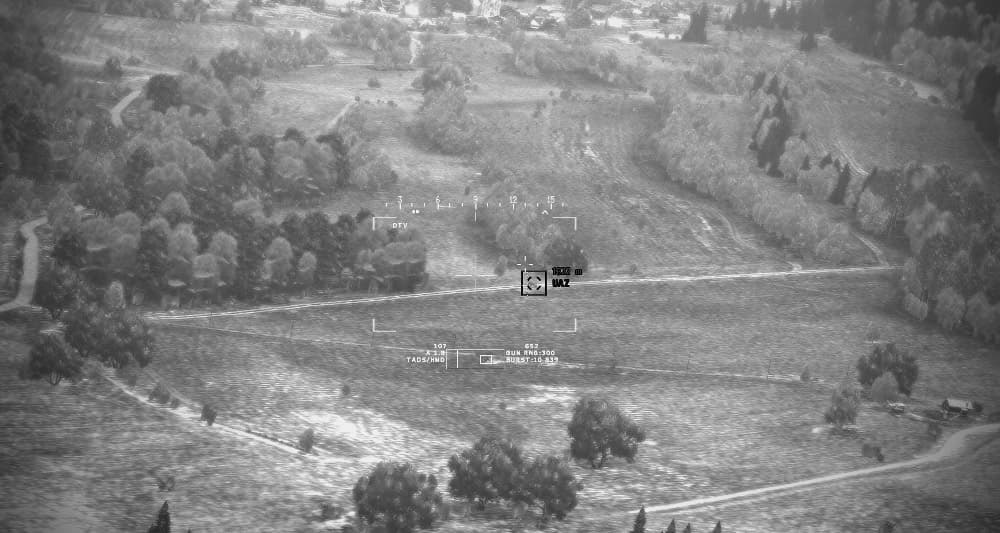
With the valley cleared of forces we finally spot the moving vehicle blip on the radar and move south down the valley to intercept the UAZ…

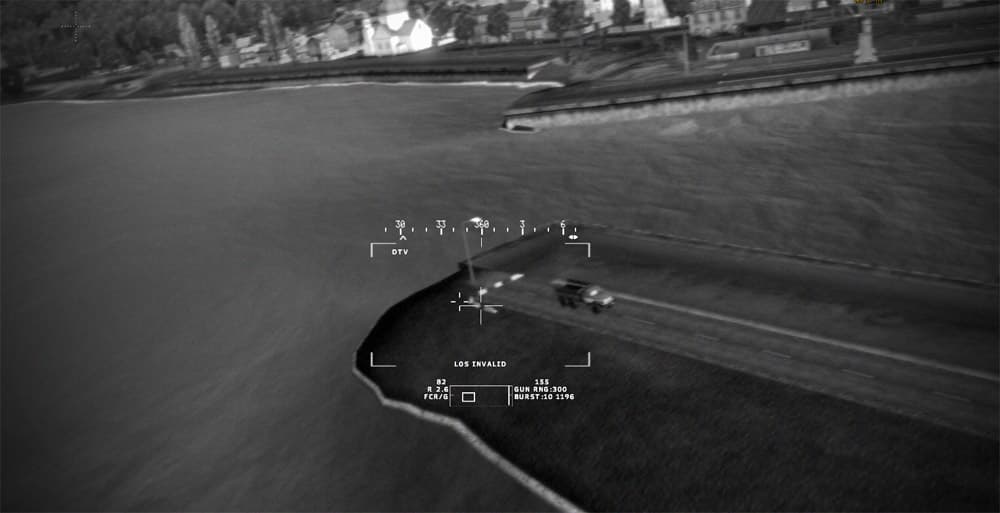
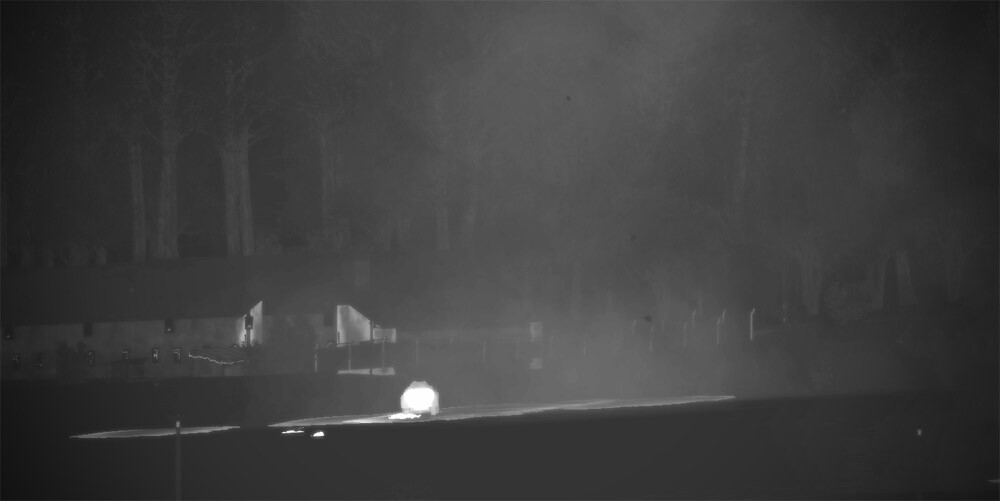
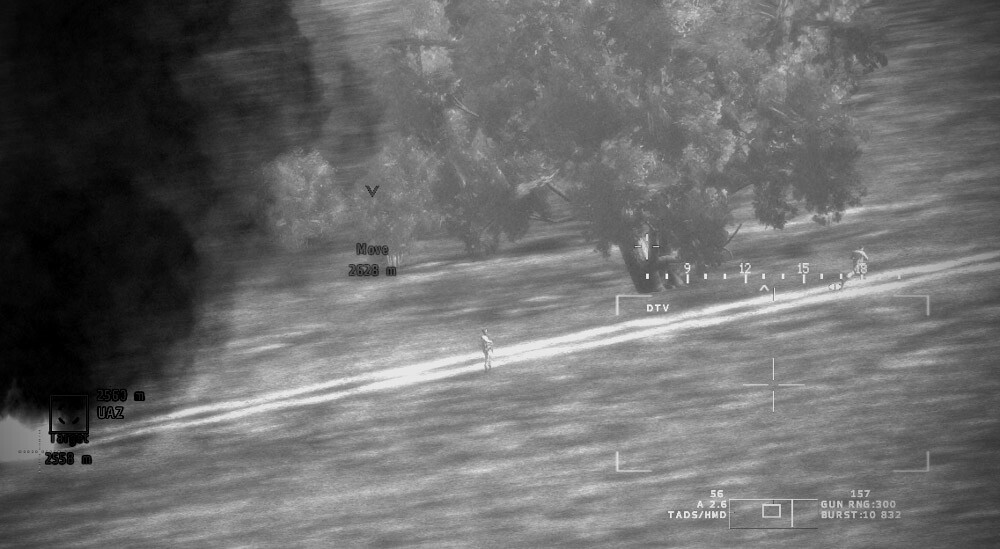
Keeping in mind the briefing not to use excessive force, I try sniping the UAZ with just a couple cannon rounds at a time until a round find its way into the UAZ and disables it…

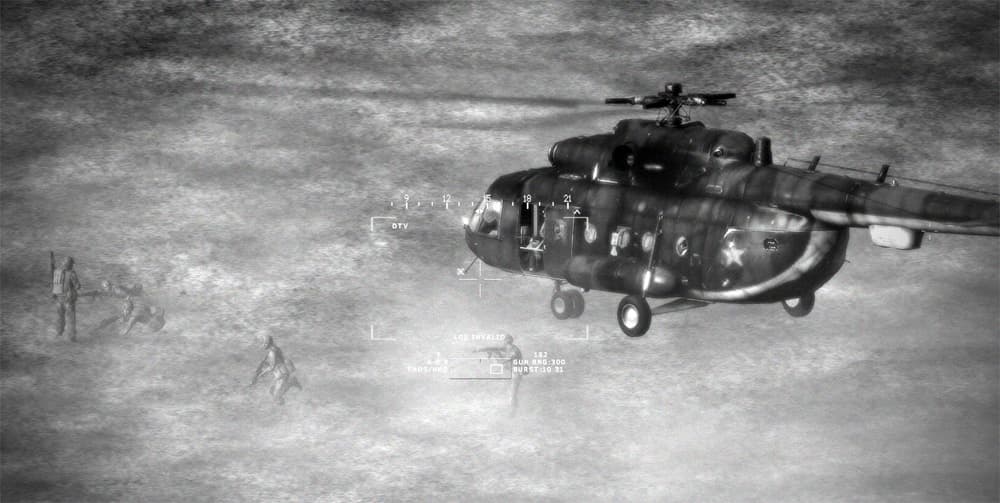
As the UAZ smokes, the occupants jump from the vehicle and start running for woods…

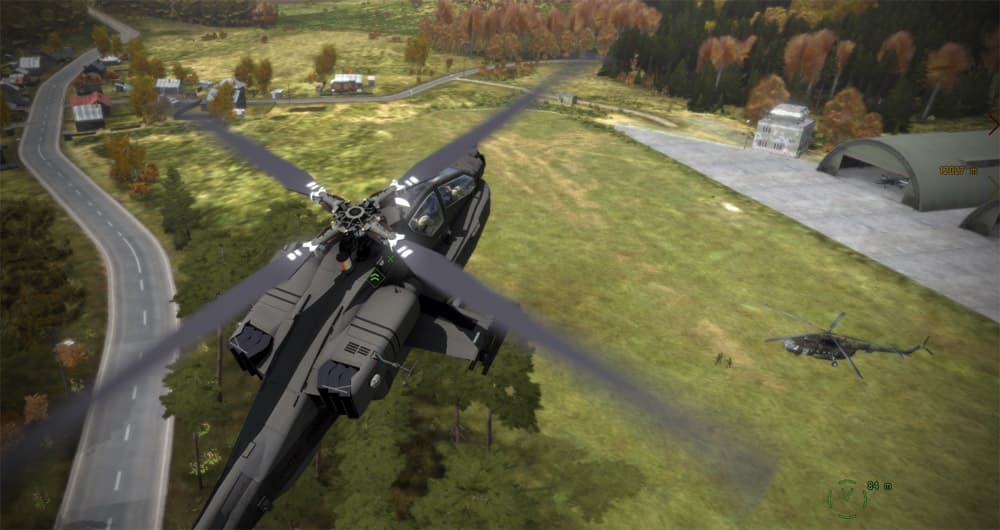
We can’t let them escape, so we set down near the road and do what any self respecting Apache pilot would do – give chase!

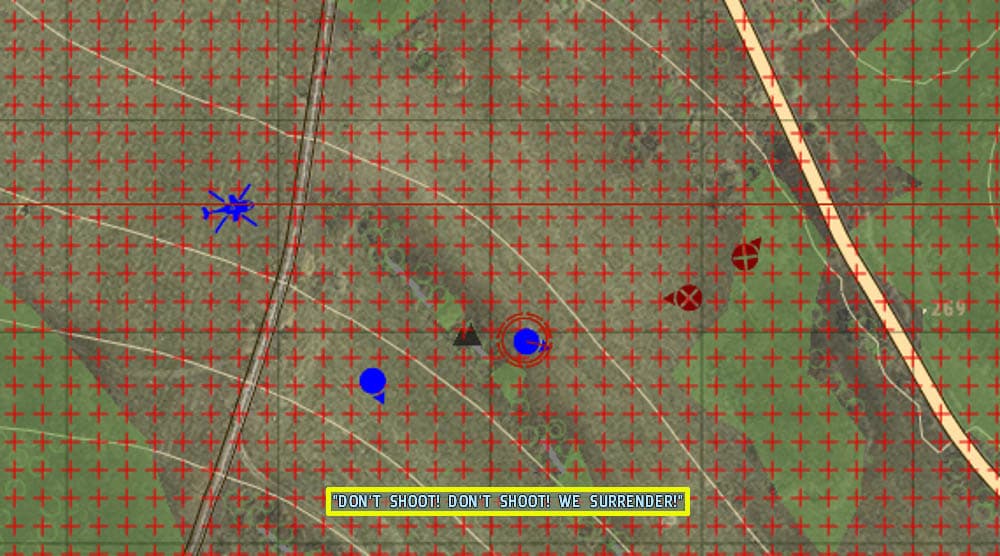
We chase them up into the woods – I’m wishing I had an assault rifle instead of this little Berretta, but as we get close they surrender! (I think you can actually do this while IN the helicopter hovering over them…haha…but this was far more exciting!)…

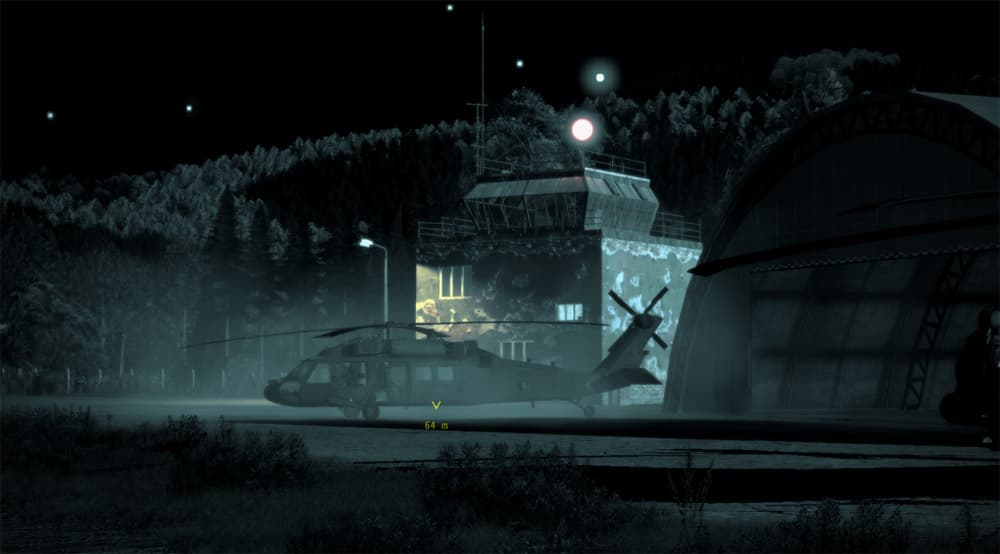
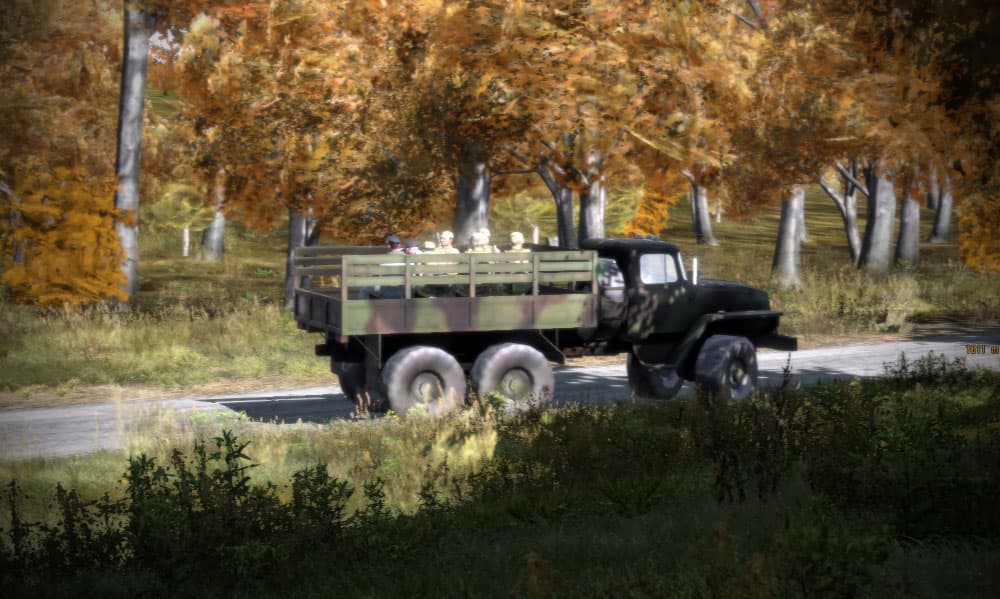
We wait for several minutes and I’m hoping that something is going to happen and I hear a distant motor coming closer. I just hope it isn’t a ChDKZ tank! The sound gets closer and then stops. A few moments later CDF forces emerge from the woods and take possession of our prisoners…

They request an escort to the capitol in Chernogorsk…so we run as fast as we can back to our helicopter…

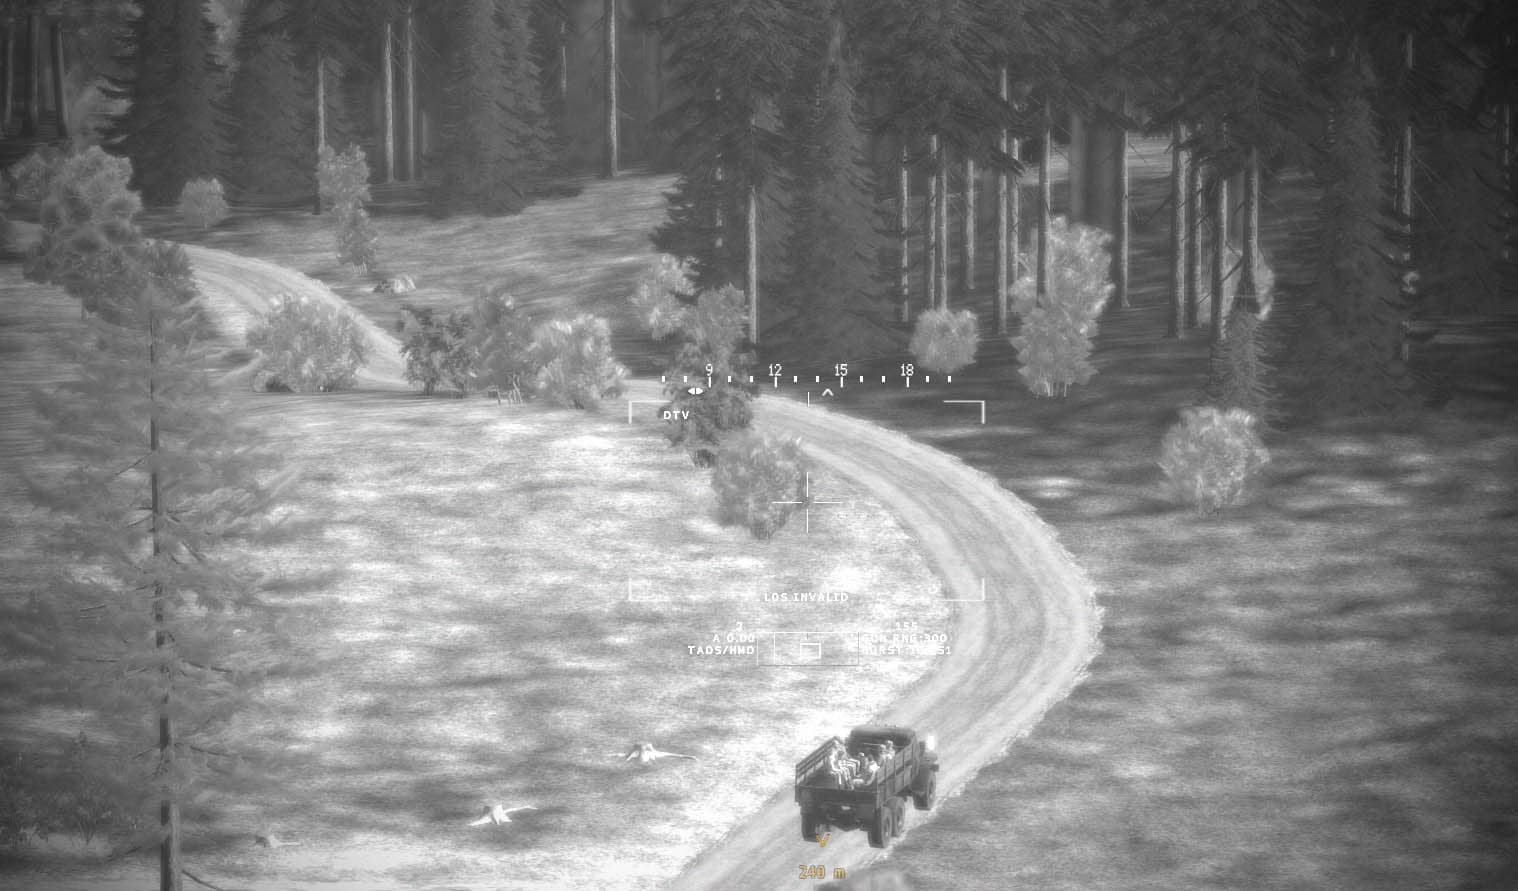
The truck trundles off down the road toward Chernogorsk and we keep pace and survey the road ahead for hazards…

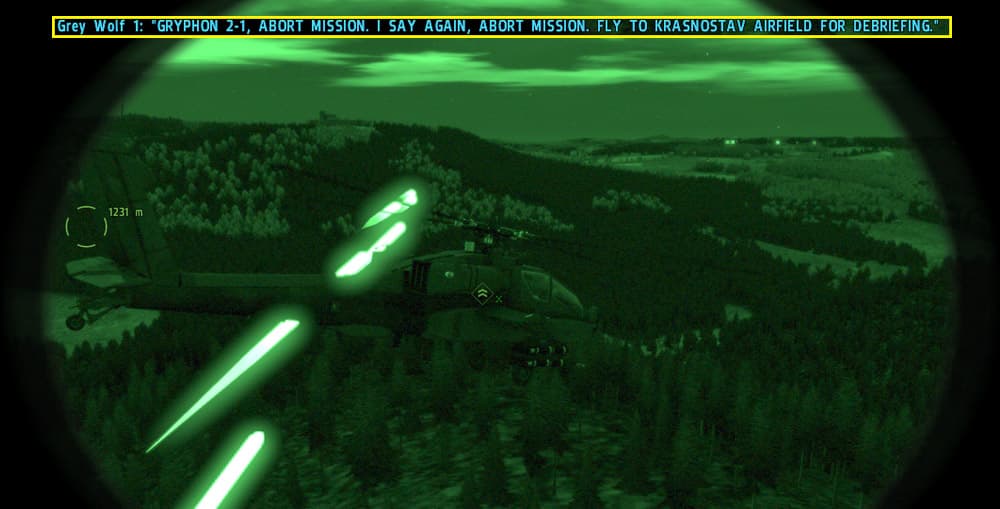
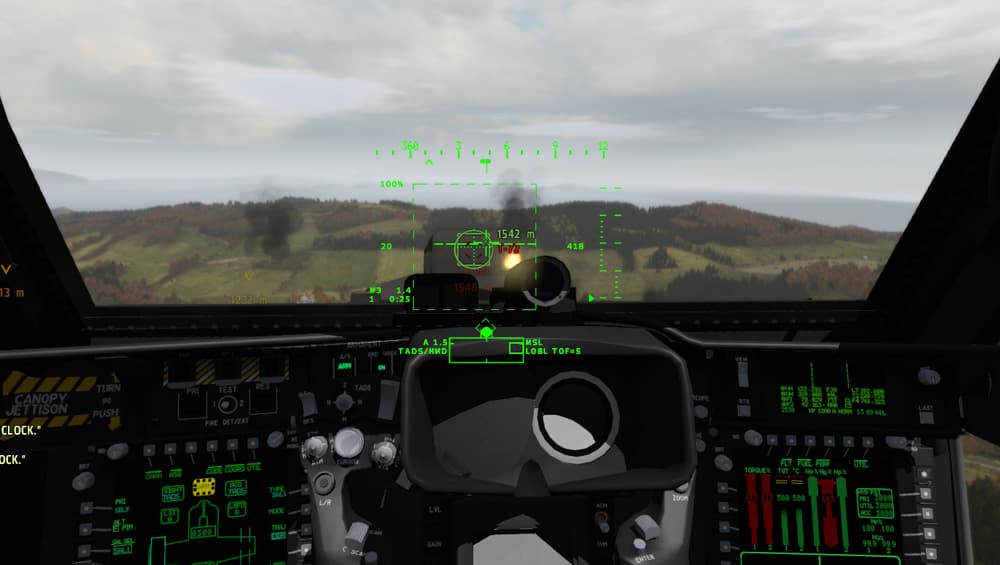
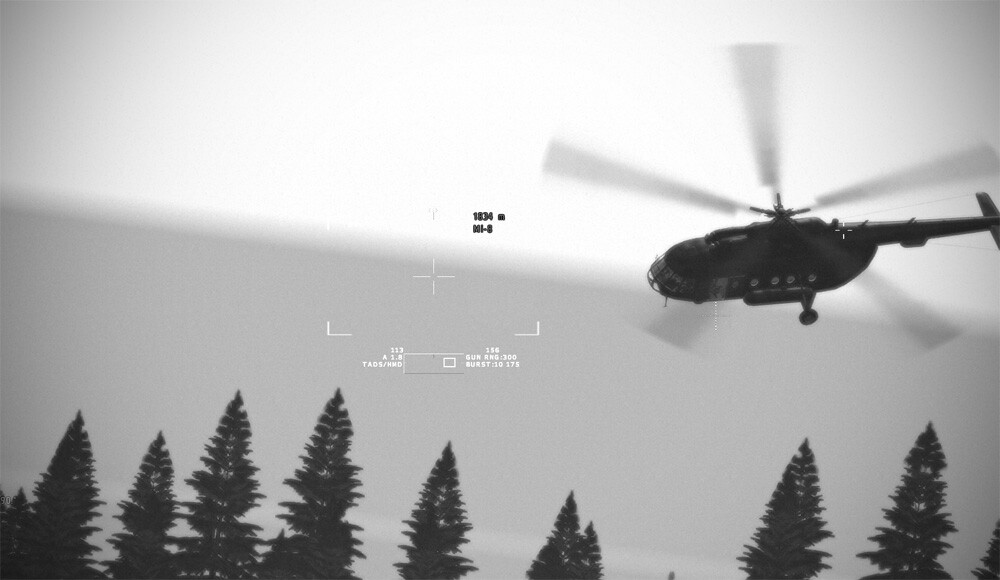
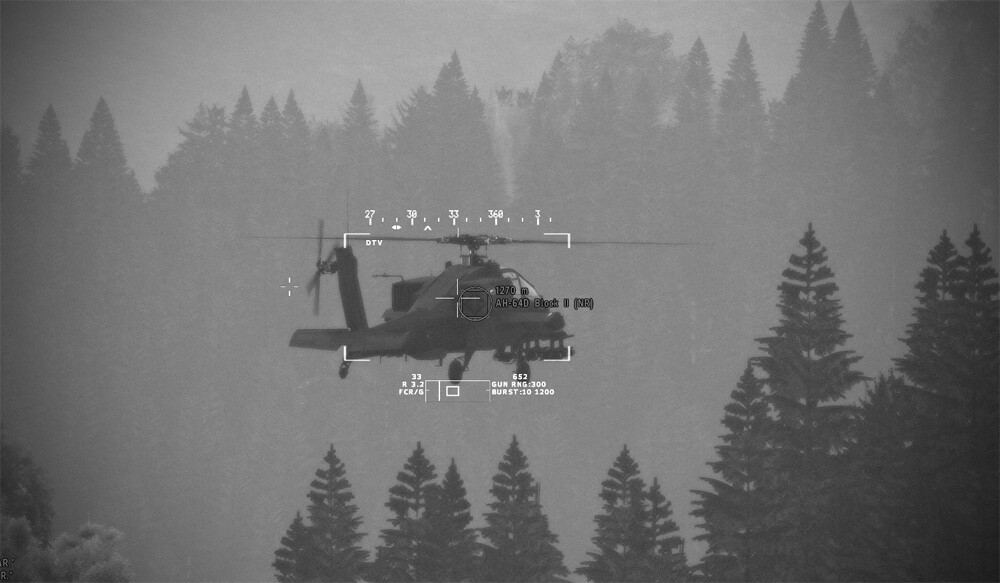
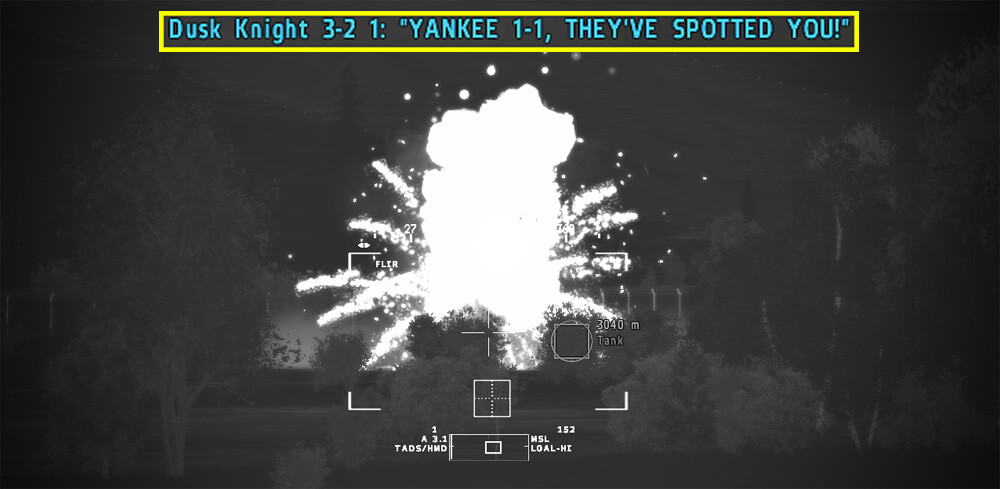
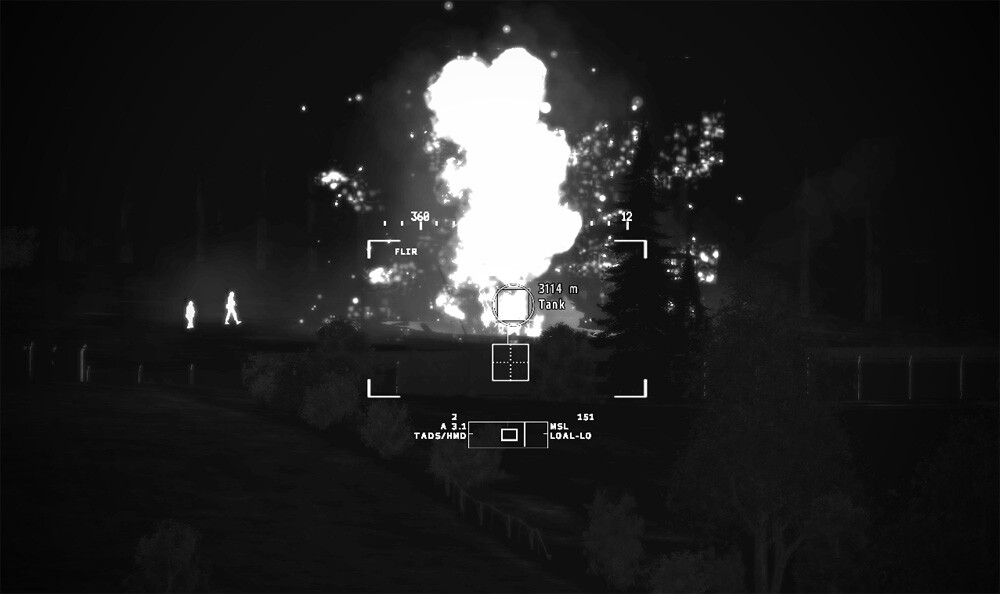
As we pass through the first town the pilot calls out a helo contact to our left and I swivel the TADS to the left and spot a pair of Mi-8s swooping across the ridgeline to our south. I pull the trigger on the gun and I see a few smoke puffs come off the lead Mi-8 as it takes a couple hits. Moments later it starts a steep descent and plunges into the forest in a huge ball of flame…

Note – it begs the question – if I had killed the two Mi-8s on the ramp at the airport – would these have shown up?

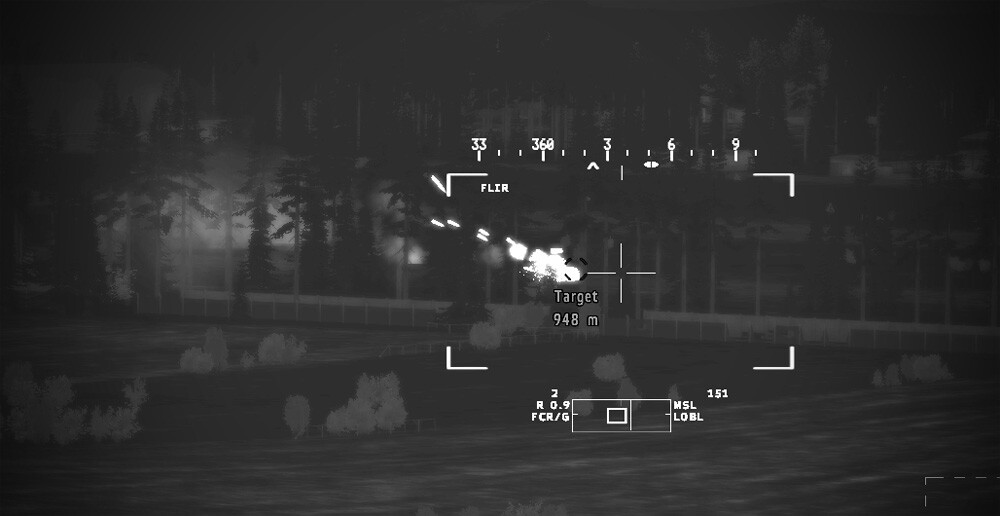
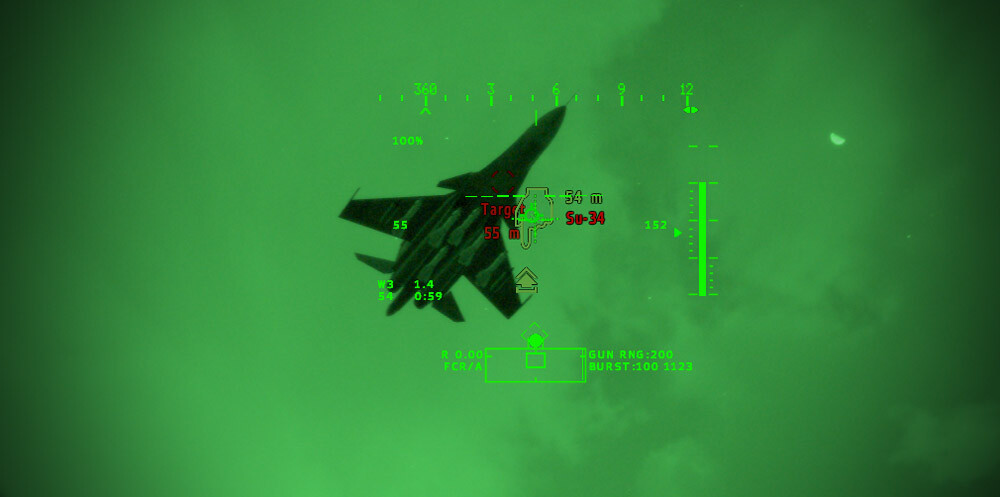
We pass the wreckage and I order the pilot to reverse course because the second Mi-8 has tucked in behind us and I can see tracer rounds whizzing past the cockpit…

We pass head to head and I’m not able to get my gun on him. I’m flying by proxy since I’m giving commands to the pilot, so I’m not able to maneuver fast enough to shake the Mi-8…

I take slight damage in my FCR goes dead. In a flash of brilliance/cowardice, I realize we are very close to my base and I drag the enemy Mi-8 toward it…because I know there is a friendly ZSU-23 guarding our base…

I continue past the base and my speed outpaces the Mi-8…but he continues to come and the trap is set!

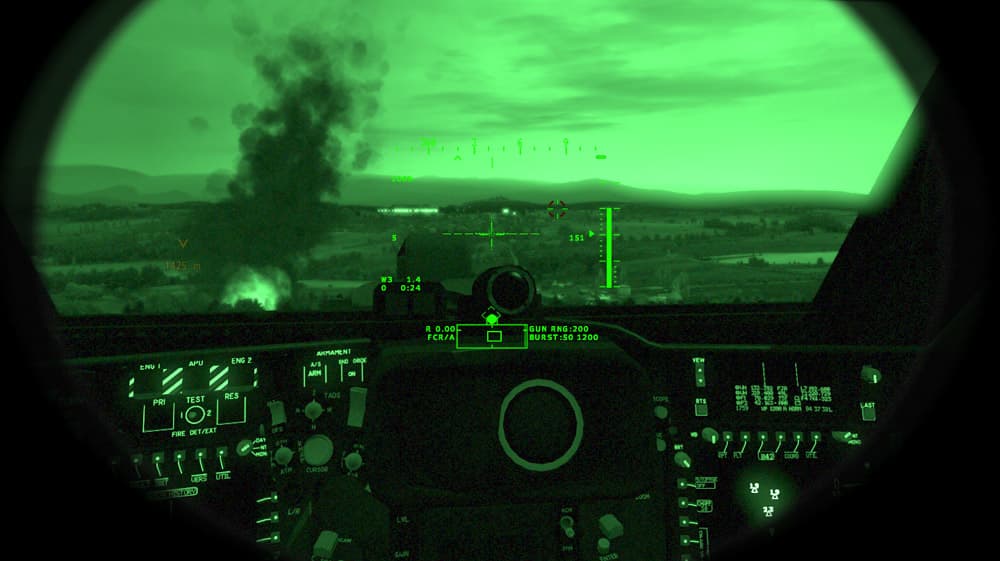
We reverse course so I can get my TADS optics on him anticipating having to put my gun on him and then I see the wonderful sight of the ZSU-23 rounds arcing up over the ridgeline toward the Mi-8. He starts to take damage but survives long enough to do a forced landing in a field on the opposite side of the ridge from the Zeus…

The Mi-8 crew and passengers exit the downed bird and make a run for the woods. I feel a bit heartless, but they were just trying to kill me, so I lay down some 30mm and a short burst is all it takes. I leave the helicopter intact for some reason…

I return back to the north and thankfully find the truck intact and still creeping south. In a brilliant mission design, the Mi-8s were supposed to insert troops to ambush the truck and take back their leaders…but my gun acted as a bit of a spoiler…

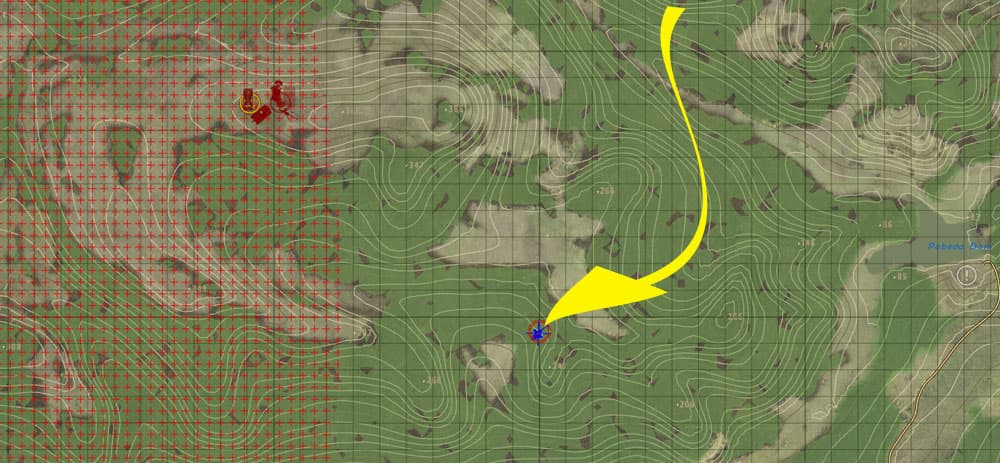
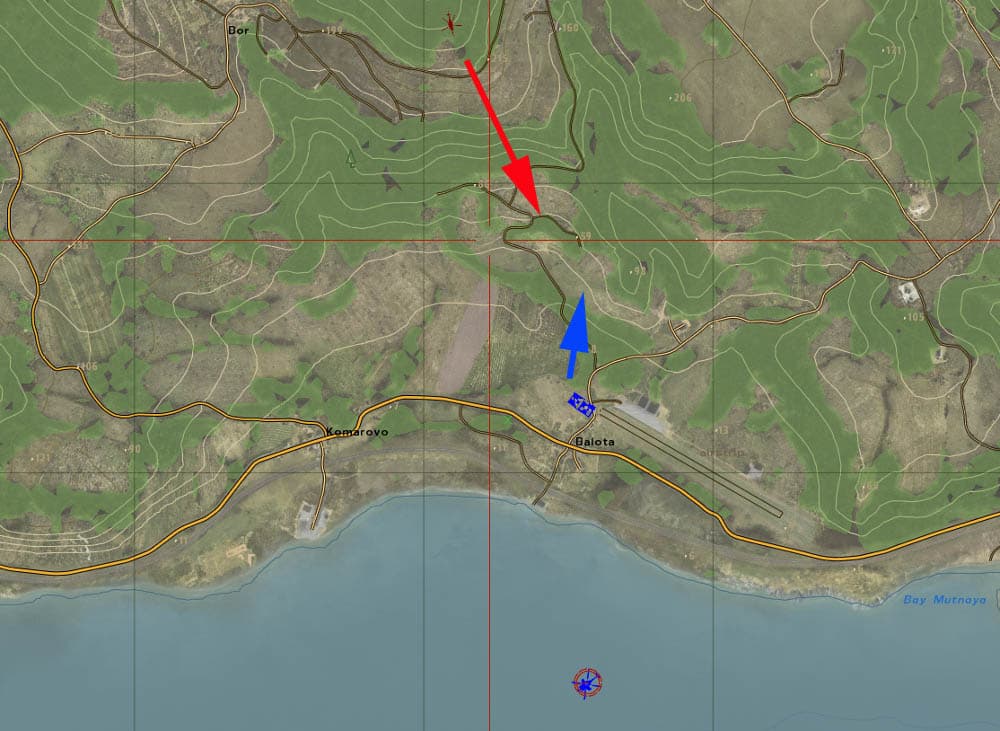
As the truck continues south I’m once more stunned to see another development – an AN-2 flies across in front of us. In an interesting twist on the mission and mission design, due to the fact that I lured the Mi-8 south toward the ZSU there was a mission consequence that the ZSU also moved north to engage the Mi-8. Due to that movement, the ZSU took a few shots at the AN-2 as he passed in front of us and I didn’t even have time to put my gun on him. What was supposed to happen was the AN-2 was to make a troop drop in front of our advancing truck to set up yet another ambush…

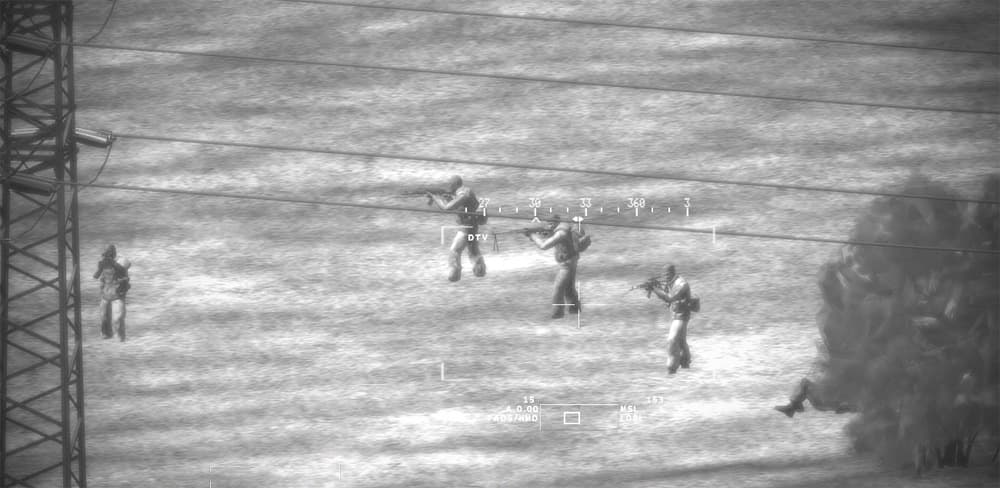
But the presence of the ZSU pulled toward the north forced the AN-2 to circle and do the drop further north after our truck had passed the ambush zone…!

Here you can see the drop occurring after we’ve passed the area…whew!

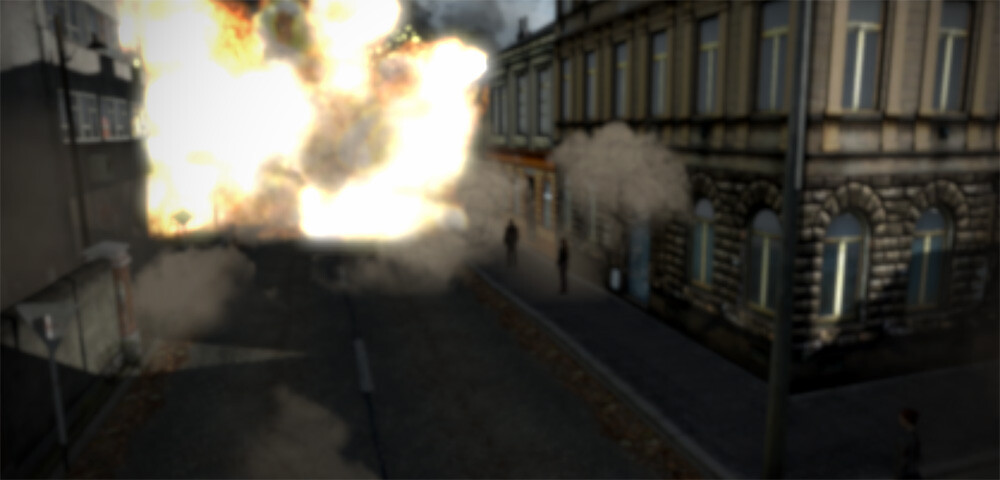
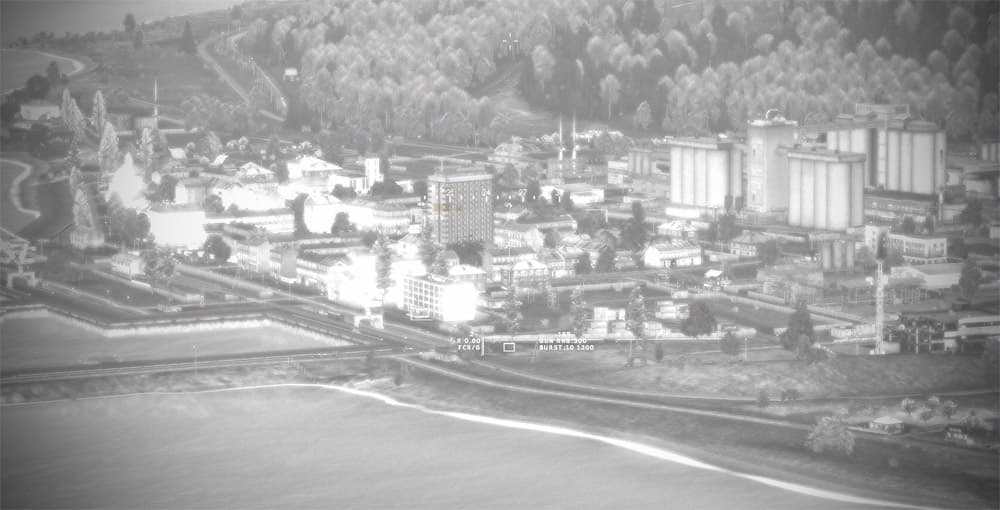
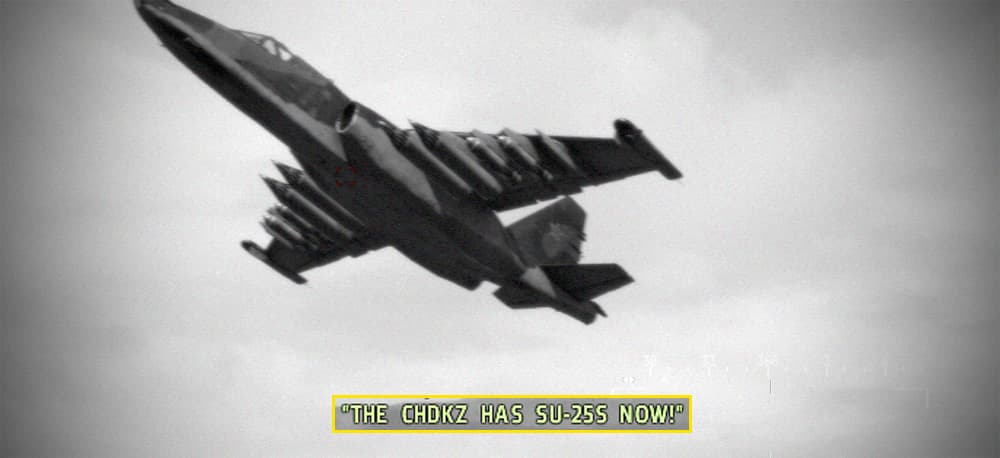
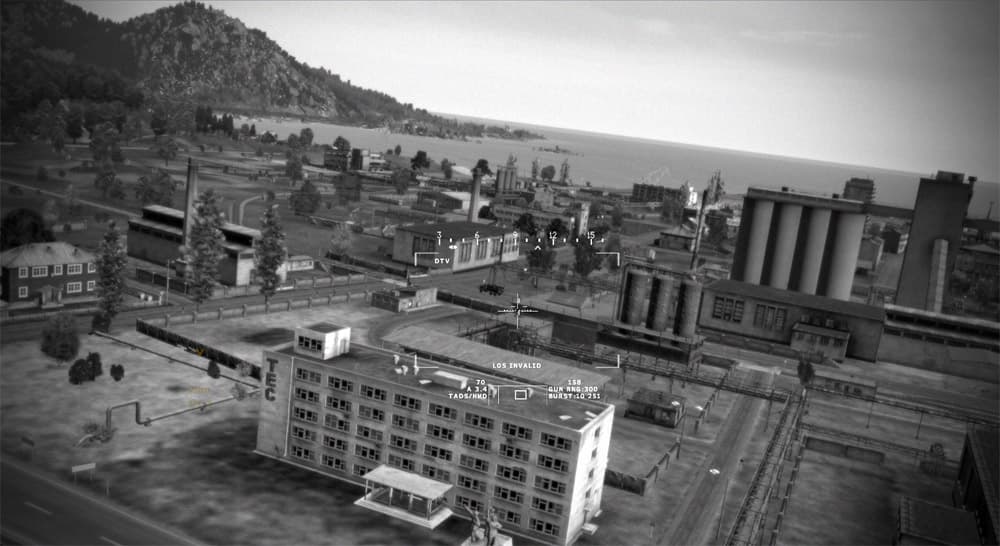
Five minutes later, the truck finally enters the northern outskirts of Chernogorsk. I’m tense, waiting for a car bomb, or an ambush, or a Su-25 to come up and snatch defeat from the jaws of victory…

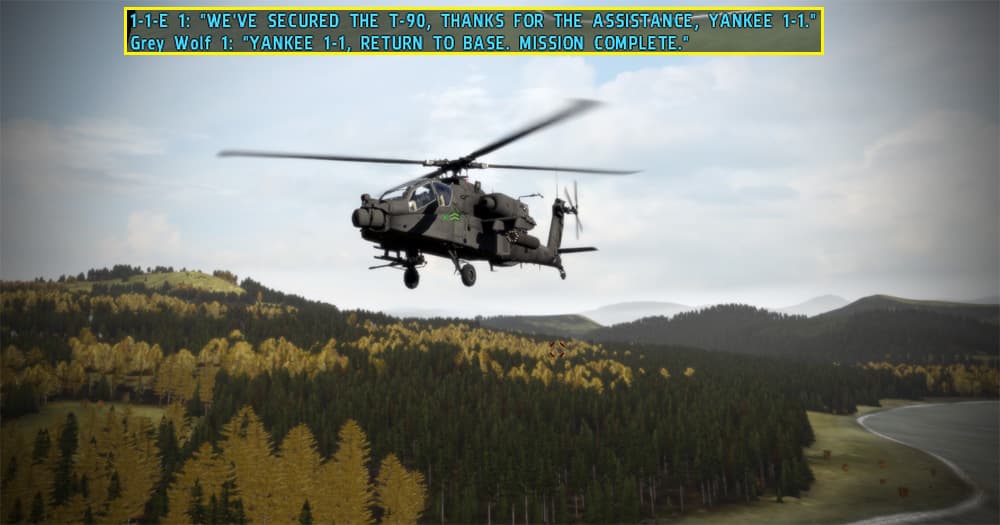
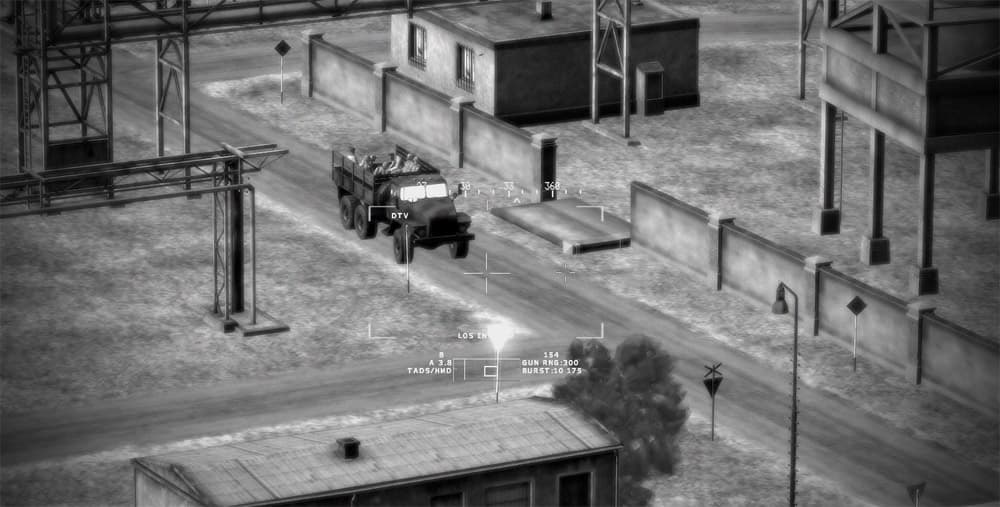
With great relief I see the truck pull up in front of the government building. The ChDKZ commanders will now be held accountable for the war they’ve waged…

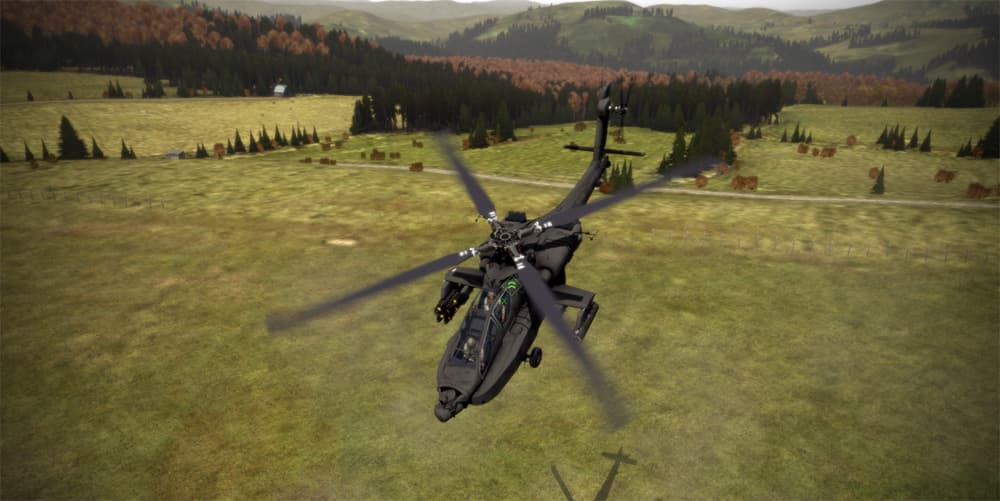
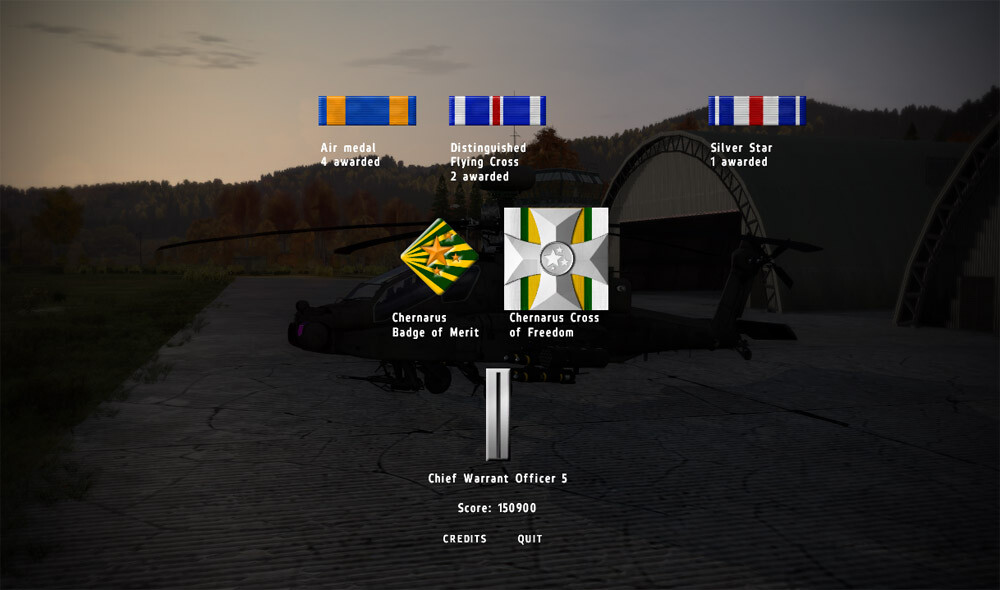
We head the short distance over to our base…and we are cleared to land one last time…(yes, the gun parks itself in the stowed position prior to touchdown!)
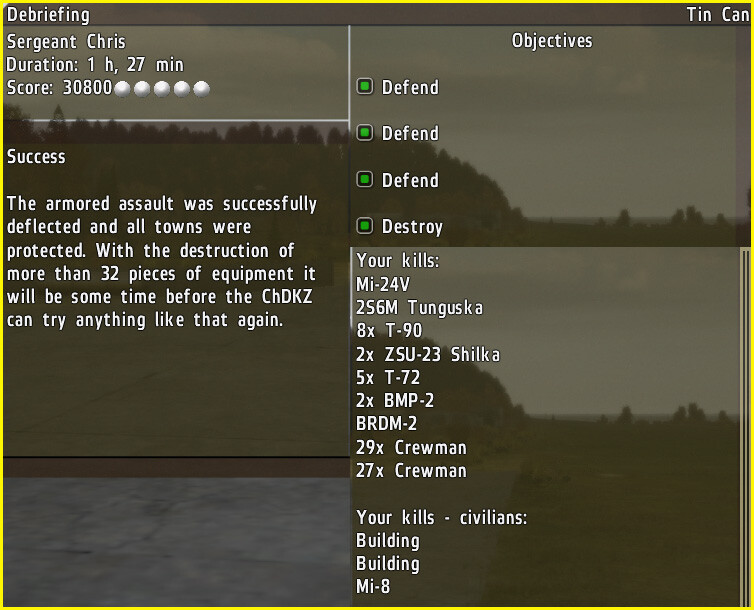
And it is done.

image

Let me just say – this campaign is epic! The storytelling and mission design are top notch, and the way each mission plays off the next is phenomenally good. Professionally good. I’d put this campaign up against any other I’ve played in my simming career. If the measure of a good campaign is the anticipation one feels between missions, then Tarnished Gold is a masterpiece, because I was actually antsy between missions knowing I had to complete the AAR before moving on to the next part of the story. Each mission had unique challenges and utilized the Arma environment to near the maximum. On call air-strikes, the ability to sometimes control the pace of the mission by controlling the escorted aircraft, refueling, rearming, and all of the little in-mission details are done nearly perfectly.

Is it too hard? Yes, probably. Two of the ten missions are extremely hard. But the campaign is a fantastic mix of game and simulation in that a challenge is thrown down, and you can find a way to win. And as the last mission shows, sometimes you win by thinking outside the box but it doesn’t diminish the accomplishment at all. The testers, mission designers, and everyone who had an input in the writing and scripting of the missions deserves high praise. Someone needs to hire these guys. You could charge $20 easily and make this campaign DLC – that’s how fun it is. I say all that having been through the frustration of coming to grips with the Arma interface and some of the limitations of Arma (limited draw distance and that darn mouse scroll interface), but I had time to do the missions, have fun, and take screens all at once – so it isn’t an impossible learning curve to reasonably master.

Finally – the Apache add-on itself is just a masterpiece. Again, within the bounds of Arma 2, I simply don’t know how Franze and Nodunit did it. Does everything work exactly like the real thing? No, but it is close enough and fun enough. And I had a ton of fun even though the AI was doing most of the driving and I was doing most of the gunning – so once you become familiar with the scroll menu and realize you probably aren’t going to play many of the missions straight through without a load from save, you’ll find yourself embracing the melding of game and simulation. The Arma environment is wonderful for helicopter ops and the very sandbox nature of it is incredibly fulfilling.

I apologize for being so long winded with my comments, but I think I owe it to the guys that put together this package because I want people to download it and play it and appreciate all of the hard work that went into it. Congratulations on an astounding module and I hope BIS calls you to make DLC for them. They should.

Chris “BeachAV8R” Frishmuth

1 Like

An amazing series of articles if I’ve ever seen one.

Feels weird seeing that after spending all that time with the DCS AH-64… everything feels so much more familiar than the first time I read it!

1 Like