CMANO Northern Inferno AAR

About one hour later, the Kotlin-class destroyer succumbs to its damage and sinks.

The AEW Shackleton detects 8 Bogeys near Banak. In anticipation of a major attack, Bodo launches 12 Starfighters to intercept. Closing in at mach 2, the Starfighters quickly reach the formation and identify the Bogeys as Badger G missile carriers. All 8 are quickly shot down, for the loss of a single Starfighter to the bomber’s defensive guns.

Ark Royal launches a single Buccaneer armed with Martel ASM to finish off the last ship of the second SAG. A single missile sinks the already crippled Kanin destroyer. With this it seems that the Norwegian Sea has been cleaned of Soviet surface units.

The task force is overflown by a Soviet ELINT satellite. But since our ships are operating under strict EMCON, I do not think we were identified.

Two hours after the first Badger attack, another wave of 13 bombers comes down northern Norway. This time, Bodo launches 8 Starfighters to intercept. All Badgers are shot down without loss.

One and a half hours later, another wave of Bogeys appear. 9 this time. 6 Starfighters head to intercept. Again all bombers are killed without loss. Bodo air base is now running low on Sidewinders. The stock of AIM-9J is used up and returning aircraft are now rearmed with AIM-9B, of which there are only 4 additional missiles left in the bunkers. Still, there still are 24 fully armed aircraft available and the back of the Northern Fleet’s Badger force seems broken by now. The biggest threat left now are probably subs.

The left-hand-most Sea King in Ark Royal’s screen picks up a Goblin. A nearby Orion comes in to assist and drops a Mk46. On its 3rd re-attack, the torpedo hits and sinks a sub.

As the task force is approaching Narvik, I move up the AEW stations further up north. Then, two Bogeys are detected on a racetrack way up north, halfway between Jan Mayen and Bear Island. I send two Starfighters up 360 NM over open ocean to check them out. They turn out to be Tu-16Z Badger tanker. Both are shot down.

The same mission is repeated about an hour later, claiming two more tanker. And a 5th tanker a while later.

Near the entrance to the Vestfjorden, a Sea King in Ark Royal’s screen detects another Goblin. While the Sea Kings holds contact with its dipping sonar, a second helo comes in and kills the sub with a Mk46.

30 hours after scenario start, HMS Ark Royal enters the sheltered waters of the Lofoten, followed by both amphibious groups.

Its getting crowded in the Vestfjorden. The amphibious groups launch their embarked transport helos to Bardufoss Air Base. The Harriers move ashore as well. Various landing craft are launched to transport material further up the fjord to Narvik.

6 of the Sea Cobras crash on the way to Bardufoss due to fuel starvation. Apparently this helo cant make a ferry flight of 115 NM!?

S20

This was an incredible fun scenario to play. Surprisingly, the Phantoms played almost no role. The big killing was done by the Starfighters from Bodo, which were perfectly positioned to intercept any enemy aircraft. But this also exposes some of the limitations of the AI, which tends to repeat suicidal missions over defended areas. A route around the North Cape, approaching over the ocean, would have been a lot more effective.

At first I wondered why the Su-17 did not attack Bodo Air Base, but I later noticed that the aircraft has not sufficient range to reach that far south-west.

Probably the biggest blunder of the enemy was to nuke 3 radar stations instead of Bodo Air Base right next to it.

12 Likes

Hey @MBot, you do know this is how Clancy got his start, right?

Good stuff! Please keep it up. (Because I will never be smart enough to successfully play this game. I need to think vicariously through my betters.)

3 Likes

Scenario 6 - The Grey Ghost from the East Coast

Our primary mission is the prevent two Sverdlov cruiser from passing the Denmark Strait into the North Atlantic, where they could cause havoc on NATO convoys to Europe. As mentioned above, our primary unit to counter this is the old heavy cruiser USS Newport News, which has been on a training cruise (the US carriers have been curiously absent until now).

The Sverdlov class of Light Cruisers are armored ships of 13’000t displacement, armed with 12 152mm guns.

USS Newport News is a Des Moines-class heavy cruiser, launched just after WWII, and constitutes the pinnacle of heavy cruiser design. The ship has a displacement of 21’500t and has a primary armament of 9 203mm guns.

As escorts we have a guided missile destroyer of the Charles F. Adams class (armed with SM-1MR Standard SAM), two Forrest Sherman destroyers, two Gearing FRAM destroyers and one Basilone FRAM destroyer. All of our destroyers have 127mm guns, a pretty good sonar and 4 of 5 ships are armed with ASROC.

The only aviation of our ships are 2 Seasprite helicopters carried by Newport News for reconnaissance.

Additional air support is provided by two P-3B Orion from Sondrestrom Air Base on Greenland and 3 EC-121 Warning Star AWACS from Thule Air Base.

A Ka-25T radar recon helo appears to the north, so enemy ships must be close by. As the heloc strays closer, USS Henry B. Wilson powers up its radars and launches two Standard SAMs, destroying the intruder. This in turn has compromised the position and identity if the ship. A second helos is soon destroyed the same way.

The Orion from Sondrestrom arrives and starts with a radar sweep of the area, detecting a two groups of 5 fast surface contacts each. The Orion descends below the cloud layer at 2000ft and approaches to ID the northern groups. It consist of the two Sverdlov cruisers, a Kanin guided missile destroyer and two Skoryy destroyers.

The second groups is apparently the support groups, consisting of a Fleet Oiler, 3 Kotlin destroyers and a DDG of unspecified class. As the Orion approaches the identify the last ship, it is being shot at by a SAM. The missile missed and the Orion opens to safe distance.

The Orion carries 4 Maverick missiles. Now it is time to engage. I plan to attack the support group with Mavericks, then follow up with my destroyers. Newport News will attack the cruiser group.

3 of the Kotlins of the support group are hit by Mavericks. The damage by the small missile against sturdy destroyers is probably not big, but hopefully some weapons and sensors are destroyed. This will make our life easier in the coming surface engagement.

One of the destroyers of Newport News’ screen picks up a Goblin at 12 NM. It is moving at 15 kts, so is definitely a submarine. As the sub enters range, USS Henry B. Wilson launches two ASROC. The sub is struck and sunk.

The Orion makes another attack and puts its last Maverick into a Kashin DDG in the support group. This is the only enemy ship armed with anti-ship missiles, so hopefully this attack has damaged its launchers.

The fight is on! USS Newport News opens 203mm fire on the lead Sverdlov. Both escort destroyers have let themselves fall back a little in order to not become targets for the enemy cruisers.

As Newport News has spent her initial supply of ready ammunition, she turns around to open distance to reload (which will take about 3 minutes). The first Sverdlov is already heavily damaged. Newport News’ Seasprite helicopter has launched in order to provide up close information on the status of the enemy ships.

The second Sverdlov fires two salvos against our destroyers, but since both ships turned around to run, all rounds land well behind.

With her ready magazines rearmed, Newport News continues to fire with both her primary 203mm and secondary 127mm guns on the second Sverdlov. The first has fallen back damaged.

A Sverdlov is sunk. After another 30 salvos, Newport News needs to reload her magazines again for 3 minutes.

Newport News turns back and engages again. After firing 16 salvos against the remaining Sverdlov, which seems to be taking on water now, the heavy cruisers fires 7 savlos each against the two Skoryy destroyers each.

Newport News’ escorts join in with 127mm gunfire. As the remaining Sverdlov, now dead in the water, is hit by further 203mm shells, it is finally destroyed. The remaining ships of the cruiser group are subsequently mopped up.

Next its time to finish off the support group.

Vampires inbound! These must be the anti-ship missile of the Kashin destroyer. USS Henry B. Wilson engages with Standard SAM. Using 6 SAMs, both inbound missiles are shot down.

USS Newport News initiates engagement with the support group. USS Henry B. Wilson draws some 130mm fire from a Soviet destroyer, but no hits are sustained. The support group is quickly wiped out, having no chance to take on a heavy cruiser.

7 Likes

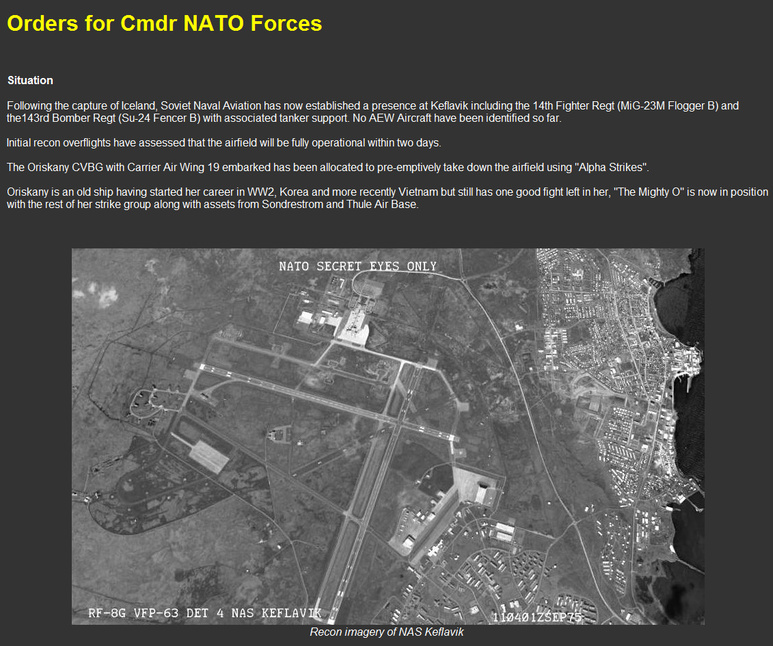
Scenario 7 - The Mighty “O”

The Soviets have taken Iceland and are setting up aviation facilities. If they are allowed to deploy bombers to Iceland, then NATO convoys in the North Atlantic are under direct threat. We are therefore to participate in a combined USN/USAF operation to disable the airfields at Reykjavik.

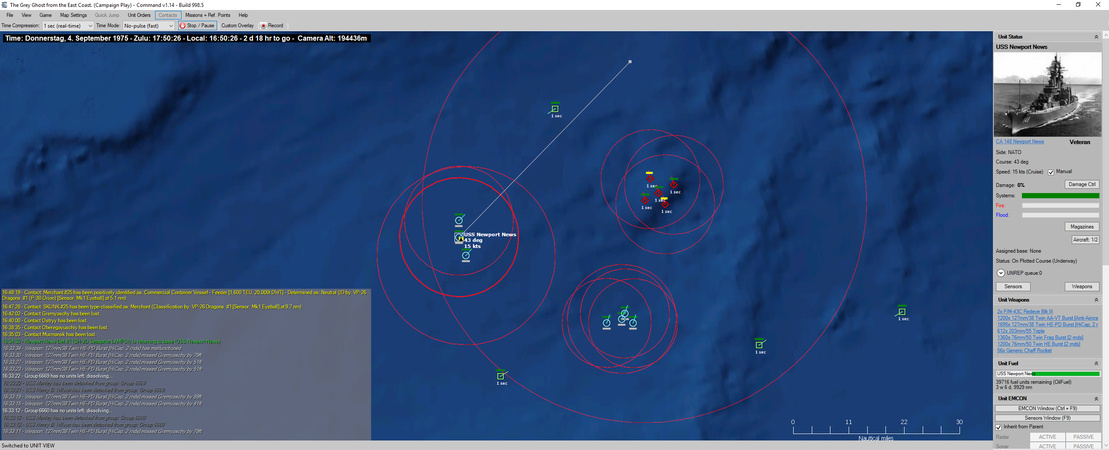
150 NM south-west of Iceland the USS Oriskany Carrier Battle Group steams within striking range. The Oriskany is an old Essex-class carrier of WWII vintage. She is too small to carry the latest aircraft but still carriers a large and powerful air group on her deck.

S6

Carrier Air Wing 9 consists of 24 F-8J Crusader fighters, 30 A-7B Corsair II attack aircraft, 4 RF-8G Crusader recon aircraft, 4 E-1B Tracer AEW aircraft and 8 SH-3H Sea King ASW helicopter. In addition, there is another Sea King and two Seasprite helicopters on the escorts of the carrier.

S7

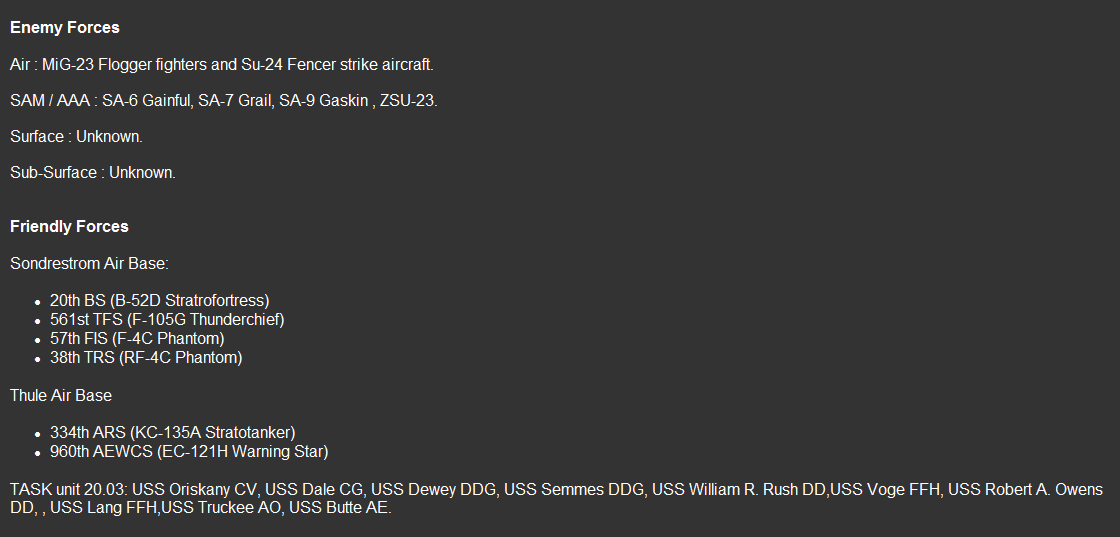
The USAF contingent for the operation is based at Sondrestrom Air Base on western Greenland and consists of 12 B-52D Stratofortress bombers, 16 F-4C Phantom II fighters, 12 F-105G Thunderchief Wild Weasels and 4 RF-4C Phantom II recon aircraft. The 725 NM from Sondestrom to Reykjavik is no problem for the B-52, but the fighters will require tanker support to get there. For this purpose, 10 KC-135A from Thule Air Base are available. In addition, Thule supplies some EC-121 for AWACS support.

Duration of this operation is just 6 hours, so there is not enough time to re-arm strike aircraft. Every strike aircraft will be able to fly a single mission only. Our general tactic will to launch some small strikes first from Oriskany to destroy radar sites on Iceland. This should make subsequent missions less likely to be intercepted. Then the USAF B-52 with support will destroy the runways at Keflavik NAS and Reykjavik airport. And finally, the remaining aircraft from Oriskany will destroy hangars and aircraft on the ground.

First we launch our tankers from Thule, because they will need 2 hours to get on station. Over the Denmark Strait, 200 NM west of Iceland and just outside of enemy radar range, we set up 3 tanker tracks. This is where the aircraft from Sondrestrom will refuel before descending to low level and approaching Iceland. Two tankers are already airborne, 4 will launch right now, 2 in 1.5 hours and 2 in 3 hours.

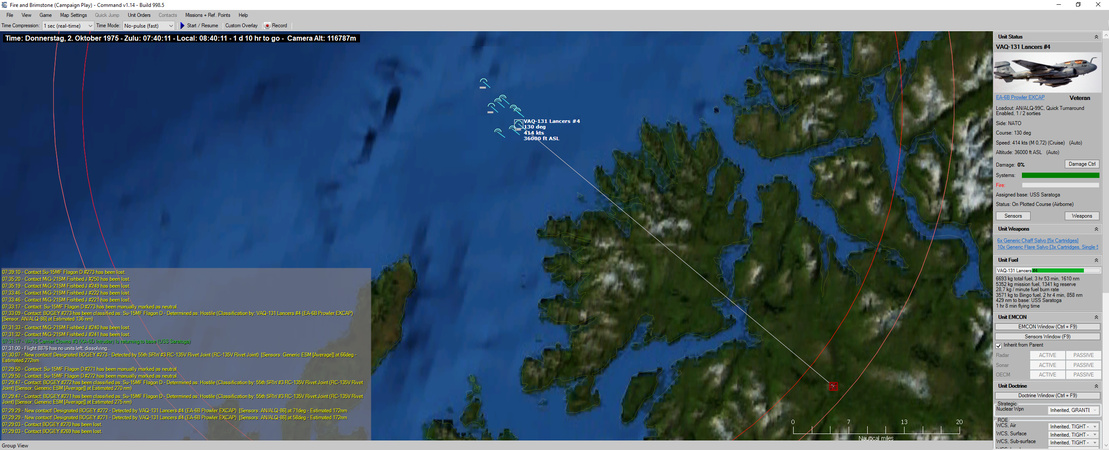
First lets launch some recons. A RF-8 from Oriskany and a pair of RF-4C from Sondrestrom. We need to know which airbase has aircraft on the ground, as well as if there are additional radar sites along the coasts.

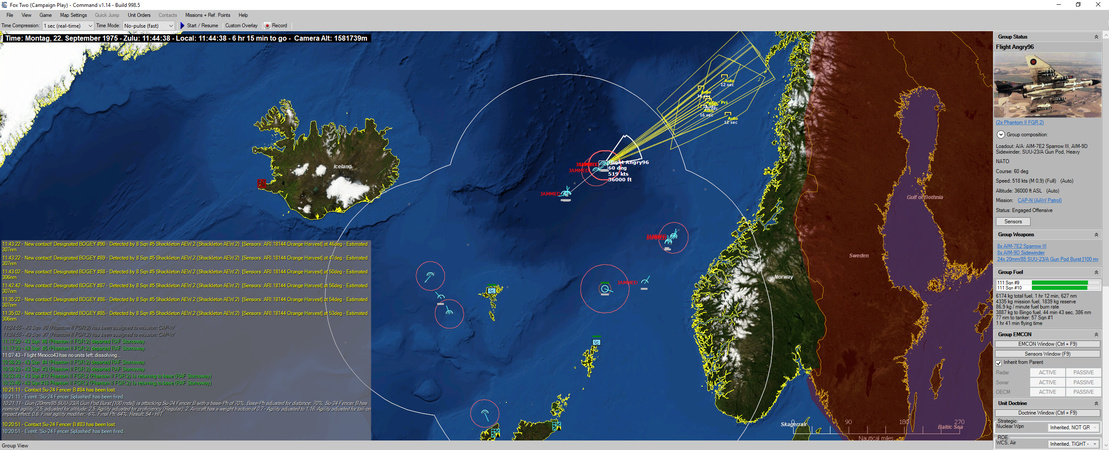
There is a flurry of activities developing over Iceland, as our Tracer and Warning Star aircraft track 9 hostile aircraft taking off from Kevlafik.

The RF-8 passes right below 4 MiG-23 as it approaches Kevlafik, but since it screams at low level and it is a pitch dark night it remains undetected. As it lights its afterburner and starts its run over the airbase, the Crusader detects 38 aircraft on the ground, but is subsequently shot down by an SA-6.

Time to launch the first airstrikes. The Long Track radar sites on the western and southern coasts of Iceland need to go. I launch two groups with two Corsair and two Crusader escorts each.

A Be-12 Mail patrol aircraft heads out towards our fleet and two Crusaders launch to shoot it down.

The western radar site get struck by two Corsair with 36 Mk-82 bombs and is destroyed.

The southern radar site is struck with cluster bombs but is not destroyed. But it seems to be not emitting.

Meanwhile the two RF-4C arrive at the tanker track and take on fuel.

On its way back, two of the escort Crusaders are attacked by MiG-23. But lighting their afterburners, they manage to pull away at low level. I don’t want to engage in dogfights unless absolutely necessary. The Cursaders land back at Oriskany on fumes.

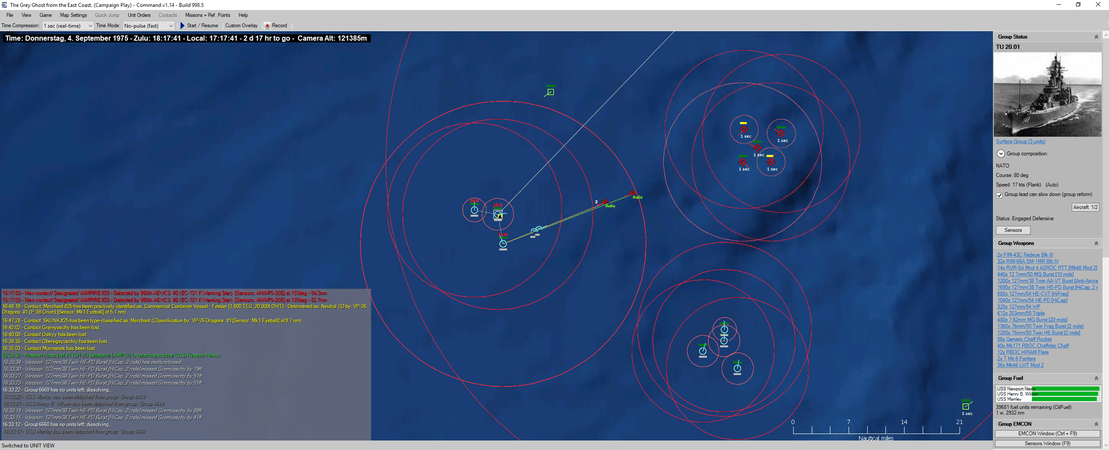
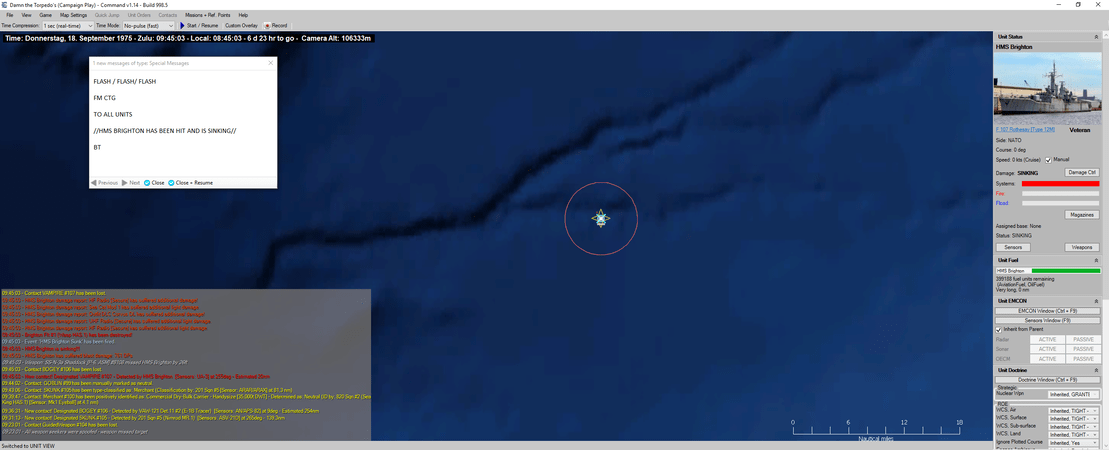
Two MiG-23 follow our aircraft back to the fleet. USS Dale engages the fighters with SM-1ER SAM and takes them down, but not before one of our Sea King helicopters is destroyed.

Even worse, two missiles rise from the Keflavik area. The MiGs must have phone in our position and these must be Shaddock anti-ship missiles.

A pair of Crusaders that is airborne intercepts the missiles and manages to shoot one down, but they cannot catch up with the second one. Fortunately the other gets taken down by USS Dale with a Standard SAM.

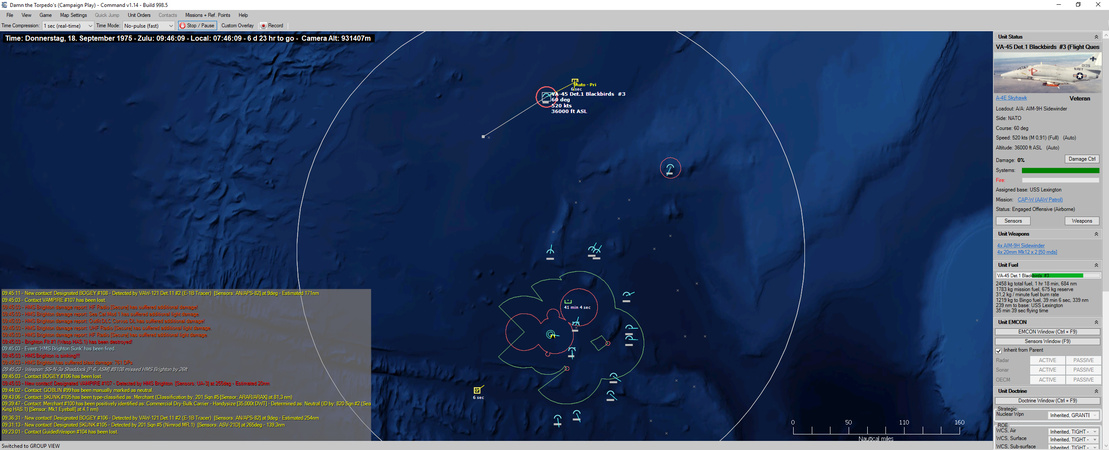
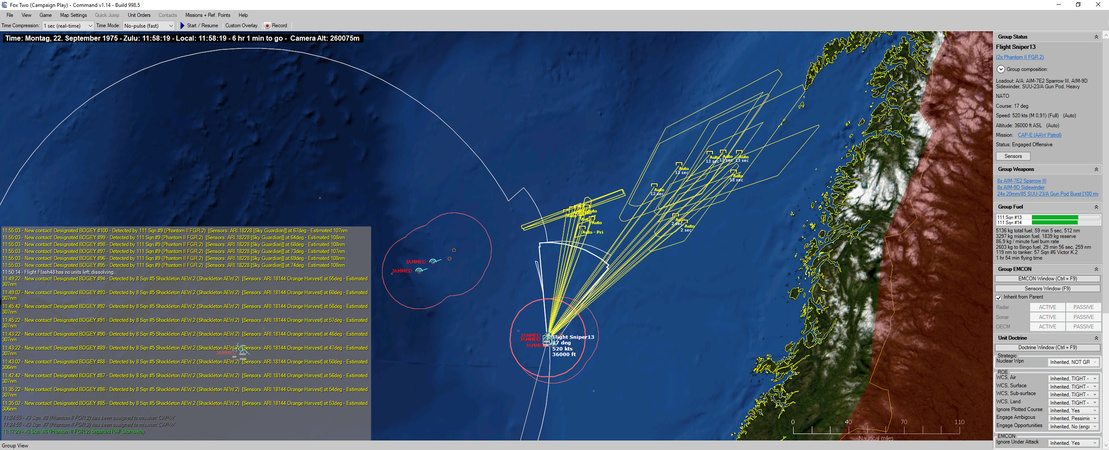
More Bogeys are inbound, fast and at low level. These are probably Su-24 that are being reported at Keflavik. The last two ready Crusaders from Oriskany launch to intercept.

Things look bad. One Su-24 was shot down by a Crusader, but not before it could launch its missiles against the fleet. More aircraft and Bogeys launch from Keflavik. Our ships hold their ground with SAMs for the moment.

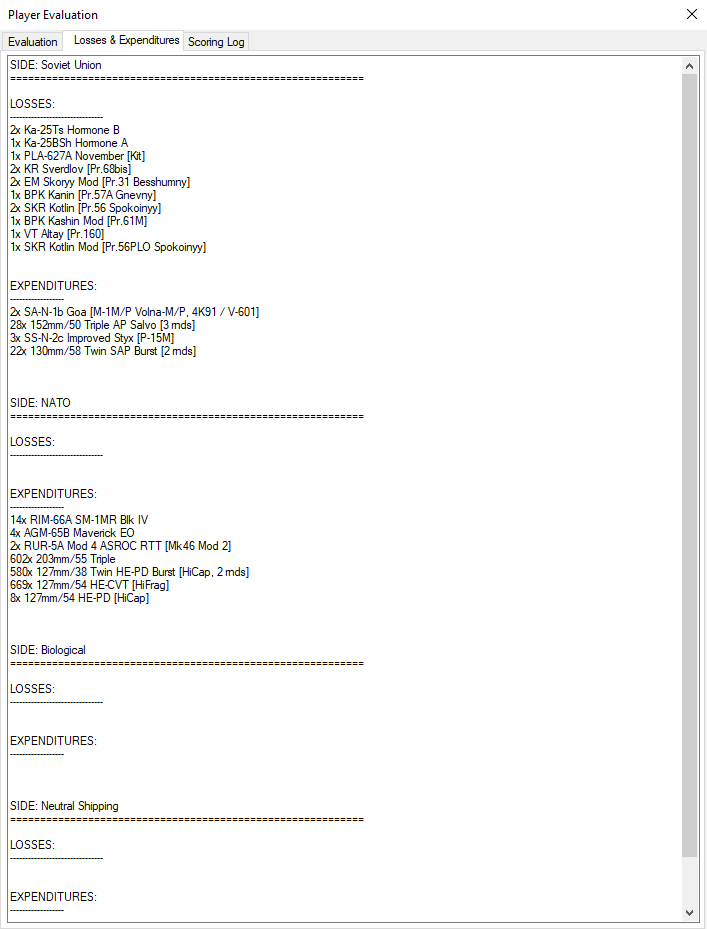
Eventually, 8 Su-24 are shot down, but a Crusader is lost and USS Dale and USS Dewey get damaged by an AS-9 ARM missiles. Fortunately their SM-1ER SAM systems remain operational. All in all, we came away lucky.

The damaged USS Dale must defend against another land-launched ASM attack. All SSC-1 Sepal are shot down.

Another strike is inbound against the Oriskany Battle Group: 5 Su-24 escorted by 2 MiG-23. Oriskany manages to put up 6 Crusaders. This time, all enemies are shot down before any missiles can be launched, for the loss of a single F-8.

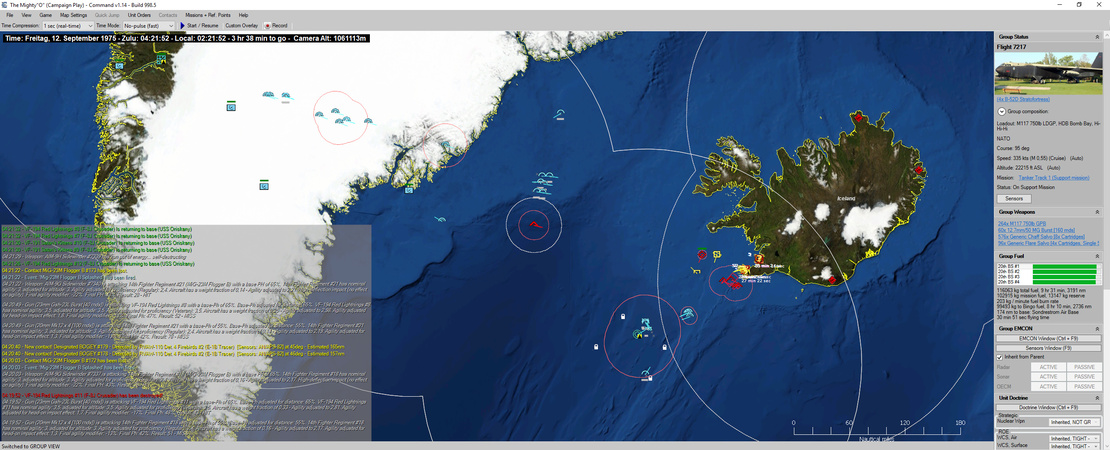
It is time to end this. The USAF armada from Sondrestrom (12 B-52, 12 F-105 and 16 F-4) is inbound to the tanker tracks.

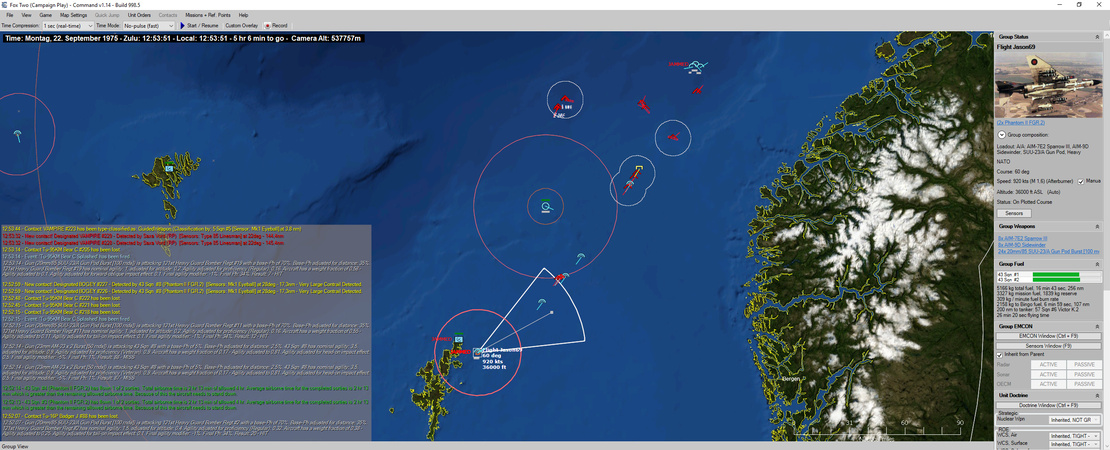
Tanking complete and the strike force is inbound to Iceland. A flight of Phantom flying ahead is about to engage 2 MiG-23.

4 MiGs have been shot down, now the Thunderchiefs launch Shrikes against the defenses around Keflavik.

3 SA-6 sites are hit and disabled.

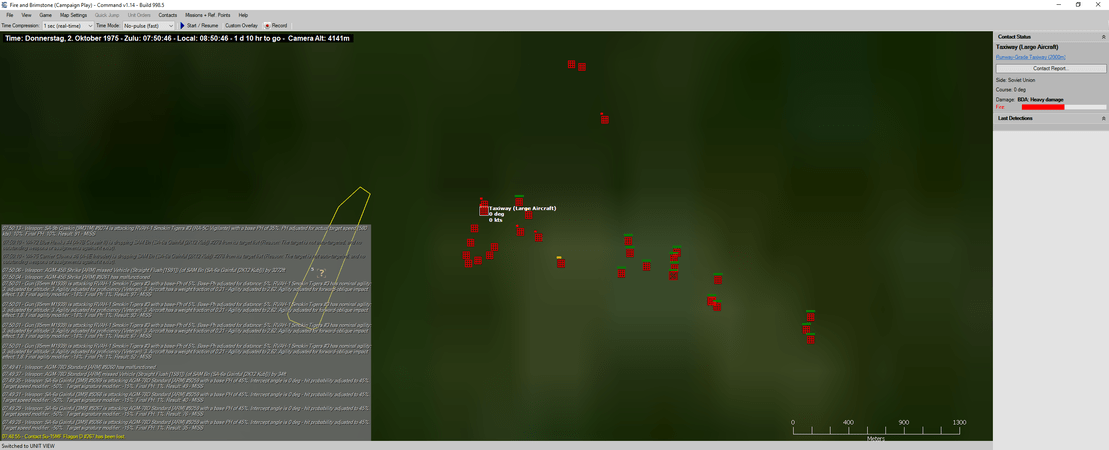
The first 4 B-52 unload over one of the runways of Keflavik, while 4 F-105G launch Shrikes against AAA sites. The next 4 B-52 drop over Keflavik’s second runway, destroying many nearby parked aircraft. Finally 4 B-52 attack Reykjavik airport with two drops on the airport’s two small runways.

At the end of the attack, all of Iceland’s reinforced runways are heavily damaged. Soviet air operations out of Iceland have been put to a stop. The USAF head back to Sundrestrom with the loss of a single Phantom in air-air combat.

Next it is the Navy’s task to clean up on the ground. Oriskany prepares to launch 16 Corsair.

While the USAF heads back to the tankers, the Oriskany strike is inbound. Apparently the runways at Keflavik were not destroyed completely as two new Bogeys have taken off (fighters only need short stretches of undamaged runway). I quickly launch 4 Crusaders from Oriskany to provide escort.

Sweeping in behind the two MiGs undetected, both or shot down by Crusaders.

At first, two Corsair attack the two surface contacts off the coast of Iceland. They turn out to be Nanuchka-class missile boats and both are sunk with a single Walleye glide-bomb each.

A flight of Corsair launches a salvo of 8 Walleyes against the hangars at Keflavik. Next follows a salvo of 6 Walleyes against ammo bunkers and the fuel depot. And finally, 4 Corsair go in at low level and attack parked aircraft with Snakeyes and cluster bombs, covered by 4 Corsair shooting Shrikes.

Keflavik NAS is left a smoking wreck as all aircraft return to the carrier.

S20

I did take the defense of the carrier battle group a bit on a light shoulder, which resulted in the loss of two Sea King helicopters and two escort ships being damaged. Fortunately the ships performed well and managed to avert greater damage to our fleet.

3 Likes

Scenario 8 - Damn the Torpedos

S2

Our mission is to get a convoy safely across the North Atlantic into the English Channel. Despite our successful action against Iceland in the last mission, the Soviets have rebuilt their aviation facilities on the island. With Iceland under Soviet control, we can expect reconnaissance flights into the North Atlantic, providing guidance for submarines and possibly maritime strike aircraft.

To escort this important convoy, the old WWII veteran carrier USS Lexington has been taken off training duties, equipped with some reserve squadrons and made ready as ASW carrier. It brings into battle: 24 S-2G Tracker ASW aircraft, 8 SH-3D Sea King ASW helicopter, 4 E-1B Tracer AEW aircraft and 8 A-4E Skyhawk as fighter component.

The convoy is provided with a pretty strong ASW escort, consisting of one guided missile destroyer, two destroyers, two guided missile frigates and 3 frigates.

South of Ireland we get 4 Royal Navy frigates to cover the approaches to the Channel area. As usual, these are pathetic ships with lousy sonars, no ASW weapons to speak off and a total of 3 Wasp helicopters (1 torpedo each, no sensors of its own).

At the Channel entrance we have 6 mine counter-measures ships from the UK, West Germany, the Netherlands and Belgium on a mine clearing mission.

Land based aviation support is extensive with 8 UK Sea King helicopters, 6 Nimrods and 4 French Atlantic patrol aircraft.

The convoy consists of 13 large merchants, including container ships and tankers. The carrier Lexington travels in the center of the formation for protection, together with a destroyer. Maximum speed of the convoy is determined by the slowest ship and is 14 kts.

The American frigate’s sonar systems are extremely powerful and cover a wide area, allowing ships to spread out considerably. All US warships except the carrier are equipped with ASROC and USS Valdez even has two nuclear ASROC ready to fire. In support, Lexington’s 6 operational Sea King helicopters are used to set up two dipping sonar stations between the lead escorts.

Considering the strength of the escort I consider a successful torpedo attack on the convoy unlikely. The big threat will be from the air, either through air or sub launched cruise missiles. The air defense capability of the convoy is rather weak. The guided missile destroyer USS Charles F. Adams is equipped with 40 SM-1MR SAMs and two fire control radars. I decided to move it in the center of the convoy where it can cover all merchants and the carrier. Two Brook-class guided missile frigates are also equipped with SM-1MR, but only with 15 missiles and a single weapon director. They will easily be overwhelmed by multiple targets. I keep them up-threat in the direction of Iceland, to the north and west of the convoy. Finally, the Knox-class frigate USS Valdez is equipped with Sea Sparrow, suitable for limited self-defense. She is also on the left flank. The other escorts are not equipped with SAMs. The escorts have little to none to counter even a small cruise missile attack.

USS Lexington is an ASW carrier so will bear a large part of the ASW duties for the convoy. Of the 20 serviceable S-1G Trackers, 18 are used to set up 9 patrol areas in a 180° circle 150 NM from the convoy. This is meant to clear the ocean far ahead of cruise missile submarines. 2 Trackers are kept in reserve to respond to the situation.

The Tracers are used to set up an AEW station 100 NM north of the convoy. With its radar range of 250 NM, this should give just sufficient warning of approach bogeys, at least from the north. Of the 8 Skyhawks, 7 are operational. Since these aircraft are hopeless to intercept a Backfire raid in almost any respect, their primary mission is to keep the convoy hidden by destroying enemy maritime patrol planes before they get into range to detect us. 6 Skyhawks are set up to continuously cover two single-ship CAP stations 200 NM from the carrier. From this position, they can hopefully intercept any recon aircraft in time approaching from the north. The 7th Skyhawk is armed with bombs to respond to any surface threat that might be around (possibly hostile intelligence trawlers).

Closer to the mainland, 6 Nimrods set up 3 patrol areas along the final path of the convoy to the Channel. The bend of the path into the Channel is covered by 4 French Atlatics. And the Channel entrance itself is patrolled by 8 Sea King helicopters.

The mine warfare ships patrol the Channel entrance for mines.

The 4 Royal Navy frigates south of Ireland do not have a particular mission. Their best hope is to serve as forward helicopter bases for their Wasps to respond to any contacts found by Nimrods.

45 minutes after mission start, the frigate HMS Brighton is attacked by sub launched cruise missiles south of Ireland. The first two missiles can be decoyed by chaff but the third missile strikes, sinking the ship. Unfortunately the frigate was unable to report the direction of the attack, so we can only tell that somewhere in a 200 NM radius there is an enemy cruise missile sub.

The Tracer detects a Bogey approaching from the north. One of the Skyhawk CAPs intercepts it 250 NM from the convoy and shoots down a Bear D with a Sidewinder. The Bear had its radar off (and was shot down out of range anyway) so the presence of the convoy probably remains secret.

One of the escorts detects a Goblin on active sonar. But since the contact remains stationary I determine this is probably a false contact and flag it to be ignored.

The frigate USS Pharris leading the convoy by 50 NM detects a Goblin moving at 5 kts. A Tracker moving out to its patrol station is nearby and is redirected to engage.

The Tracker drops its two Mk46 Torpedos which both hit, sinking an enemy Victor II SSN.

Another sub contact is made. One of the Trackers on station detects a November SSN with sonobuoys. The sub proves to be a difficult target, requiring 3 re-attacks by the first Mk46 before being hit and then a second torpedo to finish it off.

Another Bear D is detected approaching from the north and the same CAP Skyhawk from the first engagement intercept it 250 NM from the convoy. The Bear is shot down with a Sidewinder just seconds before the Skyhawk has to head back to Lexington due to a low fuel state.

Inbound Vampires are detected just 10 NM south of the frigate USS Koelsch. Unfortunately it is not equipped with SAMs. The frigate is struck by the first missile and is immediately sunk. Just before impact its Seasprite helicopter could take off, which now heads down the bearing of where the missiles came from.

A Sea King and two Seasprite start to search the datum of the cruise missiles with dipping sonar, sonobuoys and MAD gear. Finally the Sea King picks something up with dipping sonar. The Seasprites converge on the contact and both drop Mk46 torpedoes, sinking a Charlie SSGN. Koelsch’s Seasprite then finds a new home on the destroyer USS Orleck. USS Koelsch is avenged, but the loss of the frigate hurts.

TO BE CONTINUED

7 Likes

4 Vampires are detected 140 NM northeast from the lead frigate. The missile profile suggest SS-N-3 Shaddock anti-ship missiles. 3 Trackers are immediately sent to the position. The closest two Trackers (50 and 60 NM out) are out of sonobuoys, so can make a MAD search at most. The next Trackers with sonobuoys left is 100 NM out, but it is a terribly slow aircraft.

The missiles seem to be targeted at our lead frigate, USS Pharris. Unfortunately she doesn’t have a SAM system. If we had more potent fighters, there would be time to launch them and run an intercept on the missiles. But the A-4 isn’t fast enough to catch Shaddocks.

Long minutes pass as USS Pharris tracks the inbound missiles and nothing can be done about it. As the missiles dive in for the attack, Pharris launches chaff and miraculously, all 4 ASM are decoyed. Phew.

10 minutes later, another salvo of 4 missiles pops up from the same position. Must be an Echo II SSGN judging by the number of missiles.

Simultaneously, HMS Salisbury is also attacked by two Shaddock missiles, which are both decoyed by chaff. The direction of attack was from the south-west, but the missiles were only detected last second so the range to the firing sub remains unknown.

12 minutes after initial detection, the second salvo against USS Pharris arrives on target. The frigate seems to be out of ready chaff rounds and the defensive jammer fails to spoof the first missile. Pharris is struck, immediately sinking the frigate.

Judging by the point where the remaining missiles dropped off radar and using the maximum range of the SS-N-3, I determine the probably launch site. It seems to be further 70 NM than where the missiles were originally picked up. The 3 Trackers are sent further out to search this area.

Since HMS Salisbury had already been under attack anyway, I let her keeping transmitting with the air search radar. She picks up two more incoming missiles, but this time already from 130 NM out. So somewhere there must be another cruise missiles sub. It is a very inconvenient position: 400 NM from Lexington and the UK coast with currently no Nimrods airborne. A Nimrod will have to check the area but it wont be for one and a half hours before one can get there.

As the missiles approach, HMS Salisbury prepares to defend itself with Seacat SAM and chaff. But 7 NM out, as the missile seem to activate their seeker, they veer off sharply, pass the frigate and are lost from radar as they pass beyond 16 NM. Did they lock on to a juicer (neutral) target, or was Salisbury jammer strong enough to mask the ship? She is safe for now and if all missiles that attacked the UK frigate squadron came from the same sub, then an Echo II has shot all its powder.

About one hour later, another Bear D approaches form the north and is shot down by the eastern CAP Skyhawk.

Considering the loss of two frigates of our convoy escort, I decided to update the formation. USS Talbot from the outer left flank has taken up the lost sprint-and-dirft point position 40 NM ahead. The destroyer USS Barry and the frigate USS Valdez have switched position, so that the frigate with the more powerful sonar leads directly ahead of the merchants, while the less capable destroyer gets is now on the inner left flank.

One of the Trackers shortly makes a sonobuoy contact with a Goblin. But the contact is quickly lost again and after an hour of searching could not be restored.

One of the Nimrods makes contact with a diesel sub at periscope depth near the entrance to the English Channel and sinks it with Mk46. Meanwhile, the searches for the two cruise missile subs and the 3rd Goblin in the Tracker screen remain fruitless.

As a fresh Tracker with a full load of sonobuoys arrives, the Goblin in the Tracker screen shortly pops up again. A lengthy search follows with the contact seemingly change depth frequently and vanishing for long periods. A Mk46 is finally dropped on the suspected position but to no effect. Finally a closely dropped sonobuoy manages to identify the Goblin as school of fish.

5 hours after the USS Pharris was sunk, a Goblin is finally found at the suspected launch position. The last remaining searching Tracker makes contact through a sonobuy. The Tracker still has fuel for 1:20 hours so can hopefully complete the engagement. As the Tracker moves in, the sonobuoy identifies the Goblin as Echo II SSGN. This is the one! A Mk46 is dropped and the sub is struck on the second re-attack. The Tracker’s second and last torpedo sinks the Echo II.

Now things are moving. A sonobuoy in one of the Nimrod patrol areas picks up another Goblin. All 3 airborne Nimrods are RTB for fuel, but the Royal Navy frigate squadron is just 16 NM away. The squadron’s two remaining Wasp helicopters, armed with depth charges, are launched.

Both Wasps circle above the contact, now identified as Whiskey V, but unable to determine its exact position they can’t drop their depth charges. Why didn’t I rearm the helos with torpedoes earlier?

After half an hour a Nimrod appears on scene and blasts the Whiskey V with a B57 nuclear depth charge.

More trade for the Trackers. The southernmost Tracker in the ASW screen picks up a Goblin, but it is eventually identified as biologic.

Things get quieter for a while, but the sub that sunk HMS Brighton is still unaccounted for.

Two Bogeys doing 520 kts are detected approaching from the north. That doesn’t look good. These are definitely not Bears. Two Skyhawks on CAP head to intercept them, but one is low on fuel. Shortly later a third Bogey is picked up. As the Skyhawks approach, one reaches bingo fuel but I order it to press on none the less (it has 10% additional reserves).

220 NM from the convoy the Bogeys are intercepted and identified as Tu-22M2 Backfire B. They have their radars on and probably already detected our ships. At 215 NM they can launch their AS-4 Kitchen anti-ship missiles.

One of the Skyhawks manages to turn behind the third Backfire and launches 4 Sidewinders which all miss.

The other Skyhawk cannot get into firing position as the Backfires (running not on afterburner) fly at the same airspeed and stay ahead. The first Backfire launches its two AS-4, then turns back around towards Iceland. This is the chance for the Skyhawk which cuts the corner and launches all its 4 Sidewinders. The 3rd scores the kill. The Skyhawk now finally is allowed to head back to Lexington, critically low on fuel.

The second Backfire presses on and also launches 2 missiles, followed by 2 AS-4 from the 3rd Backfire. We now have 6 missiles inbound towards the convoy.

The first two AS-4 scream in at 2300 kts. The destroyer USS Barry, after our recent escort reorganization now on the left flank, seem particularly exposed with no SAM cover. But the missiles pass, heading towards the 18’000t RO/RO vessel SS Aegan Breeze at the top left edge of the convoy. Both missiles are way too fast to be intercepted by nearby ships with SM-1MR SAMs. The first AS-4 strikes the Aegan Breeze and sinks it. The second missile passes and heads towards the 20’000t tanker SS Alpha Germania behind, sinking it too.

The next two missiles come in, heading towards the 75’000t tanker BP British Envoy. Both missiles hit, sinking the tanker.

The last two missiles head toward the center of the convoy and possibly USS Lexington. These AS-4 come in in a sufficient angle that the guided missile destroyer USS Charles F. Adams can launch two Standard-MR against the first missile. Unfortunately both SAMs have a 1% probability to hit and miss. The 75’000 tanker BP British Pride is struck twice and sinks.

4 ships sunk. This has been a devastating air strike. At least USS Lexington was not hit. The two surviving Backfires head back towards Iceland. Perhaps we will get visited by them again in a few hours?

TO BE CONTINUED

4 Likes

fantastic write up … just like Red storm rising

Did you know Red Storm Rising is actually evolved from a Harpoon AAR Clancy did with his buddy Larry Bond?

The big question is, could the Backfire missile attack have been defeated if I didn’t reorganize the convoy formation and kept the air defense capable ships on the left flank? Probably not. The early block SM-1MR Standard missiles which some of our escorts are equipped with are simply unable to catch a Mach 4 AS-4 Kitchen and cannot reach its cruise altitude of 74’000ft either. As such, even with ships positioned forward in their path, we would have been unable to hit the incoming missiles. Our only hope is in the final seconds of the terminal dive, as the AS-4 gets slower as it descends into higher density air, to engage it almost head-on. And even then it is a very low probability shot. So keeping the Adams guided missile destroyer close to the targets, or even have it targeted itself, is our best chance to defend against an AS-4 attack. Also there is still the submarine launched cruise missile threat, which can come from any direction.

As such I decided keep the basic escort formation and additionaly move the rearguard frigate into the rear of the merchant formation. The merchants in the convoy shuffle a bit to fill the gaps on the northern side, in order to have a barrier for the USS Lexington. Both destroyers on the flanks are extremely vulnerable to missile attacks, but ultimately they are expendable. Should another Backfire raid take place, we will simply have to ride it out.

7 hours after the Backfire raid, the E-1 Tracer on station detects two new Bogeys approaching from the north. They are shortly followed by two more Bogeys. Their current speed is 480 kts, so there is hope that our Skyhawks can intercept them. Unfortunately one of the Skyhawks is currently RTB for fuel and its replacement hasn’t launched yet. Only one CAP Skyhawk heads to intercept.

The Bogeys throttle up to 520 kts and two more appear from the north-west. This looks extremely bad.

The intercepting Skyhawk blasts by the first two Backfires, shooting its guns but misses. The Skyhawk quickly turns around and shoots two Sidewinders each at the lead-Backfire and its wingman each. One Backfire is shot down! But the remaining 5 now approach unopposed with the Skyhawk unable to catch up.

215 NM out the Backfires launch their missiles, 10 in total.

The first two AS-4 scream in and as they slow down in the terminal dive, the guided missile frigate USS Richard L. Page engages with two Standard-MR at close range. Both SAMs miss and the first AS-4 sink the 18’000t RO/RO SS Atlantic Causeway. The second AS-4 continues, now heading for USS Page itself. It launches another Standard at very close range, which misses again. USS Page is is struck and blows up.

The next salvo of 4 AS-4 is inbound. This is going to hurt.

USS Charles F. Adams launches 4 Standard in defense but scores no hits. The 18’000t RO/RO SS Atlantic Conveyor is sunk first. Next our carrier USS Lexington takes two missiles and is destroyed! And finally the tanker MV Camelot is sunk.

But it isn’t over yet. 4 more missiles are inbound. The large container ship Emma Maersk is hit twice and sunk. One AS-4 malfunctions and the forth missile splashes into the ocean.

The sorry remains of our convoy. Just 5 merchants are left, escorted by one DDG, two destroyers and two frigates. Most of the airborne aircraft immediately head towards RAF St Mawgan, just some Trackers with high fuel states remain on station for the moment. Most airborne Trackers will probably make it but it looks bleak for the Skyhawks and Sea Kings.

One of the remaining Trackers on station detects another Goblin and sinks a Zulu IV SS with a single Mk46.

Just 6 minutes later, a Nimrod picks up a Whiskey V sub and sinks it with two Mk46.

Perhaps we can get at least the remaining 5 merchants to Europe? The ASW battle seems to go rather well, even though the loss of USS Lexington has been a massive blow. But the enemy subs have already taken massive losses and as distance to the mainland closes, perhaps the land-based aircraft can take over the air protection lost with Lexington. If we are spared another air strike, we might get the remaining ships through.

TO BE CONTINUED

3 Likes

Fascinating AAR’s @MBot. Thanks for taking the time to share them with us. You have inspired me to try CMANO again. I’m having a hard time getting ASW aircraft to drop a string of sonobouys where I want them without me having to manually drop each bouy. Any advice on that?

Its ultimately pretty random, as aircraft fly around in their patrol areas randomly, dropping buoys as they go along. If you assign a patrol area that is not too big and the aircraft has enough buoys, given enough time it will eventually fill the area out. If I need to get a good pattern right away, for example along the bearing of an inbound submarine launched cruise missile, I do it by hand.

1 Like

Damn the Torpedos - Continued

With the loss of Lexington, there are some decision to be made. First we have to deal with the loss of airborne radar early warning. While we wont have a CAP to intercept Bogeys anymore, we still need radar early warning against missile attacks. One of the ships will have to act as air search radar picket. I order the frigate Talbot to have her radar on. She is 40 NM ahead of the remaining merchants so wont raise attention too close to the main body and in case she draws fire in the form of submarine launched missiles, she has a chance to defend herself with her Standard SAM system.

Next we have to replace the ASW cover provided by the Trackers. I order all Nimrods to set up a moving screen 100 NM ahead of the convoy. The French Atlantics keep patrolling the intended path south of Ireland. Once the convoy gets closer to the English Channel, the UK Sea Kings will also be available to set up a supporting screen.

The UK frigate squadron has been steaming out towards to convoy since a long time now and I hope to add them to the escort screen in about 6 hours.

The area gets overflown by a Soviet ELINT satellite. It surely has taken notice of USS Talbots position and identity through its radar emissions.

Meanwhile, one of the Nimrod’s sonobuoys pick up a submerged biologic contact.

The new Nimrod screen is already at work. A sonobuoy picks up a Goblin. The engagement will have to be swift, as the nearby Nimrod only has fuel for 13 minutes left. Its a false alarm though, as the contact turns out to be biologic too.

Radar emissions of 16 Backfires are being picked up from the north. Well, I guess this scenario is about to end soon.

I don’t have to go into details. Needless to say, the complete convoy and all escorts are wiped out. USS Talbot saved her honor by shooting down the first AS-4 aimed at her before being sunk.

The scenario is obviously lost, but there is a little aftermath. A neutral cargo ships reports detecting cruise missiles emerging from the water. The flight profile indicates SS-N-7/9 missiles launched from a Charlie SSGN. One of the French Atlantics heads to the reported missile datum and a Charlie II is sunk by two old Mk44 torpedoes.

And at this point we are going to end the scenario.

S6

S7

This scenario has been great fun. I loved the premise, the mix of second line units available and some of the hard tactical decisions that were necessary. But it is also a little frustrating, putting so much time into it and getting a loss without having a clear idea what could have been done differently.

As expected, torpedoes were no issues at all. At no point did I have the impression that a submarine torpedo attack could come even close to happening on our convoy. As a matter of fact only two torpedoes were launched in total and a neutral commercial vessel was on the receiving end. Submarine launched cruise missiles were a bigger threat and in fact cost us 3 frigates. In the bigger picture though I think it was manageable. We would have been able to get the majority of the convoy through anyway, and some losses, especially expendable escorts, were to be expected and bearable. With 9 subs sunk we did clean up pretty well and it would have been an ok exchange ratio against 3 frigates. Probably there were more subs left though. At least the Echo II that sunk HMS Brighton got away.

Of course the Backfires were murderous. It is very clear how they became the primary striking arm of the Soviet Navy. It is interesting to note that Skyhawks shot down two Backfires. A lot less than would have been necessary but more than I expected. The Backfires could easily go supersonic and become untouchable, but considering that the Skyhawk doesn’t have a radar, they probably never realized they were being intercepted.

With the units at hand, the handful of Skyhawk fighters and the available SAM systems, it is simply impossible to defend against a Backfire raid. Our only hope would have been to remain undetected in the first place. I am not sure where this went wrong. We did shoot down all recon Bears at a safe distance. The very early long range submarine cruise missile attacks indicate though that our position was compromised almost immediately. Probably by multiple submarines tracking our active sonar emissions. Perhaps the scenario needs to be played under complete EMCON with even active sonar off, even though this would make the ships almost blind to submarines. I guess I will have to try this variant again in order to proceed with the campaign.

6 Likes

I did try the convoy escort scenario again. In the belief that I gave away my position last time by having the escorts using active sonar, I enforced strict EMCON on this run. All ships were operating with their radar and active sonar off, which greatly reduces their performance against submarines. I kept the formation close together and exclusively used aviation to clear a path for the convoy. The cleared lane was limited to ensure no detection by submarines would occur, rather than a wide area to prevent (cruise missiles) attack. No detection no engagement, that was the idea.

To my surprise I still got the full brunt of long range submarine launched cruise missiles, which cost me two American frigates. I have no idea how we were detected and how those cruise missiles were targeted.

At least no Backfire raid took place and the scenario ended in a triumph with all merchants entering the English Channel safely. 10 submarines were destroyed in the process.

S1

3 Likes

Scenario 9 - Fox Two

We are in command of the RAF for the air defense of the UK. Expected hostiles are the Su-24 from Iceland, which we had already contact with, and Tu-95KM Bear C from the Soviet homeland, supported by Tu-128 Fiddler long range interceptors operating out of Bardufoss air base in occupied Norway. Up to now we always dealt with the Tu-95RT Bear D, which is the Naval Aviation’s unarmed long range maritime recon aircraft. The Tu-95KM Bear C on the other hand is the Soviet Long Range Aviation’s strategic bomber. Its primary weapon is the AS-3 Kangaroo ASM with a 800kt warhead, so we are dealing with a major nuclear attack on the UK here.

For our defense we have 34 Phantoms and 16 Lightnings, supported by 5 Shackleton AEW aircraft and 7 Victor tankers. There is also the air defense destroyer HMS Bristol north of the Shetlands, which will act as SAM trap.

Our air defense plan is as follows. Since we have plenty of Shackletons and they have an excellent endurance, we set up 3 AEW stations. One between the Faroes and Iceland in order to keep an eye on the Su-24 there (Whiskey Station). And two in line abreast off the coast of Norway (November and Echo Station).

On Whiskey Station off the Faroes the Phantoms of RAF Stornoway set up a 4-ship CAP, which will use up 12 aircraft. The remaining 6 Phantoms at RAF Stornoway remain on ground alert.

The Phantoms of RAF Leuchars set up two CAP stations at November and Echo with 4 airborne aircraft each, which will use up all of the squadrons 16 aircraft. A ratio of one aircraft airborne to one aircraft on the ground is unable to sustain a continuous station, especially 500 NM from base. Therefore the Victor tankers are to provide both N and E CAP stations with tanker support. I drew a line in the Norwegian Sea which is 310 NM from our ground radar sites on the Faroes and Shetland. This is the maximum range where the Bears can launch their missiles against said ground radar sites. So this will be the line where all incoming bombers have to be destroyed. With a total of 8 airborne Phantoms on station 100 NM behind this line, and radar coverage 100 NM beyond it, this should be possible.

Since the Lightnings have a lousy endurance, all 16 will launch as fast interceptor if the Phantom CAP line has failed.

After 16 minutes, 4 low bogeys are detected inbound for the Faroes. The first two Phantom are almost on Whiskey Station and begin an intercept. 4 Su-24 are splashed. The Phantom, having spent all their Sparrows, are ordered to RTB and are to be replaced by a fresh pair.

After 1:45 hours a large attack seems to materialize. 6 jamming aircraft are making their presence felt to the north.

Currently there are 16 Bogeys inbound, but the picture is still very unclear due to the heavy jamming. Our 8 Phantoms from November and Echo Station have already the crossed the no-crossing-line.

I think now is the time to put up more aircraft. I launch 8 Lightening from RAF Wick and 2 Phantoms from RAF Stornoway. The next 24 fighters wont be ready until in one hour.

The fight is on. The first Tu-95 and Tu-128 are going down. Weapons are quickly spent though ans many Sparrows miss their mark. This is still the early AIM-7E2 model which hits in 20-30% of shots. About the same as with the early AIM-9D Sidewinders. A wild brawl develops and the Phantoms quickly are engaging with Sidewinders and their 20mm gunpods.

The first group of bandits is decimated, with a tally of 6 Tu-128 long range interceptors, 6 Tu-95KM and 2 Tu-16 jammers. But our Phantoms which started with a total of 32 Sparrows and 32 Sidewinders are down to just 4 Sparrows and 12 Sidewinder, plus the gunpods. I still count about 33 bogeys remaining. The no-cross-line is just 60 NM away and there is no way this is going to be defended.

New Tu-128 start to harass our Phantoms. The Fiddler is no match to the Phantom in air combat, but it prevents them from engaging the Bears.

The Phantoms are completely occupied in a dogfight with about 20 Tu-128, while a large number of Tu-95 bypasses further east completely unopposed. Eventually the first Phantom eats a low pH AA-5 Ash missile shot. As the remaining 7 Phantoms become down to 2 Sidewinders and are critically low on fuel, I allow them to disengage and head to the tanker. The current tally is 21 Tu-128, put there are still 9 left. Desperately trying to disengage, the Phantoms take a barrage of missiles and two more are lost. Whether the remaining 5 will make it to the tanker is unclear. Two Victor tankers autonomously leave their station and head out to meet the dry fighters.

The bomber stream already crossed the no-cross-line. But this is in relation to an attack on the Shetlands only. No ASM launches have been detected so far, so the bombers probably head further south to attack the UK mainland. The 8 Lightnings need another 30 minutes to intercept, and a pair of extra Phantoms is heading out near the Shetlands as well. A major number of additional fighters will only get ready in 40 more minutes.

Another Phantom is hit by a perusing Fiddler. Only 4 of the original group left now. Another one runs out of fuel on the way to the tanker. Only 3 Phantoms make hook up with the Victors, the last one with a mere 50 kg of fuel left.

The Lightnings are about to commence their engagement. All Tu-128 seem to be out of ammo and returned to base, so hopefully the this will be a turkey shoot. The bombers actually pass just 10 NM from our tanker station. So once the 3 Phantoms have filled their tanks, they hopefully get an opportunity to empty their gunpods.

The Lightnings score 9 Tu-95 but lose three of their own number to the bomber’s gun turrets while attacking with 30mm cannons. The 3 refueled Phantoms enter the bomber stream as well, shooting down another Bear but all get shot down by defensive fire.

With all of the original Phantoms lost, and the remaining Lightnings out of ammo, I still count 13 bombers inbound, plus a bunch of Tu-16 jammers. Next to engage is a pair of fresh Phantoms.

The Phantoms cannot intervene before three AS-3 cruise missiles are launched. In the subsequent engagement, both Phantom again fall to the bombers guns. Trying to engage the bombers with cannons is extremely dangerous, but there is no alternative. The lives of Millions are on the line.

More ASM are launched from the north. A pair of Phantoms from the Whiskey CAP that I redirected a while ago attempts to maneuver ahead of the inbound first trio of missiles, attempting a head-on, snap-up Sparrow shot on the high and fast targets. These two Phantoms are currently the only airborne aircraft left with weapons.

The Phantoms engage the AS-3 head-on with Sparrows, while HMS Bristol engages two AS-3 to the north with Sea Dart SAM. Both engagements are successful and all AS-3 are shot down! The Phantoms spent all their 8 Sparrows though and four more AS-3 were just launched further north-east. This seems to be the final threat, as the remaining 9 bombers and 5 jammers turned around and head home.

A fresh batch of aircraft becomes ready and everything possible is launched. 8 Lightening from RAF Wick, 8 Phantoms from RAF Stornoway and 8 Phantoms from RAF Leuchars. The missiles seem to head for Scotland, so perhaps there is still time to intercept them?

The Lightning is armed with just rear aspect IR missiles, but it actually has the performance to run down the Mach 1.6 AS-3 from behind. 60 NM from the Scottish coast the missiles are intercepted and shot down!

Success, no nuclear weapons fell on the UK. The RAF had to pay the price though.

S18

4 Likes

Thanks for the info @Mbot. I guess I am doing things correctly then. :sunglasses:

Scenario 10 - An Eye for an Eye

Despite our success in defending the UK from strategic air attack in the last scenario, Scottish air bases have subsequently been hit by submarine launched cruise missiles. Carrier Strike Group 2, centered on HMS Ark Royal, is ordered to send an appropriate response by vaporizing two Soviet air bases on the Kola peninsula.

S4

The mission is pretty straightforward with all aircraft armed appropriately and enough time to execute only this single strike. Both target air bases will receive an equally made up strike of two Buccaneers armed with one WE.177 B 400kt nuclear bomb each, escorted by 4 Buccs armed with 4 AS.37 Martel anti-radar missiles each and 4 Phantoms as fighter escort. The range of the Buccs is sufficient, but each of the two Phantom flights will require support by a Buccaneer configured as tanker. This means we will launch all 14 Buccaneers of the carrier.

Of the Phantoms, 5 will remain on the deck for air defense of the Carrier Strike Group.

As usual, the Carrier Strike Group will receive airborne radar early warning by its Gannets.

The formation of the Carrier Strike Group is fairly tight with radar and active sonar turned off. ASW cover is provided by a total of 4 helo dipping sonar station, two at the front and one on the flank each.

SAM defenses on the Kola peninsula are extremely heavy, but studying the relief map I think it should be possible to slip in along the Norwegian border at low level and approaching Murmansk from the south-west along a valley.

Time to launch the strike.

All aircraft are launched. A total of 22 aircraft in two groups. There are surface units in the Barents Sea, probably ASW groups, with their air search radar on. Since we can’t fly the complete mission at low altitude due to fuel burn, the inbound strike has probably already been detected. Still, we need to go low otherwise we have to fight our way in. Already 100 NM from the carrier, the formation descends to sea level. We will see how the Phantoms will tolerate this.

Two Su-15 and two Yak-28 head out over the ocean, but flying at low level and doing some maneuvering, both strike groups seem to be ably to bypass them. Still over the ocean at 300 ft, the Phantoms top off their fuel from the Buccaneer tankers for the first time.

Tons of enemy aircraft head out to see, in the general direction where we disappeared to low altitude. I do not think we have been detected again, but it will be difficult to cross below to get to that entry near the Norwegian border. I probably should have launched some decoy Phantoms to assists with the penetration.

As a matter of fact, I do that just now by launching two Phantom. It is already late, but perhaps they can draw out the enemy some more.

Just off the coast the frist Buccaneer tanker is empty and heads back, while package enters a fjord right below some bogeys. The Phantom decoy from the carrier seems to work, 8 Tu-128 are drawn out over the ocean.

The two decoy Phantoms drag 6 Tu-128 up north, but two Fiddler seem to go at our AEW aircraft. I order it the retreat and launch two more Phantoms to help out. These are the last two ready Phantoms.

The strikers seem to do well for the moment. The first Buccaneers have made it behind the first line of SAM defenses. But ESM indicates that enemy fighters are close by. But flying at low level in heavy rain makes difficult targets for Soviet interceptors. As a pair of Su-15 passes the lead Buccs head on, the Phantoms following behind power up their radars and start to engage with Sparrows. 3 Su-15 are splashed, the but engagement draws a lot of attention and more and more enemy fighters coverage on the position. Eventually 2 Phantoms are shot down.

In the north, one of the Tu-128 heading for our AEW is shot down. The other turns around for home, but is run down and disposed with Sidewinders.

The first group of Buccaneers is about to start their valley run towards Severomorsk-1, with 3 Yak-28 in hot persuit. It seems the Yaks cannot engage as long as the Buccs stay low. The two remaining Phantom escorts are trying to catch up in burner.

The sceond group has made a little detour along the border, but also has bogeys in pursuit. It’s Phantom escort is also trying to catch up.

The 4 Buccs with Martel ARM climb to 1000 ft and start to engage SAM sites, while the two with the nukes initiate their attack run on Severomorsk-1.

Bomb away! The leader gets shot down by air-air missile just seconds from the target, but the wingman drops his WE.177. Now everyone get the hell out of there!

Just second before the detonation, the remaining escort Phantom of this attack gets blown out of the sky by a nuclear SA-5!

Severomorsk-1 is hit by the 400kt WE.177 and vaporized (for some reason there was no graphic of this, so no screen). The remaining 5 Buccs of this strike retreat at maximum speed and low level.

The attack on Olenegrosk is next.

Approaching the target, the ARM Buccs climb and start to clean house by firing 16 Martels. Both nuclear carriers successfully drop their bombs. The base is wiped out.

Of the second strike, all 6 Buccs and 3 Phantoms make it back out to sea. For some stupid reason though, one flight refuses to land back home and all 4 Buccs crash next to the carrier. I did order them to RTB manually, no idea why they didn’t land. The same happened with one of the tankers too.

All in all, of the 14 Buccs launched, one was shot down by an air-air missile and 5 (one tanker and 4 wild weasels) crashed next to the carrier due to not landing and running out of fuel. Of the 8 Phantom escorts, only 3 came back and 5 were lost.

Overall, with both targets destroyed and acceptable losses, a pretty successful operation.

S18

3 Likes

Scenario 11 - Fire and Brimstone

After its daring mission during the last scenario, HMS Ark Royal was cornered by Soviet submarines near Bear Island and sunk. Now, finally, the supercarriers of the USN show up on scene. A Task Force consisting of the USS John F. Kennedy and USS Saratoga Battle Groups has entered the Norwegian Sea and moved to a position north east of Jan Mayen Island. Their mission is to support the land battle in Northern Norway by neutralizing Soviet held Banak and Bardufoss air base, and striking the 37th Motorized Rifle Division. Operating in contested waters, the Task Force has to defend itself against substantial subsurface, surface and air threats.

This is a huge scenario and we have a ton of aircraft under our command. Let’s get an overview first. Numbers represent operational airframes vs. total number with aircraft in maintenance.

USS John. F. Kennedy:
20/24 F-14A Tomcat, fighter
20/24 A-7B Corsair II, attack
10/12 A-6C Intruder, attack
3/4 KA-6D Intruder, tanker
4/5 E-2C Hawkeye, AEW
3/4 EA-6B Prowler, ECM
2/4 RA-5C Vigilante, recon
8/10 S-3A Viking, ASW
5/6 SH-3H Sea King, ASW
0/1 C-2A Greyhound, transport
6/6 SH-2D Seasprite, ASW (distributed among escort ships)

USS Saratoga:
20/24 F-4J Phantom II, fighter
16/20 A-7E Corsair II, attack
10/10 A-6E Intruder, attack
3/4 KA-6D Intruder, tanker
3/4 E-2C Hawkeye, AEW
4/6 EA-6B Prowler, ECM
3/4 RF-8G Crusader, recon
8/10 S-3A Viking, ASW
6/8 SH-3H Sea King, ASW
0/1 C-2A Greyhound, transport
4/4 SH-2D Seasprite, ASW (distributed aming escort ships).

In addition, we get air support by the RAF in Norway with 10 Jaguar GR.1 at Bodo Air Base and 10 Harrier GR.1 at Evenes Air Base. From RAF Mildenhall in the UK we get 3 RC-135V Rivet Joint ELINT aircraft and 4 RB-57A Canberra photo recons.

Both CVBG operate 90 NM apart. They will share common outer air defense and ASW screens, while having their own individual inner air defense and ASW screens. They are currently 500 NM off the Norwegian coast and will approach to a position 300 NM off the coast. Initially I want to keep the carriers far out to have sufficient space for air defense, even if this means long distances and reduced loadouts for the strikes. Carriers require huge amount of space for their air defense and in this case this will take up most of the Norwegian Sea. What I want to avoid is that our CAP comes into contact with enemy land based CAP, which will turn into an protracted battle of attrition that serves no specific goal. I intend to trap and destroy enemy fighters in bulk at their bases through strikes. Once enemy land based air power is neutralized and our air defense screen can safely extend over land, we may move the carriers closer to the coast to facilitate air strikes.

With such a huge amount of aircraft, proper planning is paramount. In fact I spent a whole evening just planning our air and anti-submarine defense. Let’s have a look.

This is our CAP plan. As usual, it is the first priority to shoot down recon aircraft before they can detect the fleet. The Tu-95RT Bear D has an air-surface radar range of 260 NM, so this is the distance that no enemy plane is allowed to undercut. In red you see the prosecution area which extend 350 NM from the carriers (4 individual sectors which are overlapping). The CAP stations are 200 NM from the carriers. This should allow the CAPs to destroy all Bogeys before they get below 260 NM, even if the enemy approaches between two CAP stations.

USS John F. Kennedy will be in overall command of the outer air defense screen with all its Tomcats allocated to this task. Two 2-ship CAP stations are positioned in the center around the primary threat axis. This will use up 12 aircraft. Since with 200 NM the CAP stations are fairly far out from the carrier, the Tomcats carry a light-CAP loadout of 2 Phoenix, 2 Sparrows and 2 Sidewinders, which improves endurance. Turnaround time on the carrier for this loadout is 3 hours, plus the transit time to/from station. So on station time should be long enough to have 1 per 3 aircraft on CAP continuously.

Kennedy’s remaining 8 Tomcats are armed with a heavy loadout of 4 Phoenix, 2 Sparrow and 2 Sidewinder. Their task is ground alert to intercept any large scale raid, in case the anti-recon CAP fails. They might or might not be able to intercept Backfires at 215 NM before they can launch their missiles. The Tomcats are also suited to intercept the missiles themselves.

USS Saratoga is providing auxiliary CAP with two 2-ship Phantom stations on both flanks. This will occupy 12 F-4J. The remaining 8 Phantoms are tasked with providing strike escort.

The Task Force has sufficient E-2 Hawkeyes to set up 3 simultaneous airborne radar early warning stations. This will provide radar coverage over the complete CAP engagement area as well as extending over the rear of the Task Force. This allows the Task Force to keep their radars off and still have sufficient warning for submarine launched cruise missiles from any direction.

Since we have a total of 7 EA-6B Prowler ECM aircraft available, 4 are used to set up two 1-ship jammer stations 50 NM behind each Battle Group, on the opposing side of the primary threat axis. Initially they will keep their jammers off and collect enemy emissions. Should a Bear D approach the critical distance of 260 NM without being shot down in time, the jammers can be turned on the degrade the enemies detection range. In case of a missile attack, the jammers will be positioned on the opposing side of the targeted ships and will try to blind their targeting radars. The 3 remaining Prowlers are available to escort strikes.

The final line of defense against air attack are the escort ships. The Kennedy CVBG includes the nuclear powered guided missile cruiser USS California, one of the most powerful ships of the era. She carries a newer block of SM-1MR Standard missiles and is the only ship in the group that can engage AS-4 Kitchen ASM in all flight phases. California only carries the medium range Standard, but with a total of 78 missiles shot from two fast firing single-arm launchers and the capability to engage 4 targets simultaneously, she is an excellent air defense ship. California is positioned 12 NM from the carrier along the primary threat axis. The group also includes the Belknap-class CG USS Wainwright, still armed with the older Terrier SAM and the DDG USS Mitcher, armed with early SM-1MR. Both ships can’t reliably engage AS-4, but should prove capable to defend against ship and submarine launched cruise missiles. Interestingly, Wainwright also stores two nuclear Terrier SAM (1kt), which should potentially be very useful against a massive AS-4 attacks, but because of target speed constraints I am not sure if the game will allow launching it against such targets.

The primary air defense ship of the Saratoga CVBG is USS Richmond K. Turner, a Leahy-class CG. It is armed with 76 long-range SM-1ER, which due to its booster can also engage AS-4. The ship also has a 4-target engagement capability. Turner is kept 12 NM ahead of Saratoga along the threat axis. Another interesting ship in this group is USS Albany, a 1950s guided missile cruiser conversion of a WWII light cruiser. It is armed with the 100 NM range Talos SAM, though that missile is close to become obsolete. I keep it close to the carrier. If everything fails, this massive ship might screen the carrier by absorbing a lot of damage. The CVBG also includes two Adams-class DDG armed with early SM-1MR, which will provide all around protection of the carrier against sub launched missiles.

In green you can see the outer ASW screen for the 16 S-3A Vikings. There are 7 patrol areas at 50-90 NM from the Battle Groups. This will cover the area from outside the ship’s sonar systems to a little beyond the maximum engagement distance of a Charlie II SSGN. Both patrol areas on the flank have 2 aircraft assigned (so 1 on station) and the forward areas have 3 aircraft assigned (due to great endurance 2 on station), with overlapping sectors to ensure complete coverage. 1/4 of the Vikings are armed with two B57 nuclear depth charges, the remaining aircraft carry 4 Mk46 torpedoes each.

As usual there are dipping sonar lines for SH-3H Sea Kings 20 NM ahead of the carriers. Of the 11 available helicopters, 6 are armed with one B57, the remaining 5 with two Mk46.

The 10 SH-2D Seasprite helicopters remain on ground alert to prosecute contacts detected by their parent ship’s sonar. 1/3 of the Seasprites is armed with a single B57, the rest with Mk46.

Both Battle Groups have excellent escort ships with powerful sonars and all armed with ASROC. USS Wainwright and USS Francis Hammond carry two nuclear ASROC each. Active sonar emissions are authorized to maximize aggressive submarine prosecution. The Battle Groups should be strong enough to defend against potential submarine launched cruise missile return fire.

The last preparations are regarding the aircraft from RAF Mildenhall. The RC-135 are assigned a long patrol along the Norwegian coast in order to collect enemy electronic emissions (blue line in the screen above). The RB-57 are assigned a high altitude patrol over the front in Norway. They have very good photographic cameras but there are moderate clouds at medium altitude and heavy rain. Hopefully they can reconnoiter some of the enemy ground units through gaps in the clouds. Once the threat situation over the front has become clearer, there might be an opportunity to send the RB-57 below the clouds.

These are all preparations in regards to air defense and ASW. Our defenses should now work with little manual input, giving us the opportunity to concentrate on the complex strike operations. Next we will start to make plans for them.

TO BE CONTINUED

2 Likes

Really enjoying reading these - keep it up!

Now let’s get on to strike planing. This is a little difficult, because at scenario start all the aircraft are armed with loadouts at various states of readiness. Some are ready to go, some aircraft take another 3 hours to become ready. Re-arming aircraft with a different loadout takes 6 hours. So there are some decisions to be made whether to take the aircraft with loadouts and numbers that are available now or in 3 hours, or to get the preferred strikes in 6 hours.

Intel reports that there are two Soviet Surface Action Groups near Spitsbergen. These are the most immediate targets, since they can actually threat our carriers. They are not detected yet, but I want to have aircraft ready to launch as soon as the SAGs are discovered. Spitsbergen is fairly close, so A-7 Corsair II can do the job, leaving the longer range A-6 Intruders available for the strikes in Norway. The US weapon of choice to attack ships is the AGM-62B Walleye II glide-bomb. Remember this is the 70s, so the only alternative American aircraft have to attack ships are dumb bombs (no Harpoons yet). Ideally we should have up to 8 aircraft with Walleye for the mission. Also we will need some Corsairs armed with Shrike ARM to suppress the ship’s radars (4 should be sufficient), as well as a Prowler for jammer support. Fighter cover is not needed. Fortunately, there are already 4 Corsair with Walleye and 2 with Shrike ready across both carriers. In 3 hours we will get 4+2 more. We set these aircraft aside for the SAG Strike mission.

The next target is Banak Air Base. This should be an easy target, since it is actually a small civilian airfield and just has two ramp areas and one hangar. Bombing just these 3 elements should destroy most of the enemy aircraft on the ground and if the facilities become unusable, even shut down the base for good. This will require only few aircraft and will fall on Saratoga’s air wing. Assigned are two A-6E armed with 10 Mk-83 1000lb bombs each for the ramp spaces, and two A-7E armed with 2 Mk-84 2000lb bombs each for the single hangar. Escort is provided by a single A-6E armed with 4 AGM-78D Standard ARM for defense suppression, a single Prowler for jamming escort, a single Photo-Crusader for bomb damage assessment and 4 Phantoms as fighter escorts. Since Banak is currently 550 NM from Saratoga and beyond range of the very heavily laden Intruders and the Cursader, two KA-6D tanker will accompany the strike. The Phantoms will probably also need some extra fuel. All aircraft for this strike are ready to go, so should launch pretty soon after scenario start.

Bardufoss Air Base will prove to be a much more difficult target. This is a heavily reinforced military base with a large runway and multiple runway-grade taxiways. Making them unusable would require a lot of effort. The base has all of its parking areas in 3 underground aircraft caves (I assume all regular parking spaces and shelters were destroyed by the Soviets when the base was still under NATO control). Destroying those caves or their blast door is probably also very difficult. I elect to attack a number of taxiways and runway access points that lead to these caves in order to shut them down. Cutting taxiways with bombs is difficult, so even this will probably require multiple large strikes with heavy bombs. In 3 hours, we should get available 10 Intruder and 8 Corsair armed with Mk-83/84 from both carriers, plus 5 SEAD escorts, so this will be our first major strike against Bardufoss.

The remaining aircraft are ordered to rearm, so that in 6 hours we will get another 6 Intruders and 8 Crosair with Mk-83/84, plus 4 A-7 SEAD escorts.

The CAS mission against the 37th Motorized Rifle Division is on hold for the carriers until both air bases have been neutralized. Perhaps if the SAG strike mission is flown early, these 12 Corsair might be re-armed for CAS upon returning for the carrier. Meanwhile the RAF Harriers and Jaguars will be used for CAS.

Now let’s finally get going. At first we let all the defensive aircraft take off and get on station, in order to collect an initial picture. ESM from various aircraft pick up some Bogeys near Bardufoss, a helicopter near Bear Island (so somewhere around there should be a SAG) and a Tu-95RT Bear D to our rear over the coast of Greenland! It has its radar on and is just barely out of range detection range of the fleet. The Phantoms of the northern CAP immediately set off in afterburner to intercept this snooper.

Also there is a surface contact with a Russian type surface search radar just 50 NM ahead of JFK, right in our ASW patrol area. JFK needs to launch two of the Walleye armed A-7 immediately.

Two Walleye glide-bombs are quickly launched by the A-7 against the close surface contact. As the TV guided weapons close in, they relay the target ID back to the shooters as a Cuban freighter. Both bombs strike, sinking the dubious spy. Both Corsair still have two bombs and plenty of fuel left, so instead of returning to the carrier and being unavailable for the next 6 hours, we send them towards Bear Island in order to do some armed-recon in the area.

The Bear near Greenland has meanwhile approached to detection range with our interceptors still only halfway there. The position of both CVBG gets compromised. I think we can prepare for some heavy action within the next hours. The Bear is eventually disposed by 3 Sparrows.

There is another Bear coming down from Spitsbergen, this time it is a less capable Tu-95MR photo recon. It is dealt with by two Tomcats on CAP with two Phoenix.

Have a look at all the air activities near Norway. 8 MiG-21 took off from Bardofuss (seems intel was wrong that the MiGs are at Banak) and head out over sea. I had to mark them neutral in order for our CAP to ignore them for the moment. In addition, ESM picks up 8 unknown fighters coming over the North Cape.

The realization that the MiG-21 are operating out of Bardufoss instead of Banak as reported by intel has changed the situation quite a bit. The MiG-21 are taking up CAP positions over the ocean in strength and have the potential to disrupt our outer air defense screen. As such I think neutralizing Bardufoss has become a high priority. Saratoga and Kennedy are ordered to launch all ready strike aircraft (minus the ones allocated to the SAGs) for an immediate strike against Bardufoss. The strike is composed as follows:

2 A-6E with 4 Mk-84
2 A-6E with 10 Mk-83
2 A-7E with 2 Mk-84
2 A-7B with 2 Mk-84
1 A-6E for SEAD with 4 AGM-78D Standard ARM
2 A-7B for SEAD with 2 AGM-45 Shrike ARM and two CBU-59
1 EA-6B Jammer
4 F-4J fighter escorts
1 RA-5C for BDA
2 KA-6D tankers

A pair of MiG-21 is a little too interested in our RC-135 and two F-14A on CAP are forced to intervene. Both MiGs are shot down, at the cost of 3 Phoenix and Tomcat on-station time. That is exactly this situation I wanted to prevent.

The E-2C have detected a group of 3 ships to the west of Spitsbergen making 25 kt. This must be the first SAG. The ready aircraft set aside from this mission are launched. Four A-7E from Saratoga, two with Walleye and two with Shrike.

Another fast surface contact is detected south of Bear Island. The two Corsair already airborne and armed with two remaining Walleyes are just 130 NM away and are ordered to attack it. It will still take over 2 hours for the next 4 Walleye aircraft to get ready.

Meanwhile our first Alpha Strike against Bardufoss is outbound from the carriers.

The situation gets tight with more MiG-21 coming out, apparently being attracted by our E-2C. I decide to avoid an engagement as long as possible in order to conserve the Tomcats. The short-legged MiGs eventually turn around 50 NM short of the Hawkeye. Two more Bear announce their presence coming over the North Cape with their radars on, so the F-14 will be needed for these essential targets soon. There are only 2 CAP-replacement Tomcats left ready for immediate launch, the next batch wont be available for another 2 hours. The initial engagements have eaten fuel and station time and it is foreseeable that in about an hour we will have gaps in the CAP.

Near Bear Island, the two Corsair that sunk the Cuban merchant attack the sole fast surface contact with their two remaining Walleyes. As the glide-bombs dive below the clouds, they provide a TV picture of a Kresta II-class guided missile cruiser. The ship is completely surprised by the silent and sudden attack. Hit by both bombs, the cruiser is destroyed.

Both incoming Bears are intercepted as planned and shot down with 3 Phoenix. Both airborne Tomcat flights now each just have a single Phoenix left.

The first Alpha Strike goes feet dry and descends to 12’000 to approach through in cloud cover. So far there are no hostile radar emissions and no enemy fighters. 4 MiG-21 were bypassed over the ocean and it seems as if the Soviets also are to enter a phase of lower sortie rates after the previous flurry of activities.

Almost simultaneously, USS Richmond K. Turner in the lead of Saratoga’s screen makes a sonar contact at 17 NM. One of the airborne Sea Kings heads to investigate, and Turner also launches a Seasprite to support.

Lots of stuff is happening now. Also the strike against the SAG west of Spitsbergen arrives on target. From above the clouds, two A-7 launch two Walleye against the lead ship and one glide-bomb each against the two rear ships. The two Corsair with Shrike remain ready to engage any ship-borne radars, but no emissions are detected yet. As the bombs close and get a visual on the ships, the lead is IDed as Kynda-class guided missile cruisers, followed by two Kanin-class destroyers. The Kynda and one Kanin are hit and sunk, but the weapon targeting the remaining Kanin malfunctions and the destroyer gets away for now.

Meanwhile the Goblin near the Saratoga CVBG gets hit by two air launched Mk46 and destroyed. In turned out to be a Zulu IV diesel sub.

The Alpha Strike on Bardofuss is pretty successful. The aircraft descend to minimum altitude and accelerate to maximum speed. One of the Corsairs failed to drop its bombs on the first try. The A-7B circles around and doing a second attack, is hit by an SA-6 after pulling off target (the famous re-attack). The SA-6 is subsequent plastered with ARM and silenced. BDA by the tail-end Vigilante shows 8 of the 7 target-points have been hit and damaged pretty good. Most taxiway facilities around the underground aircraft caves have been cratered. It remains to be seen if this is sufficient to shut down the base.

The attack has raised quite a bit of attention, and as the Strike is egressing, the 4 MiG-21 patrolling over the ocean head south and close in. Now is the time for the Phantom escorts, which split off to block the approaching MiGs. 8 Sparrows take care of the 4 Bandits. Now the way back to the carriers is clear.

The next round of strikes becomes ready in 1 hour.

4 MiG-23BN are attacking Evenes Air Base at low level. That is the receipt for targeting Bardofuss before Banak. Rapier SAM and AAA try to defend the base in veil and several installations are struck. Fortunately only empty revetments and a taxiway. The bases 12 Harrier seem to have gotten away untouched.

As the aircraft from the first Alpha Strike return to the carrier, I think these can now be rearmed for the CAS mission. In any case, neither carrier has any Mk-84 left in their magazines (other than the bombs that are currently being loaded).

As the defenses around Bardofuss and the front seem to be degraded already, the RB-57 Canberra photo recon is allowed to go below the clouds and reconnoiter the front area. A photo recon Harrier is also launched. Shortly, a Soviet surface-surface missile battery, an artillery and more targets are found and 4 RAF Harriers and 4 Jaguars are launched to strike them.

But Bardofuss is apparently still in action, as suddenly 6 MiG-21 launch right next to our activities. 2 Harrier, 2 Jaguar and 2 Canberra are shot down. We need to shut down this base for good before we can continue on the CAS mission.

With the recovery of the first Alpha Strike back on board the carriers complete, it is now time to launch the next wave of strikes.

First, two A-7 armed with Walleye are launched against the remaining destroyer west of Spitsbergen, as well as two Corsair with glide-bombs against another surface contact near Bear Island.

Next an Alpha Strike against Banak is launched, consisting of:
2 A-6E with 10 Mk-83
2 A-7B with 6 Mk-83
1 A-6E for SEAD with 4 ARM-78 Starndard ARM
2 A-7E for SEAD with 2 AGM-45 Shrike ARM
1 EA-6B for jamming
2 F-4J for fighter escort
1 RA-5C for BDA
2 KA-6D for tanking

And finally a follow-up strike on Bardofuss in launched, consisting of:
4 A-6C with 4 Mk-84
2 A-6E with 4 Mk-84
2 A-7E with 2 Mk-84
2 A-7B for SEAD with 2 AGM-45 Shrike and 2 CBU-59
2 F-4J for fighter escort
1 EA-6B for jamming
1 KA-6D for tanking

The second wave of strikes is outbound. There are 6 Su-15 on a CAP station off the coast of Banak. I guess these come from Kilpyarv from the Kola peninsula (which is pretty far away). Hopefully these will run low on fuel soon. There are also again around 6 MiG-21 airborne. These strike are only escorted by two Phantom each, due to lack of aircraft.

TO BE CONTINUED

1 Like