Hello Everybody!
This topic is brought to you in part by a question by @WreckingCrew last night about the benefit to using the AGM-65E/L laser guided Maverick missile since it will be finally joining us on the A-10C’s weapon list when A-10C II comes out. We had a discussion but I figured I should share some information with everyone and include some screenshots to make this easy to visualize.
Not everyone flies every day to try every thing every way!
Maverick Models
For reference let's start with some data:| Model Letter | Warhead | Seeker Type | Force Correlate? |
|---|---|---|---|
| D | 126lb shaped charge | IR | N |
| G | 300lb penetrator | IR | Y |
| H | 126lb shaped charge | TV | Y |
| K | 300lb penetrator | TV | Y |
| E/L | 300lb penetrator | Laser | N/A |
The Basics
Let’s start by talking about range. The A-10C manual guides you to use the AGM-65 within 7 nautical miles of the target, slant range. Players are often get closer than this and when assisted by a TGP handoff (set SPI with TGP, force sensors to SPI with China Hat forward) the non-laser models are easy to use and get on to the vehicle of choice within a column or group.
Our non-laser models are all fire & forget. This works well for short range air defenses (SHORADS) such as AAA, manpads and the IR SAMs like the SA-9. We’ll talk about something tougher - an SA-3 site. Assuming that you only have one missile, you need to hit the tracking radar in order disable the site. Being close enough to pick it out on the maverick seeker and be certain you have locked the right target is not a good idea. At max range, you cannot pick out the target.
Some Visuals
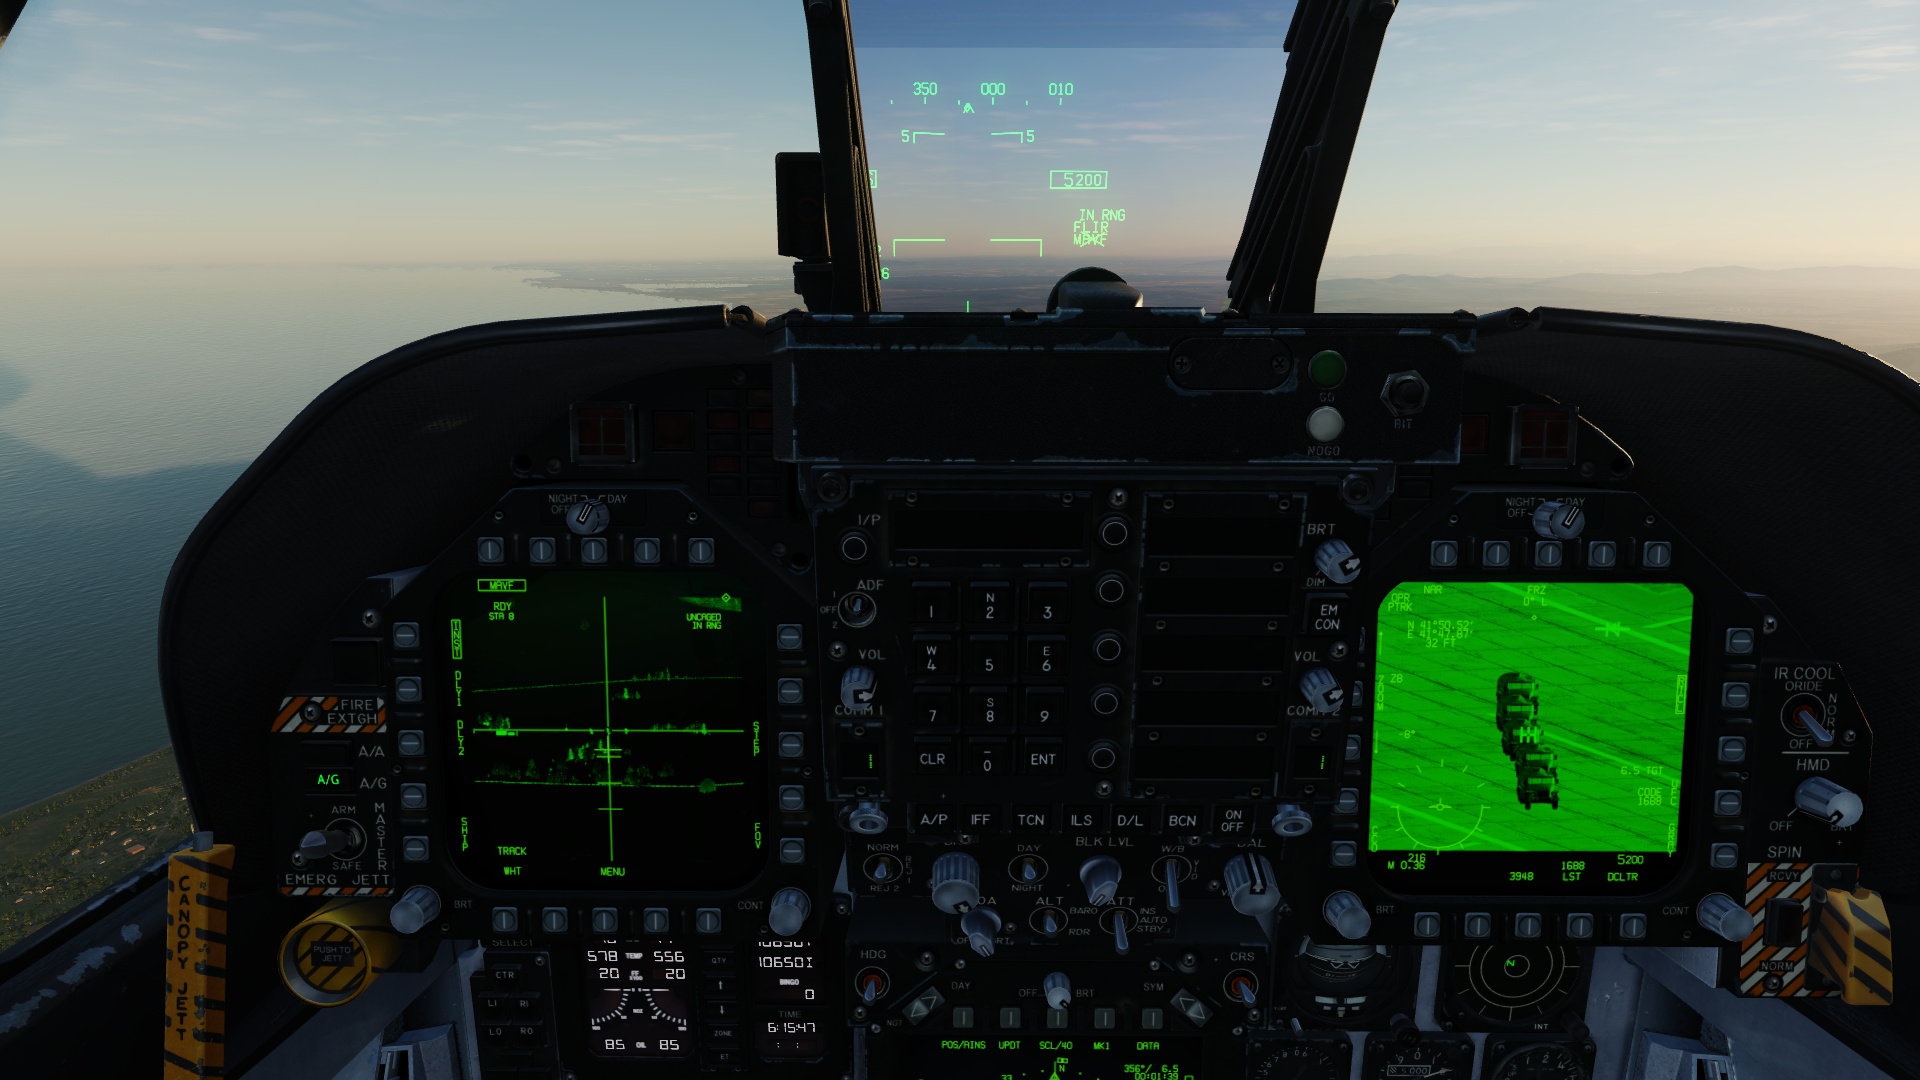
Below is the view of a group of closely spaced trucks at about 6.5 nautical miles away. On the Left MFD is full zoom with the TGP. On the right is the wide field of view of an AGM-65 with IR seeker.

Below you can see that using the narrow field of view does not really help us pick out a single vehicle.

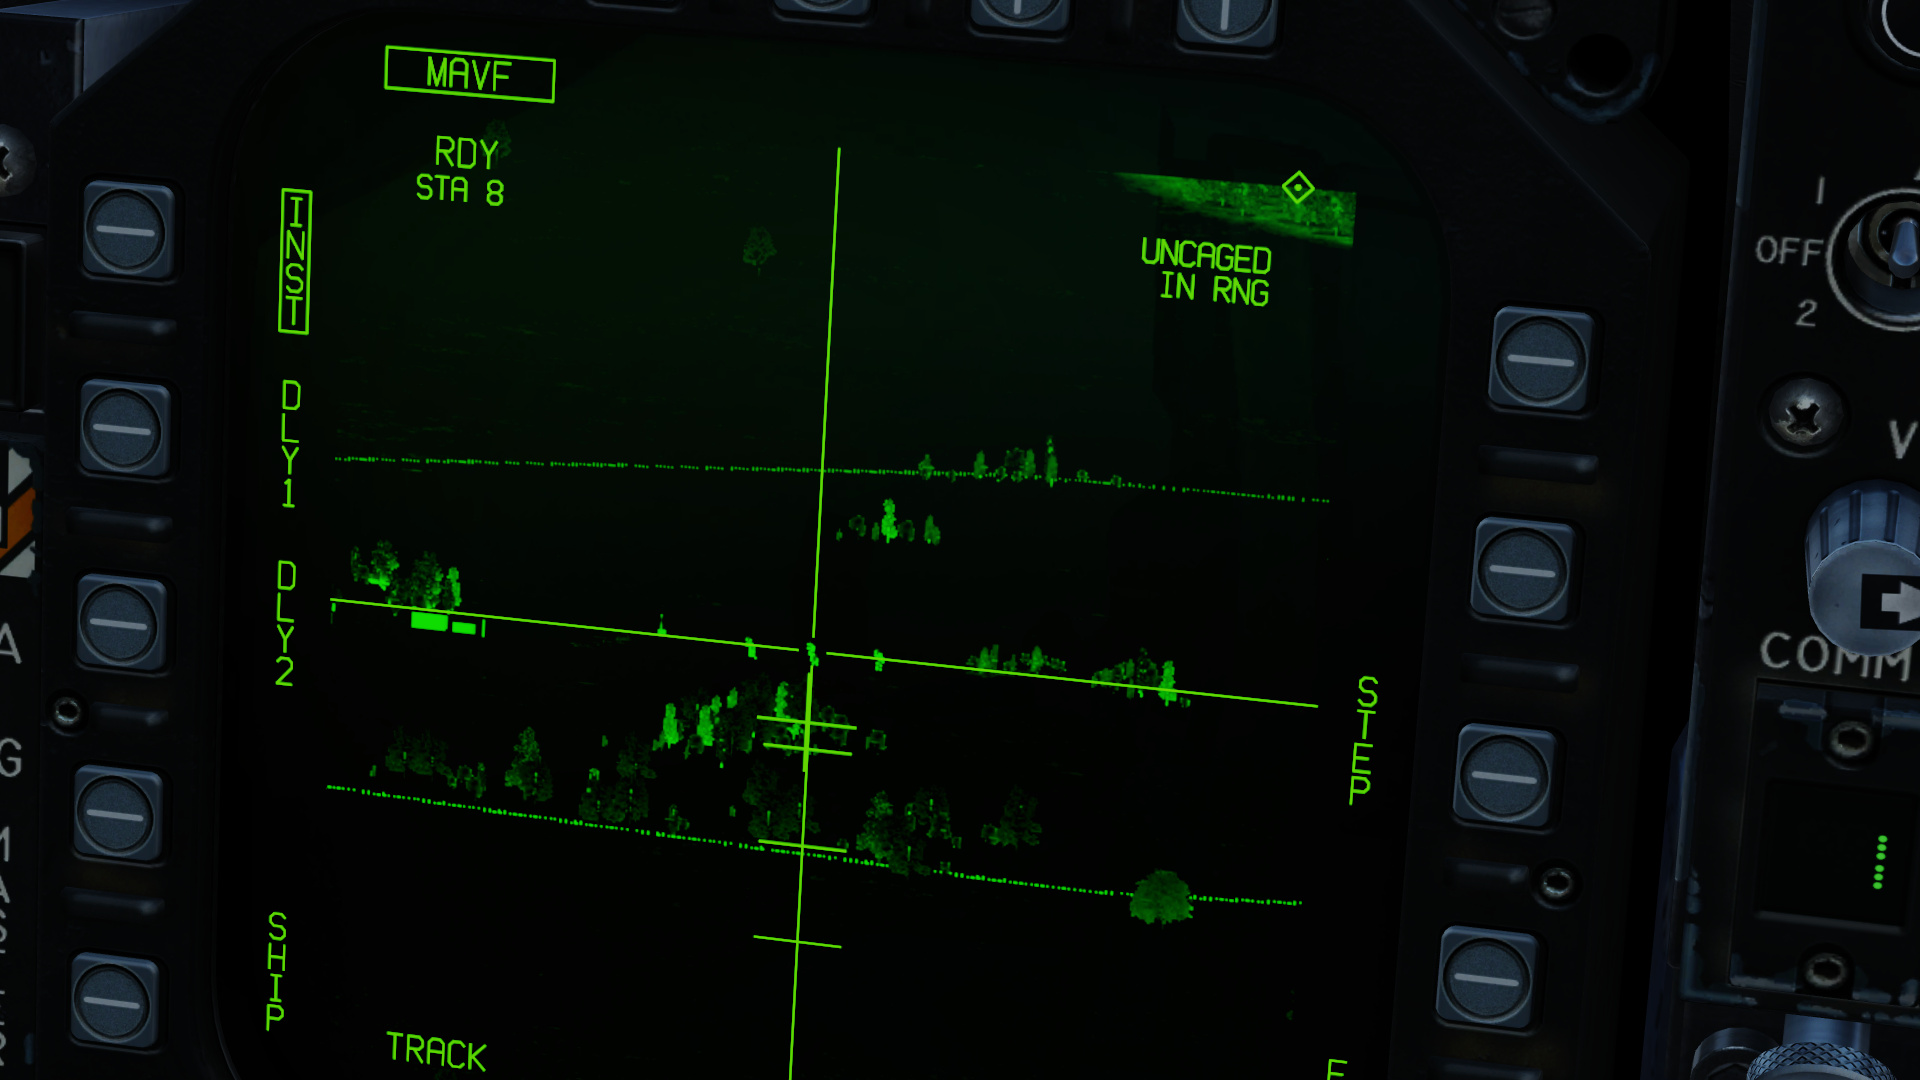
A close up on the MAV seeker display, our targets are a hazy blur of pixels. This is not going to work.

Our A-10C is gifted with some very crisp and clear displays. The black and white display method and default values for brightness and contrast work great. What about an aircraft not so well set up? Below are a similar set of images from the F/A-18C Hornet:
Left DDI - IR Mav seeker wide FOV, Right DDI - Zoomed in TGP.

Left DDI - IR Mav seeker narrow FOV, Right DDI - Zoomed in TGP.
Close up of the Left DDI with the narrow FOV.
It is also worth noting that in these images the Maverick is not locked on to the target, which closes the reticle making it impossible to actually see what it is on top of in a situation like this. It applies to both aircraft - you could be one vehicle off to the fore/aft or left/right and possibly not be able to tell.
So what can we do? We can use a bit of guess-work - with an SA-3 site, the tracking radar is usually right in the middle of the layout. We can also try shooting from or just beyond maximum range. However, we likely cannot get a lock at these ranges. The A-10C does have an amazing feature to pull out of the bag of tricks for this - Force Correlate.
Force Correlate
The models which can use this feature are marked in the table at the top.
To take from the ED A-10C manual (page 571 - shortened for brevity).
If you need to attack a specific part of a large object (such as a particular window in an office building), you can use force correlate mode. This mode allows the seeker to create a basic picture of the scene and home in on one specified area of that scene.
The instructions are like this:
1. Place the Boat Switch in the center position.
(To make sure DCS has matched your switch IRL to in-game correctly, I like to click it fore/aft and then center which I call “rocking the boat” - it’s easy to remember!)
2. Slew the tracking gate near the intended target.
3. Ground stabilize the Maverick by pressing TMS Aft Short.
4. Slew the tracking gate over the target and the tracking gate will fully collapse. The Pointing Cross will go steady.
5. You can now launch the Maverick by holding down the weapon release button.
The problem with force correlate is that it’s not going to be very precise at range, and may even fail to track properly. However, this can work from lower altitudes under 10,000ft from nine nautical miles, which is a large bonus to our range.
But I digress...
To understand why I love Force Correlate mode, you have to go back to one of the first AAR’s of sorts that I ever gave, on a mission designed by our own @BeachAV8R with help from @WreckingCrew! There is some detail there about just how far you can push force correlate, and the A-10C into heavier threats it shouldn’t really be taking on.
Laser Maverick (LMAV)
We have shown that we can get away without a laser guided maverick. Why bother with it then?
There is really only a chance you can:
- survive close enough to get a maverick shot,
- make a good lock from far away,
- use force correlate and get a good hit from a safe distance.
Like Laser Guided Bombs, the LMAV allows us to use the amazing zoom out our TGP, taking care of targeting. We do sacrifice the ability to disengage as we must keep the TGP within it’s view limits.
There are strategies to this:
The outboard position of the TGP on the A-10C makes for a pretty unobstructed view if you turn 90° off target, which also can notch an incoming missile. For the Hornet, you will need to plan your payload to ensure that you don’t have an obstruction to the TGP if using it on the cheek station, or flying in a banked turn away from target at a slow turn rate if using it on the centerline without much altitude.
You can get the fire and forget portion back by making use of buddy lazing from another aircraft, or ground forces. The Laser maverick would also do better at what force correlate is meant for, hitting a specific point on a target like the defensive weapons on a warship.
One of the real-world advantages I read about today thanks to a book suggestion by @AndyE, is that the LMAV can be used in areas where there is higher risk for collateral damage because it is more precise, and the ground forces authorizing the attack can be sure it will hit their requested target. Another benefit, which I am not sure is currently modelled in DCS, is that if the LMAV will not arm the warhead if the laser is lost.
Buddy lasing benefits too. If one aircraft flies as an airborne forward air controller [FAC(A)], they can lase for you and you do not need a TGP. If you were to use LGBs, they must talk you on close enough to drop the bomb and have it find the laser - but nobody can be sure it “catches” until the weapon is on it’s way (if we use F6 camera) or impacted - this is not a very safe method. If we are using the LMAV, the talk on can be looser as the missile will scan and lock onto the laser source before launch, so you can be certain it has picked up the target. This would make for some good co-op gameplay where one player (or crew in an F-14!) can work on finding all the targets, while others simply bring in the missiles.
The laser maverick will also be a great compliment to the upcoming APKWS laser guided variant of the Hydra 70mm rockets (JF-17 owners will be familiar with this weapon concept already) which are too weak to take on armored targets like modern main battle tanks. Both of these weapon systems can be used to essentially cross-train on the other, and you could take both on one flight to attack a variety of target types while practicing the same basic methods. The APKWS is coming with a HE and anti-armor warhead (which is of course, very small) and can cover soft and light armored targets while the LMAV cover hardened or heavily armored targets.
The LMAV is also employable of course as implied above by the Hornet and currently also available to the Harrier.
This turned out far longer than I originally imagined. I hope some will find this information useful, and if the idea of some basic weapons employment threads has some popularity maybe we could cover more weapons - I am sure @Franze has lots to offer in as well!