Impressive!
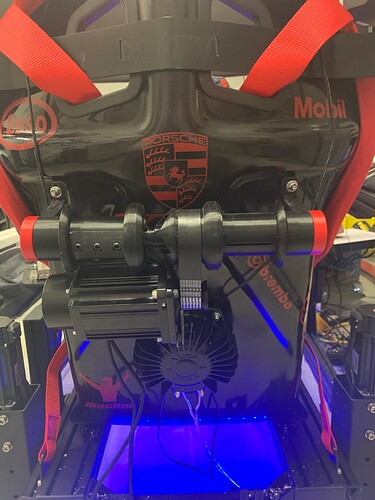
Looks like a mix of stock alu tubing and 3D printed parts.
Friction holding the collective in place, or are you planning on adding a damper or such?
yep, perfect @vman69au
my alu tubing will similarly benefit heavily from 3d printed parts. I was rebuilding just yesterday my alu tube joystick extension and had very little options without custom build parts.
Very nice!
Will try both. I have a motorcycle steering damper on the way and will build some adjustable friction plates inside the case as well.
Finished the design of the internal friction clutch.
It works so well. Very smooth and adjustable by adding elastics.
Soldering done.
Arguing sketch with Jostsick.h completed to handle calibration and buttons.
Mounted on rig and first test last night.
So happy . It works! And well.
Flew my first ever Helicopter on MSFS2020 . The latest H135.
Was so much fun…
Also loved the process of learning how to make this, prototyping and printing … I printed the outer case with big holes in it just to save printing time. Was going to take 28 hours to print …So cut the big rounded rectangles all over it. doesn’t look the best but got me up and running quicker.
Very elegant and simple design!
It’s possible that the clutches will wear more in the area where the collective operates more often and because of this it may develop a ‘detent’ when you pull out of this area… But, you can just print new clutches and it will be as good as new again. One of the biggest advantages with DIY is that if it breaks, you can fix it ![]()
Well done!
And that simulator rig you got there… ![]() Tell me more!
Tell me more!
Does it have motion? Are those belt tensioners?
Yep has full motion. On the back are seatbelt tensioners I also 3D printed . They are amazing for realism when sim racing…You hit the brakes and it pulls you into the chair.
guess it could also work so simulate G’s on a high G pull-up…
I have not tried motion on yet while flying. Wanted to first get hang of this rotor thing then I will add motion.
I was thinking of cutting out some plastic from a milk carton and lining the clutch with that. That way if /when they wear just rip it off and stick on a new set. But the parts are also easy to print so will see how long it takes to wear out. I don’t fly that much …
My steering damper for motorbike arrived. Was looking at fitting that but it seems very stiff even on weakest setting. I am not sure how hard it should feel as never flown a real chopper.
I have finnished my first Tinkercad model
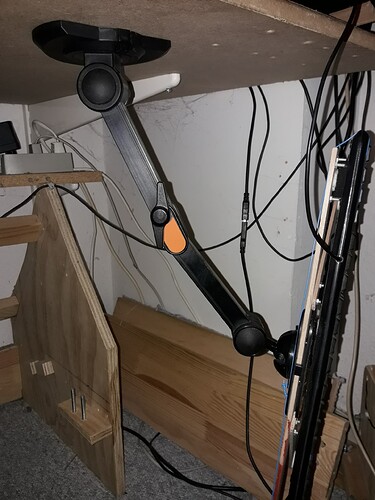
It is a replacment for my Plastic Tablet holder DIY Mouse platform swivel as it broke from the weight of my arm.
Right now I am seeing if I can find somebody locally to make the parts in aluminium.
Meesa crossing meesa fingers.
Here are a couple of pics of the Mouse- and Keyboard platforms based on the same tablet holder.
Not having the use of this arm is the major reason that I haven’t don any flight or tank simming for quite a while.
My backup Mouse platform is sitting where I want the joystick.
Happy Simming
Howdy fellas. I searched for a bit online but couldn’t find someone who tried a similar idea. So… I finally got myself some working LCD screens to go with my cougar MFDs. I love them so much I’m going to keep them in my desk permanently. Which means something has got to go. Yup, I’m talking about my trusty deskmounted stick and throttle.
So reasoning is I tried desk mounting them with the customary desk clamp system, but that doesn’t work for me. I still need my desk for other work, and detaching them every time was a bit too much. Besides, my desk is too wobbly and those kind of mounts made everything just too unstable to be fun.
So my reasoning is to mount the stick and throttle to custom built tiny wooden bases that I can just set on place on the floor next to my chair and store them behind the door when not in use. Now, I’ve seen somebody nail stuff to some plywood that lays on the floor for support but that would make it harder to stow away. now I was thinking something like this:
Probably should make a wider base for stability and maybe get some steel on the bottom to make it heavy. The question is: Anybody had some luck with this setup? Something for me to keep in mind to avoid some unnecessary tree killing?
Appreciate all the help!
You wouldn’t have a link handy would you? Ive been wanting to do this for ages but cant find anything quite the right size
What my friend said here…
Unfortunately there’s no single size that fits perfectly. I got 2 LCD’s from ali-express that fit behind them and then you only use part of the display. Covering up the rest with 3D printed parts and brackets.
My TrackIR is from 2005, still going strong! It’s a 3 Pro with the Vector expansion. Unfortunately the original base gave way a few years ago at which point i made due with a bunch of metal 90 degree brackets. Then I got a new display where this solution didn’t fit either so I printed a new bracket for the curved display and finally I needed a some way to guide the cable and hold it into place. All in all, a fun little project whereby the last part took 3 tries to get right!


