Fridge's Battletech Campaign (spoilers, maybe)

Very nice !
My personal opionion. Always stomp a vehicle if you can. Stomping gives you a damage bonus vs vehicles. Some vehicles carry heavy armour and can hit hard, so attacking them with lasers may take a while.

As for loot. I would always say, When available take mech parts. You can build mechs out of them and keep them, or sell them for money.

But good job and nice work of the tactics! Looking forward to more !

[edit] you may end up with a lot of weapons or stuff you don’t need. Its good to keep lots in your storage, but you can sell excess to help your wallet.

1 Like

I very much enjoyed the AAR so far. You and @Bogusheadbox have got me close to purchasing this little gem. My favorite line in your AAR is the one quoted above…LMFAO! I’m still chuckling… :slight_smile:

3 Likes

I love stomping on things so much, half my lance is semi-dedicated to doing that. The animations for it are great: sometimes they stomp, sometimes they punch, kick or even headbutt!

True story: ~20 years ago, the BT/MW video game community was scared out of their wits regarding melee combat with 'Mechs. They feared it would turn into the above.

haha yeah, and in the game the steam achievements for 5 and 25 melee kills (iirc) are called “Rock 'em” and “Sock 'em” :smiley:

In Heavy Gear 2, going melee meant out of ammo, out of weapons, and down to tickles. It was really ridiculous when bare fists did more damage than knives, swords, and axes.

Mission # 05: Let’s get those ammo containers off of the centre torso (CT).

Been reflecting on what I have been reading and spent a free hour yesterday tinkering in the Mech Bays and trying to get a feel (and remember) what I am fielding and what it can and can not do.

And sitting here a day after I am not sure that I remember any of it. I am sure that moved the ammo containers off the centre torso though, because at least one of my mech is out of service for a few days. In light of that I choose the mission with the least return as I will be fielding two light mechs and two mediums. I am being conservative which is a theme.

I opt for less salvage and more money as I try to make sure I make back the transport/transfer costs and get back above the 1M mark.

Here’s the lance makeup. I have a recruit in the spider to get some XP and my main character Darius ‘Funkel’ Something-or-other-I-forget in the BlackJack. Don’t be fooled by me dropping mech names as if I might have any idea what I am doing.

From the drop zone I see a few approaches to the target: fast down the road to the right, slower off to the left.

I end up choosing the left approach as it offers me some tactical options with a small butte to work around. Arrows show where I previous thought I would be going but as the terrain becomes more visible I am glad that I choose this approach. Still no sensor contact with the enemy.

I opt to spread my forces out a little with scouts on either flank and the main force holding behind the butte. I get a message about the enemy being away on patrol and that causes a little anxiety as I have no idea where they are going to show up. It would be nice if they appeared along a road or something but you never know if a game is going to do that or just drop 'em in somewhere inconvenient. In this case it looks like the former as a light mech (a Locus I believe) walks up the road.

Taking a moment to view the tactical situation from their POV hoping that this little lad is a scout working ahead of the main group. I like what am seeing here - my light (very light) mech is off the the right of the next picture (my left flank) at the top of hill. My other light mech is off to the left (right flank from my POV) is not in a great offensive position but it is in a nice place to harass the enemy.

As I double down on my positioning and use my left flank to try to take a look down into the valley the enemy scout take a moment to back slowly down the road. I like that the AI did this because I think it might be a smart move instead of just letting that gal go down in the volley of fire that would likely occur.

I back my medium mechs back behind the butte to hopefully deal with the main force as it becomes visible. I opt to burn some morale on ‘Vigilance’ thinking that I can move this mech up to quickly respond to the main force which I expect to show up next turn.

What I should have done was hold on to that morale and use ‘Vigilance’ when I was engaged to get the medium mech responding faster to a known and active situation instead of hoping that they would show up.

Instead, I get sensor contacts from my left scout as their scout pushes back into the engagement area. The enemy scouts, in my opinion, are spread out and in a position that might allow me to deal with them individually.

Short term plan then is to pound that forward scout into the road surface; saw some pot holes in the road that seemed to be Locus sized. ‘Glitch’ in the Vindicator and the right flank scout will take shots in that order (because Glitch is all eager after that ‘Vigilance’ call to hit something). I am holding my left flank scout to respond to what happens.

Not getting the hits that I was hoping for but, in honesty, the percentages were not great. This allows their Spider to climb the hill to the left and get in on the action. They must have the same percentages that I have though because they can’t really hit anything either.

Really want to move my Spider (left flank) up and stop their Spider but the hill must be preventing the mech-to-mech combat. I end up moving up, hoping that the evasion I generate will offer protection, and miss my shot.

I was hoping at this point that it would be 1v4 but instead I have to commit my last move of the turn to get ‘Frankel’ up in the BlackJack and try to get that ratio where I want it before they get to shoot again.

Whew. 1v4 means that I can hopefully limit the damage I receive.

Their Spider likes my moxie and decides to drop the gloves and get into a slap fight with my Spider. He does damage to my armour and my Spider … misses. I pull in each of the other mechs and end up missing most of my shots but get a lucky break and take out one of the legs of the last remaining enemy mech. It gets knocked over giving me the opportunity for some called shots. It comes down to the last mech to make if count and get that last leg off.

No significant damage to my forces, the group that contracted me moves in to occupy the depot and ‘liberate’ it’s resources. For a moment I head explosions and get the impression that the drop ship has landed on my right flank mech but no issues there.


My first salvage of any significance. I had dropped my choices down to 1 piece, opting for more money on the contract as the last action my lance was in was against vehicles. I was tempted to take the Spider salvage as it was possible that I might be gifted the additional Spider salvage which would put me closer to having an extra light mech. I end up going for the Jenner salvage as I was impressed with the weapons load it was able to bring to the field.

And I end up with the extra Spider salvage. Oh well :slight_smile:

3 Likes

I think I express everyone’s opinion by saying that we all think big butte are much better.
:slight_smile:

2 Likes

“I like big buttes and I can not lie”?

2 Likes

Mission #6: Got Milk?.

The next mission was a bit of a milk run. Feels like I need to keep doing these to get the money and figure out how to ween myself off the the banks. It feels like its been too long since I was born into the Battletech universe for me to still be dependent on their sweet nourishment (and giving them those interest payments).

That and I need to get my mechs potty trained. Okay. Maybe I am taking that infant metaphor pun too far?

I am going to balance this one for both salvage and milk … I mean credits.

Same lance set up as last time. A couple of my warriors leveled up so I was able to get two with the sensor lock skill. Part of me feels like having two might be overkill (?) but I like having the flexibility of which scout has to spend it’s shooting phase locking a target.

Everything is looking swell.

And another one of those ‘caught them out in the open missions’.

Again, I have left and right options and again I split my scouts to give me quick intel on where the bad guys are. The right scout, the Locus I believe, pulls in the two contacts noted while the Spider stays just behind the ridge line.

I opt for a ‘double reserve’ to let the enemy approach while I move my mediums up to the left scout.

A bit more activity and the engagement plan is coming together. the right scout is burning, I mean melting, a path in the snow while the left scout moves out to a pincer location. Plan will be to sensor lock the first/closest target with the right scout and hit with one of the medium mechs.

With that quick KO (particle cannon versus vehicle ends the discussion quickly) then hold the rest of the force in reserve to respond to the enemy movement.

They opt to close the distance, allowing me to bring overwhelming firepower down on the last two bandits.

And that is that. No interesting salvage. Let’s pack up and get back to base.

Fin.

3 Likes

Mission #7: Sit there and try to look menacing

Next mission is a defense mission. My first defense mission. I am not sure what I should do to defend because I have a feeling that I can’t defend in any depth.

I’m going to go for salvage on this mission because I feel like there will be some mech chassis to add to my collection. Probably nothing particularly useful (stupid Las Vegas Golden Knights hickey team just eliminated the San Jose Sharks - I’m not a fan of either but having an expansion team just waltz their way through the playoffs is annoying me. Marc-Andre Flury is pretty good though).

The lance makeup for this mission will remove the lighter of the scouts in order to bring back into service my third mech, choosing weight over maneuverability. I’ve moved some of the pilots around but nothing significant. I should have reconfigured one of those mediums as a missile pod with legs.

Not a bad defensive position (“It’s over, Anakin! I have the high ground!”). I am going to move my scout off to the right and forward to see if I can squeak out some contacts before they become a threat.

Two moves out and I have a good idea what’s happening.

Those are light mechs, and closing the distance fast.

Trying to get lucky, I throw down a sensor lock on the middle mech (I want to target the guy to the far left of my position but I guess that my scout can’t see that far with their sensors. I use the LRM’s on two of my mediums but don’t do much to slow the target down.

Those little guys move up fast and I am starting to think that I might be in trouble.

They are targeting the building and I am not sure if I can allow that building to be destroyed. It had not crossed my mind that they would choose to engage the structures so fast. If I had, I would have considered giving them something else to spit their fire and fury against. That leaves me reacting about a turn behind where I should have been.

I move out the Vindicator which, incidentally, walks through a few of the buildings that we are trying to protect, nothing significant but I guess we have stock in building material companies (or our banks do) so someone is likely happy.

This starts the chain of events where I feel truely unlucky.

During my turns of missing light mechs with my shots, a second force appears on my right-rear flank. At this point I have destroyed one of the enemy scout mechs, leaving two slightly damaged scouts to keep taking cracks at that tall building.

I take another turn to try to decisively deal with my front before having to react to the second group.

But I’m not doing it right because the RNG engine is handing me a bunch of low rolls (but luckily no critical fail 1’s … yet - and honestly this DnD joke might imply that such a thing exists in Battletech but I sure hope not :slight_smile:).

This leads me to one of my mistakes for this mission … firing arcs. I assume that my multi-target capable pilot (Glitch) is able to start making her way over to my right flank where she would be able to split her fire: direct fire on the right flank units with indirect LRM fire on those annoying scouts. I forget that depending on which way her mech is facing, those LRMs can do a 180 to go after what is now behind her. Here is me cursing the indirect fire arc that disappeared after I had moved! The nerve!

Meanwhile, back at the front, I have directed a second medium mech off to the right flank because additional vehicles have shown up and I do not want some little toy trucks taking down the buildings behind me. That leaves my BlackJack and Spider mechs to bully and playground stomp a pair of Locusts who have stopped doing damage but have not stopped running around and annoying me.

It takes a lot of work and a lot of stomping and head butting but they finally lie down.

Seriously, who coded the BlackJack to head butt it’s opponents. It has a nice glass pilot viewport on the front! When I want to head butt an opposing mech, I want a solid part of my mech to do the job without smashing the greenhouse on the front of that mech into sharp pinching hazards of an opposing mech!

It is a win though and although there was damage to the maintenance compound (I swear those small buildings were like that when we got there) there was also no significant damage to our forces.

I chose the Spider and Locust salvage and call it a day.

Fin.

3 Likes

Mission #8: Protect the conv… No, wait! Get back here!

Next mission, this mission, was supposed to be a story one but once I transferred to the correct system, my monthly payments were due, stripping 270k credits from my account. It put me back into my worry zone.

Luckily there was a second mission on the contracts BBS that offered almost half that (if I went with the 2 salvage choices, which I did). I was not sure it would still be there after the story mission so I gave in to my urge to stay above 1M credits as a safety zone of my own imposition.

This mission is a protect the convoy type and I learnt a couple of key knowledge points.

Lance is the same composition as last time. I am choosing one scout and three mediums, bringing the oompf. During the transit to the system, I had my Shadow Hawk outfitted as more of a longer range strike platform. I need to look into outfitting options because I am not sure I am doing it right.

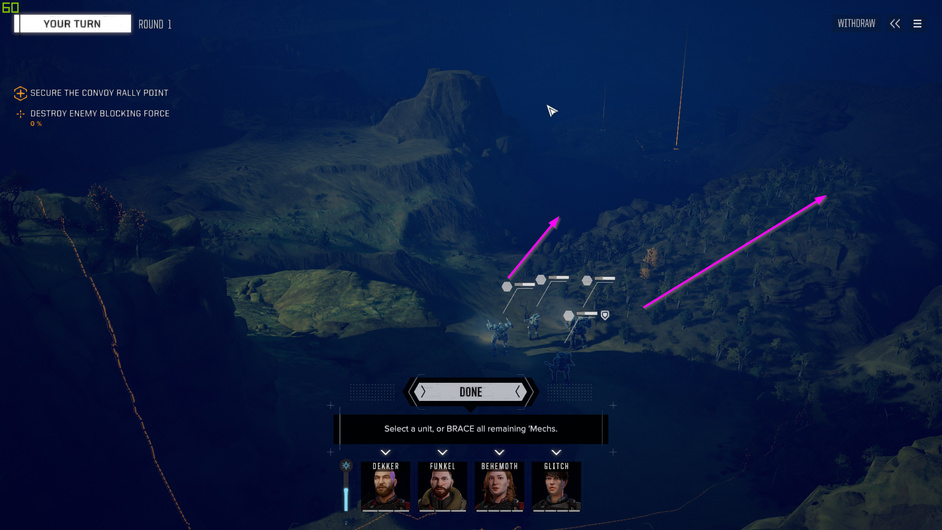
Out of the landing craft and a view down into the convoy mustering area. At the time I thought that I would run into a convoy that needed immediate protection from an advancing blocking force. With that in mind I am pushing my scout out to the right along the ridge looking for early sensor or visual contacts. He is going to blue-move - XCOM reference to moving and being able to shoot after moving, in this case moving and bracing because he is exposed on the ridge line. The rest of the force is going to move down into the valley anticipating immediate contact.

A couple of turns in draws the first sensor contact beyond the mustering point. My scout can, luckily, make it down the ridge on the far side and doesn’t have to loop back and follow my main force.

As I move up, two more contacts resolve themselves as the intial contact destroys a small building. I am confused. At this point I was expecting to run into a convoy in dire straights but instead I can’t find a convoy at the waypoint I expected them at. But, I do have targets and I do love destroying smaller forces than me.

Trying to maximize the damage I can do I take a look at the options that I have with the units that can move/fire in this sub phase. Unfortunately I can not discern which choices have the best percentages. I choose to utilize my multi-target capable pilot again first and let the rest perform cleanup.

Nothing is destroyed this round but next round the damage starts taking its toll on them. A few defensive rolls go my way, keeping my lance in top health.

Get some early melee in on the Jenner and satisfyingly take it out.

My scout gets the last vehicle kill, stomping it into destruction. Unfortunately he went through a friendly building to get there. I’m hoping that the contractee doesn’t notice while also hoping that the building are not housing the convoy (which might be why the first vehicle I encountered destroyed that early building by direct fire).

Bring on the convoy!

No. That’s not… you don’t wanna… get… too… you know what? I’m just gonna try to run and catch up to you.

I mean you have to stop at some point right? I have to send my scout as fast as he can go, to the head of the column and hope I get sensor contacts.

Not getting contacts but if they are sitting in ambush or something, that convoy is going to get whipped and I won’t be able to do anything about it.

I can not get ahead of them. I am sure I saw a message that enemy reinforcements are on the way but either that’s not true, I can’t see them or they are in no position to interfere with this convoy and the idiot that is in the lead vehicle and, I assume, in charge.

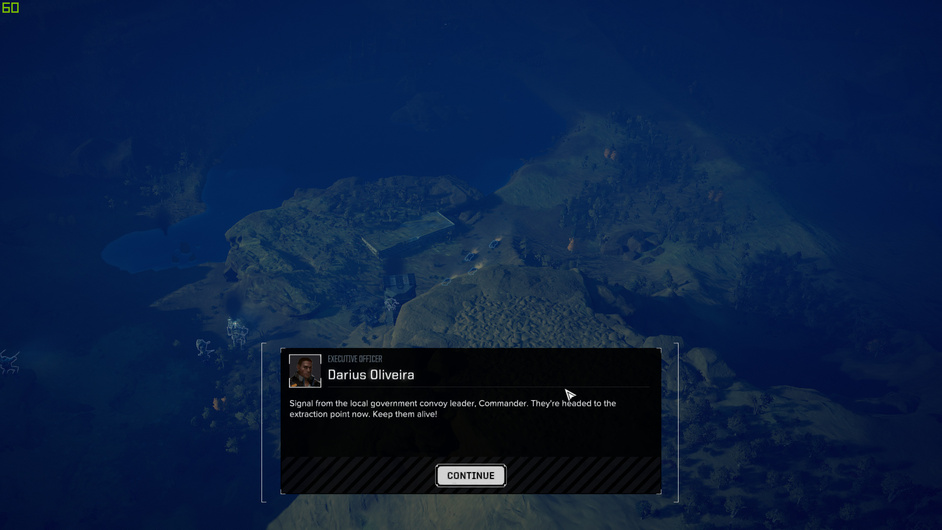
As they start hitting the rally point, the enemy makes it’s appearance. I guess luck is on my side because if they had been a turn or to early I would not have been able to affect a defense.

I move my scout up fast. I have no idea how much damage the enemy vehicle can do to one of the convoy vehicles and they all need to make it home alive. My plan is to my the scout up with the intent of pushing something in front of enemy that they might want to shoot first. I don’t see a reason to change that plan because I also do not know if there are any long range weapons that the enemy might bring to bear.

Now I have a choice to make. I can try sprinting Glitch in the Shadow Hawk up a similar blocking position or I can blue-move her and burn Vigilance which will let her move early next turn, with the scout, ahead of the known enemies. I think that this will give me good options at the start of the next round.

All the other mechs do their best to get into position moving as fast as they can. There is no good position along the road and the game doesn’t do opportunity fire.

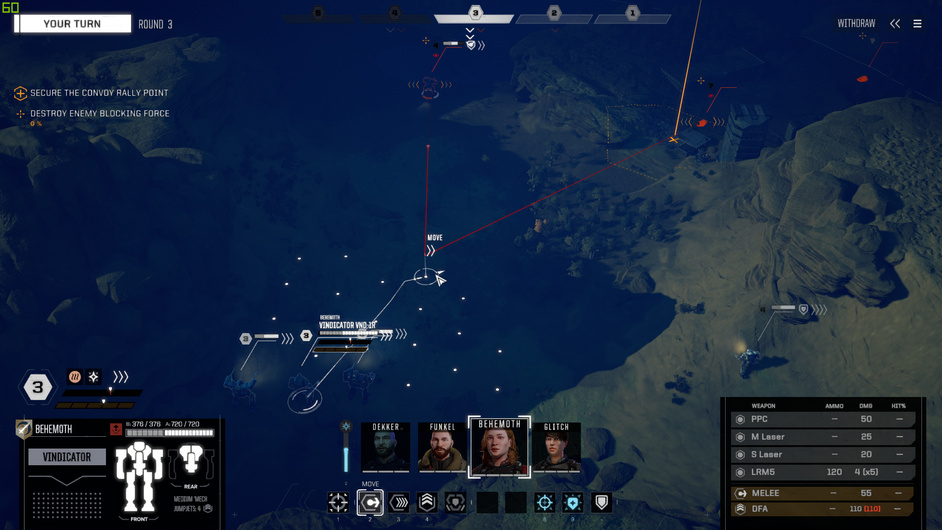
Next turn is looking good. I start to survey my options with the scout first. I am not sure that I can move up and melee the vehicle if I only have a sensor contact at the start. It looks like I can?

I take a look at what options I have with Glitch and she can get into a position that can fire on that lead vehicle. That gives me the follow-up option to attempt a melee with the scout or, at minumim, get it in place for next turn.

Lets see how the shot goes…

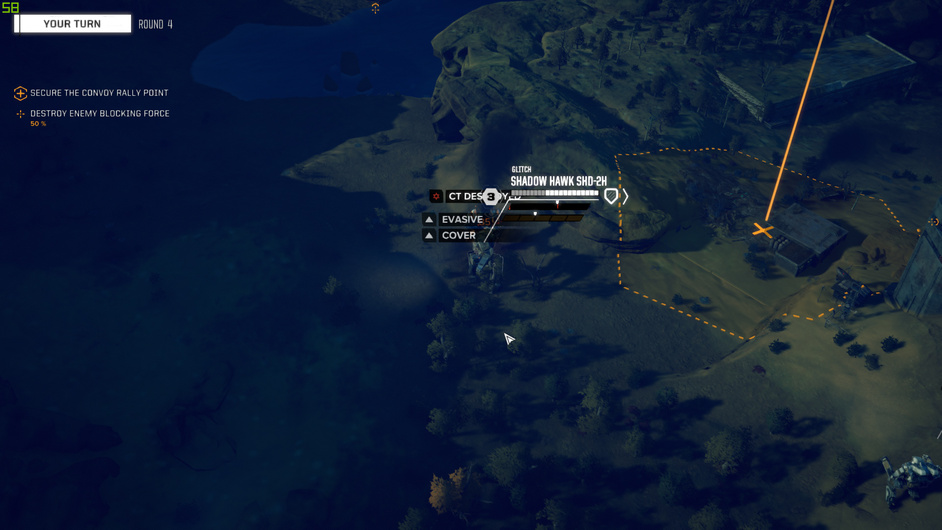
Yes! I figure it was a good plan to move the scout up anyway so I do that. Moving up I reveal an enemy mech. Since Dekker moved instead of sprinted, I can try taking advantage of a sensor lock so that one of my two very slow mechs with LRMs can take a shot. It’s not a high probability shot.

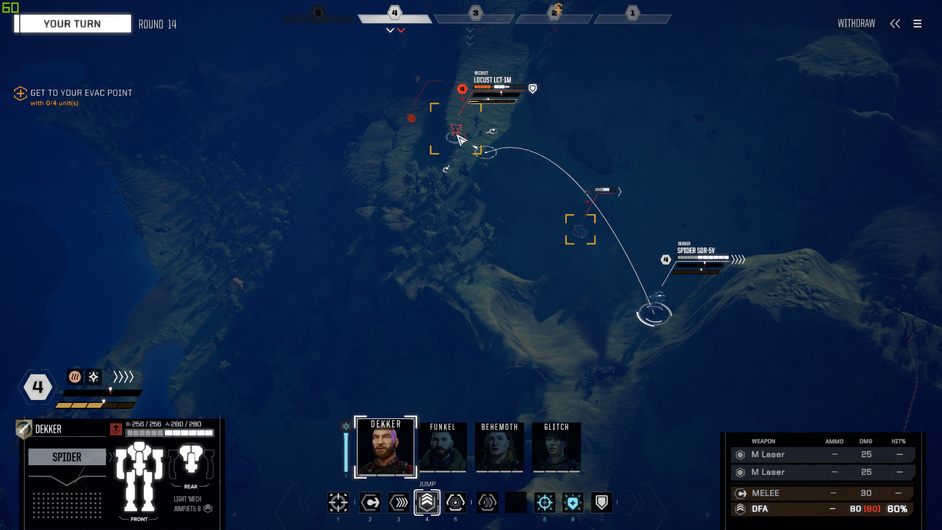
Down to my last mech move of the turn and I can’t figure a way to get him into the fight. I take a look at the jump range, and there is a spot in the water to the left where he can shoot from … if he can jump and shoot in the same turn. I don’t know if that is a thing or of the jump will act as a sprint. I figure I am in a decent position to try it and the enemy mech has LRMs, so if I can make his day very interesting for him, he might make different decisions.

This is the first time that I have jump my mech in anger.

And it works! I have some decent shot percentages with the autocannons. I had hoped I could do a full alpha strike (all weapons) on him but I will take what I can get.

Odd thing. You will notice in the previous screen shot that the task list says: “2/4 unit(s) for 1 Round(s)”. There are 2 convoy units in the rally hex. When I read that I assumed that I needed 4/4 units in the zone for 1 full round (ie: a full round after the fourth unit gets in the ralley zone). Seems straight forward right? No. As soon as the fourth unit entered the zone and the turn ended, they lifted off in their cargo ship. Seems a little cheap that they could be moved into the zone and achieve the time period on the same turn (or part of a turn as the case is).

Moral: Don’t play board/table games with me because I would have had them sit there for a full turn after they arrived.

Anyhoo…

Top of the next turn and Dekker in the scout can … Oh my! He can jump too! Does this mean he can rain death from above or is that an specific skill that need training?

One way to find out!

Yaessssss! Really wish I had zoomed in on this one!

Two enemy vehicles left! Against 4 well positioned friendly forces. It’s over before you ca…

Good payout gets me over half of the monthly financial losses (I mean costs) back.

No significant damage though I am curious how much of a repair build that last jump is going to cost.

I opt for mech salvage. Not sure if I should have gone for one of the autocannons or LRM launchers though.

Fin.

3 Likes

Any mech that can jump can DfA, it is not a specific skill but I think Guts modifies it like a melee attack.

I modified the Vindicator to remove the jump jets and replace the LRM5 with an LRM10. Dropped a heatsink as well I think to fit it. Makes it much more capable in the long range role. Shooting from the back on sensor locked targets doesn’t need to jump. YMMV.

Watch your heat level on your mechs as you fight. If you shoot everything every turn and never generate any heat you have too many sinks. Pull one and add something, even if it is just more armor.

If you have a mech that you melee with regularly add a machine gun to it. It will shoot the bad guy after the melee.

3 Likes

Mission #9: Mistakes were made.

The next mission is the story mission and I am going to skip most of the details on this one because it might give too much away; it might take away any anxiety you might feel going in. That doesn’t mean that there are lessons that can’t be learnt. I am not sure if I have double, triple or quadruple negatives in there but who are you, my editor?

Here is the lance that I fielded. I made good advantage of the time in transit to refit the my Vindicator much as @Tankerwade suggested. The Vindicator makes more sense fulfilling this role as it seems to have more tonnage to give to LRMs, especially when you take off those jump jets. I did not have time to return my Shadow Hawk to something closer resembling the original configuration so I have two mechs that can LRM targets that my scout can sensor lock. I am going to take advantage of that.

But, first things first. If you get to this point where you are ready to launch the mission but remember that you have not leveled up your mech warriors, fear not as the functional Esc key will take you back far enough to do that. You can then get back in to where you were before by following the same path (and the same, or other, dialog options). So, gentle readers, remember to get those mech warrior skills in place before you land your mechs.

I have no real reasoning behind my skill choices at this point but I do seem to be bee-lining it to max the two skill paths that each mech can specialize in. That is likely not worded good (sic) but it means that you can only choose those special skills for your mech warriors in two trees. Once a warrior has two skill paths with special abilities, the other paths loose their special abilities. You can still add more Guts to a warrior but they just can’t get the specials.

When I first hit the screen below I honestly thought that the quote was attributed to our own @DeadMeat! I mean he might have said it, but the game has erroneously given it to Deadeye … whoever that is.

Mistake #1: When you ‘Death From Above’, you damage your legs. You probably don’t want to do that at the start of the mission as it just makes everything else with the damage mech a little more risky. It is very satisfying but this vehicle could have easily been dealt with without the extra damage to my scout;

Mistake The Second: Do not, and I mean this in the nicest way that is both shouting at a new recruit yet trying to be parental, do not run your scout up next to a medium mech to engage it in Melee thinking: “I wonder if I can knock that guy down”.

Poor Dekker was mercifully punched in his mech chest, which resulted in his implement of battle becoming a pile of screws and Dollar Shave Club razor blades. Unfortunately Dekker was not removed from his mech before the process started.

I was able to retrieve the mech at the end of the battle but there is so much damage done to it that I think I can just build substitute one more easily and leave this old one in a small box. The mech-techs were able to scrape what was left Dekkers remains out of the ‘cockpit’ andI found a mustard jar that now holds all that is left of this brave pilot up on a shelf.

Another Mistake: I don’t want to count them anymore because it is all so depressing. Make Called Shots or Precision Strikes but please, when you do…

…remember to select all the weapons that you want to hit with. If you don’t, someone is going to retaliate and remove some of those weapons for you as you obviously don’t need them.

In this case I was lucky and the big mean mech was angry about the ones I did use, removed those, and left the ones that I didn’t use. I used those later.

And here is what I limped out of that battle with:

Rest in peace Dekker. It will not be the last of these virtual mech warrior lives that a extinguish - I just hope I do it more on the enemy side than my own.

2 Likes

Ouch. Sorry for Dekker/jam.

1 Like

Nice job. I lost Behemoth last night. gruelling two hour ordeal that left all my mechs in tatters and out of ammo. two-and-a-half is a tad much for my lance it seems. Wiped that save, will take that run even more careful next time. yeah I’m a save-scumming illigit child.

3 Likes

We love all of our children the same way. :relieved:

1 Like

Mission 10: Gettin’ the Rookie time in the 'pit.

I am doing a Battletech Campaign, inspired by @Bogusheadbox’s Battletech AARs and discussions, until I get bored. If you are interested, please join us over at the main thread for discussions, strategy and tactics:

Mission #4: Frankel’s return to service the lazy sod - here;
Mission #5: Let’s get those ammo containers off of the centre torso (CT) - here;
Mission #6: Got Milk? - here;
Mission #7: Sit there and try to look menacing - here;
Mission #8: Protect the Conv… No, wait! Get back here! - here;
Mission #9: Mistakes were made. - here;
Mission #10: Gettin’ the Rookie time in the 'pit. - here;


Mission AAR

I’m trying to avoid save-scumming (which is something that I tend to do a lot in XCom when I feel that I have misunderstood a game mechanic). I’m just gonna go with it here and try to get out of the habit :slight_smile:

With the sad loss of … what’s his name again? -checks notes- Drekker? Drecker? Travis? Anywhoo… we had an opening in the starting lineup so off we go to the government funded job search line, looking for someone who will blindly take orders and not complain :slight_smile:

Turns out Ghoul is is call sign … which tells me he might be related to deceased Dekker, maybe a science has re-animated his body.

Next mission is a one-skull one that I hope will not be too taxing on my resources as I get a new main scout resource trained up before I hit the next story mission. I believe it is a two-skull mission so I am a little afraid of going in with a green rookie.

I have the Jenner in place of the Spider wreck (3 destroyed parts, 3 heavily damaged parts and one intact head, left torso and arm - I am seriously considering just junking it). So, here’s the starting line up for today’s match.

Lets get the scout up front and get him in contact fast. I want to see if he is can at least take a shot before I invest in him :slight_smile:

He does well enough. I like his audio commentary - a little more fun that the previous scout (poor Dekker).

We hit the Commando on the left hard enough to encourage him to retreat a little.

The scout continues to harass him while the main force re-positions against the enemy mech on the right.

And I get a really lucky Aplha Strike on the right mech, taking out a leg fast and knocking the bandit flat.

Commando on the right has had his thorns pruned and can only run while a called shot on the sleeping mech takes off the additional leg and it’s 4 on 1. I come out of the engagement with no significant damage.

And a good set of mech salvage. I chose the Commando salvage (2 pieces and they gave me most of the rest of the locus pieces - enough to put together a spare.

I take a quick look at the market and the Spider repair bill. It’s 204k C-bills if I sell it and 148k C-bills to repair it (opportunity cost of 352k C-bills → sale income + cost savings of repair bill). I can buy a new one at the same location for the same amount. In the end I respect Dekkers sacrifice and set up the repair schedule to get the Spider back into serviceable condition.

Time to move off to a new location for some additional ‘training’ missions as I move systems to the next story target.

Fin.

3 Likes

Mission #11-#16: The Churn.

I am doing a Battletech Campaign, inspired by @Bogusheadbox’s Battletech AARs and discussions, until I get bored. If you are interested, please join us over at the main thread for discussions, strategy and tactics:

Mission #4: Frankel’s return to service the lazy sod - here;
Mission #5: Let’s get those ammo containers off of the centre torso (CT) - here;
Mission #6: Got Milk? - here;
Mission #7: Sit there and try to look menacing - here;
Mission #8: Protect the Conv… No, wait! Get back here! - here;
Mission #9: Mistakes were made. - here;
Mission #10: Gettin’ the Rookie time in the 'pit. - here;
Mission #11-#16: The Churn. - here;


Mission 11-16 AAR(s)

Being a little bummed out about the Syfy dropping the expanse, I decided to churn through a few missions that were the bridge between me and the next story mission. I could have just jumped the few systems to the target but I thought that it might be a good idea to get my new scout rookie some additional experience (ie: skills upgrading).

The plan was simple. Find a mission that would take me to the next system in the chain to cover the travel expenses, play with some mech configurations on the way, and churn through any missions that I thought I could handle before repeating the process to the next system.

Mission 11: Convoy Ambush

Simple enough but it did teach me a lesson to not underestimate the actual convoy itself.

Convoy was spotted travelling along a valley floor. The ridge provided rough terrain but also an opportunity to split the escorts from the convoy.

While the main force dealt with the scouts, I pushed my scout up to intercept the convoy … where he took the brunt of a number of LRM shots. It seems to me like the AI loves to pound on your scouts!

I have become convinced that always having the scouts moving (ie: generating evasion) is close to critical for keeping them alive. Remember that if one enemy can see one of your units all of the enemies with LRMs can fire on it.

I ended up moving my scout up way ahead of the convoy until the main force could piviot to engage.

Ended up with a fair but of damage on this one but it wasn’t too tough.

Mission 12: Locate and Destroy

An enemy lance is around here somewhere and we want you to root them out.

One of the brighter maps I have run into (maybe my gamma is too low?). Pretty straight forward though - scout off to the right, main force up the middle.

Nothing to write home about.

Mission 13: Clean up In Aisle 4

We engaged some pirates somewhere around here and we didn’t completely wipe them out. Can you do it for us?

Another nice map!

This time I am on to something different. I am trying out a skirmisher role, which as I understand it is a mech that is a somewhat close-in fighter - something that will close with the enemy and occupy them while your main force can pound on them from afar. With only 4 mechs in my lance, that means my main force drops to 2.

I like how everyone in the lance was inspired as the last enemy gets stomped to the ground. Everyone standing around enjoying the action :slight_smile:

Mission 14: Vehicles Annoy me

Nothing stands out in this one other than the reinforcement of either staying out of sight until you engage or engaging in a way that ends quickly. The longer the enemy can see you the longer those LRM armed vehicles can wear you down.

Advancing on the main force…

… while the vehicles annoy be from the rear.

Leads me to a repair bill.

But there is a PPC on the field, so I can claim that as a spare.

Mission 15: Capture the Base

Ooo. Pretty.

Move in and I can’t find the enemy patrol force. I can, however, sensor lock some turrets and destroy them with my LRMs.

For a while I do this from behind some hills but then I realize that with my long range beam and auto-cannon weapons I can hit them from farther out than they can hit me. And, their patrol has not returned yet so I have complete freedom to do this from range.

By the time that their patrol does show up I am free to use the base as a center to maneuver around.

And I can move up to smash 'em once I whittle them down.

No damage. Movin’ on.

Mission 16: Moar Pirates!

Steady diet of pirates in these systems. Must be a terrible place to live. I wouldn’t want to retire here.

Ghoul, the replacement Scout is starting to fulfill a role of skirmisher - which I think that I want Evasion and Bulwark on (Evasion because he can move and generate lots of … evasion … and Bulwark because I think it leads to a good Melee skill in the second tier? Could be wrong).

Turns into a bit of a slug-fest as I am facing more medium class mechs. I get some lucky hits on the first bandit.

We fight it out around this rough terrain patch.

And I am not liking the enemy Blackjack. Too many weapons it can bring to bear. I ended up taking mine out of the lance rotation in favour if a Centurion but whenever I face them they end up doing some nice damage on me.

Lesson from this mission is that Heat damage translates into repair bills. I thought that I could push it a little but either I pushed it too much or hitting the ‘Overheat’ band on the heat tape is a no-go-unless-you-have-to place.

Not too bad though.

Fin

2 Likes

Armor damage is repaired automatically and for free. Structure damage has to be repaired for cbills and time. Overheating damages structure inside the mech, so don’t go over the overheat limit unless it is a strategic necessity like a killing blow before being killed or the like. If you are in a bad spot and super hot use your Vanguard morale skill to protect the mech and clear the heat.

Each pilot will get three skills - two from the four in the first column. and one from the four in the second column.

Bulwark is widely considered the best skill by far. It gives you a free Brace when you don’t move the mech. So if you stand in a forest hex and shoot away it will give you a free brace which protects you when you get shot back. Every pilot should have it unless there is a good reason to not, and there is only one -

If you have a pilot whose job it is to move a lot you would go with Evasion in the first column instead. Evasion and Bulwark don’t work well together for obvious reasons: Evasion gives a bonus when you move, Bulwark gives a bonus when you don’t. It’s not that you can’t put them together, but you would be missing out on the symmetry of another skill for that pilot.

A good Bulwark pilot would be: Bulwark | Sensor Lock | Master Tactician for an LRM shooter or pair it with MultiShot | Breaching shot for a brawler.

A good Evasion pilot might be: Evasion | Sensor lock | Ace pilot so they can move to contact with evasion pips, sensor lock unknowns for LRM fire, and then shoot/move/hide when things get hairy.

My lance always has one pilot with evasion (the rabbit) and three pilots with bulwark, the LRM pilot (Artillery boy) with Tactics pips, and the brawlers with Gunnery pips.

Juggernaut looks like crap. Don’t know for sure, haven’t dedicated someone to it to see, but I hate melee. I like shooting the weapons with the pretty colors.

3 Likes