@Troll is correct. Driveshaft rises vertically to the sail driving a small cog. Two belts transmit power (with a
rpm reduction) to the big cog. This is not a great photo but the best I have.
Why no windscreen? It’s an ag drone destined for Oz.
@Troll is correct. Driveshaft rises vertically to the sail driving a small cog. Two belts transmit power (with a
rpm reduction) to the big cog. This is not a great photo but the best I have.
Why no windscreen? It’s an ag drone destined for Oz.
The ultimate RC Heli!!
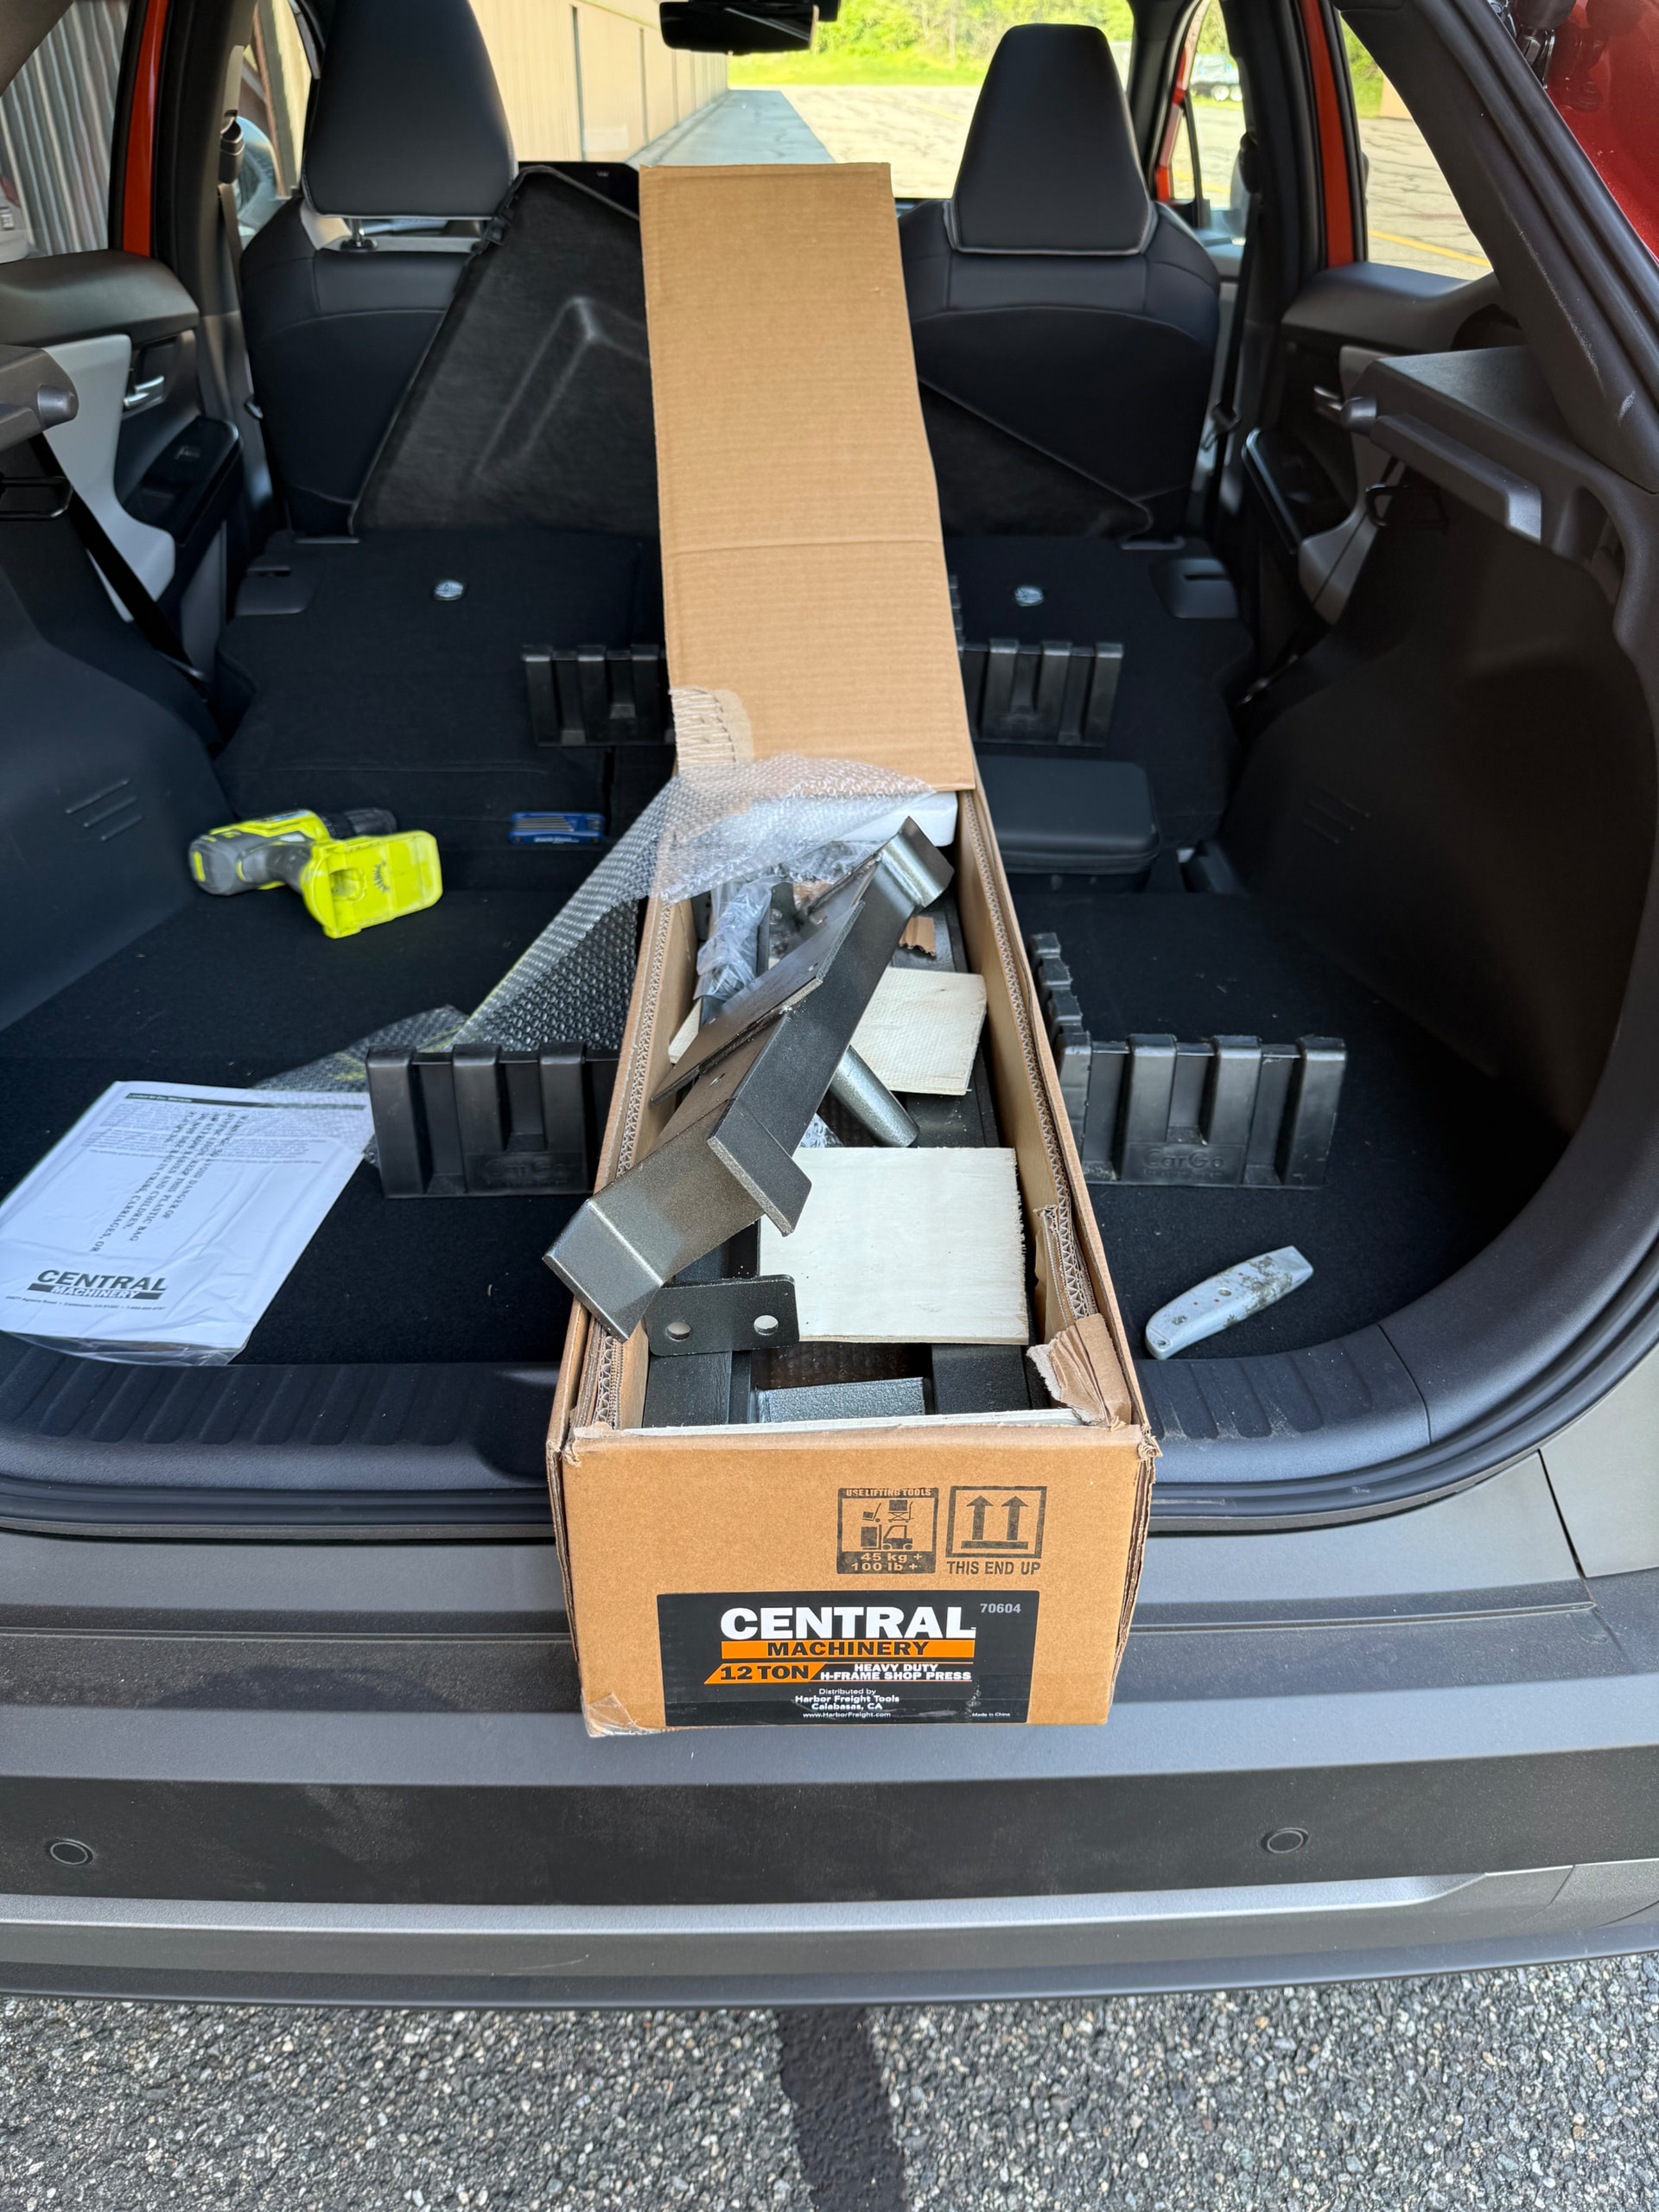
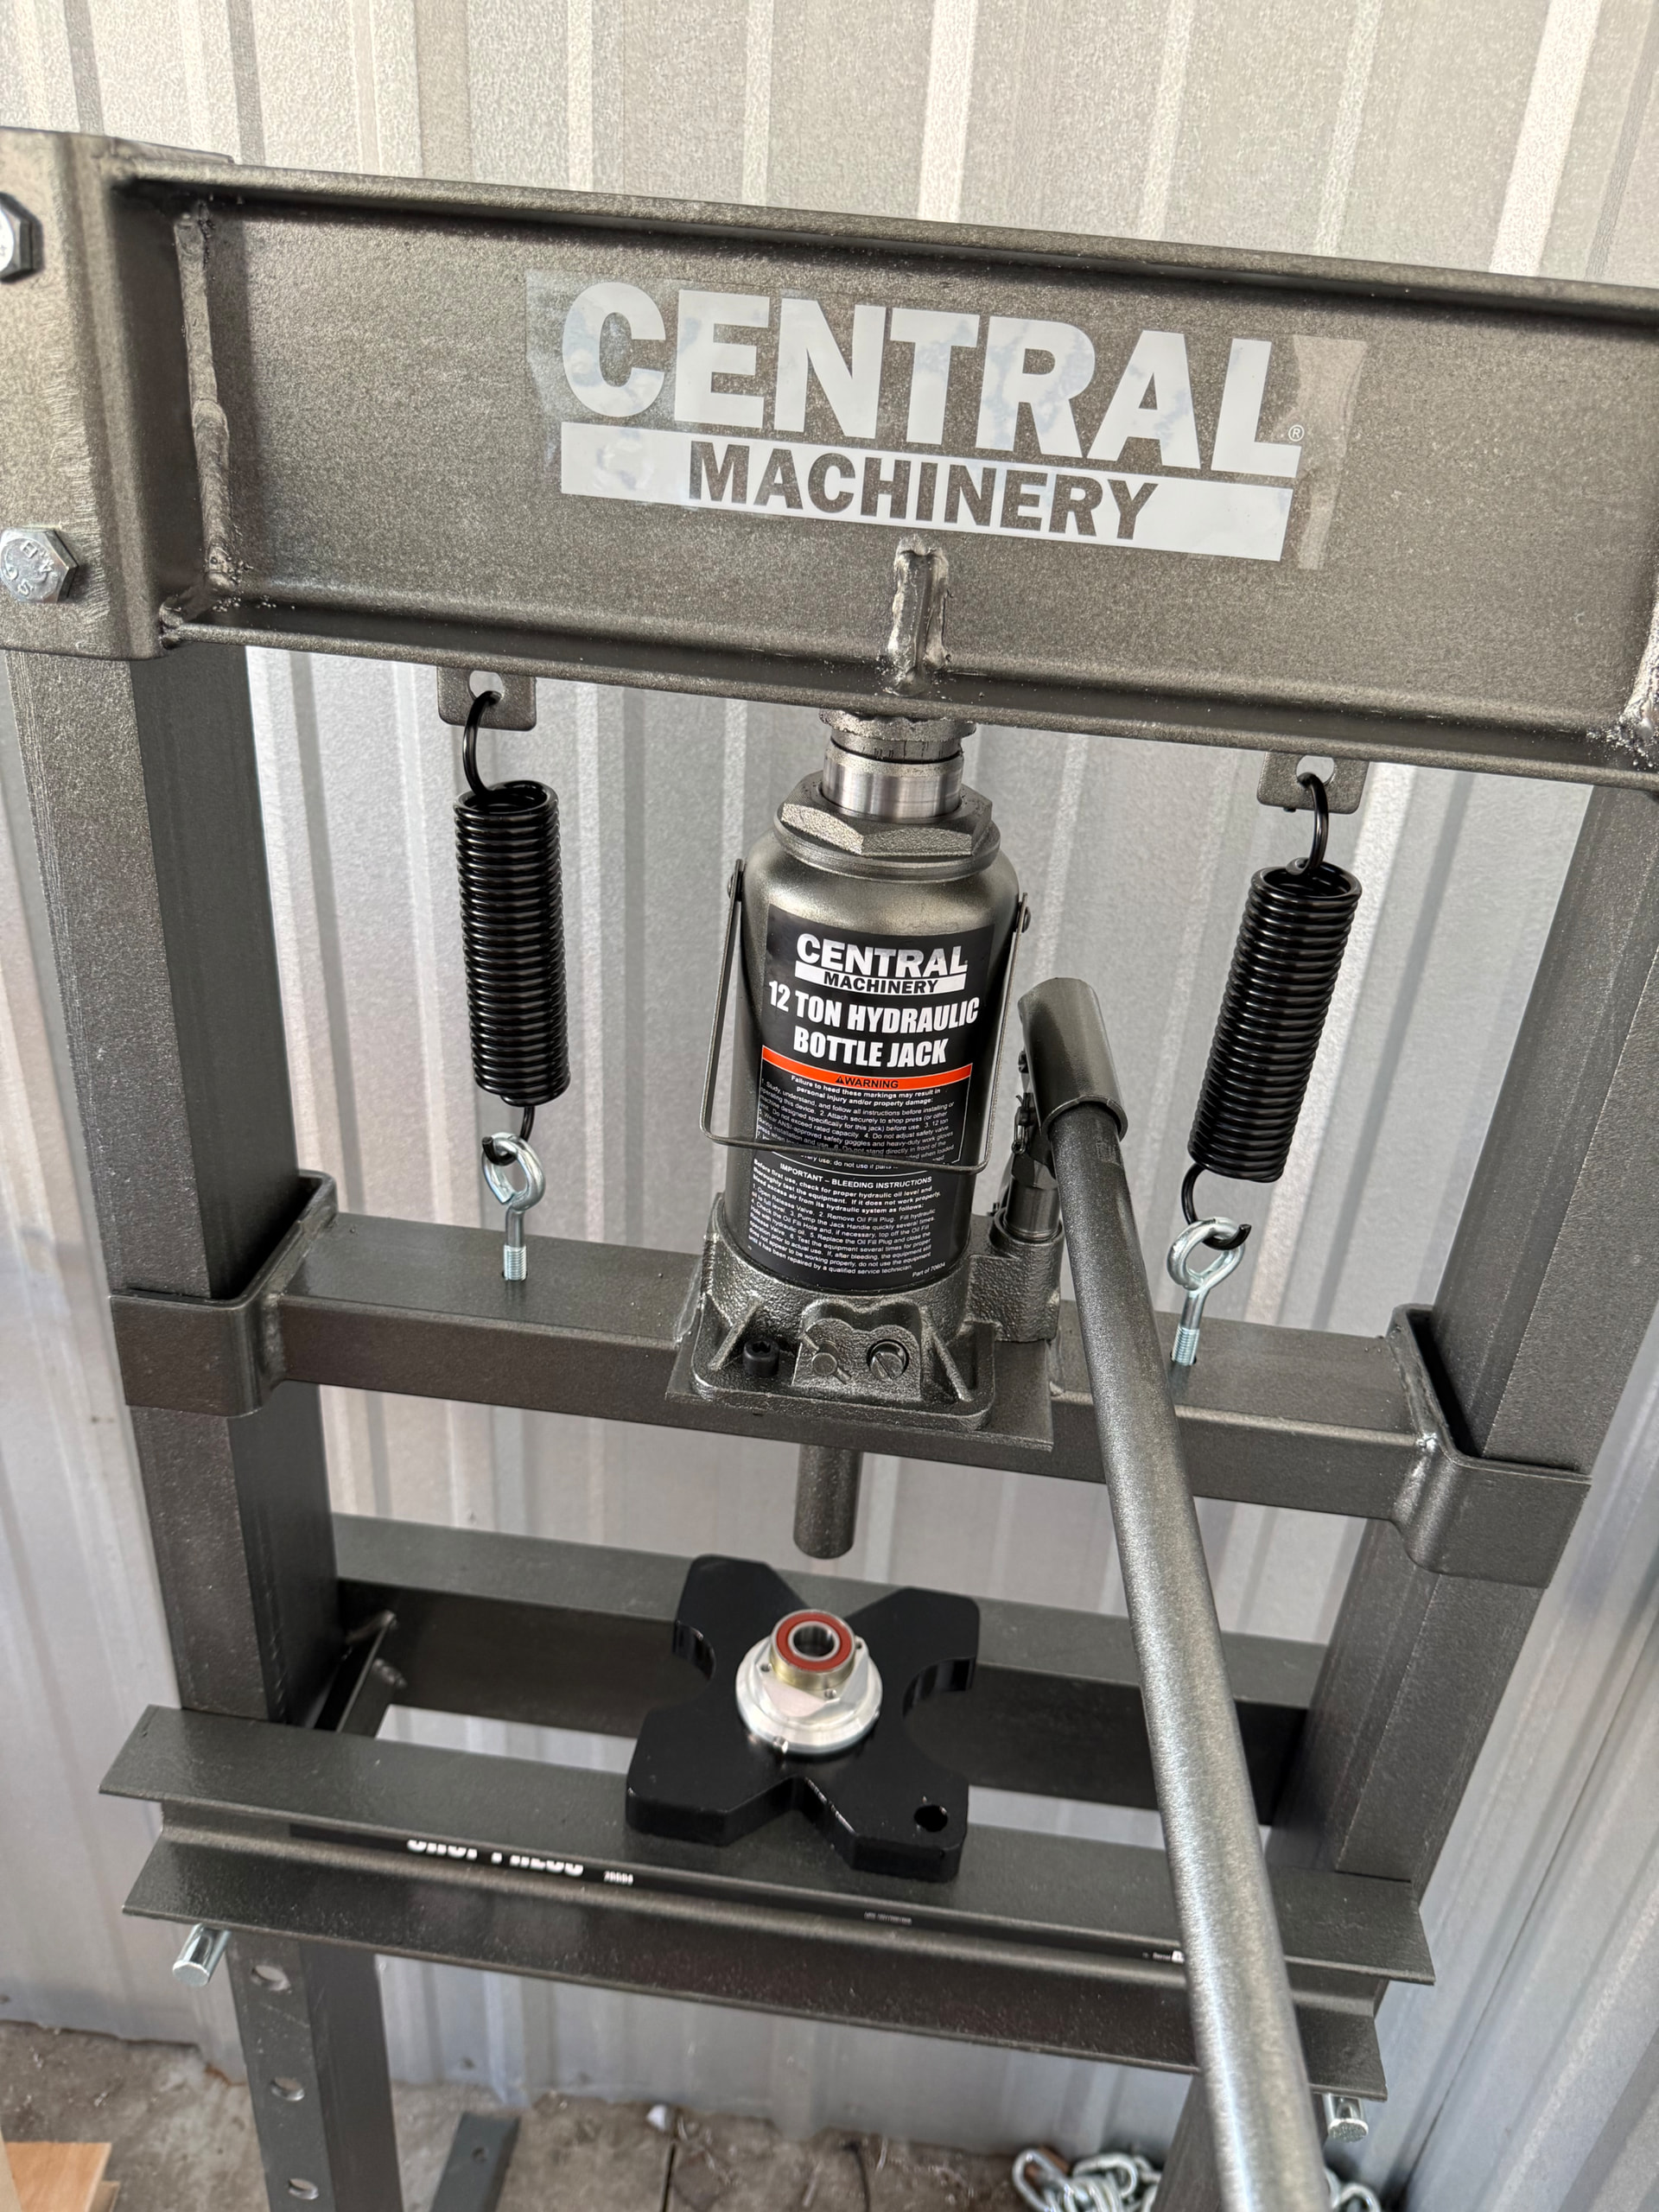
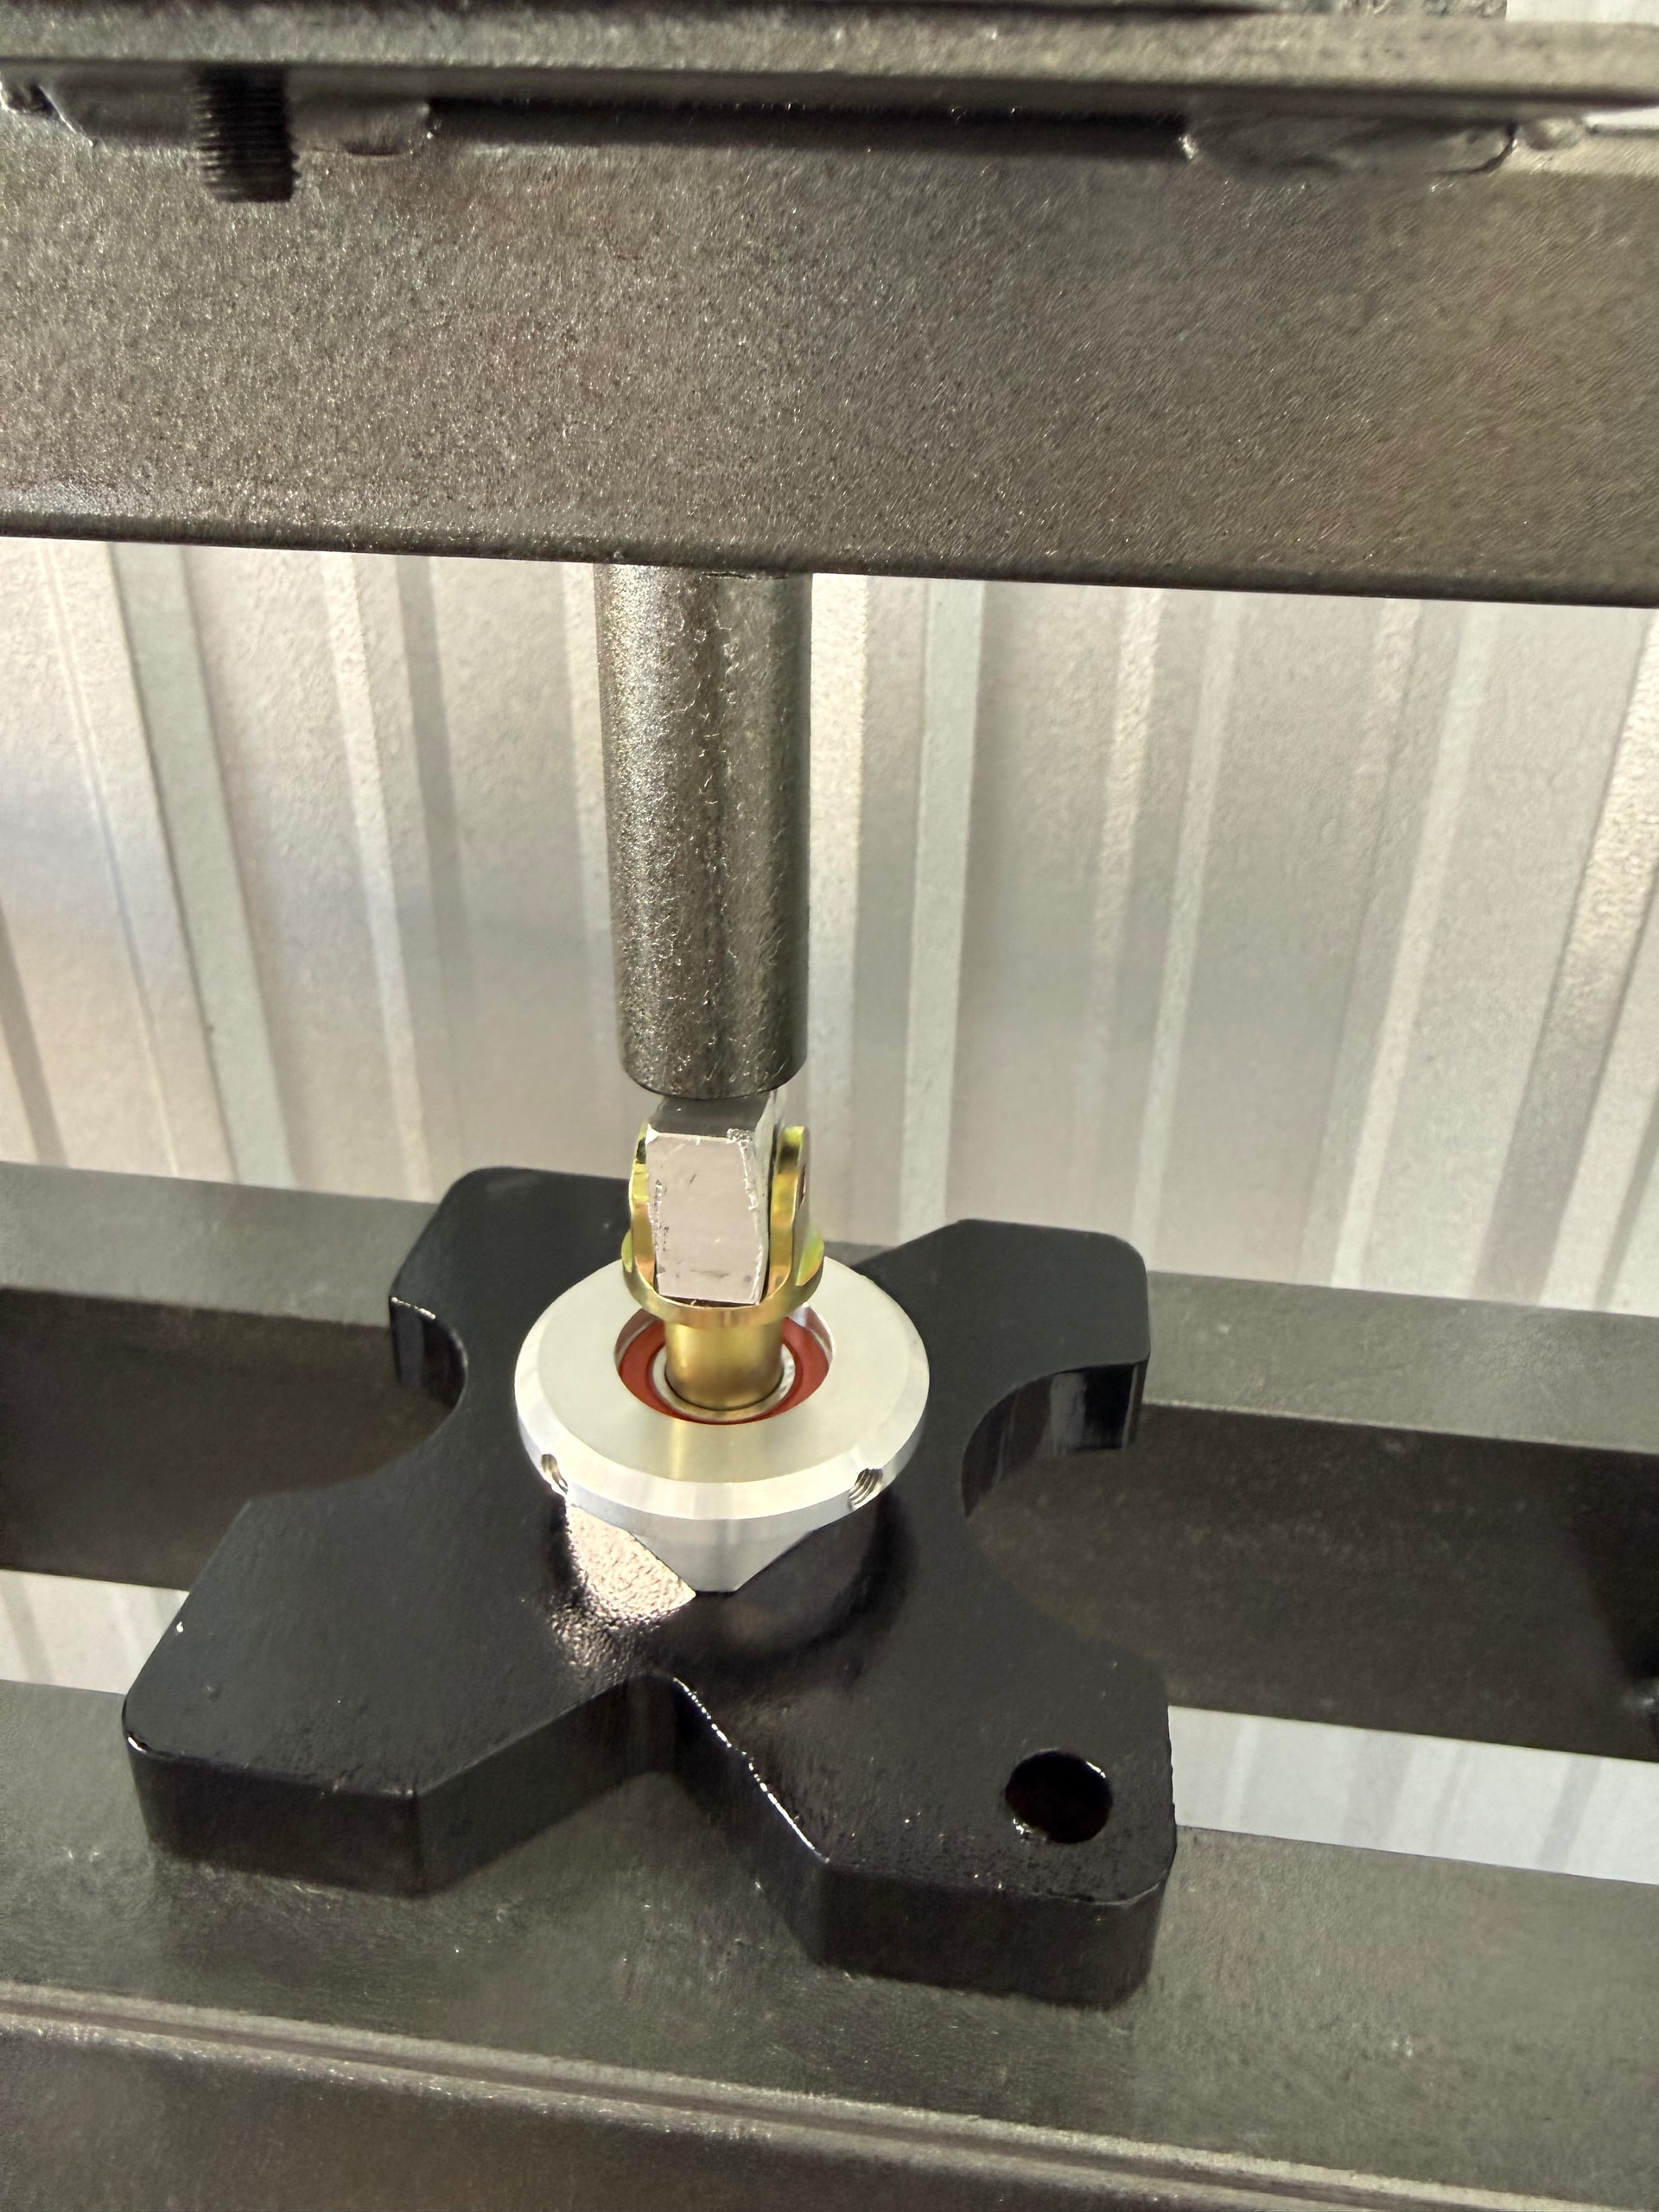
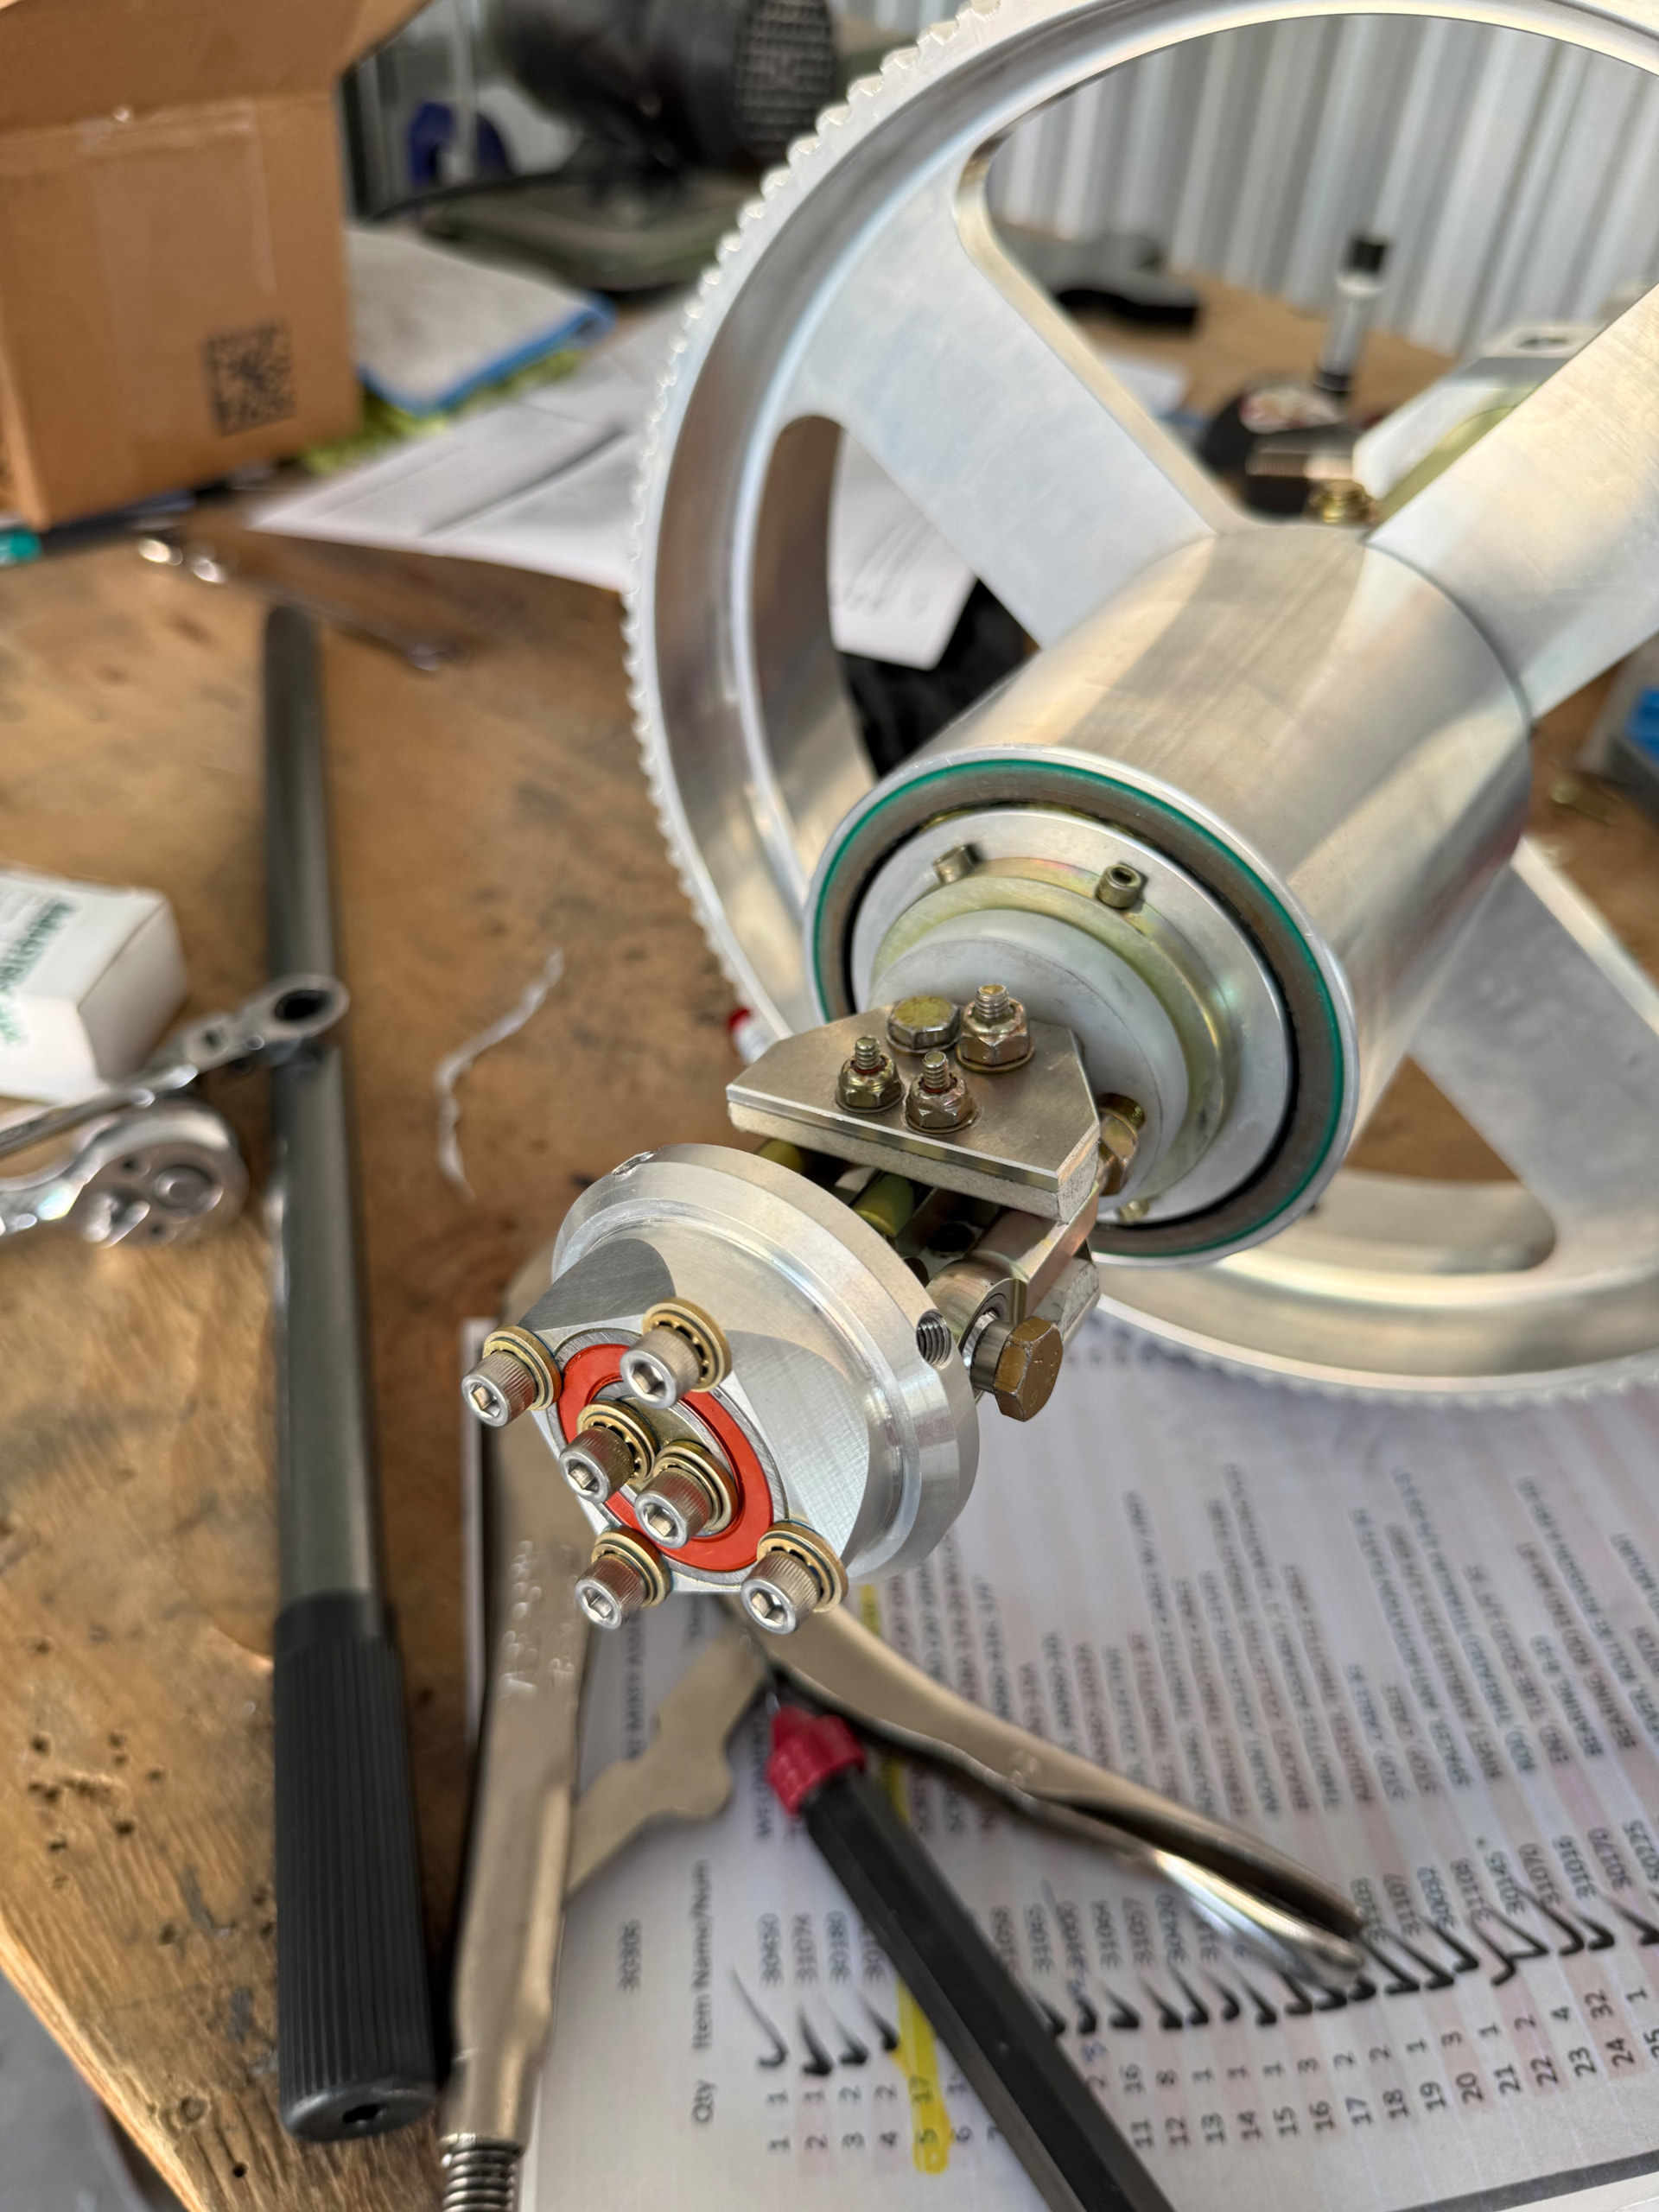
I had to buy a press so that I could assemble the swashplate and its two stacked bearings. Sparing no expense I chose a mid-tier offering from Harbor Freight.
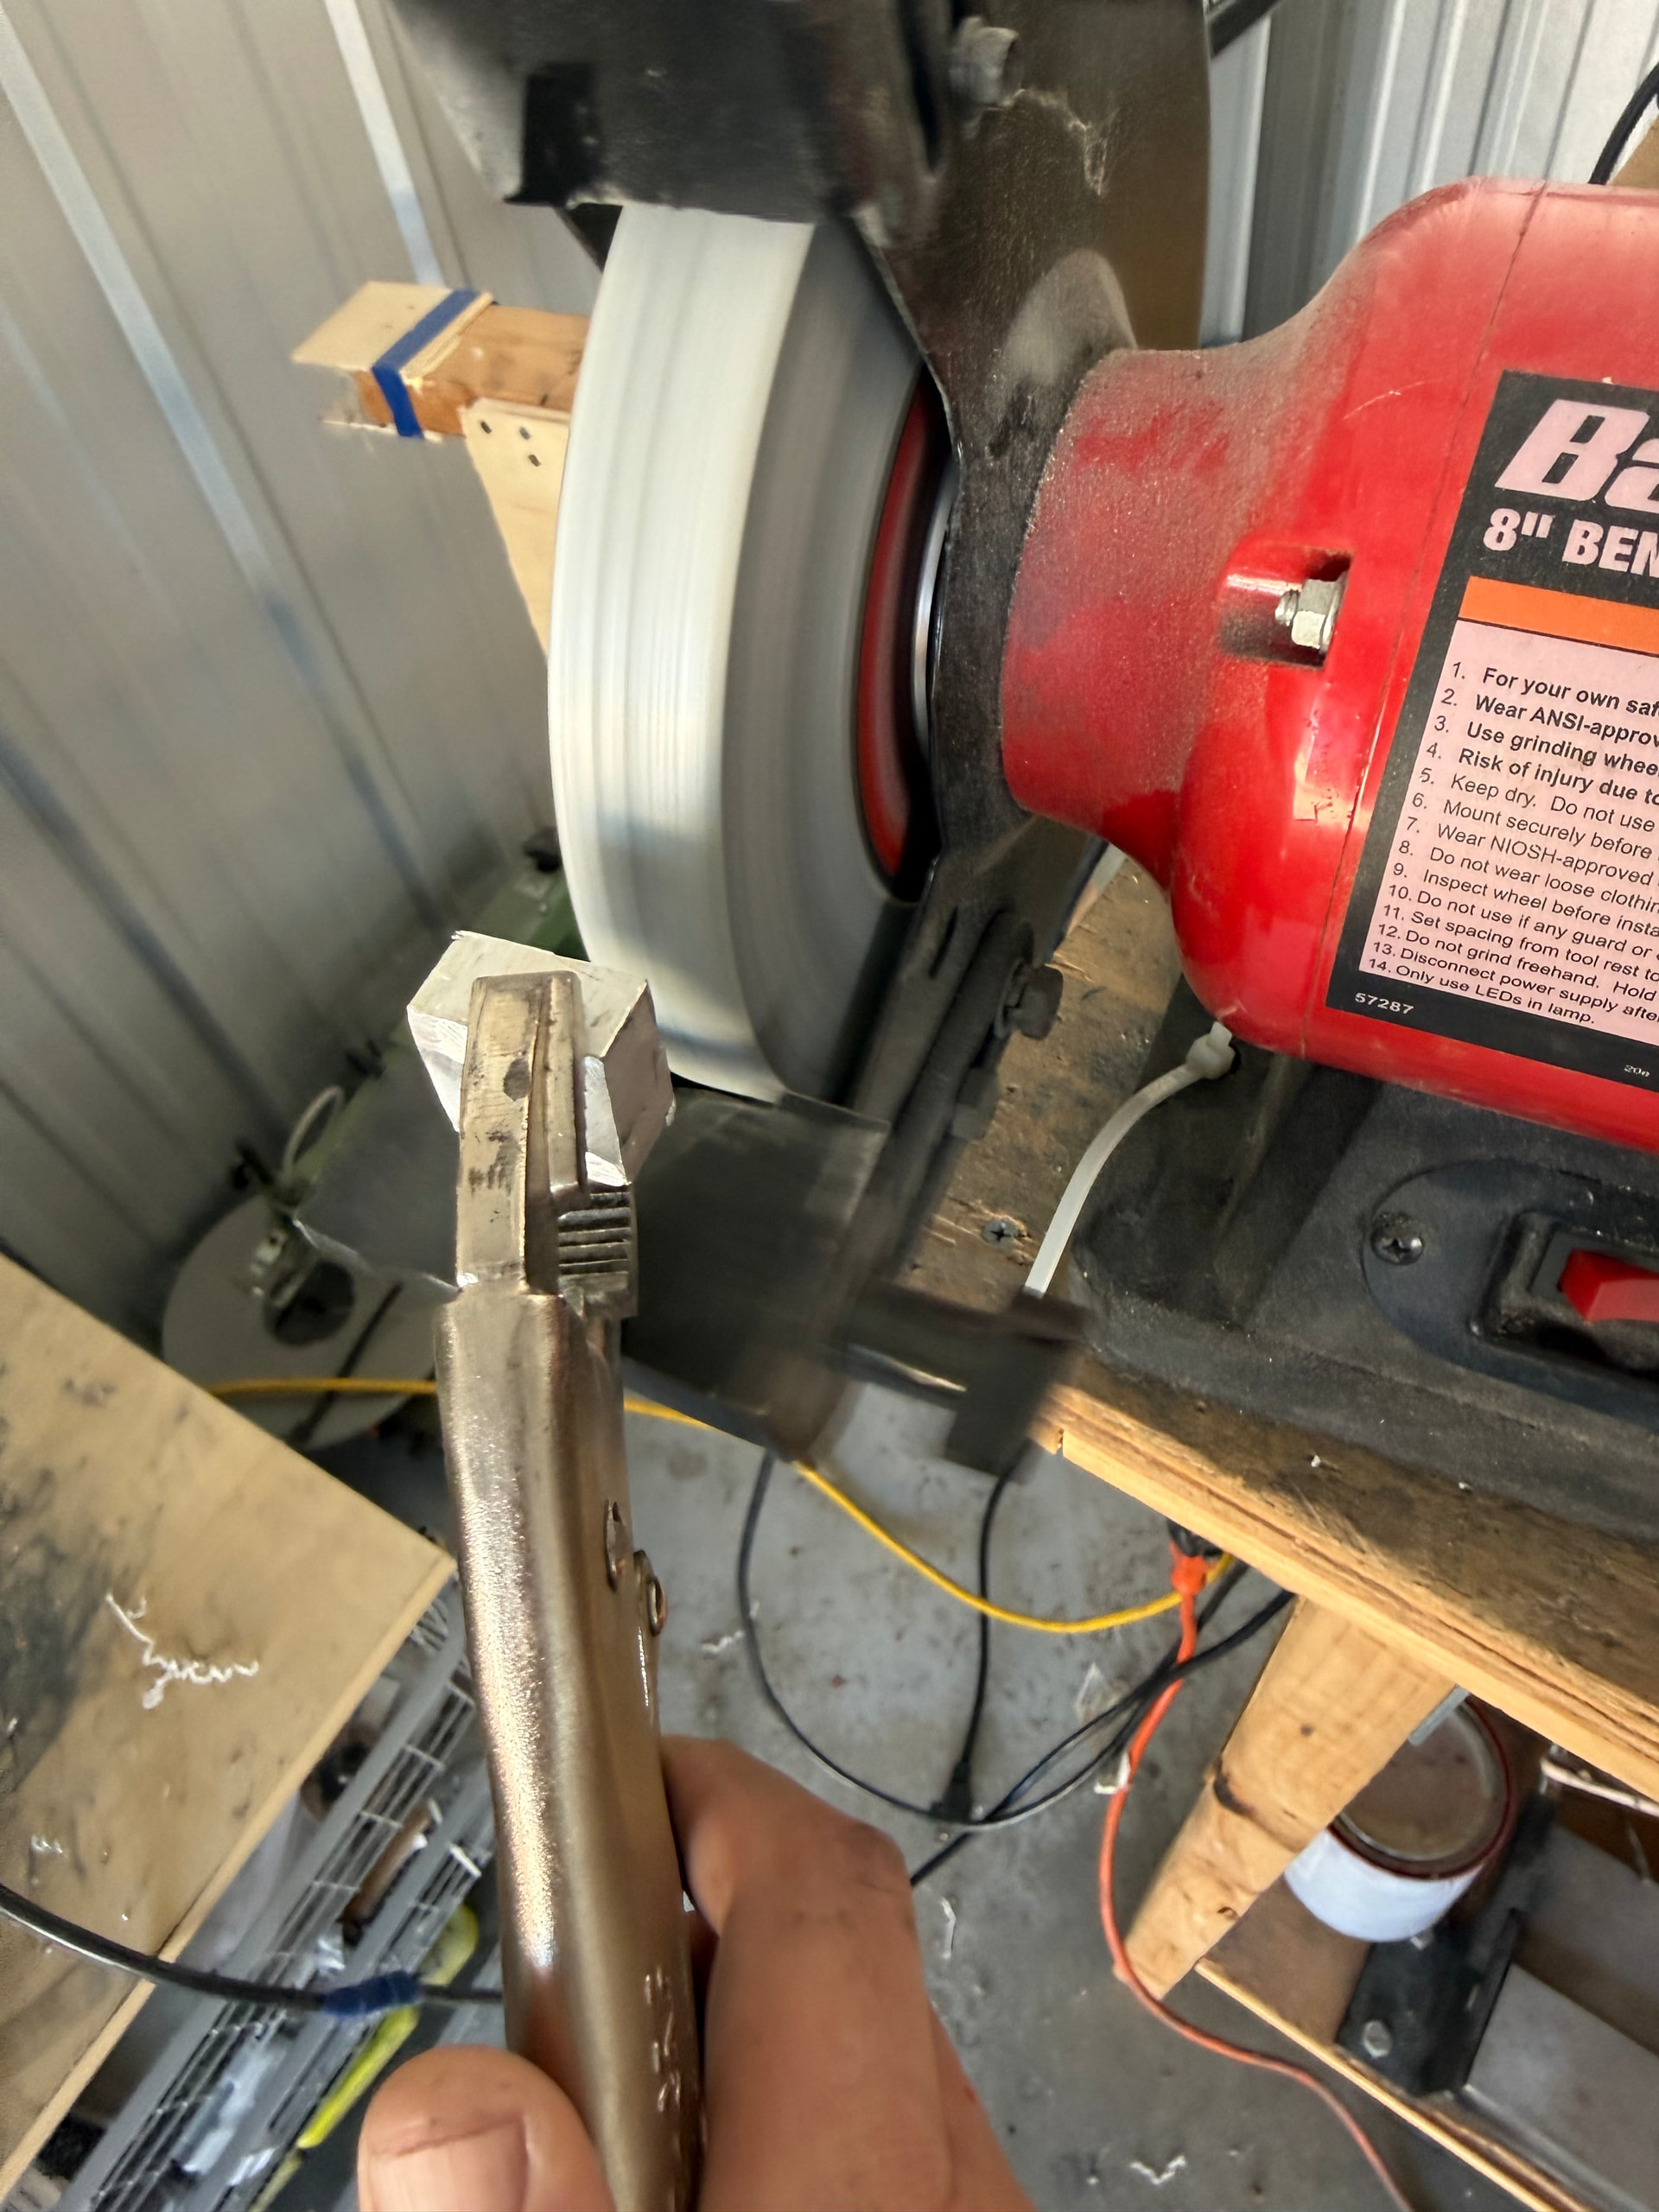
I had to fabricate a buck to safely press the swivel into the plate.
The bearing races are locked down with 10-32s and washers.
During the butterfly bellcrank assembly I realized that the kit was missing and/or supplied the wrong hardware. (A common complaint). Adam at the factory suggested moving on to another section while I wait.
If you’ve been following “theokayestengineer” on youtube, he now has his complete kit, including engine. The prediction from the factory is that I’ll be there in October.
I am in awe of this project. I know my limits. ![]()
Re: theokayestengineer
That aft cowling he is making looking nice. I suppose that there’s a lot to be considered, but it does make it look increasingly like a mini me Little Bird. I’ll take mine in flat black with dual Airsoft miniguns!
He know’s what he’s doing, I’m sure. But the tailboom is just fiberglass. It can’t handle a lot of heat. And heat there will be.
Wait… what? You lost me at swash plate and I’m an engineer. ![]()
Good on you matey!
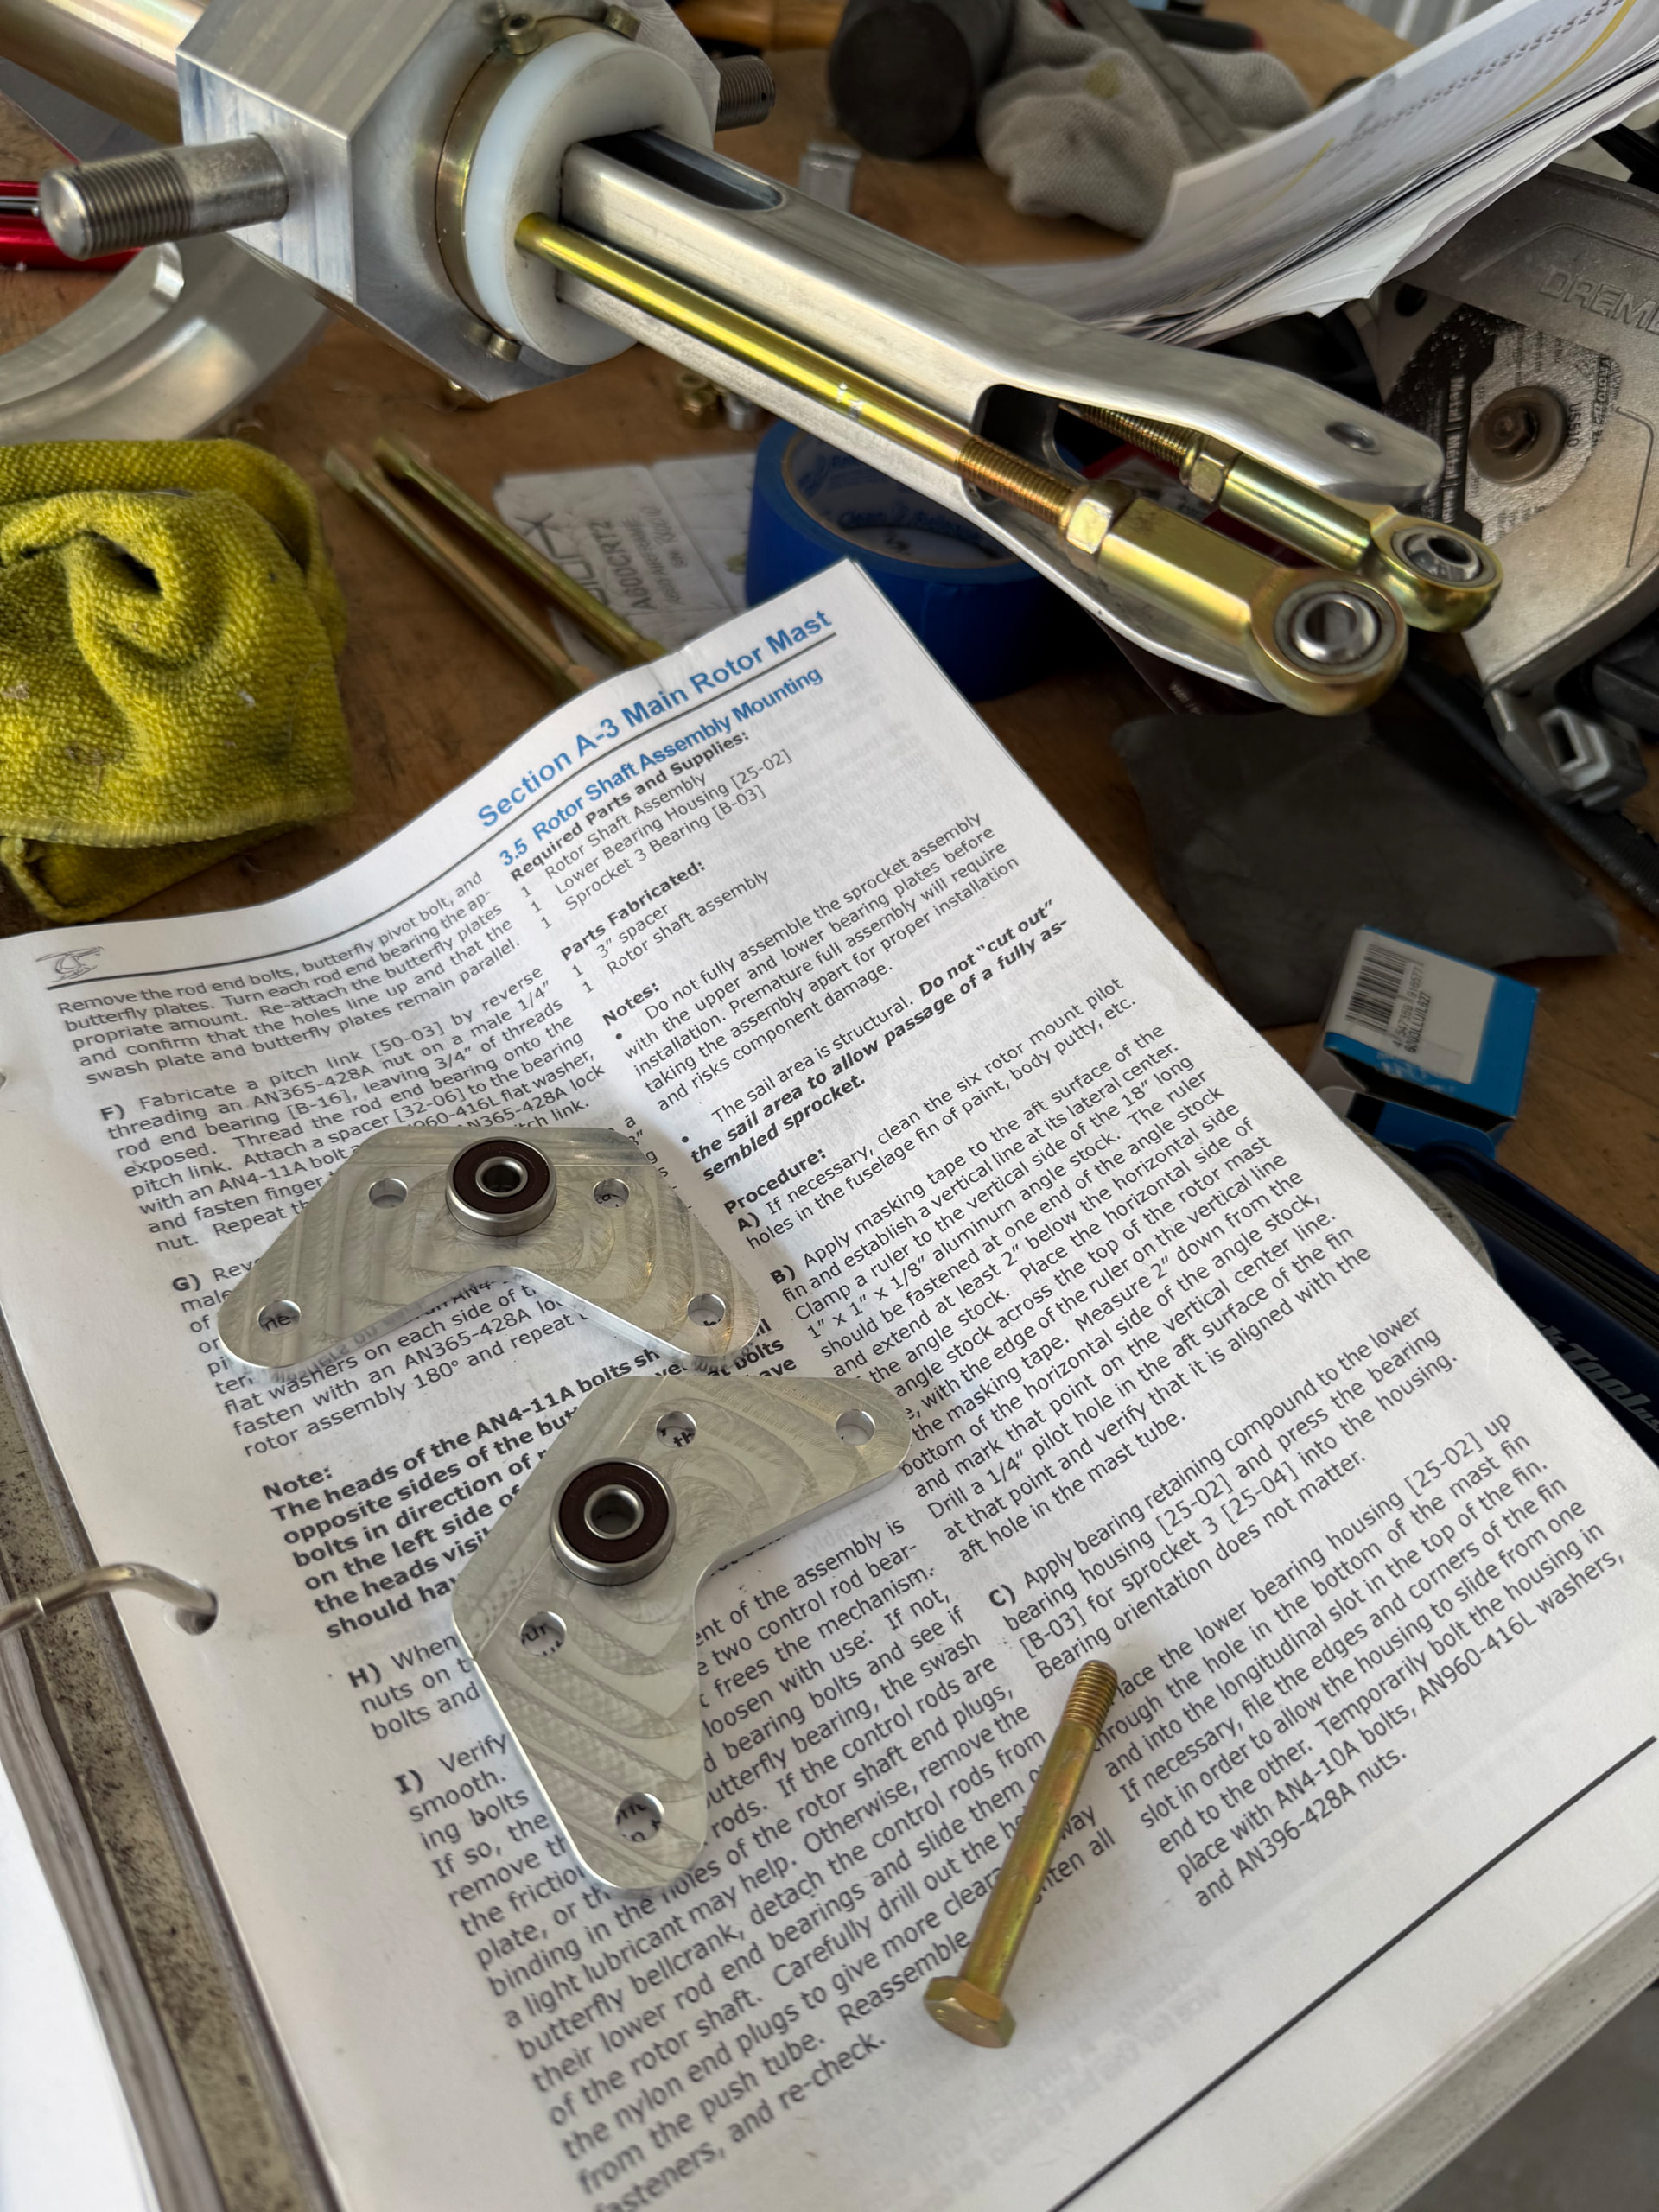
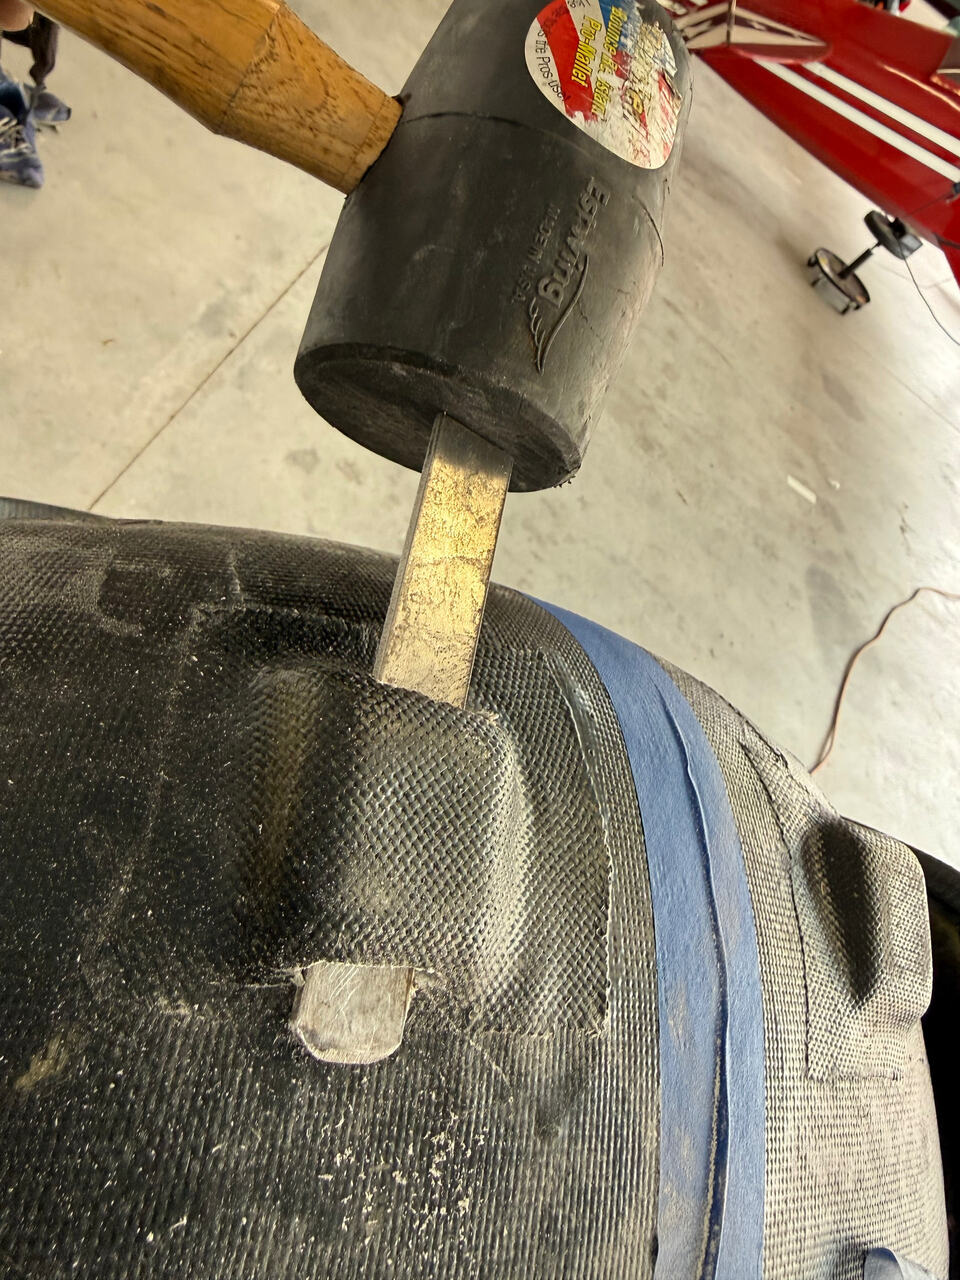
I’ve been unhappy with the tightness of the collective push-tube. I disassembled the head enough to free the tube. I then sanded the plastic guides as evenly as I could to widen the aperture 1-2 .00ths of an inch. The push-tube now moves with moderate force.
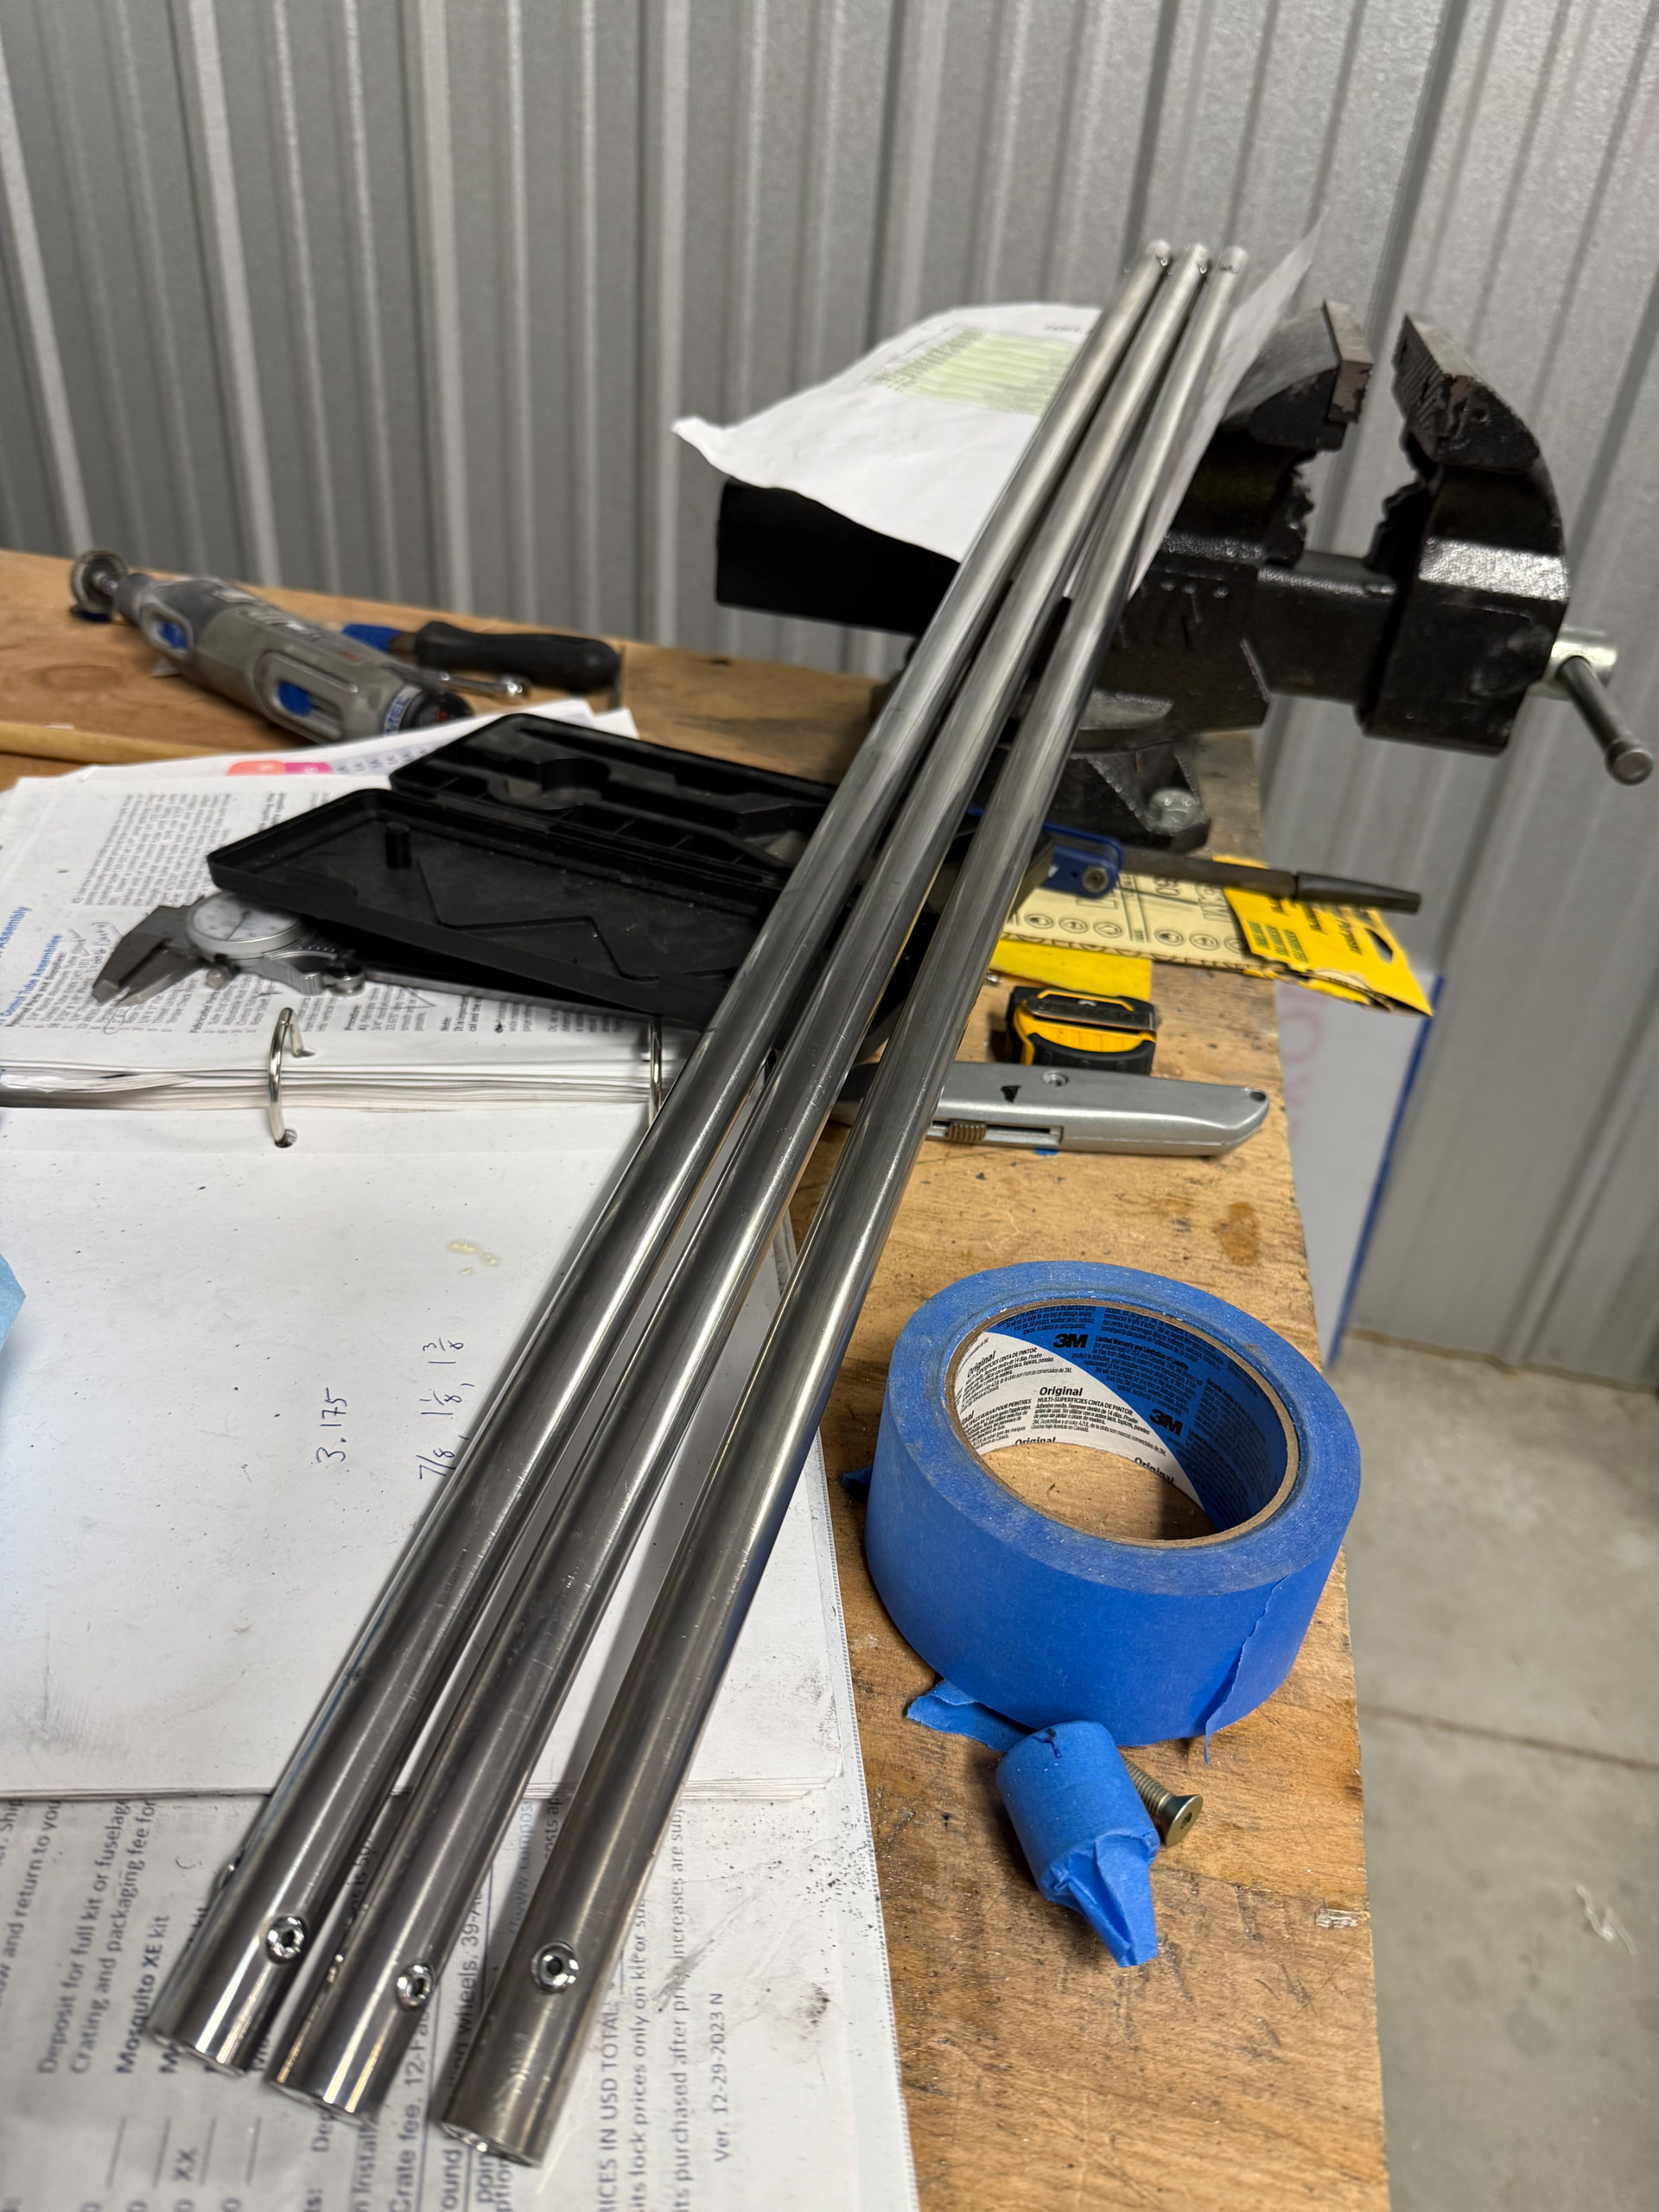
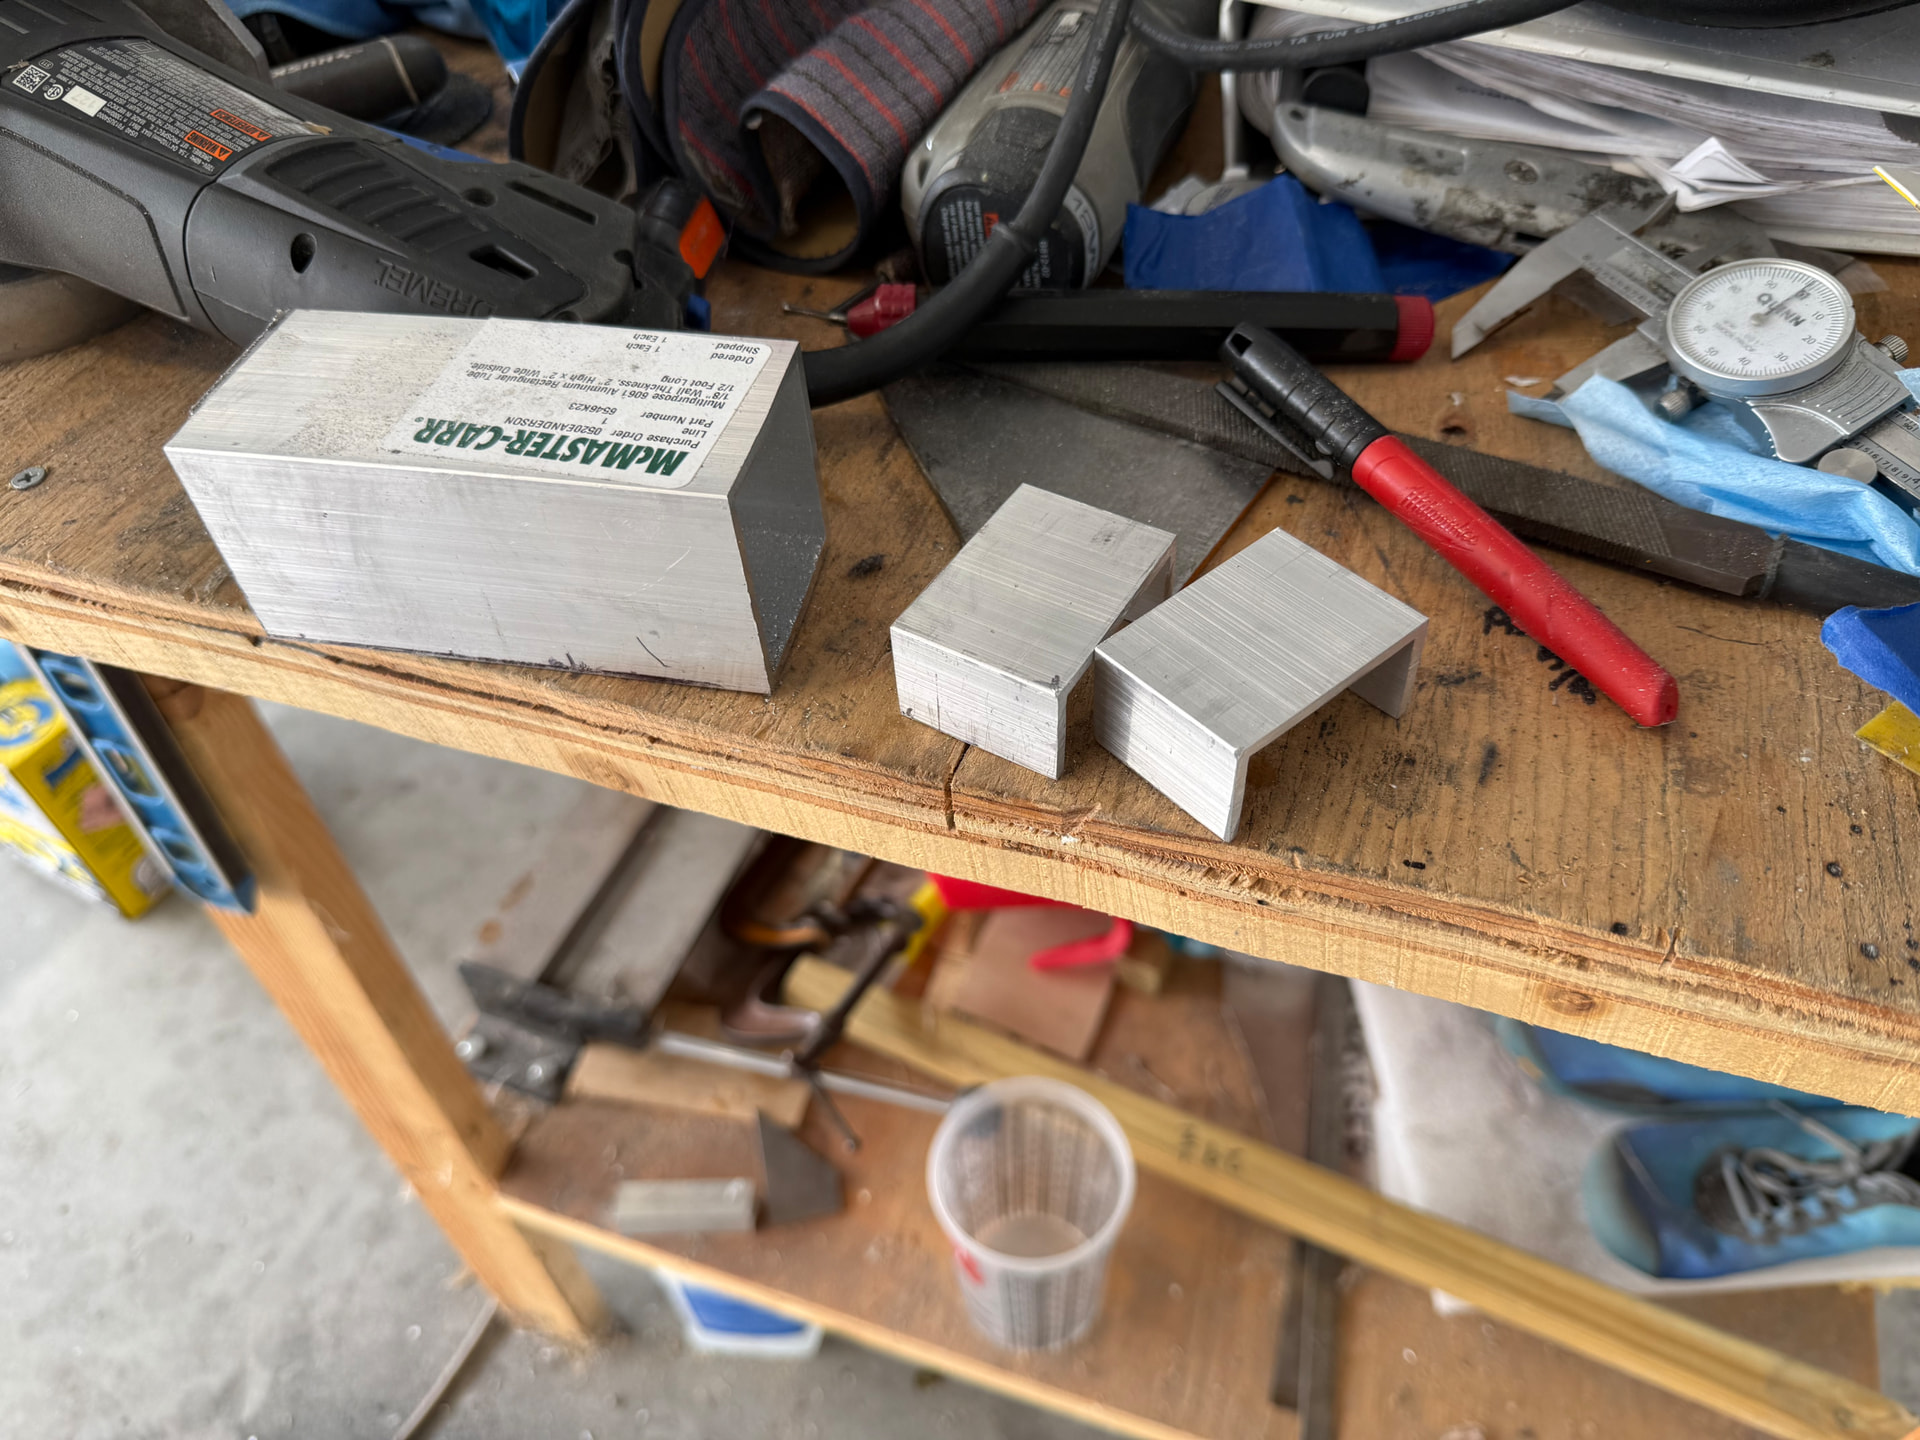
I cut the 9’ ¾” 6061 aluminum tube stock to three 33.5” control push-rods. Riveted in the threaded cap and polished. I then conducted a 3 hour inventory with a factory rep to tally up all the shorted parts. It was a herculean effort on his part and exhausting one on mine. Thousands of parts remain and we were down to counting rivets and washers.
Even when Ace was still with us, I thought of him often during these build days, especially with the old RotorX which required a bit more trial-and-error fabrication than does this current kit. Unlike him I am not triaging a broken machine and coming up with a gameplan to fix it. I am mostly just following instructions. Yet I come home exhausted. Absolutely whipped. I think of him tackling a tire or field-fixing one of his beasts stuck on the motorway and am in awe. I wish he knew how much he’s been in my head all these years while I do this work. He’s still there now. Maybe he’ll never leave. In fact I hope he doesn’t.
That was always the impression he left on me. He would show pictures of a problem…and to me..they were the kinds of problems where I’d be like “nope..no way..no way at all..who do I call?”… And you know who I’d call..the type of person like @Victork2 that looks at a problem and just gets to work solving it. With experience. With an eye towards finding the way. And sometimes with brute force.
I will miss that so much. Watching him solve problems. He was special.
I had a brother, whom we sadly lost to colorectal cancer in 2023. He came and lived with us for about 18 mos before he passed, moving home his last 6 mos to be with his wife and daughters. I didn’t share that time with the group. It was just too painful and I used coming here as a refuge.
Anyway, my brother, Fraser, definitely inherited a large part of our mother’s Scottish demeanor. Her father had immigrated with his family to Groveton, Texas in the early 1900s, the youngest of 9 siblings.
My brother had a way of facing seemingly insurmountable odds with a question.
“When an ox and a cart are stuck in a ditch, do you know how to get them out? You get in the ditch!”
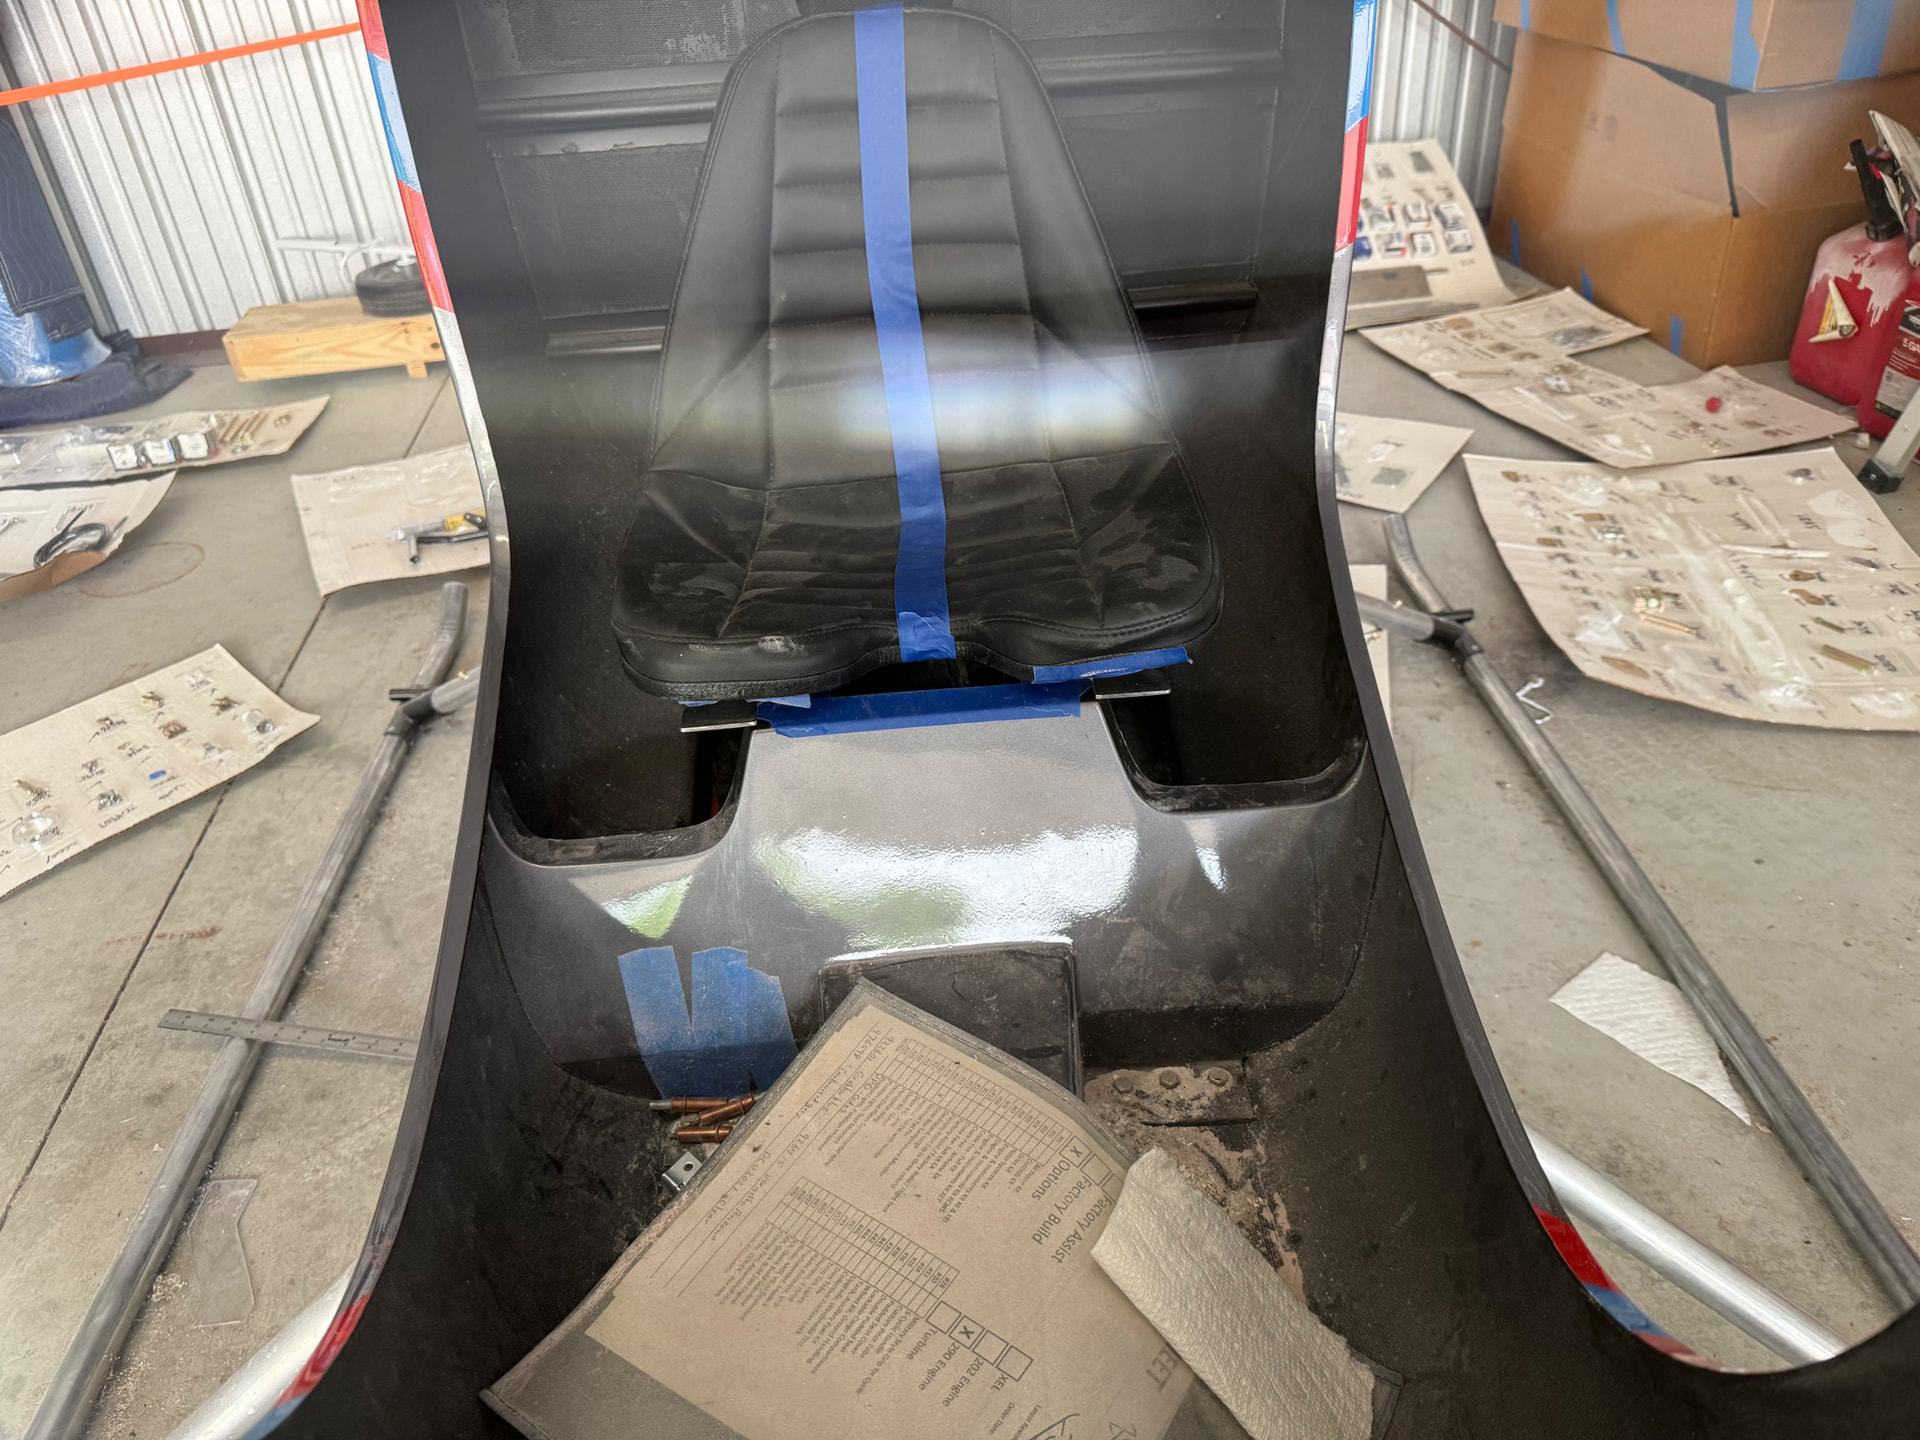
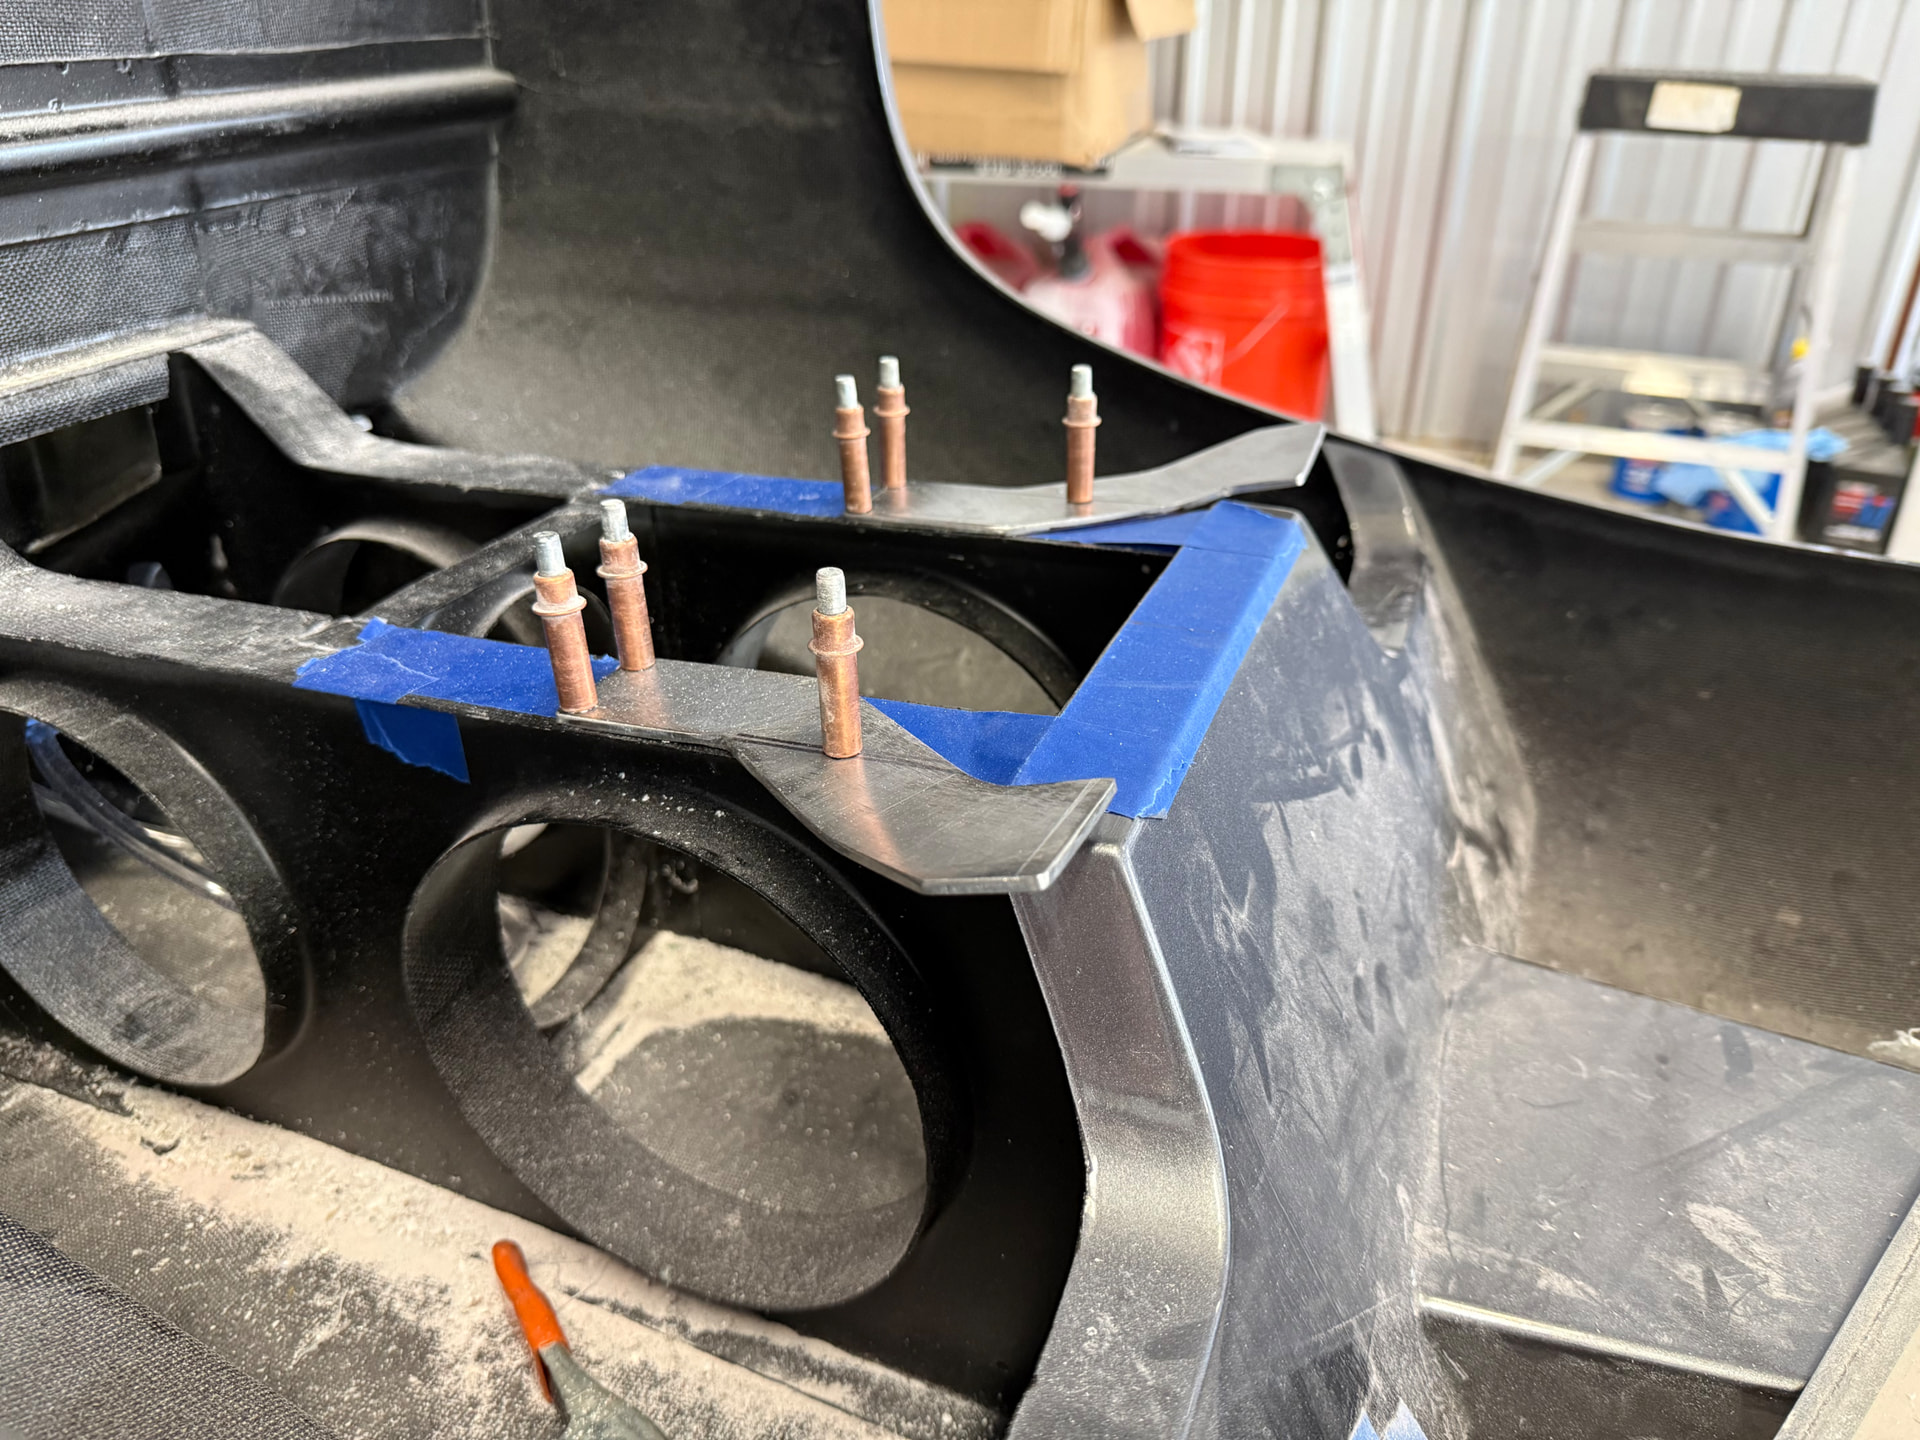
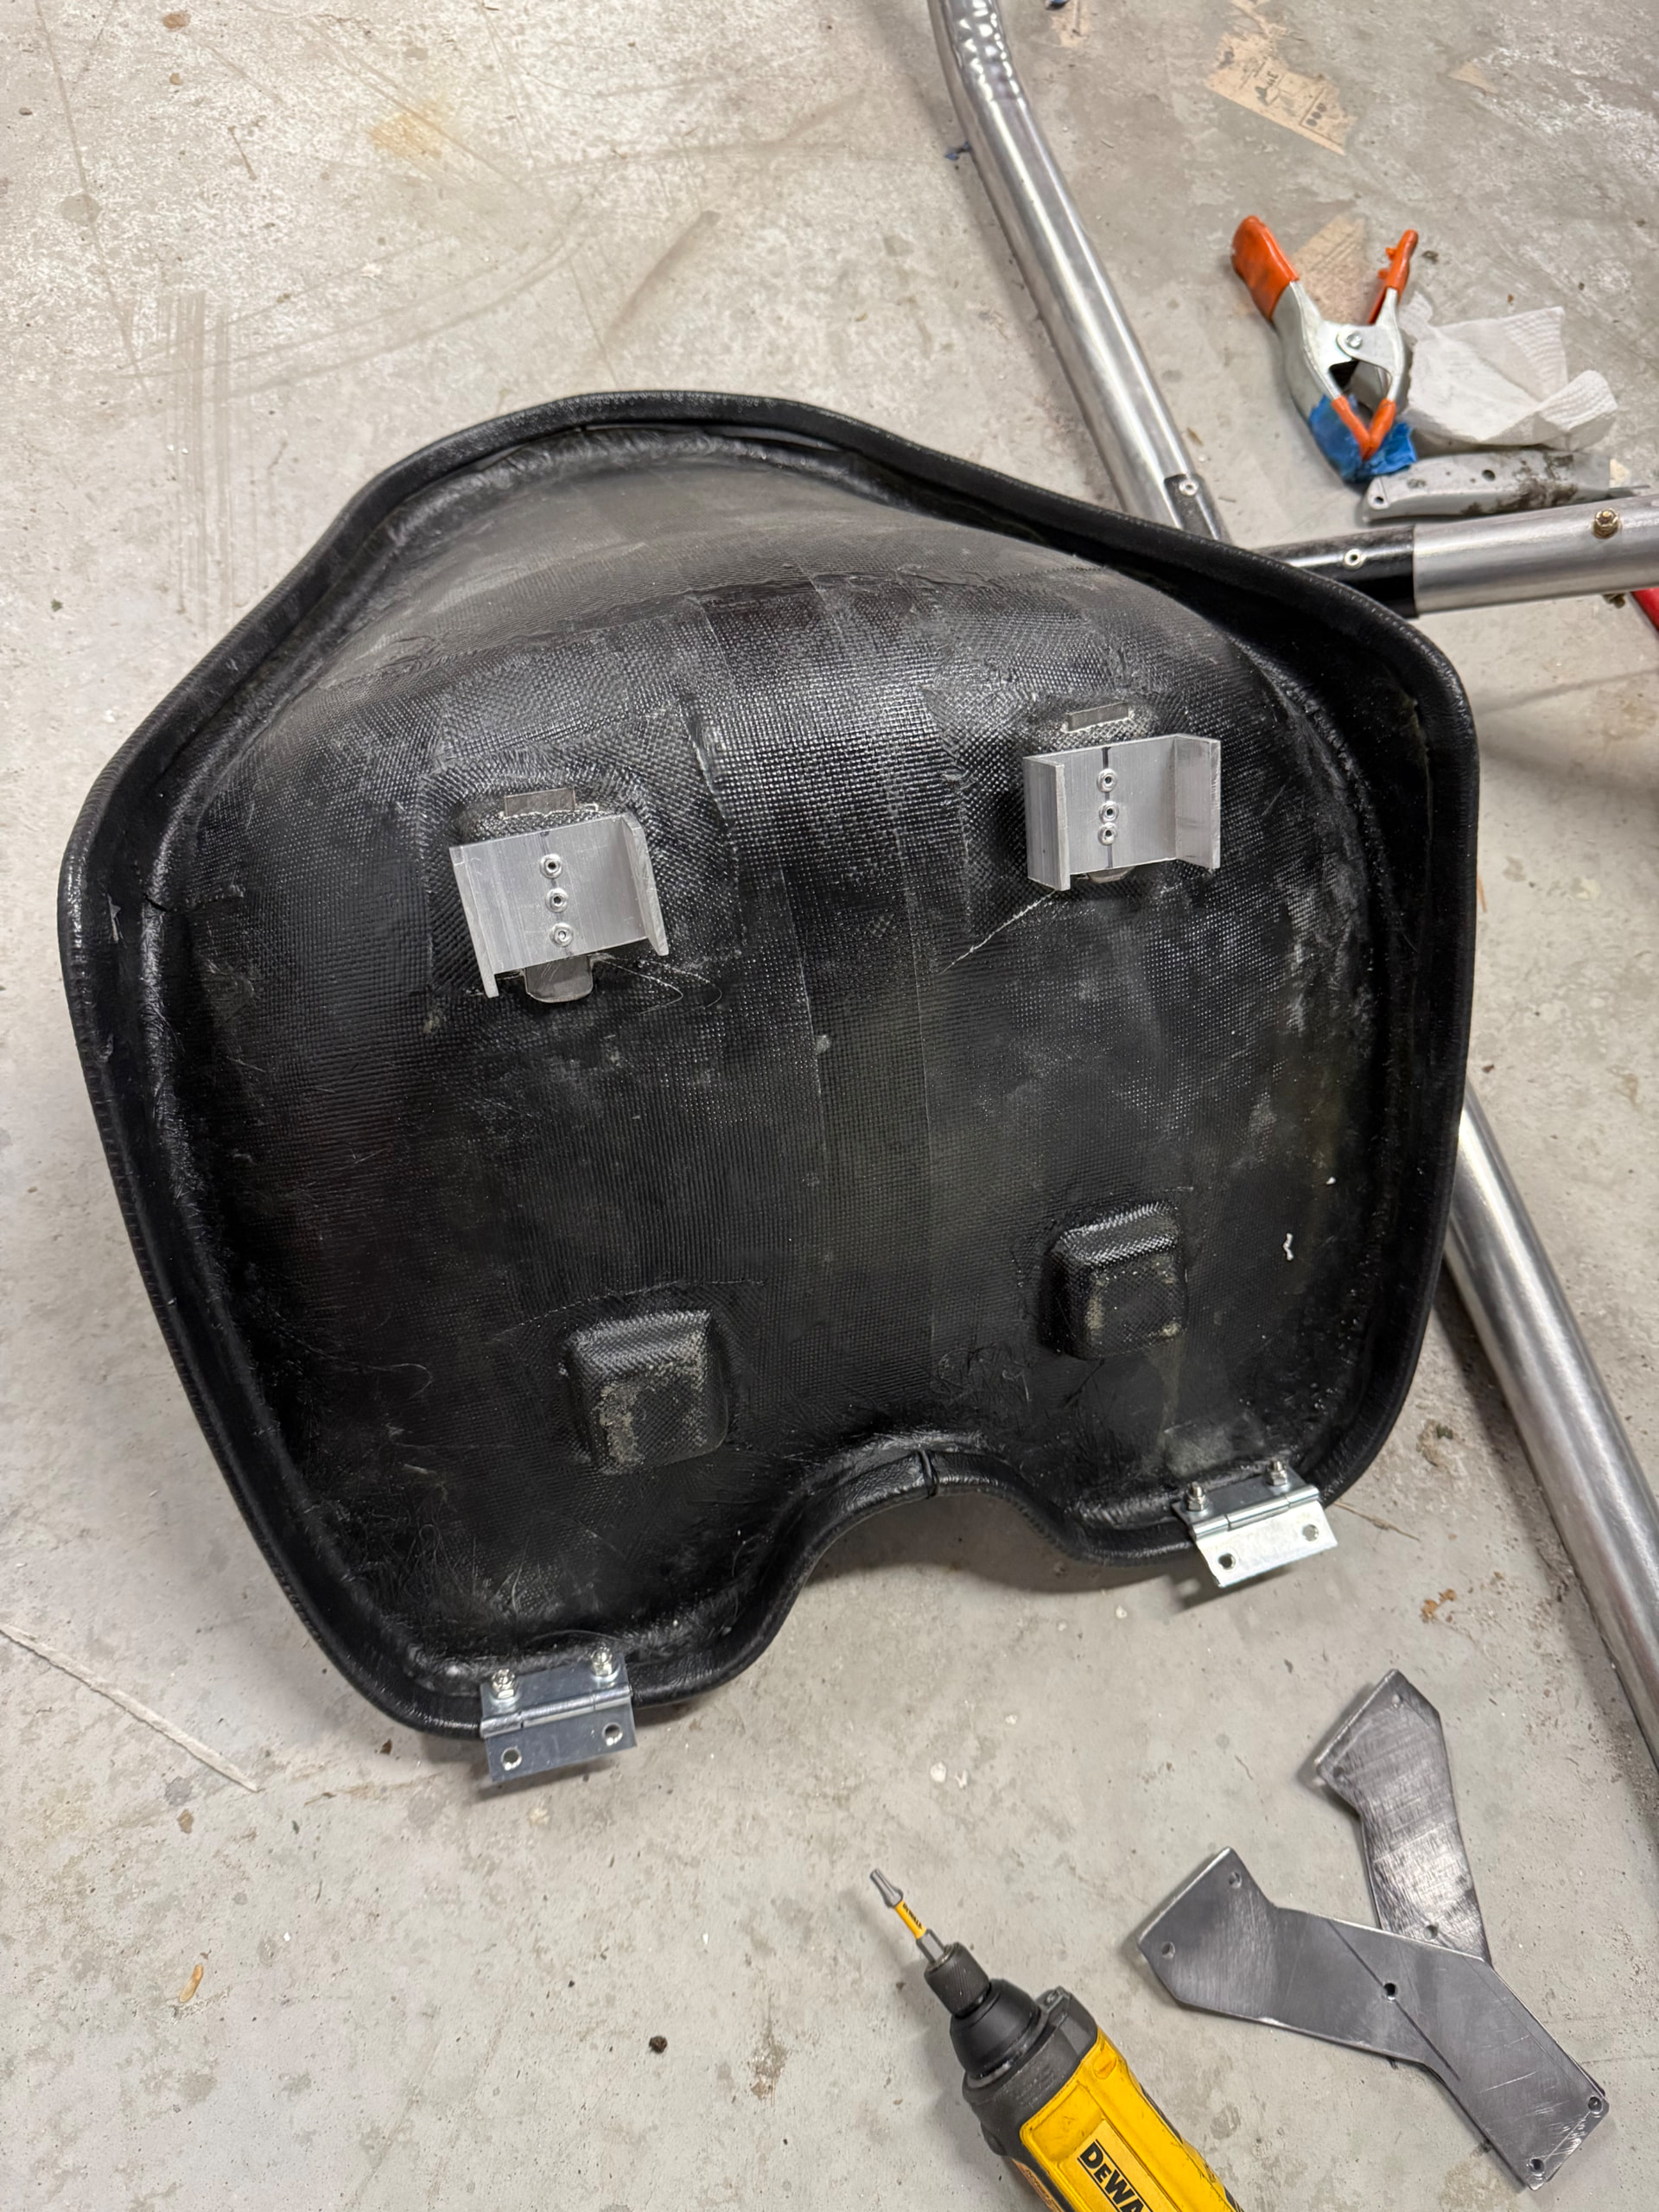
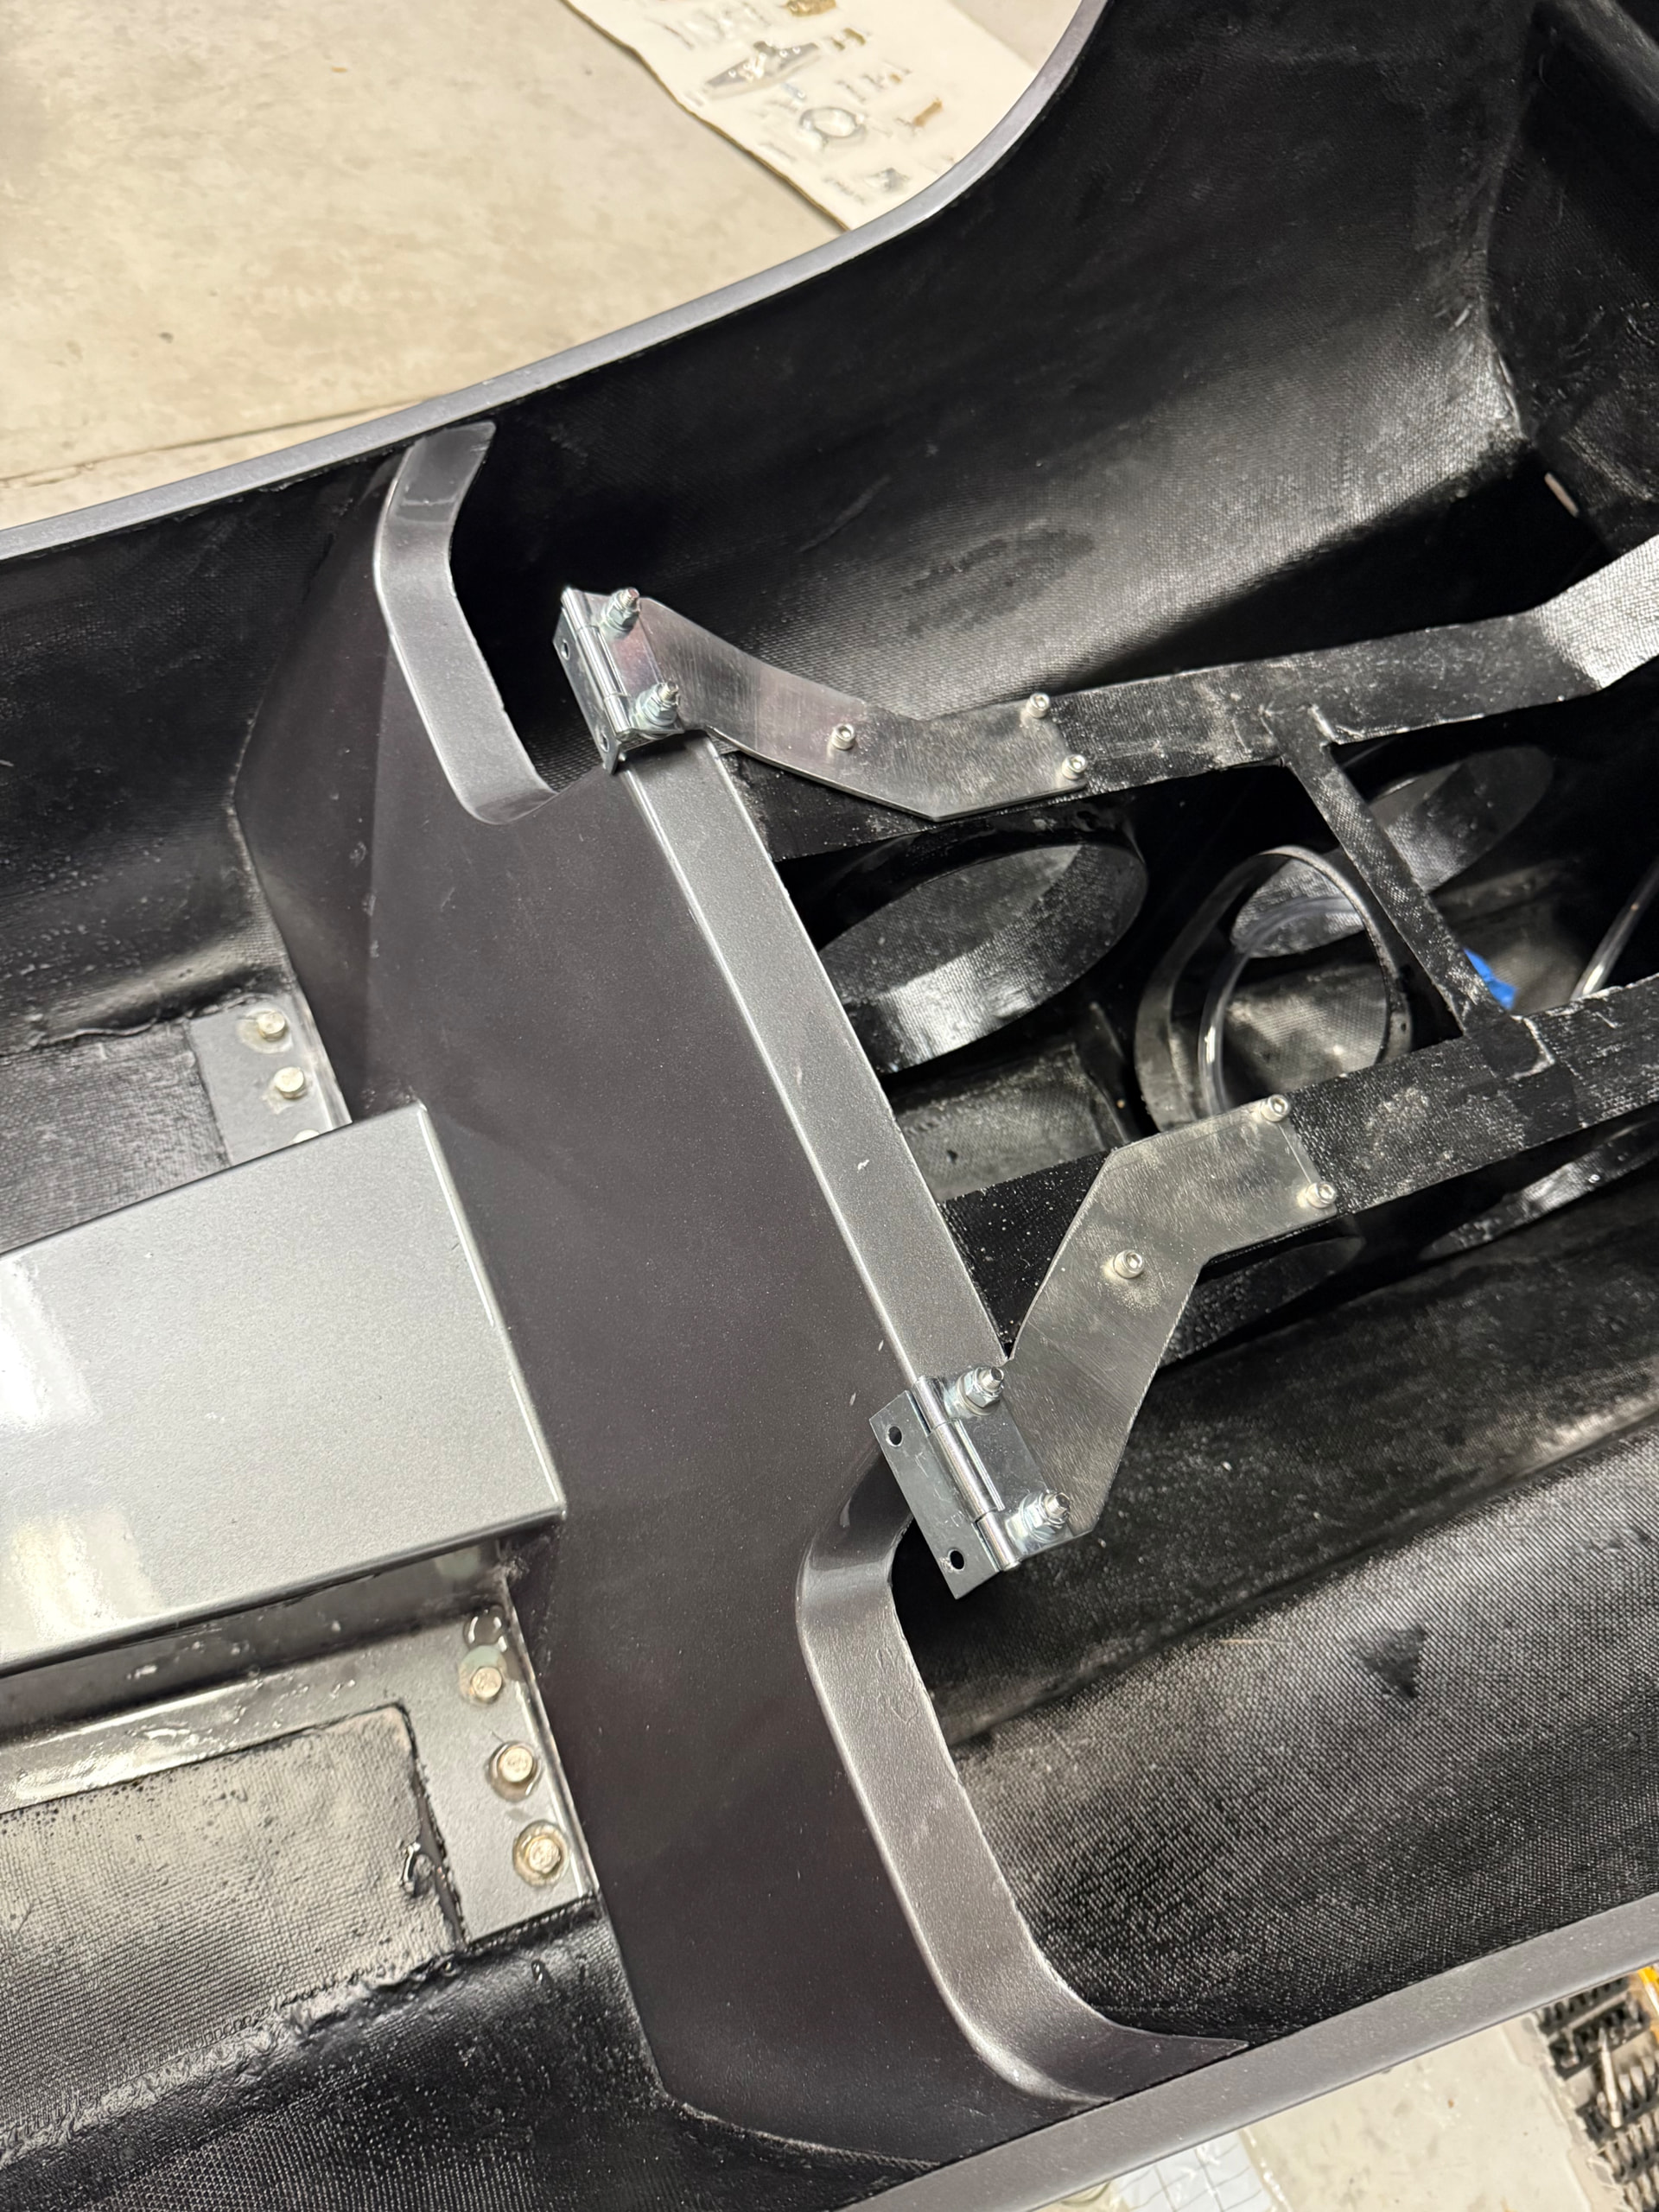
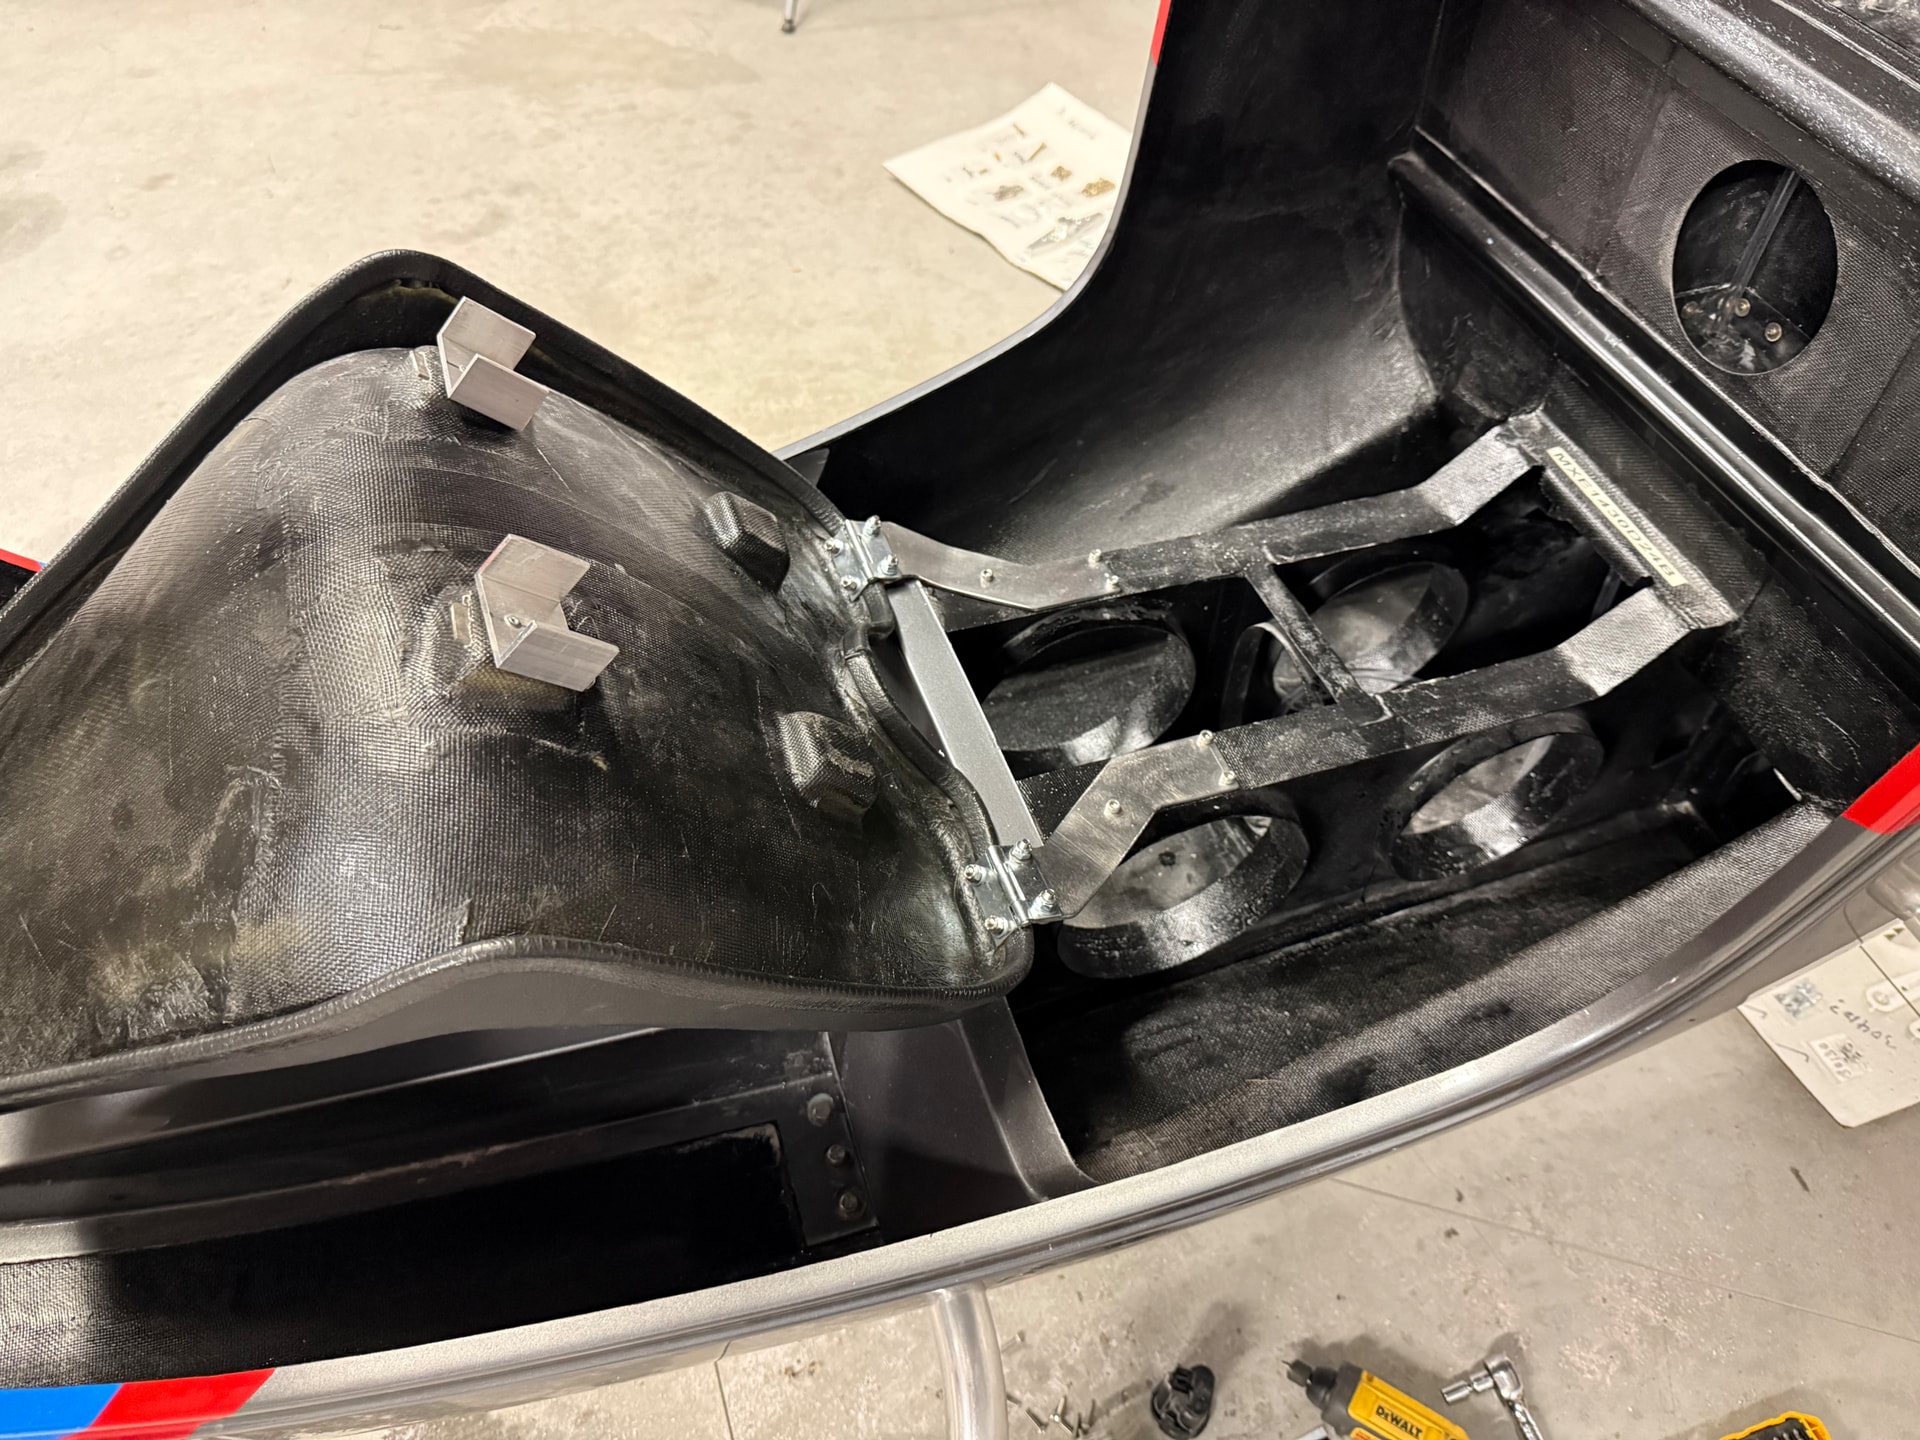
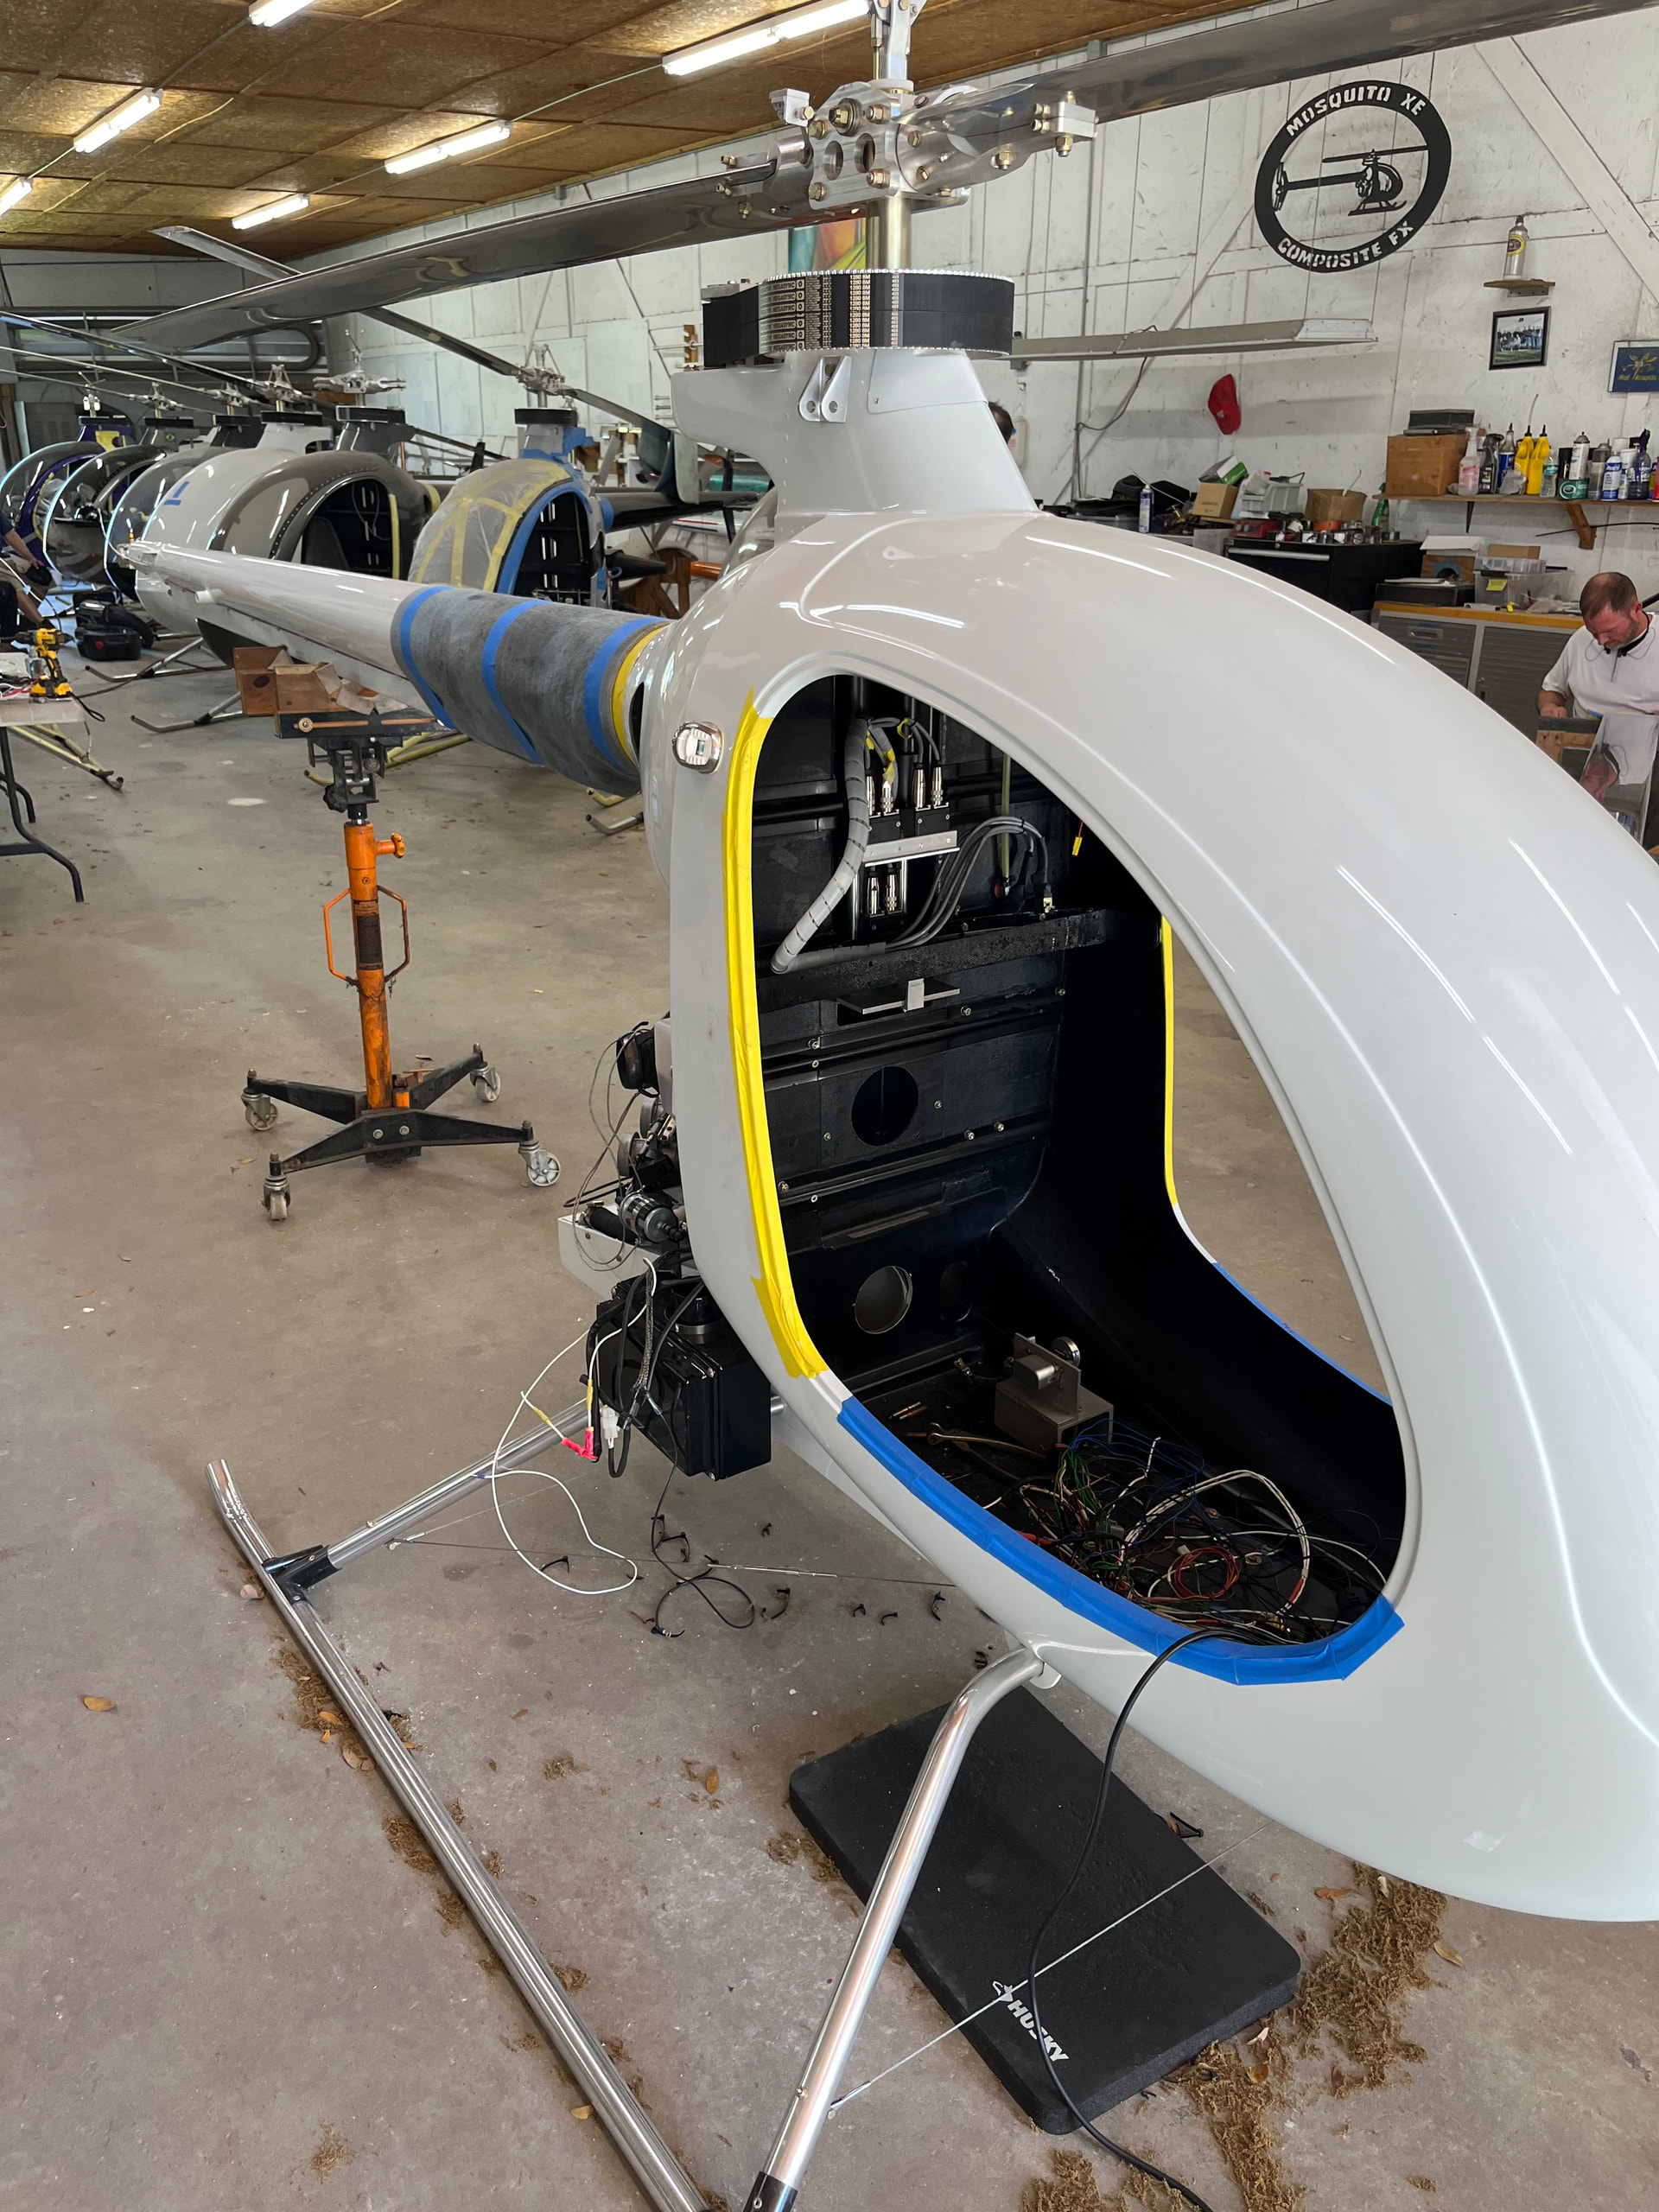
The helicopter comes with a simple plastic seat that has four raised fiberglass surfaces that serve as feet. These feet are bolted onto the “i-beam” center section of the helicopter. But I opted for the upholstered seat instead of that stock plastic one. How does one insert bolts without making four holes in the upholstery?
The factory said to “make a hinge” and call a guru named Mike about how to go about it. He sent me two photos and that was it. It’s easy to be proud of a rotorhead or fancy radio wiring. But a seat? Pretty prosaic stuff. But honestly this is my proudest moment so far in the build. I’ll let the pictures tell the process. The material is 1/8” steel and a two inch square aluminum tube. By pure fortune the inner diameter of the tube is 1 3/4” of freedom units. And that just happens to be exactly the width of the i-beam sides. Not pictured are the lexan test brackets I made before committing my steel stock.
This is the first time sitting in the helicopter.

I’d sit there for hours, making whup-whup-whup noises…
Nice construction work! Even space available for a helmet in there.
I’ve long held a peeve with social media. For the purposes of relating my peeve, I’ll include Mudspike in that category. My peeve is this: people post to make themselves look their best—to make their lives look interesting and appealing. They post their awards, their freshly groomed pets, their aerobatic videos, their perfect soufflés. They don’t post their cruelty to children, their abuse of a waitress, their roadrage, their infidelities, etc. I am as guilty of this as anyone. Until today this thread has been a perfect example of my guilt. Let me make amends now. Friends, I am a bloody awful mechanic! I rush headlong into mistakes. I make them and then curse and panic and often make things worse. I fight these impulses with some success but at times they still bite me.
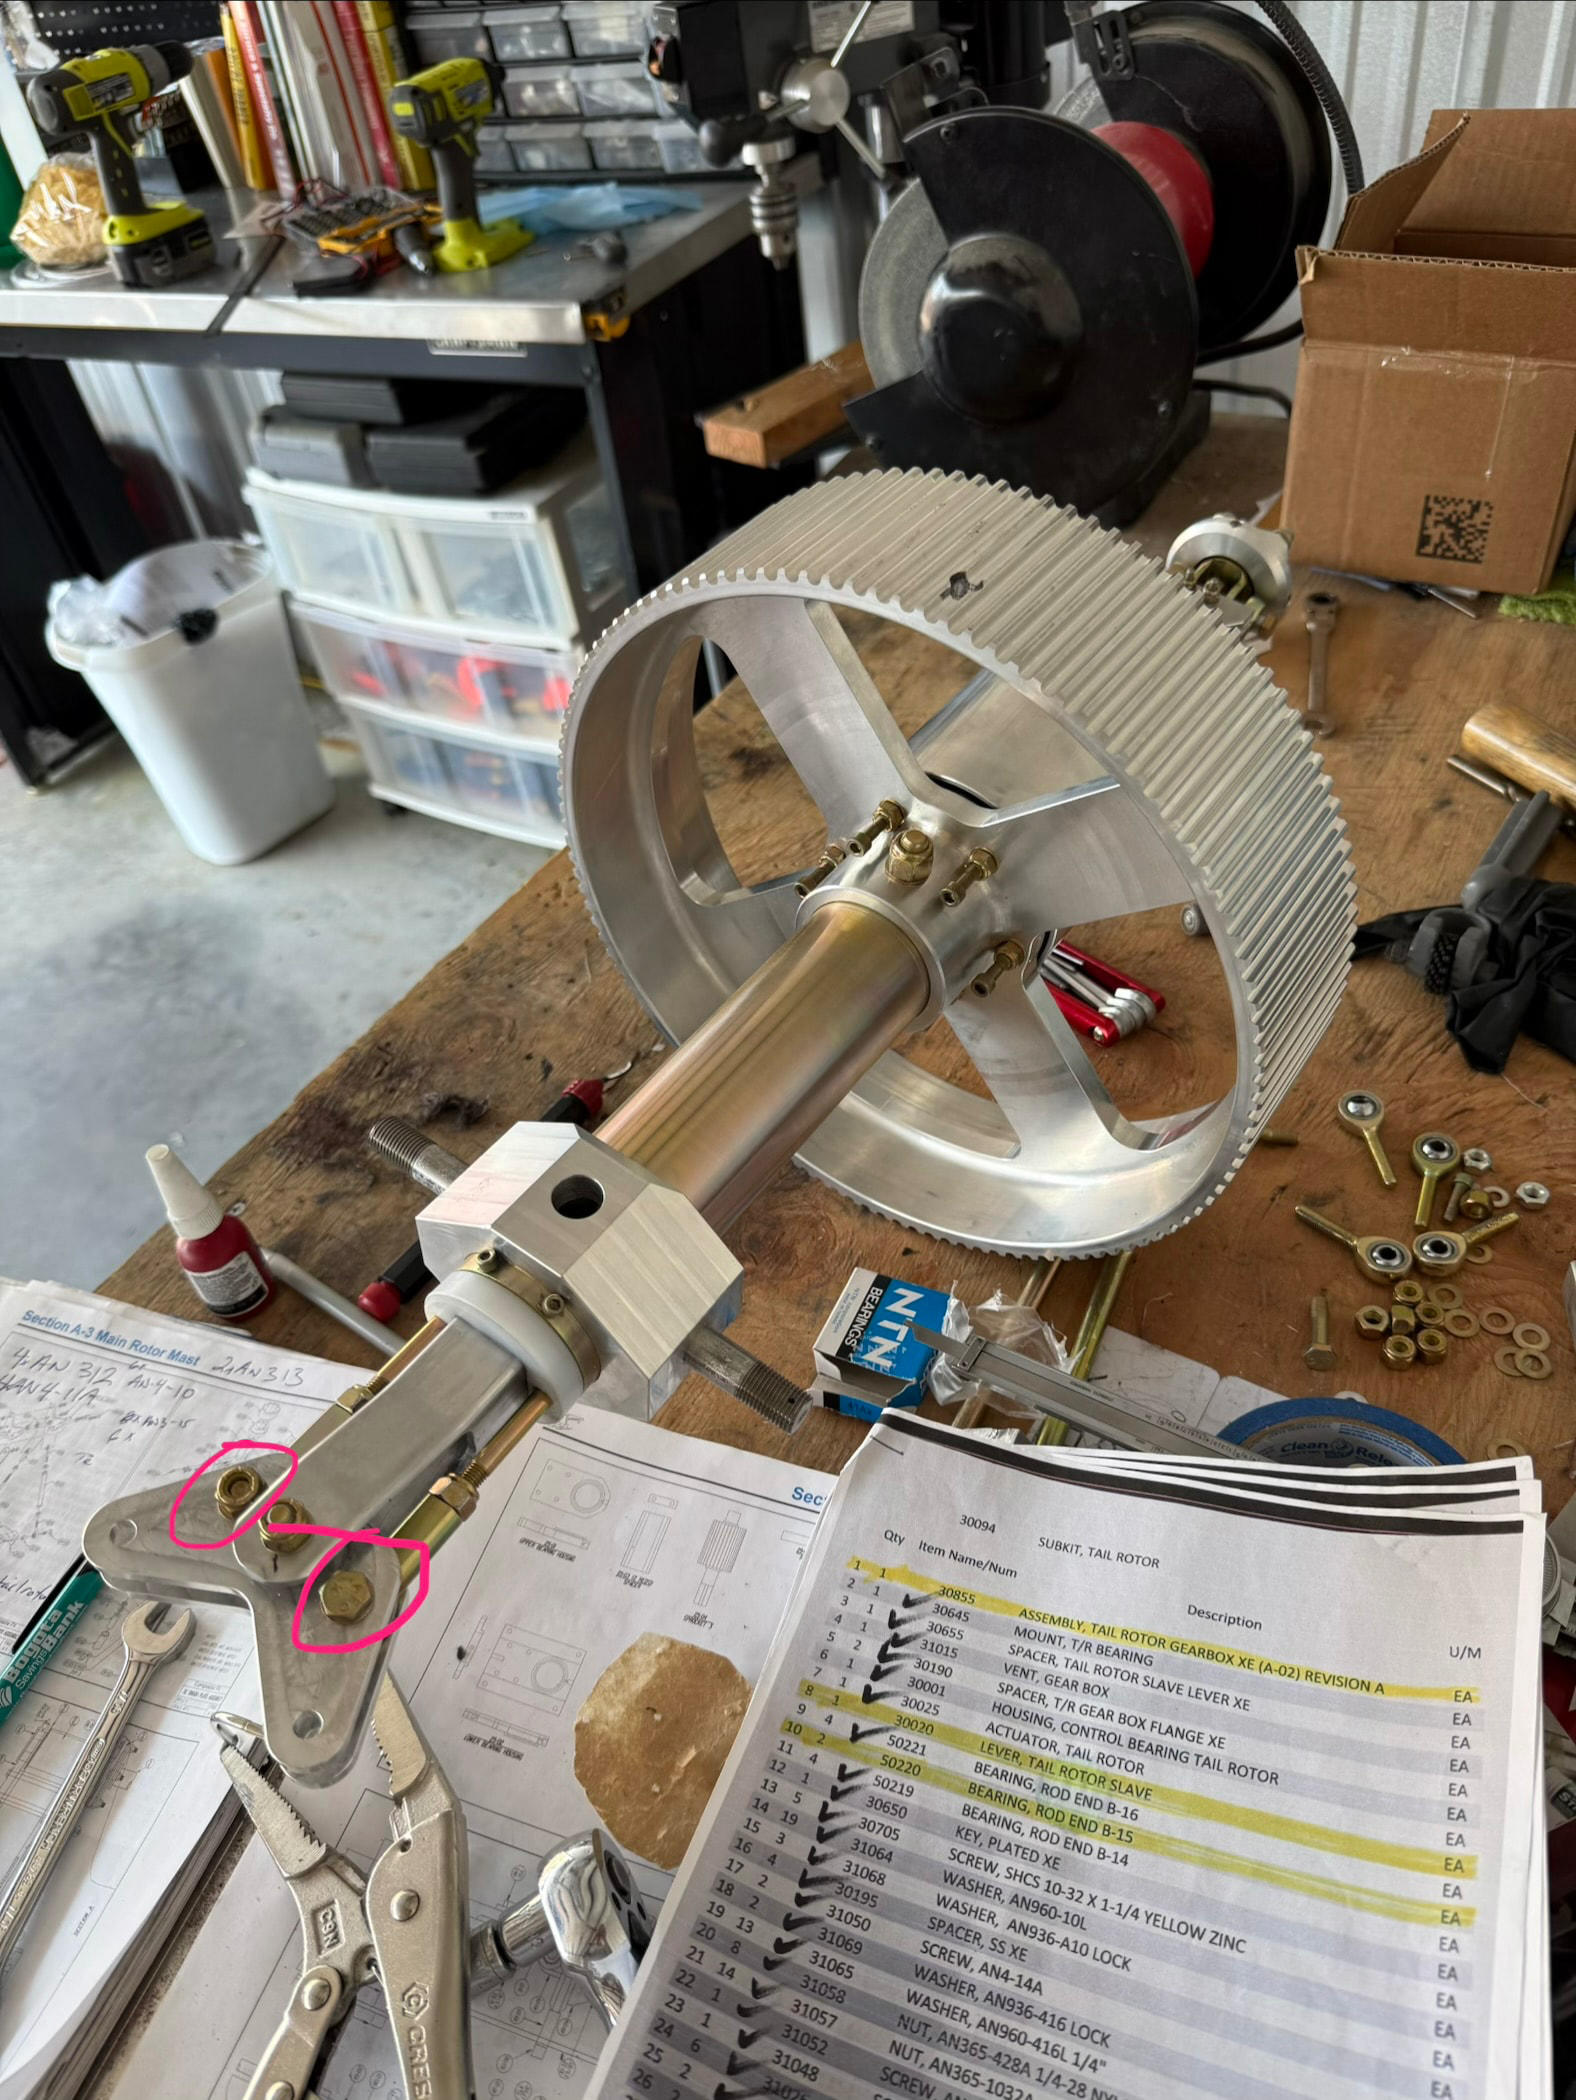
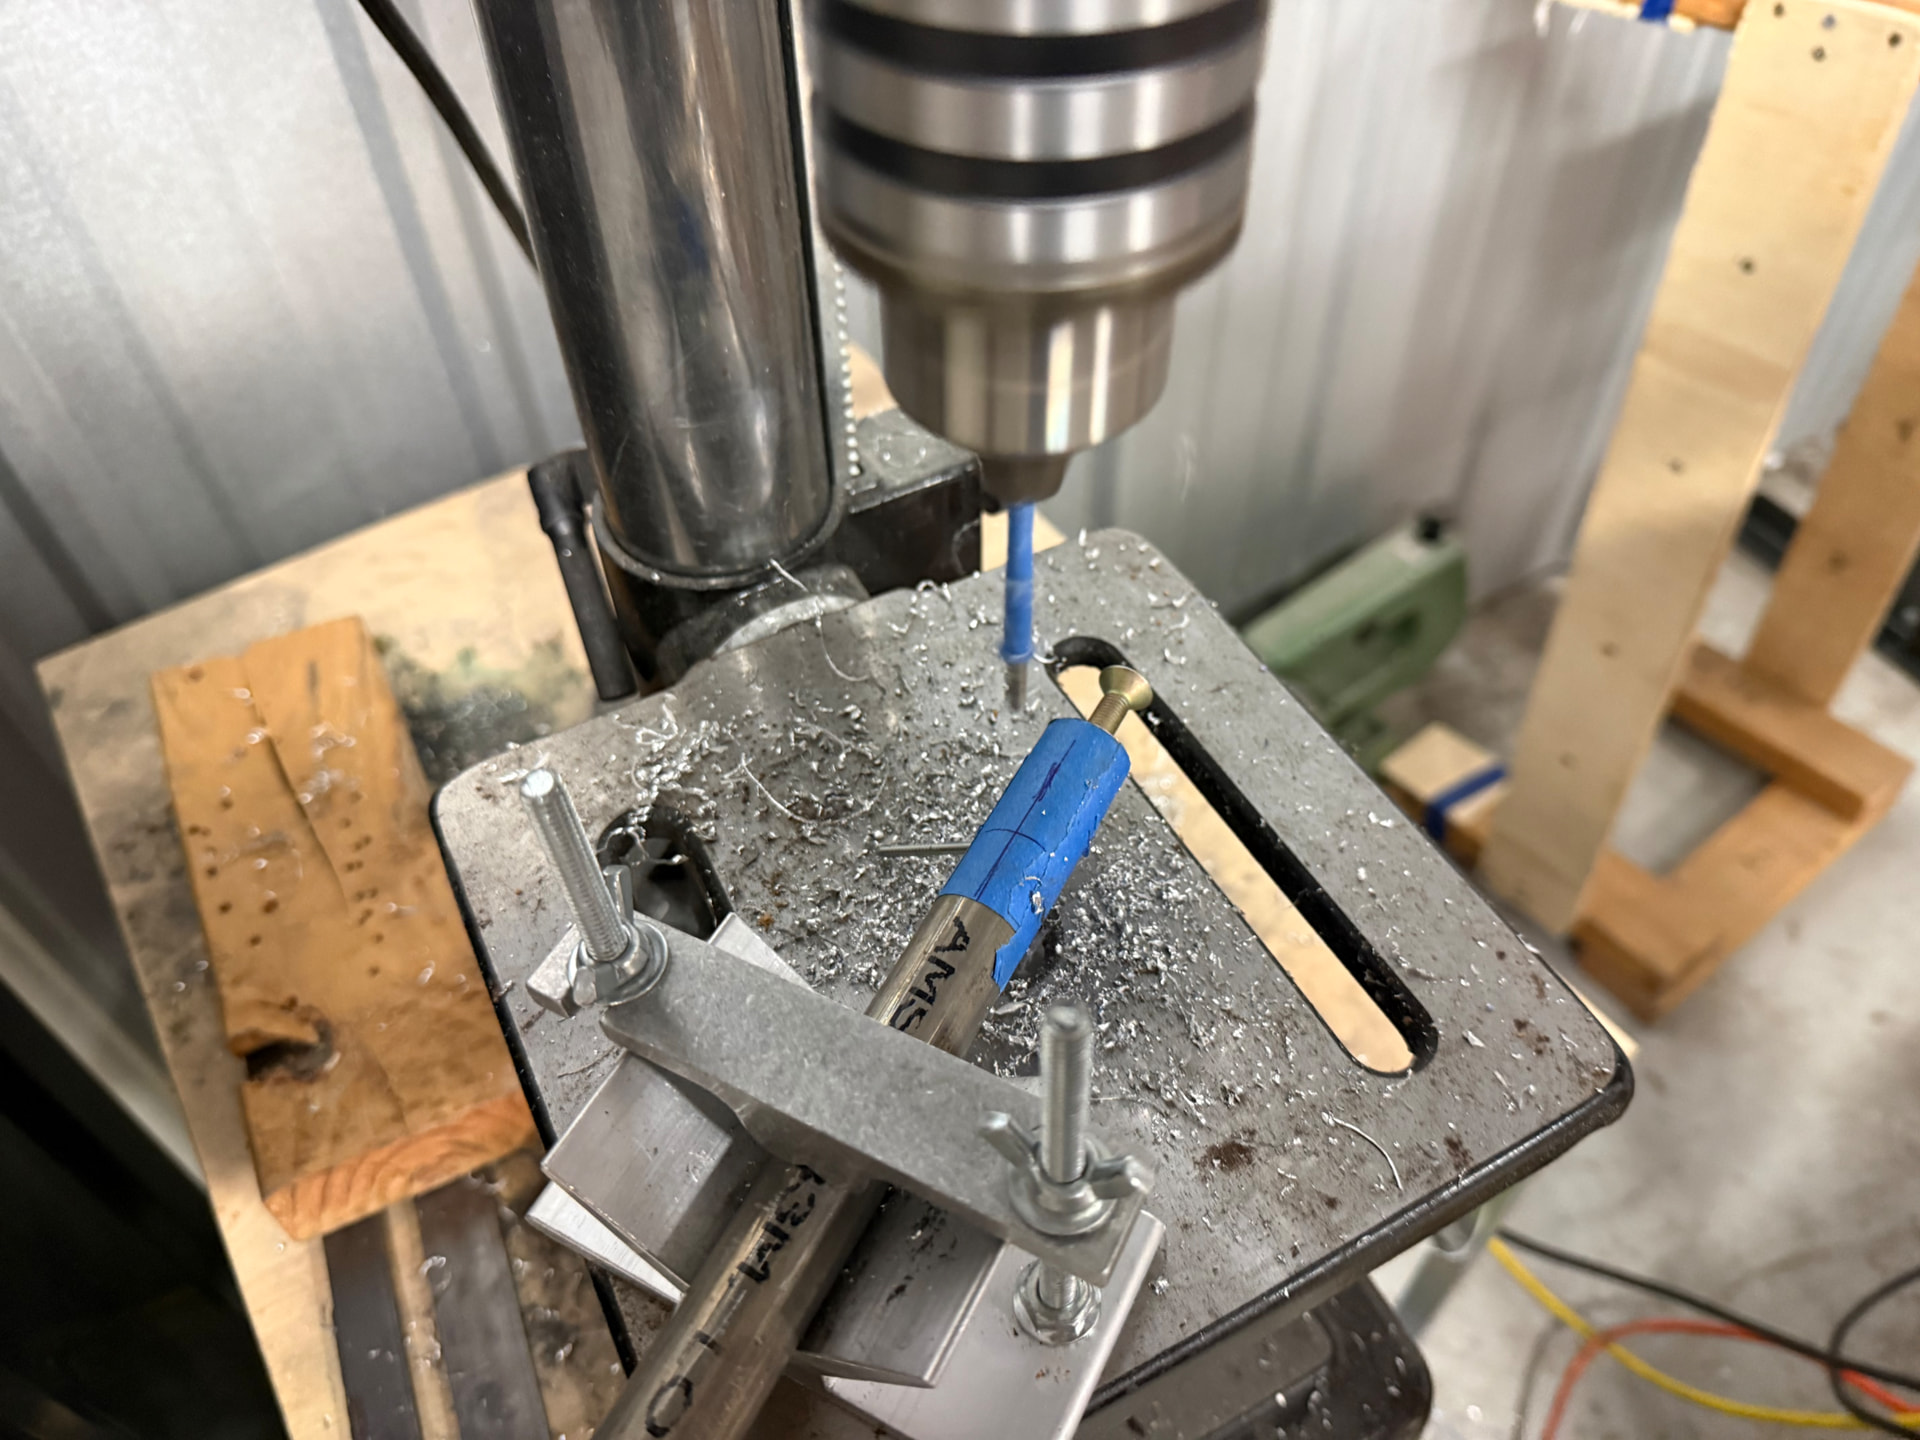
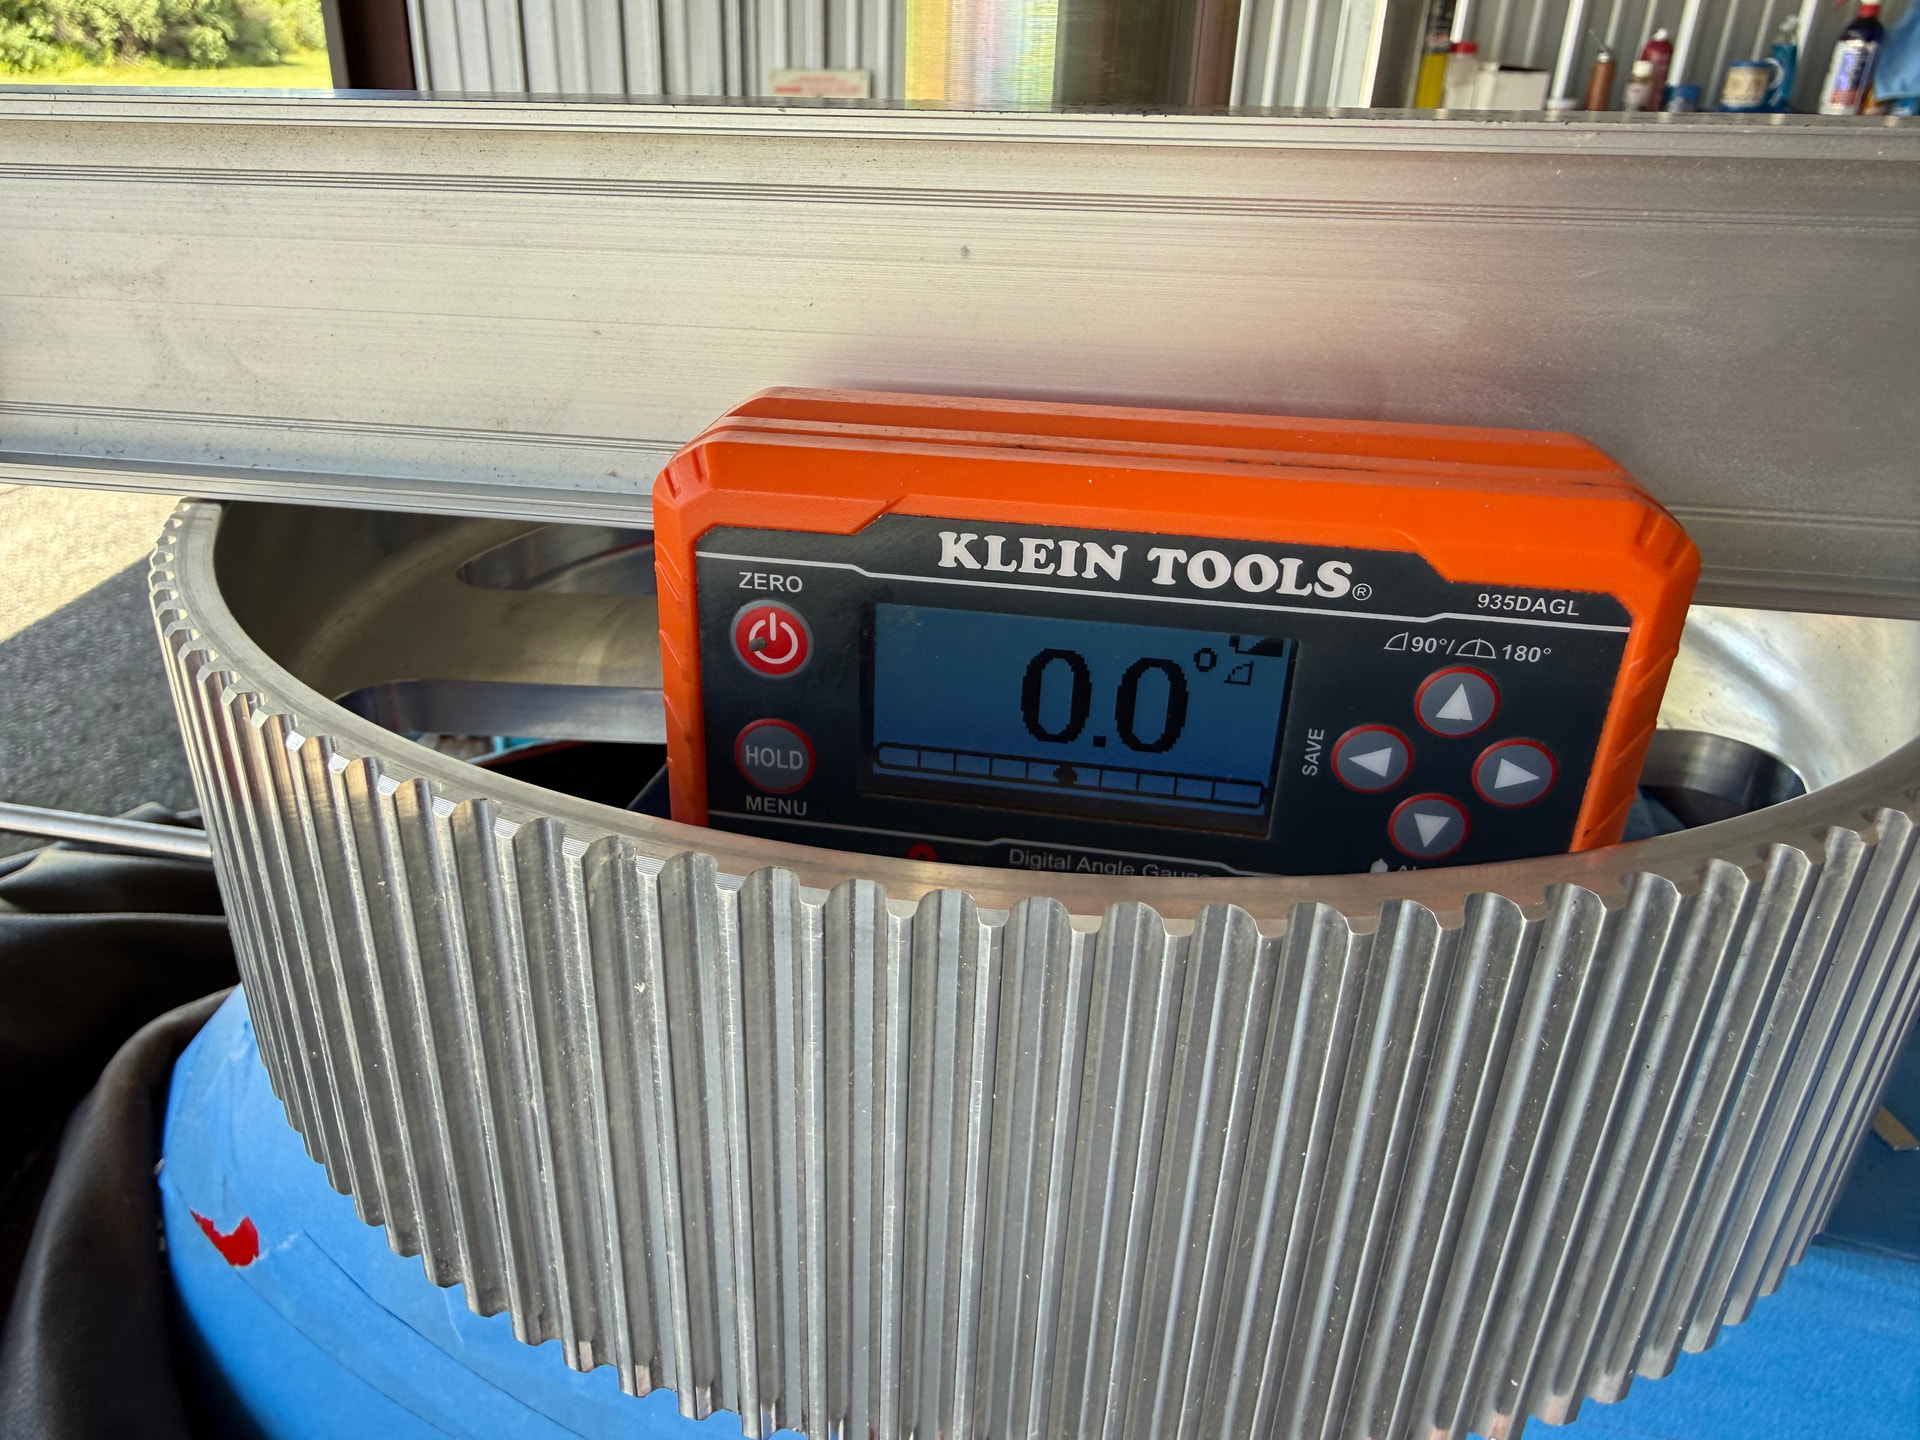
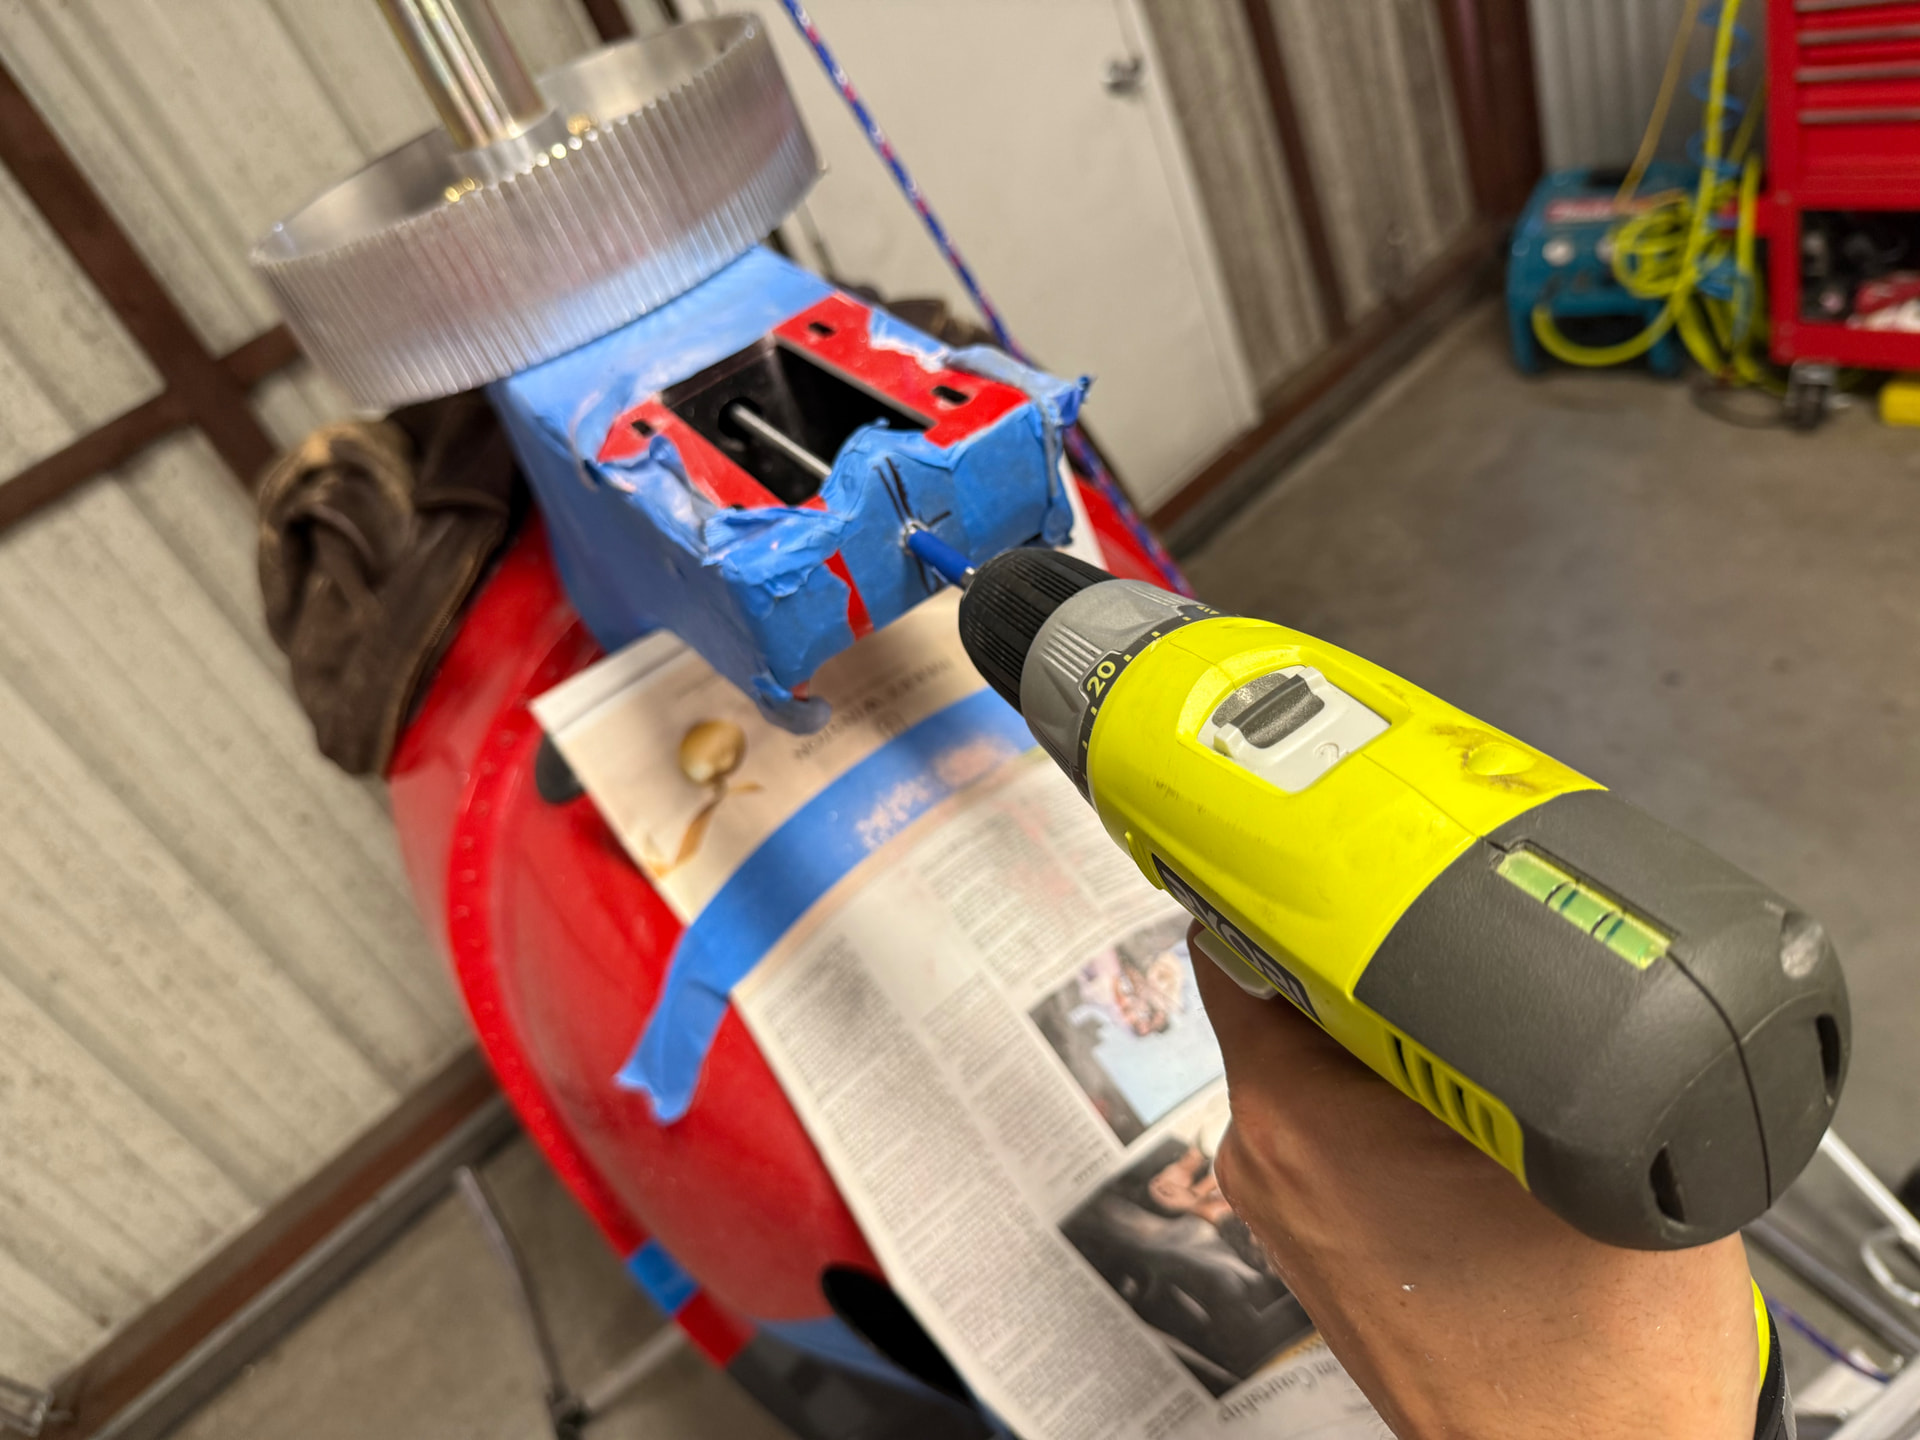
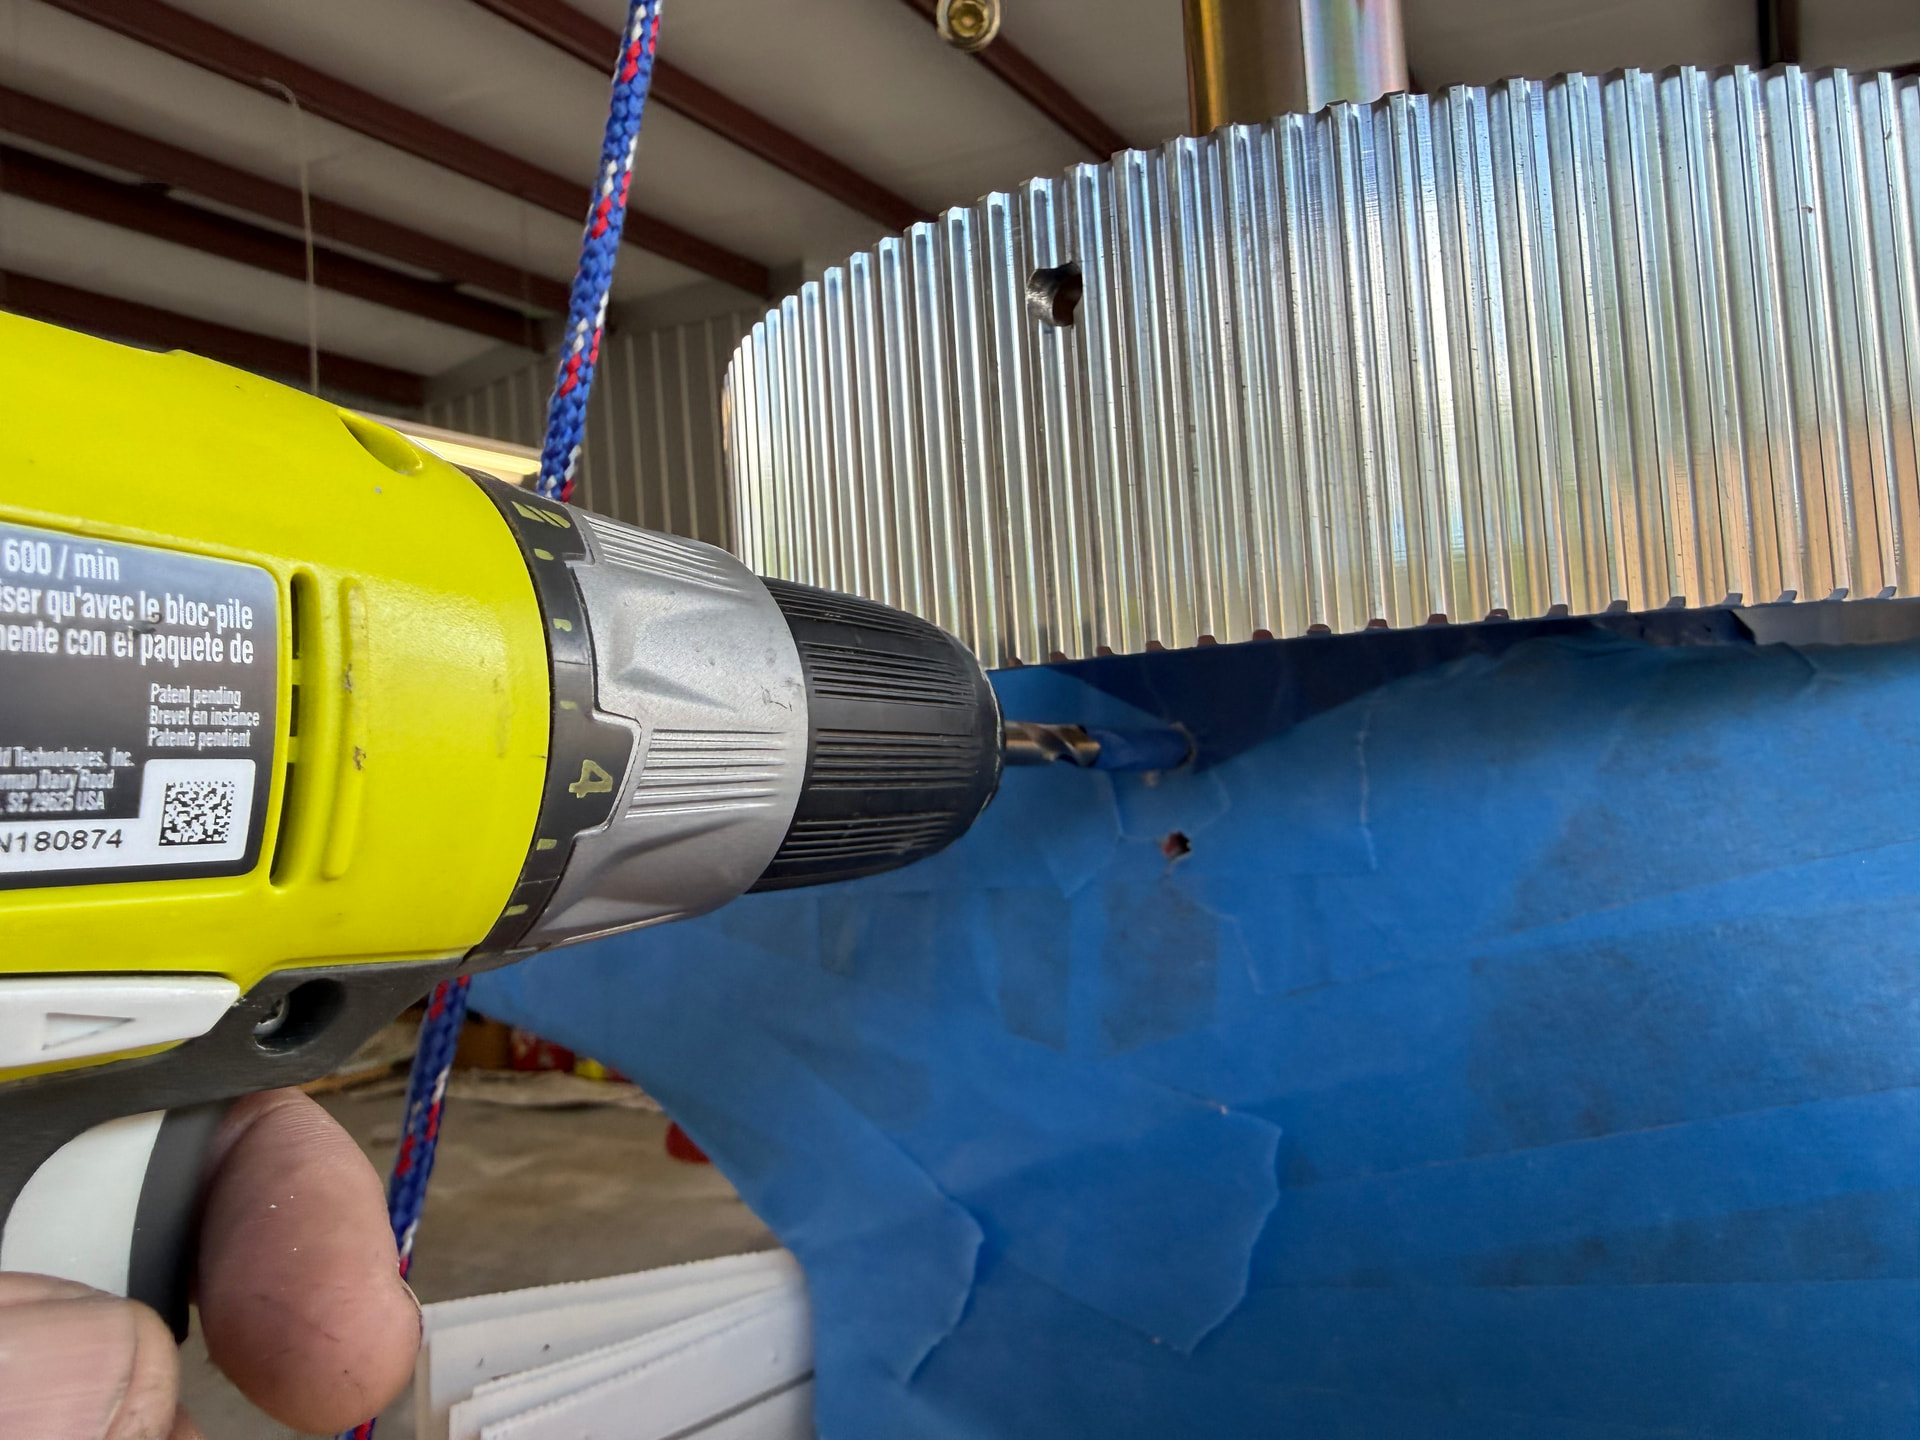
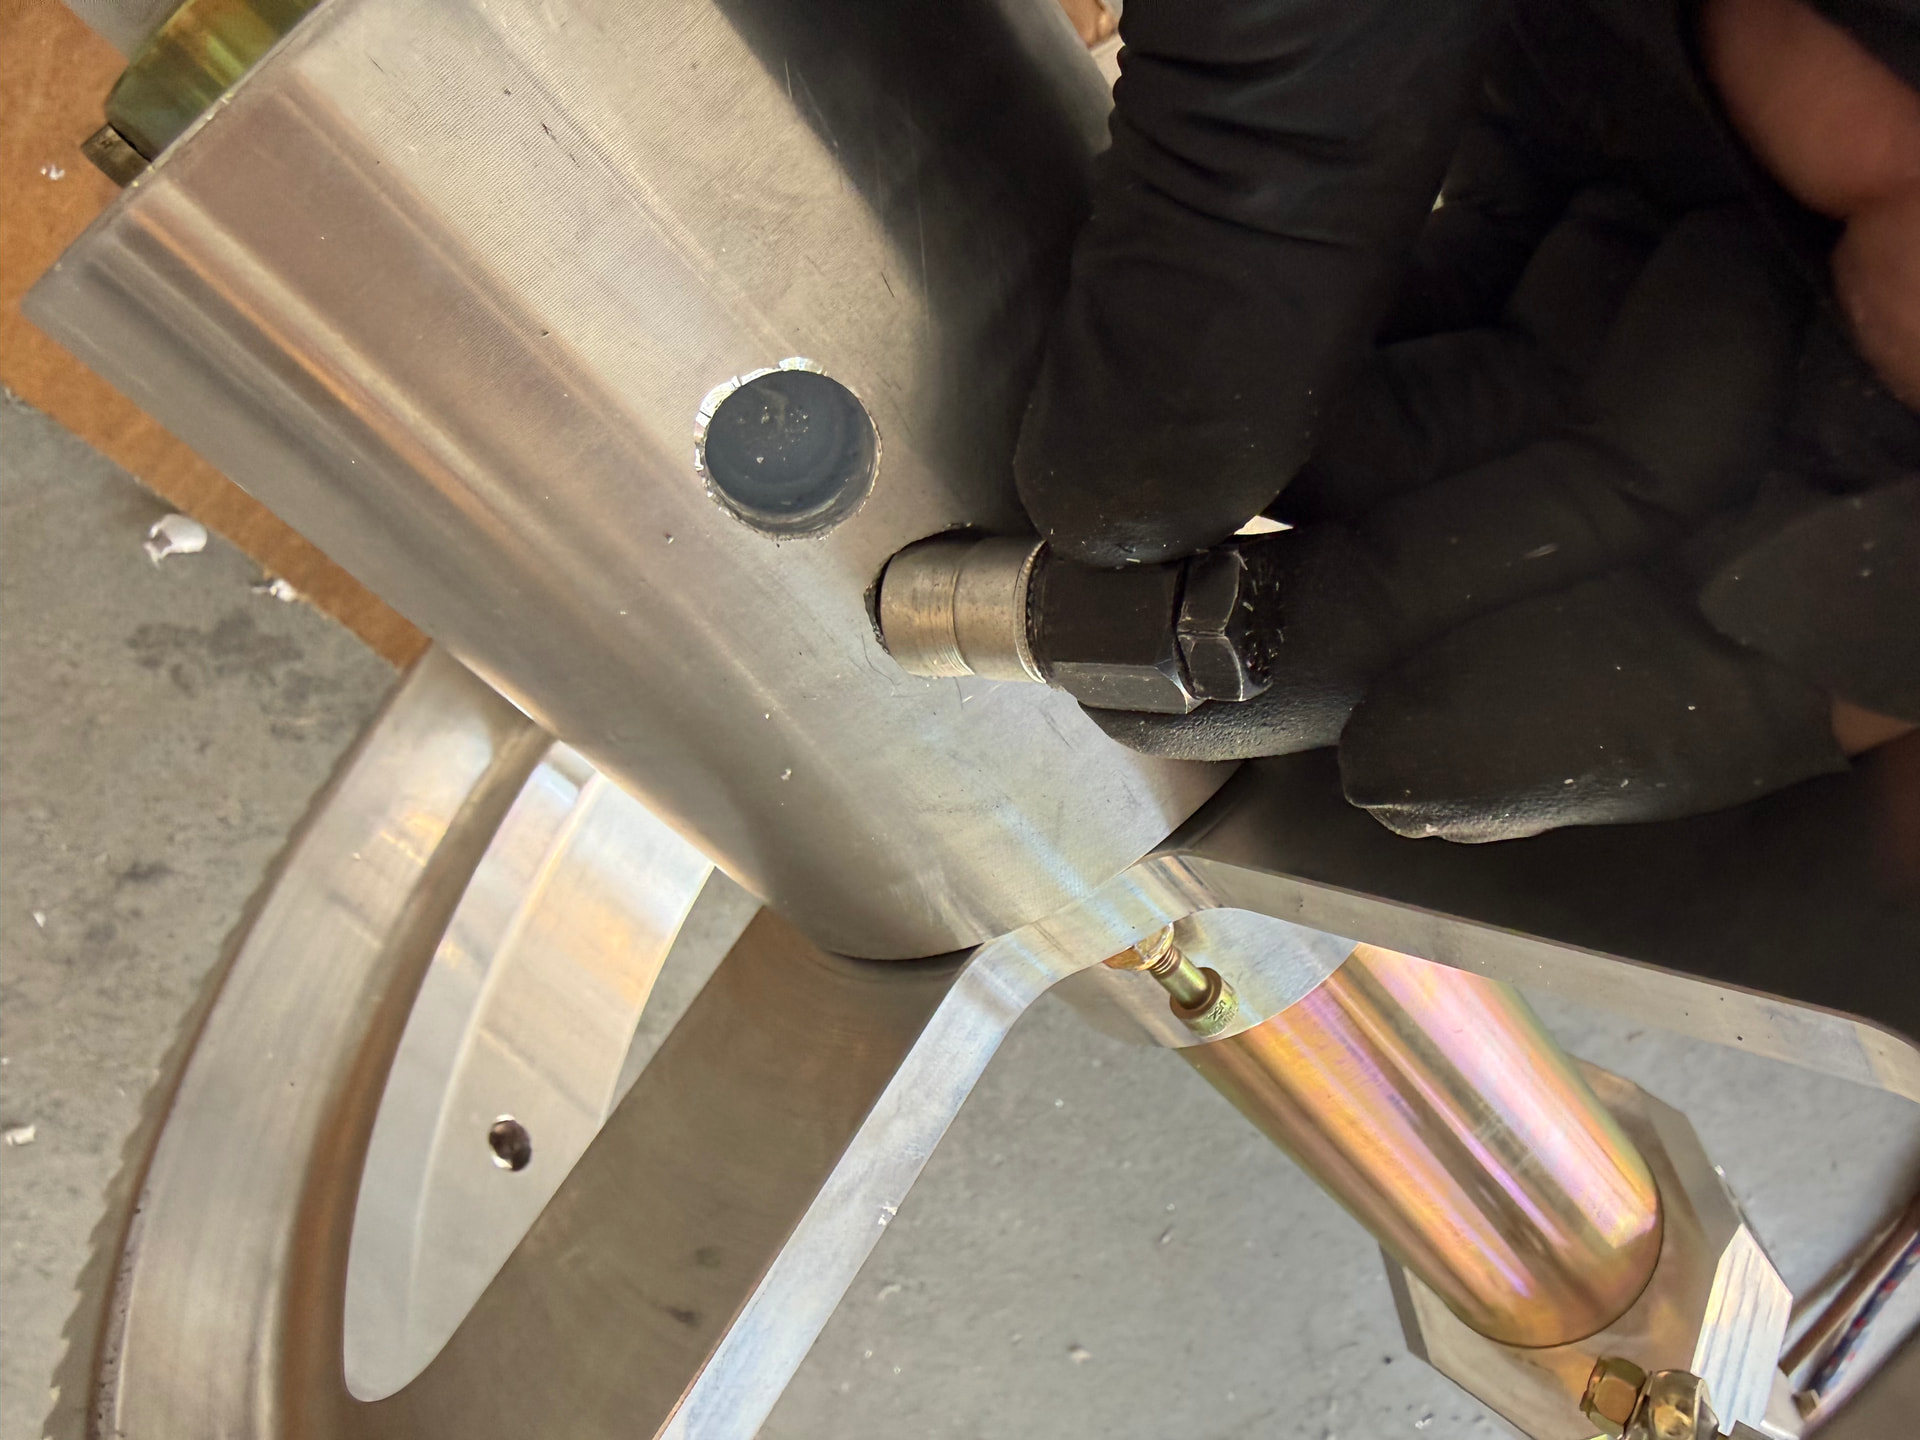
Last week started with me being the craftsman I delude myself into thinking I am. I worked on the rotor head I’ve been dreading for a year. This is not the most difficult part of the build. But it is the most stressful. The head is a clever bit of kit. It consists of a large bearing about 5” in diameter and 6-7” in length. The outer race is 5/16” of aluminum followed by 3/8” of nylon material. In the center of this is the hollow rotor mast and inside that are the controls. The aluminum bearing along with the rest of the head is inserted into another aluminum tube pressed into the structure of the sail. To secure the mast in what some people call the “jesus nut” are 7 bolts which pass through the fiberglass sail, the pressed aluminum mast-mount, the outer bearing race and about 2/3s of the nylon material. To secure the rotor mast, 7 bolts screw into 7 rivet nuts (nutserts) which the builder drills into the mast bearing.
I’d planned this for an entire day before any drilling. There is only one way to do it right and dozens of ways to screw it up. If you do screw it up, the factory allows the builder one redo. You turn the mast 45° and drill again. After that, the bearing is trash. If the description wasn’t clear, the helicopter is suspended by those seven bolts. It’s kind of an important system. And very expensive.
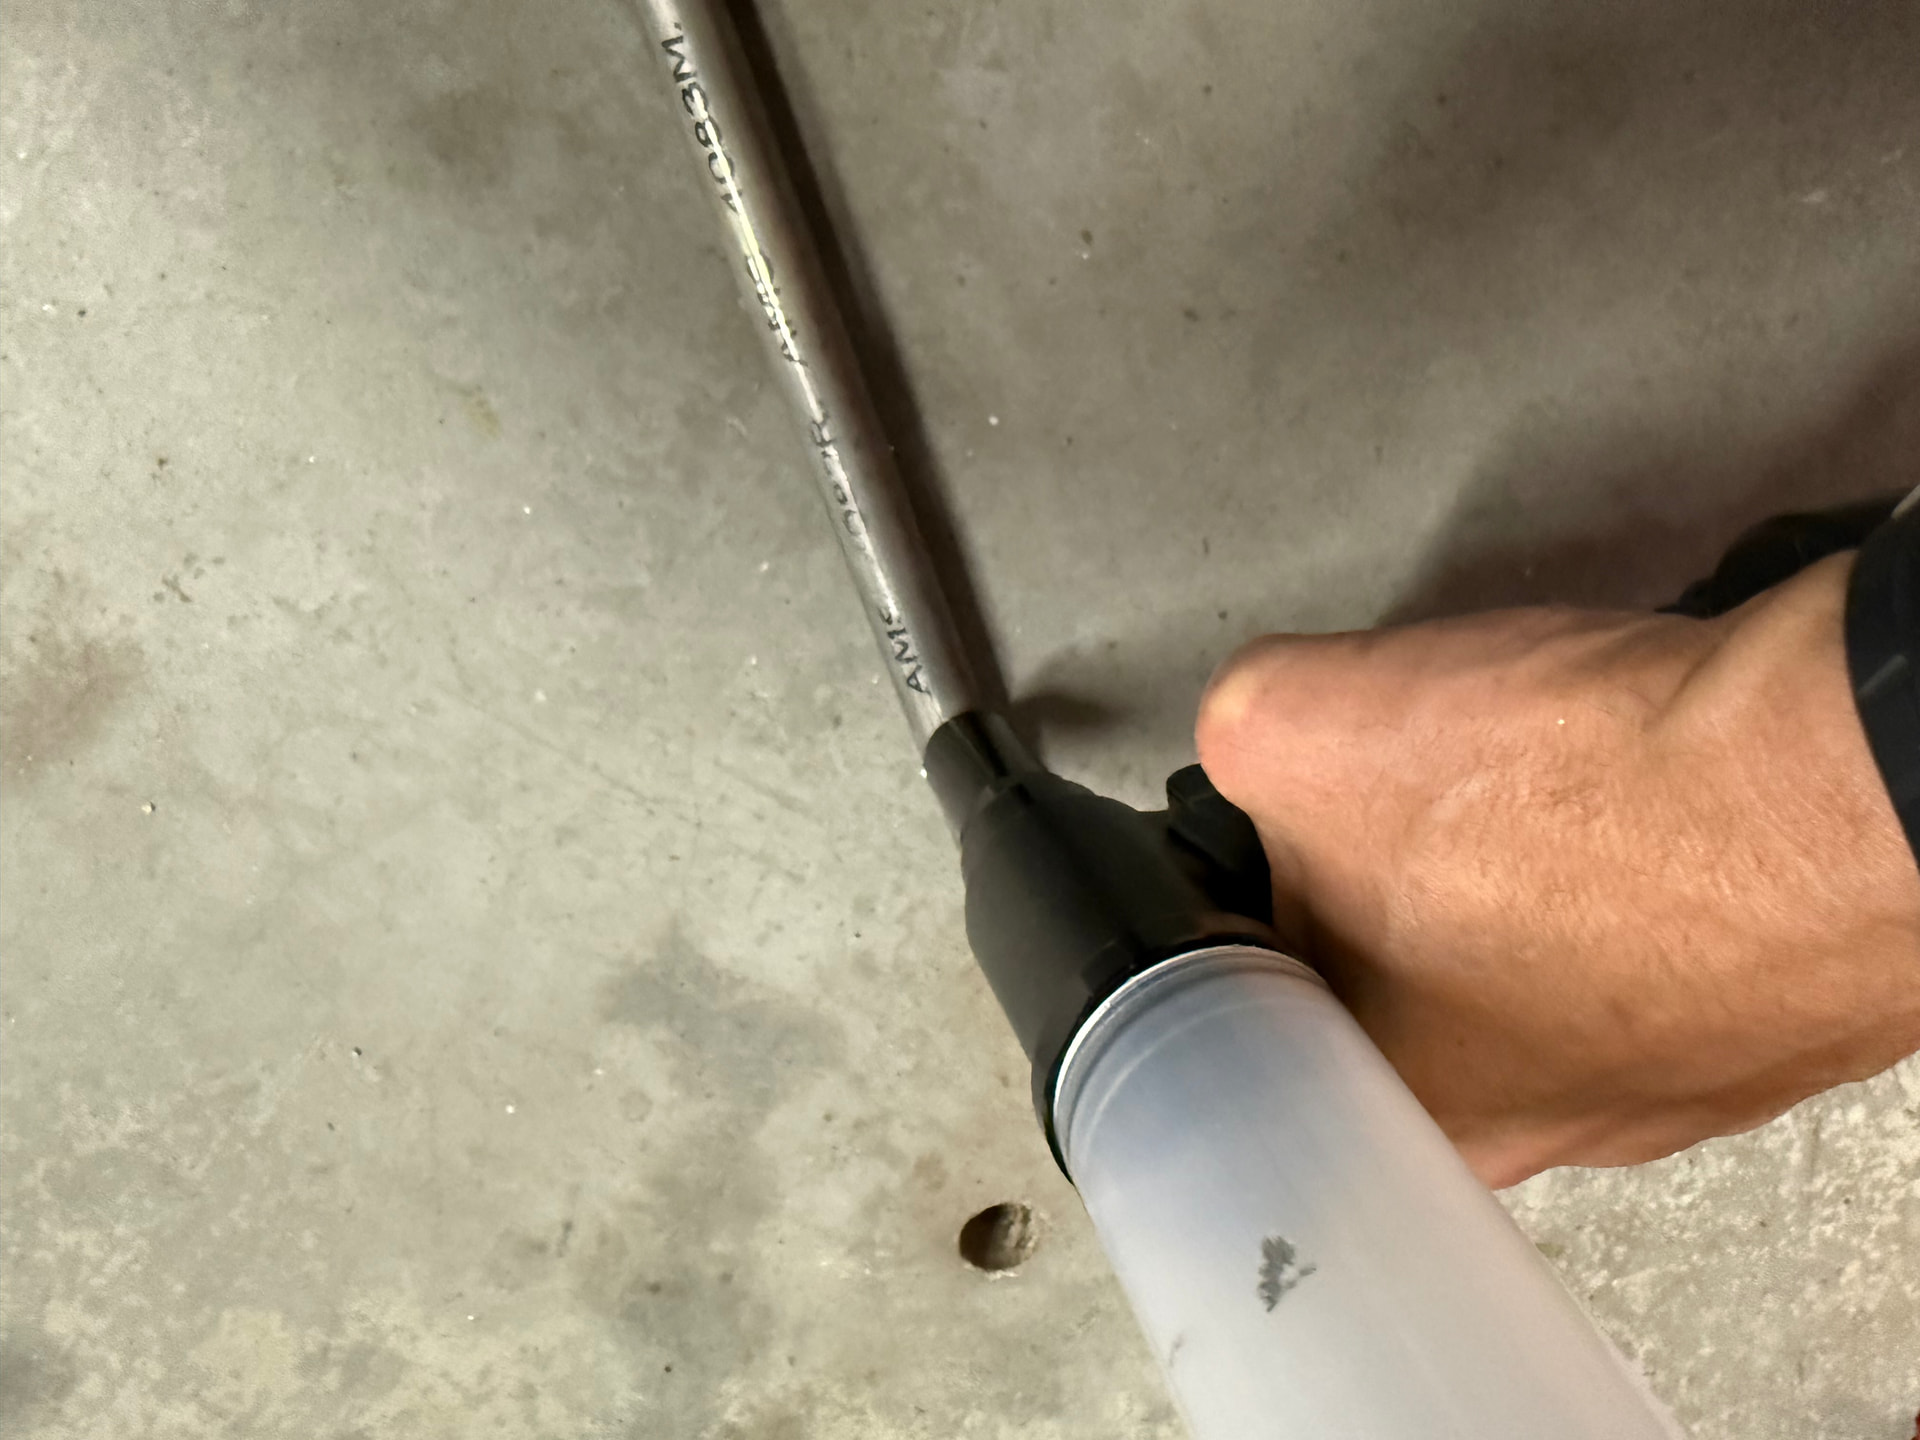
I trashed it spectacularly! The nutserts are placed into the bearing through 17/32” holes drilled through all of the aluminum and most of the nylon. A nutsert tool theoretically expands the nutsert forming a tight, threaded 5/16”s receptacle for the bolts. The bolts travel through inches of fiberglass and metal before meeting the nutserts, so alignment is critical. I crafted a v-block for my drill press and a plan to step the drills 4 times from the original 5/16” to 17/32”. I so very carefully followed the pilot holes drilled when I placed the mast on the ship. When I done I found that one hole was too big. The nutsert just turned inside the hole with no grip. I called the factory and their only solution was the 45° turn. I did that but the mast rotated unbeknownst to me. The new 5/16” holes would be too close to the originals once expanded to 17/32”. Fatigued and frustrated and scared, I panicked badly. But I realized that if I redo at the proper 45°s, I would have plenty of material between to old 17/32” holes, the four errant 5/16” holes and the seven new 17/32” holes. Again! one of my holes was too big for the nutsert. And that, too late was when I realized the problem, I was so laser focused on the hole and drill alignment, that I failed to see that the large 17/32” bit was shorter than the rest. When I get near the end of the job, the chuck from the press was striking the sprocket and creating enough vibration to open the hole. I was devastated and defeated. But then I had a solution: JB Weld (a two part epoxy that welds almost any material. Every basement and garage should have a tube of this stuff at hand.) I wrapped a fresh rivnut with aluminum shim material and stuffed it into a hold filled with JB Weld. After a period, I removed the rivnut, leaving a little aluminum-lined column in the hole.
For about a minute I prided myself on my genius, my ability to think my way out of a mistake. Then I realized what I was doing. My life would someday literally hang on this weakened, jury-rigged tube of swiss-cheese. I should know better. Today I shipped the mast back to Florida. I didn’t ask when or how much. Fools don’t have the right for such questions.
Things started out well…
But then went to hell…
I do have a photo of the swiss-cheese but I am too embarrassed to share it. Peeve or no peeve, some personal flaws are too humiliating to share. Here’s to better days and to real craftsmen.
Eric. Let us celebrate our failures as much as our successes. I promise to do the same… But yours was epic ![]() Laughing because we have all been there.
Laughing because we have all been there.
And +1 for JB Weld.
Oh man, I was going to suggest just getting the oversized holes welded up. Assuming that was a virgin casting, it’d be a pretty simple repair for any good aluminum welder. Just fill in the hole, so you can redrill it.
Someone once said that only idiots have to learn from their mistakes, but that person was a mathematician and not an engineer. In the real world, we live, we learn, we wait for the anger to subside and then we fail better next time. It is the only way stuff gets done.
SHOW US!
especially in light of your rant(1), come on Eric, fess up!
(1) I wholeheartedly agree that the all too positive bias of social media is a Bad Thing™ and that we all should strive to be more honest to one another online.
There have been so many times I had to redo bits of a construction I do. Last job for example, I am building a shed. The construction is douglas wood, which is nice tough wood, but you don’t want the ends of it wet for a long time. So I usually put in a low wall of masonry to make sure the wood is well off the ground.
To make the connection, I drill a hole in the thickened ends of the wall, in which a threaded pin goes on which are two large washers and two nuts. The vertical post of the woodwork rests on that pin and the nuts allow for a slight bit of adjustment. A clever arrangement if I may say so, if it works.
This time, we already were running slightly late on the job. And then my drilling fook’n shattered the brickwork. That was on a thursday. On friday I tore out all the shattered bricks and chipped away the cement that held them. Went back to my workshop and pre-drilled six bricks sacrificing the drill bit on the altar. Put them in, and laid another whole layer on top to make sure the rebricked bits are secure.
It ended up fine, but the job has run way late and the client is quite unhappy about that. Just because I hurried drilling those holes!
What idiot said that?
The best lesson we learn from making a mistake is that we recognise the mistake when we make it again ![]()
It was originally an argument in the vein of “measure twice, do once” or “check, recheck, double-check”. It is an ideal born from a theoreticians view, not something that holds outside the realm of perfect testability.