Oldschool PlayStation Dual Joystick Transformation

Hello there!

I just recently stumbled upon this:

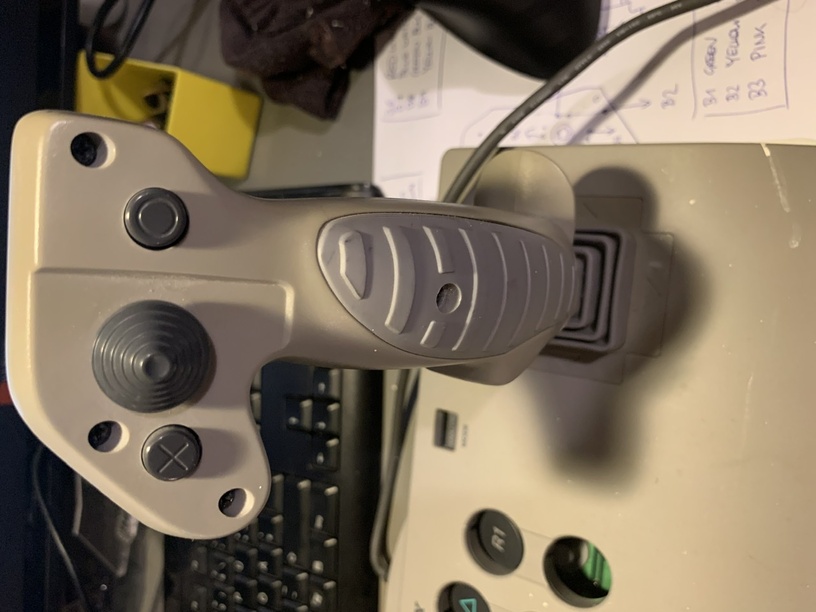
Never saw it before! I think it might be interesting for using it for SpaceSims in a dual joystick setup.

It has two fully analogue joysticks with a spacey looking dust guard. Both sticks have two buttons and a trigger each, while the right stick also has a four way hatswitch. The base has 8 large buttons plus the obvious Start and Select buttons.
Interesting!

So I actually bought one used for just 20€ along with a copy of “Raging Skies”, which seems to be a title meant to be played with it.
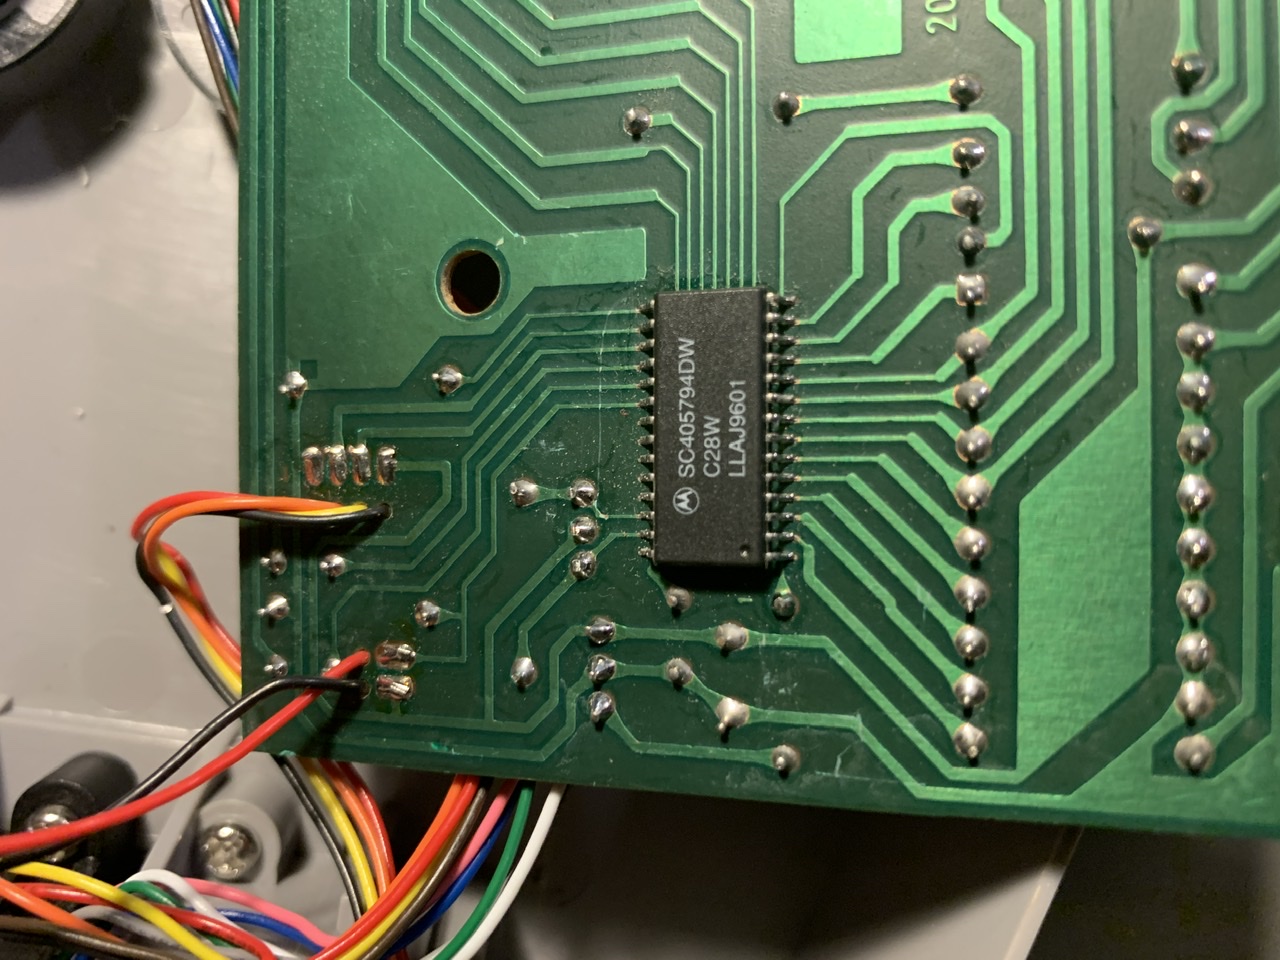
I do in fact still own a PS2 so I could try it in its original habitat, but as a engineer I can’t wait to dive into transforming it into a USB compatible device being able to actually be used with modern PCs.

As I have done this before with another old joystick, I think I will go down the Arduino Micro + Shift Registers road.

Of course this will open up other possibilities like adding more switches and axis :slight_smile:

It just came with today’s mail, so I just had a quick glance inside. I will update this thread with progress.

Maybe it is interesting for other people as well.

Cheers

7 Likes

Cool find!

3 Likes

Seems like a great way to drive a tank, if the game offers axis for each track!

1 Like

Or ConstructionSiteSimulator2020 for controlling a digger or something :tractor:

1 Like

Actually, if it can be made to work with DCS, it would be great for the Gazelle. Right stick for the cyclic and left for the ATGM controller.

Would still need a collective but a TMWH throttle might work.

If it is transformed into a USB device it can do whatever you want :wink:

Although the Gazelle does allow mapping the ATGM stick separately to the cyclic using the same axis as you never really control both at the same time AFAIK. You switch seats and then the cyclic is out of effect (autopilot) anyway…

Speaking of collective:
Any ideas about what additional axis (and where!) I could glue into the thing? I got 4 axis to waste left basically. Maybe some rotaries? Some sliders?
Hmmm.

1 Like

It does and you can (I think it is press/hold a button for the switch). That said I’ve never been real comfortable with that arrangement as I feel like it is too easily confused and/or too easy to get it wrong if you suddenly “need the collective now” to get out of a dicy situation. I’ve been thinking about loading up a third controller. This would solve that.

1 Like

So I did work on it a bit today.
First I want to share some pictures of it’s guts. I find things like that interesting, as somebody back in the days put thought into designing it and had to make decisions based on cost and requirements. Always cool to see traces of those thoughts in the internals :slight_smile:

So this is the whole thing with the backplate removed. Looks pretty oldschool. Gimbals are very simple spring loaded constructions, but look solid.

A close up to the super old school wired resistors and diodes. I wonder how they manufactured those PCBs without SMD parts … manually??

After unscrewing the PCB and turning it around…
You can see some things:

  1. the big front buttons are basically rubberdome type buttons that push against the PCB to close the circuit.
  2. tracing the circuit a bit points to it being arranged in a matrix.
  3. what looked liked removable connectors for the cables from the other side is now revealed as soldered wires. Weird.

Unknown Motorola(?) IC, did not find any info.

Those buttons are huge! So are the holes they are in. I don’t think I will try to reuse the rubber dome buttons, so that is going to be interesting. Let’s see.

Let’s move on to the sticks:

Every stick has 4 buttons (1 trigger, 1 pinkie, 2 top), while the right stick also has a 4 way hat.
Note the brownish tint on the 20+ year old plastic…

Inside the stick, there is a very simple PCB just mounting the buttons and some wires. There is no extra electronics in the sticks. Just buttons and wires for each button (with shared ground).

After that I removed the whole main PCB, think I have no use for it.
This of course leaves the holes open where the buttons were. They were duplicates of the stick buttons anyway electrically as the PS labels reveal.
I think I will somehow fill those holes and mount some toggle switches in there.

Finally I tested one of the sticks analog function with a quickly wired arduino. Feels quite ok :slight_smile:

Next up:

  • holes need to be filled with epoxy or something
  • I think I will paint the whole thing black

Edit:
Images are all rotated 90 degrees, no idea why…

4 Likes

Did you just butcher a Steel Battallion controller?

Uhm, no?

Check first post for what it actually is.
But yeah, that SB controller is a nice source of ideas :slight_smile:

1 Like

I’ve still got my Steel Battalion controller, debating doing something (not sure what) to it.