X-Plane Ortho4XP Guide

Update EDIT: See link below for more recent instructions (as of October 2019):

https://forums.mudspike.com/t/x-plane-ortho4xp-guide/3416/156


X-Plane 10 and 11 have a really good group of contributors where you can find lots of free scenery and add-ons. The free and huge HD Mesh is especially good, as is the Open Street Map data used in W2XP.

For a while now I’ve been playing with Ortho4XP, which is a free utility to add photographic scenery tiles to X-Plane custom scenery. It uses either free or commercial map services as your tile graphics and is very flexible. It’s a complex beast though, with lots of knobs (including the one behind the keyboard) to go wrong, so I wanted to show a simple guide. I would like to say though that I’m no expert on this, so hopefully someone can step in that knows what they are really doing when reading this. :frog:

Download These Bits

I don’t think the tool has its own website, but the best/most recent build can be found in the signature of the author here:

So I downloaded these two files from dropbox (dropbox confusingly shows the contents of the zip files, but just hit the ‘Download’ button top right), but do check the above author sig for the latest each time:

This is just a zip file you extract somewhere with some space, i.e. E:\Games\Ortho4XP. Ortho4XP is a python utility and the zip contains everything you need.

Plus this one for good measure (if needed or you’re upgrading), as it includes binary updates to save updating all of the above:

The latter one just updates the E:\Games\Ortho4XP\bin with the latest, so unzip over. If you get really stuck there is also a video here: Ortho4XP version 1.17 and later : binary install under windows [September 2016] - YouTube

Let’s Run This Puppy!

I then go run Ortho4XP_v120.exe from my spanking new E:\Games\Ortho4XP\bin and get this window pop up:

I think we can all agree that is fairly terrifying. The buttons are numbered, 1,2,3 so it’s not too bad after making it work the once.

0.5 Pick A Location

So first off, let’s pick an area to go build. For that I hit that top ‘Earth tile map’ unreasonably wide button on the top left. When I do that I get this:

Yours might be over the UK at lnglat 0-0 but you get the idea. So to pick where I want to generate scenery for I follow the shortcuts in the top left, e.g. Double click a square (or more) I want to generate. So it looks like this for our test run, as I picked Victoria, BC as a nice looking part of the world:

I can also preview where we are building with the ‘Choose custom zoomlevel’ button. Defaults like ‘BI’ mean the Bing Map’s service, who I am sure are delighted to have their bandwidth used this way. Let’s just leave all the defaults and hit ‘Preview’ in the new window to see this:

Zoom levels basically describe how detailed/large to make the scenery data. Level 0 can show 360 degrees longitude in a single 256px wide tile, and they base 2 down from that. A zoom level 19 (1:2257 scale) will take huge amounts of disk and you have to be very low to make out that level of details, so something like 15/16 is usually good, with 17 around airports or towns you have departures/approaches over if you want to obsess a bit. You can also see the custom zoom preview window allows you to draw zones to get certain areas in more detail, but that’s for a more complex walkthrough (he says not having ever done it).

Step 1: Build Vector Data

Let’s hit that button and get the line data for the area, so the scenery isn’t just some big ol jpg on a disk. Once hit it should look like this:

Ok, it got some node data from the nice people at Open Street Map.

Step 2: Build base mesh

Next up the terrain elevation mesh bits, as we need bumps. This should be pretty quick

Step 2.5: Build Masks

Used for rendering tile edges between categories (land/sea etc), I tend to do this but not sure if I have to every time or not. Anyway, mine went like this, 77 seconds I spent putting my left hand on my chin and bouncing the mouse pointer up and down - recommended:

Step 3: Build Tile

Although it felt like we would never get there, let’s build the tiles! This will go grab the graphics from services free or otherwise and literally reticulate splines (for once). This will take a while and probably make your computer warm and toasty too. You can follow the grey ‘Download progress’ bar that doesn’t look like a progress indicator but actually is:

So what did it do? Well, it made a new folder with some X-Plane scenery data, like this one from the above:

As you can see, even just at defaults and using level 16 it likes to store stuff.

Now rather than do the individual steps show, what we would normally do is pick a bunch of ‘areas’ and use the ‘Batch Build’ from the first screenshot - that’ll automate things and take a while.

To install the scenery you can either cut/copy & paste from your new E:\Games\Ortho4XP\Tiles folder created to your X-Plane install, e.g. E:\Games\X-Plane 11\Custom Scenery or use a file junction to not move it. You can also specify where the tiles get built too. Here’s my XP11 (it works on either 10 or 11) where I just put a link:

##So What Does It Look Like Frog?

Here’s X-Plane 11 with some default scenery - it’s actually quite nice:

Here’s the (seasonal, because that’s what Bing Maps does as our photo source) ortho photo scenery for the same area with all the options we just ran above:

So, just a quick intro and the photo stuff is definitely an acquired taste but good for a realistic feeling if you aren’t ‘helo low’. It is worth trying out some trial areas with the different map providers (but don’t tell them, ssh!) to see what you personally like the look of best. The examples above use the default ‘Bing’ and maybe they are just welcome to get someone visiting them.

Next more advance next steps would be using the Custom Overlay to combine data with the existing HD mesh/OSM data and general digging away to make it look better. Once you have your settings then the batch build makes it easy to just tap and go (and buy more disk).

There’s lots to do to improve from the defaults but hopefully this posts shows it isn’t too hard to use or install anymore. It’s also better than paying a lot of money for similar scenery.

Series continues…

HDMeshv3 Part 2 here - X-Plane Ortho4XP Guide - #4 by fearlessfrog?

w2xp Part 3 here: X-Plane W2XP and OpenSceneryX Guide

7 Likes

Woot…! I know what I’m doing this weekend…!

Awesome guide…can’t wait to go though it and do it step by step…

1 Like

I am a bit of a toddler with a shotgun, so I’ll help if I can. I was just hoping this post would taunt someone better qualified to come correct it. :slight_smile:

1 Like

##How to Use HD Mesh Overlay Data With Ortho4XP

As we all made it alive so far, the next and probably first question will be 'how can I use my nice alpilotx.net free HD mesh scenery with all this? First off, if you don’t know about it, it can be grabbed here:

http://www.alpilotx.net/downloads/x-plane-10-hd-mesh-scenery-v3/

There is also an !!!ULTRA!!! UHD version that is even bigger, but I’m not sure it’s worth it (maybe for jaggy mountains though, so maybe). So I grabbed this area, shown by the artistically challenged red X. The map acts as a way to know which files to grab:

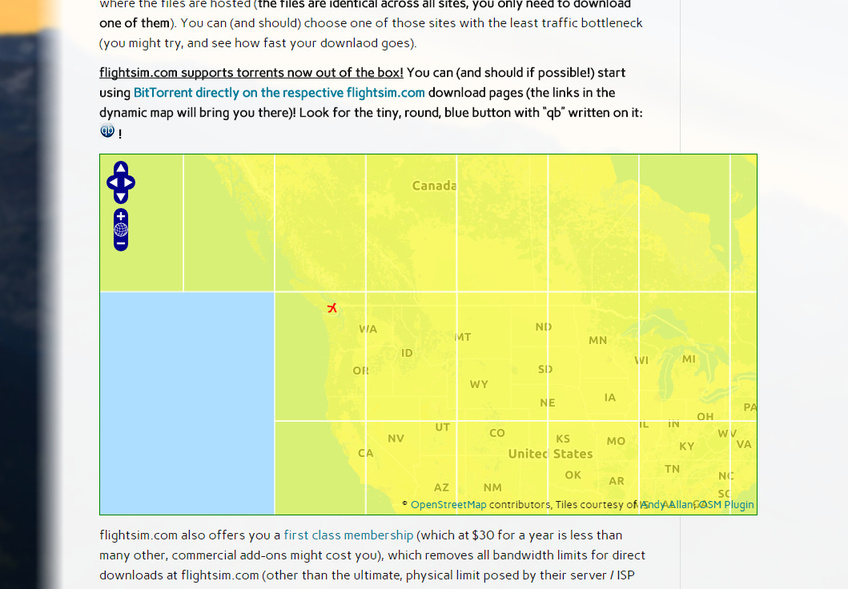
The site flightsim.com is worth registering with as they hold .torrent files that for me came down quickly, but try the others as well I guess.

Now, there is usually some confusion over this (so I hope I’m right) but I believe that only the overlay Open Street Map like info (things like roads and autogen scenery locations) are read from the HD-Mesh download, as there is no way to have two elevation meshes combined in XP10/11. The Ortho4xp doesn’t actually need the HD-Mesh download anymore after the overlay directory has been built, so you can also remove it to save space. There is no point having two meshes as X-Plane will just use the one anyway. The ‘Curv_tol’ setting in the ‘build base mesh’ area is used to set the number of triangles in the mesh and is worth playing with.

If you already use w2xp and the w2xp net scenery for overlay stuff then you don’t really need to do this in Ortho4xp, although they do cover slightly different things (you actually get roads, powerlines and autogen from HD-Mesh data and the rest from w2xp)…

Anyway, once HD Mesh v3 is downloaded and unzipped, to build an ‘overlay’ you just do this:

The Michelangelo-like red arrow at the almost bottom shows that you just point to your HD-Mesh v3 directory (you might already have it under Custom Scenery for XP) and then the (Build Overlay) button does the rest.

What you end up with is a new scenery folder called ‘yOrtho4XP_Overlays’ in the base install directory of where you put Ortho4XP (mine is E:\Games\Ortho4XP\yOrtho4XP_Overlays). You then install this like you installed the other scenery, either copy it into Custom Scenery or symbolic/junction link it in. It should then look like this (Note: you can see I don’t have the HD mesh in anymore as it’s been ‘used’):

So, we now have nicer ‘overlay’ data and have told X-Plane based on the more recent streep map data where things are. Let’s take a look:

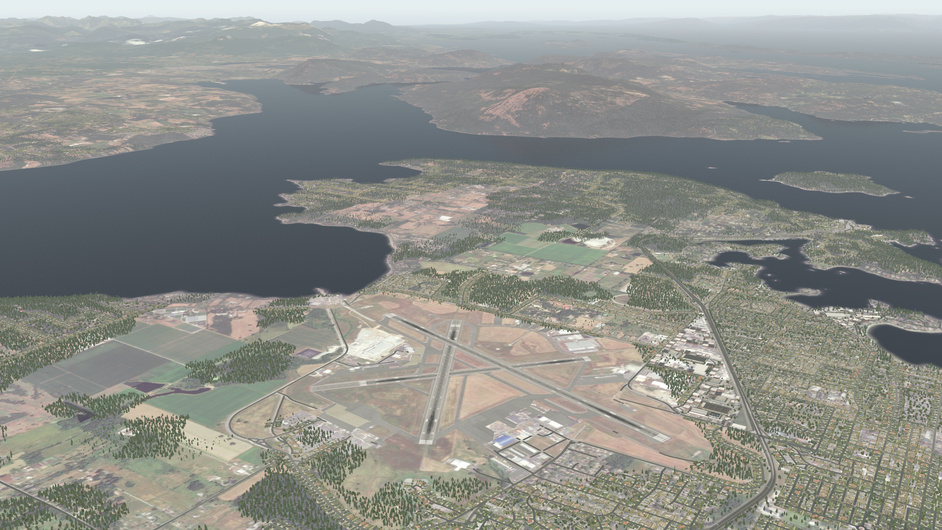
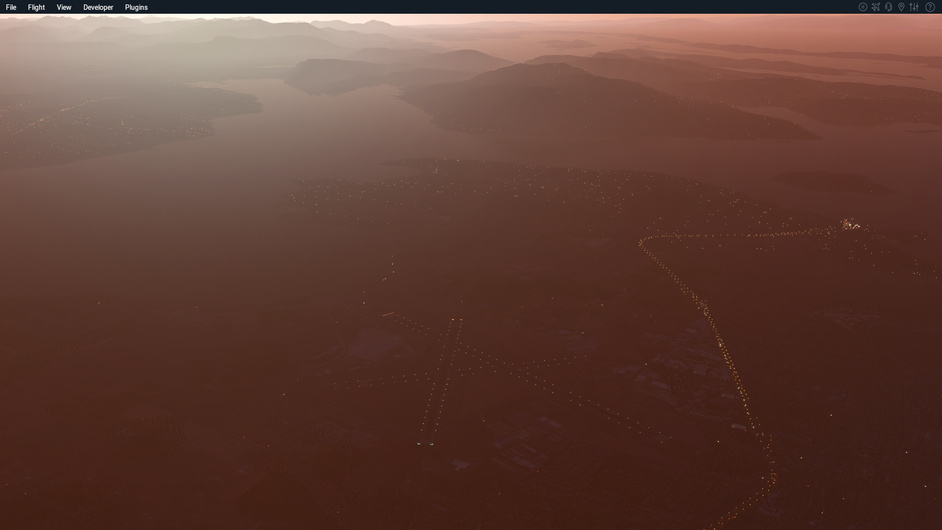
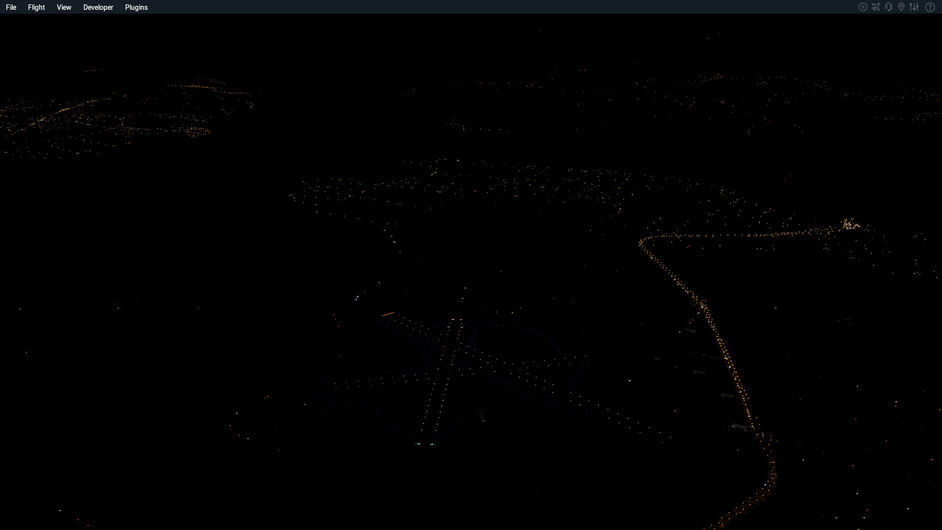
The keen of eye will now see that the roads, trees and autogen buildings are now in the proper place and things look less flat. It looks even nicer at night with some traffic and street lights (something XP is very good at):

It all lines up with the photo scenery too plus only took 5mb of space as well. Neat!

If you do fly really low a lot, then it’s worth building tiles to a higher zoom level (the defaults in this example are only zl 16, but check out the ‘zones building’ in the first post) but you can see the autogen does pretty good at combining:

For an X-Plane 11 beta install it might also be worth playing with the default scenery data that comes with that install. The OSM overlay data seems pretty good, so it might even be just as good to point the overlay directory to E:\Games\X-Plane 11\Global Scenery\X-Plane 11 Global Scenery anyway and save doing the HD Mesh big download… For a future experiment!

Also, things I want to try but if others have done already do say:

  • Try a ‘Sea Source’ tile, as although we lose the water reflections some coastal graphics will look nice.

  • Try a different ‘Curl_tol’ as how detailed the elevation mesh triangles are over somewhere like the Rockies or Andes. There’s an interesting comparison here that shows that in some cases the mesh data in Ortho4xp is actually more detailed than what you get with HD Mesh v3 anyway:

http://oscar.pilote.free.fr/meshtoolortho4xpcomparison.html

  • Over lake areas (Ontario etc) try out some settings on using ‘masks for inland’.

  • Figure out more the ability to draw shapes for zones to have higher level zoomed tiles for areas around airports or places I know I’ll be low on a route. The zoom level preview tool looks pretty straight-forward to use but I’m curious to see how XP picks up these around airports etc.

  • Write up a guide on the batch build screen, as it’s a bit weird to use.

  • Try a different map source, as I’ve heard USA_2 is good for well, you know…

  • Bring it all together with the use of xOrganizer…

1 Like

2 Likes

Oh c’mon now… Every parent over the age of 60 has the Bing toolbar installed. Ask me how I know!

So the big question - did you find your house? And was there a Microsoft van parked in your driveway? They want to know where all their Bing data is going.

1 Like

I’ll look, just checking out the local Volcano - Mt Baker is looking good today under the left wing!

The valley looking sunny, but then I set it to June as fed up with snow already…

For these I used the USA_2 map tile source with a default of 17. An area about 200 square miles comes out to 80 GB very roughly.

EDIT: Here’s what you get for your 80 GB in the nice xOrganizer view:

2 Likes

that looks awesome, but holy smokes that’s a lot of storage.

It is, although I’m not sure I’d need that level of resolution that often - I just picked a bunch of areas to let me VFR anywhere in a big circle around Seattle / Vancouver, BC to get a taste. A smart way to do it would be to draw zones around the airports and then use different detail levels (and then storage) for different places.

2 Likes

For sure. Although after seeing that it kinda makes one want it everywhere. Imagine all the trees you could fly over in the middle of nowhere :wink:

1 Like

Real area comparison, to check mesh:

(Plus bonus cow in cranberry field, although looking at it again I’m about two fields too far back)

With some stock XP 11 clouds and weather:

The mountains come out really well with the mesh and photo scenery:

The lighting model in XP11 is so far quite nice:

4 Likes

missing water drives me nuts

It annoys the fish that were in there too I would imagine.

1 Like

Amazing guides though, thanks very much. As a newcomer to X-Plane it’s one thing I would really like to do is improve the scenery. Hopefully these step by step guides can even help a numbskull like me.

2 Likes

Yeah that’s pretty great, thanks a lot!

1 Like

There’s a big body of water in that real photo… :slight_smile:

That’s just mist in the photo - my moody photography art :slight_smile:

The two Mt Baker ones are both from X-Plane.

1 Like

lmao. I’m obviously blind.

Yep, they do seem really regional. Bing Maps is great for the US, but is really washed out in Canada (ironically the source ‘USA_2’ is better for Canada). Also different zoom levels seem to be quite different sometimes (perhaps between aerial and satellite sources). I think the name of the sources are pretty cryptic but are region based (Aus = Austria or Australia :slight_smile: ? ). Definitely worth just rending a single test tile first.

If you find good sources results for a region we can share them here.

2 Likes