My old love, the Viggen is finally in DCS, and it’s great!
Those of you who have learned to fly the DCS Viggen, or are in the process of learning I should say, know that an extra joystick is quite useful for radar control, navigation fixes and Rb75 (AGM-65A Maverick) targeting.
I happened to have a spare stick, namely the VKB Black Mamba, since I got the BRD-N Black Stork (Yeah, any joystick worth its salt must have ‘Black’ in the name).
I also happen to have an old pincher type gimbal for the VKB stick, since I got the cam gimbal upgrade. This pincher gimbal is still very good, and deserves a new life.
See where I’m going with this…?
I will make a Radar Controller for the Viggen.
I have got some TLE5010 magnetic sensors from AliExpress that I will use together with a Teensy 2 controller and of course the very versatile MMJoy2 software that I used for my ConTrollR.
The stick will be a ‘look-a-like’ with all the functions of the real stick, but there will be DIY concessions to the design.
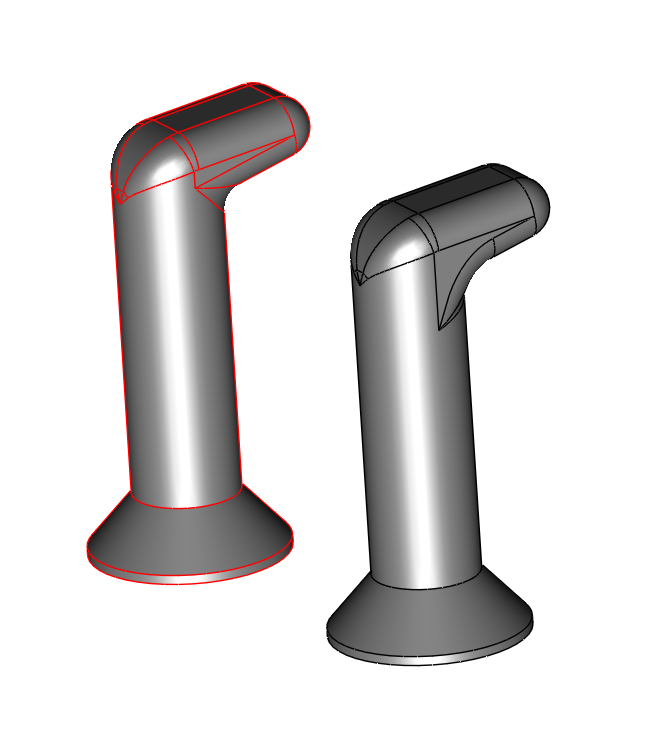
The stick grip will be 3D printed and I have started on the design.
Right now I’m contemplating how to blend the top to the stick… Your input is welcome, as always.
I was experimenting with using the right throttle on my Warthog, fixed in the idle position, as my radar stick. The left throttle was for the Viggen’s actual throttle. The micro stick on the Warthog leaves something to be desired, and the left throttle by its lonesome is not very ergonomic…
Can’t wait to see your finished product! Are you planning to mount it to a box with dials, or simply have the stick?
Absolutely! My clumsy fingers can’t do much with it…
A small box with the radar dials. Maybe a button or switch, if there’s room for it
The stick itself will have the 3-stage top switch, dual stage trigger, two buttons and the dial.
I wonder if they make cheap, easy DIY force-sensitive sticks. I don’t have a lot of room to mount a second stick with a lot of throw. An F-16-like force sensing stick, however, would be perfect.
Revisions to the design…
A 3 position switch, a dual stage trigger, two buttons and a rotary encoder need some space.
Had to make the stick slightly wider, and the head bigger.
What do you guys think?
The rotatry encoder is the little wheel on the right side? Perhaps give the trigger a little curvature to fit your finger better or is this an accurate representation of the real thing?
It has a very slight curvature. I may increase it slightly.
No. It will resemble the real handle, and will have the same functions. But I have made some design alterations to make construction a bit easier and to fit all the switches and encoders.
I think EEVBlog did a youtube video on auto-routing recently. Haven’t seen it yet but must be interesting. I kinda like the whole idea of auto-route but sometimes you just need that little human touch!
Yeah, for sure!
Especially since I need to fit the ShiftRegs inside the handle, and I’m using regular resistors. I see other use resistor networks to save space, but I’m stretching my brain enough as it is…
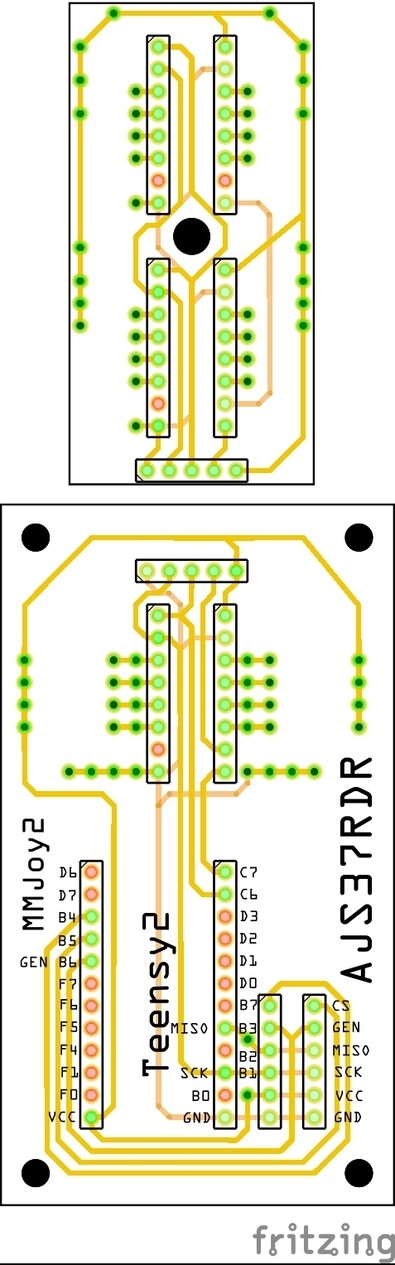
I’ve got some 74HC165 chips, and I’m using 1K resistors.
I downloaded KiCAD but that was totally over my head…
Guess I’ll just have to re-draw the design in Fritzing
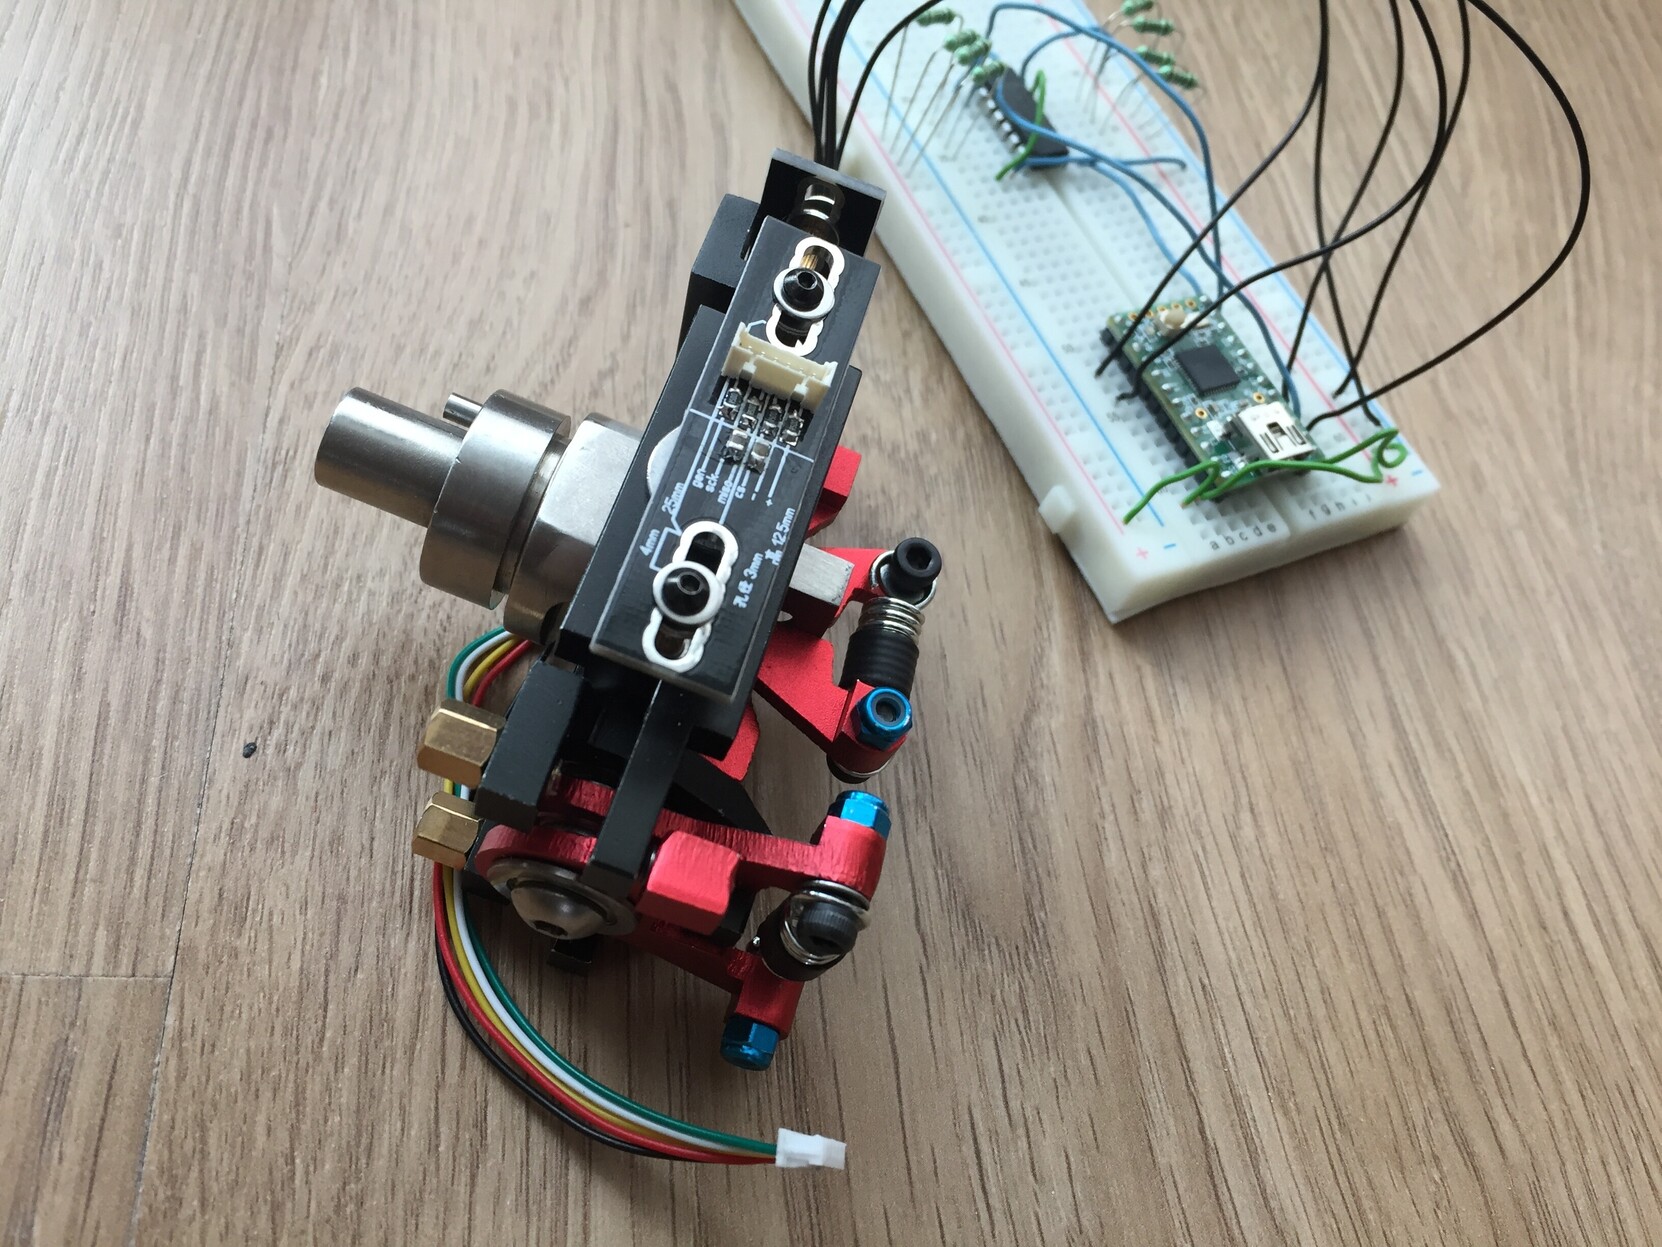
Happy to say that everything worked as I hoped! The TLE5010 Angle sensors from AliExpress are perfect!
And @TheAlmightySnark, why didn’t I try Shift Registers before…? They’re awesome!
Think I’ll get me some surface mounted resistors to save some space on the PCB. Are they hard to solder?
I know right! I’ve got a bin filled with em, cheap as chips!
SMD soldering is fine, watch a few youtube tutorials on how it’s done and you should be good to go. Can’t say I’ve ever done it myself but it is no magic as long as you have a good iron and a pair of sharp pincers.
So about those pull up resistors, perhaps consider using a resistor bank? Also are you going to use the other 6 inputs short of the 2(or 3, if you use the pushdown function) of the rotary that you need?
If not you can leave those pins floating and ignore them in the software. Something I’ve been wanting to try, especially with binary states like this with a shift register that is passing it on to software anyway, is to debounce it in the software. You can also consider that an approach. Either the Teensy or whatever package you are using on the PC can be sufficient for that! Couldn’t tell you much about that to be honest, never tried it, but last time I made 165 bank I kinda got tired of all the soldering.