The ConTollR

Due to popular demand, I thought I’d post something about my DIY throttle, the ConTrollR. Yes, @Maico came up with the name :slight_smile:

I did a build thread about this at SimHQ. I have since then migrated over here.

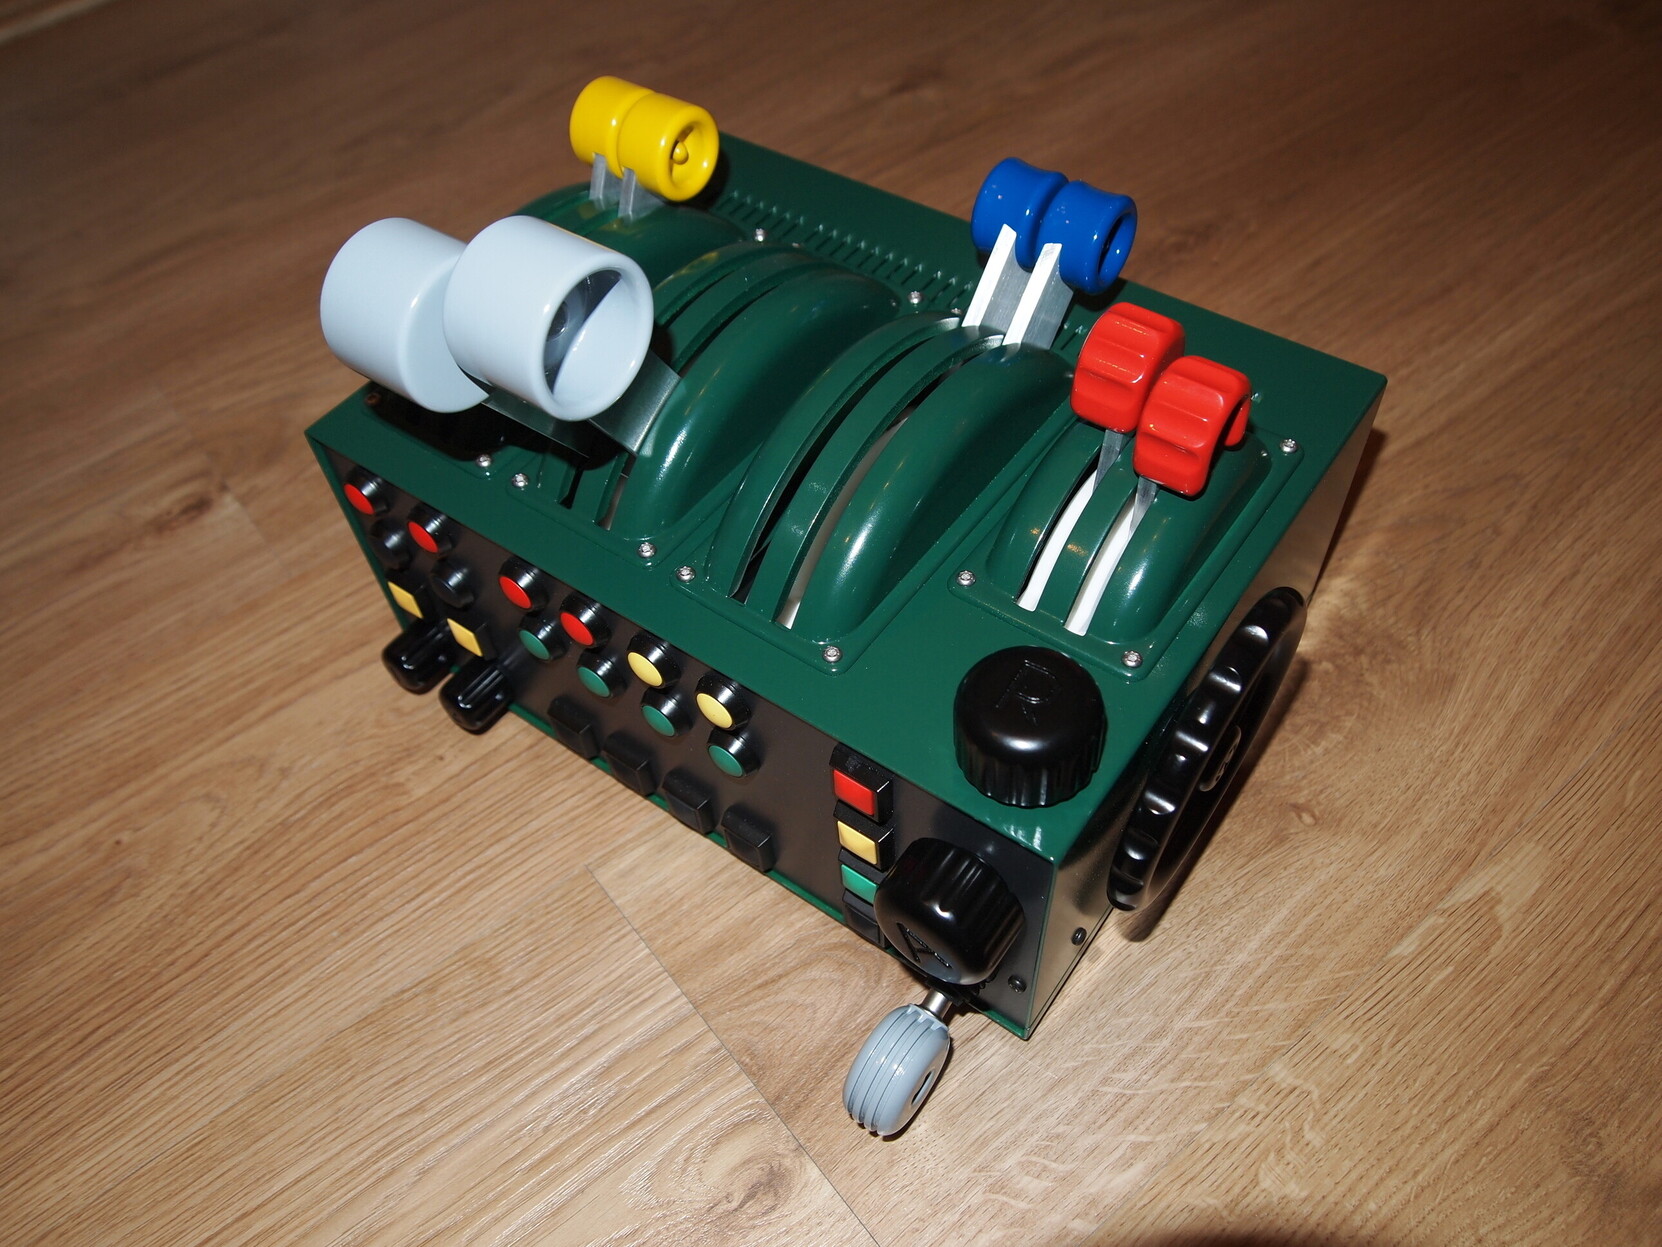
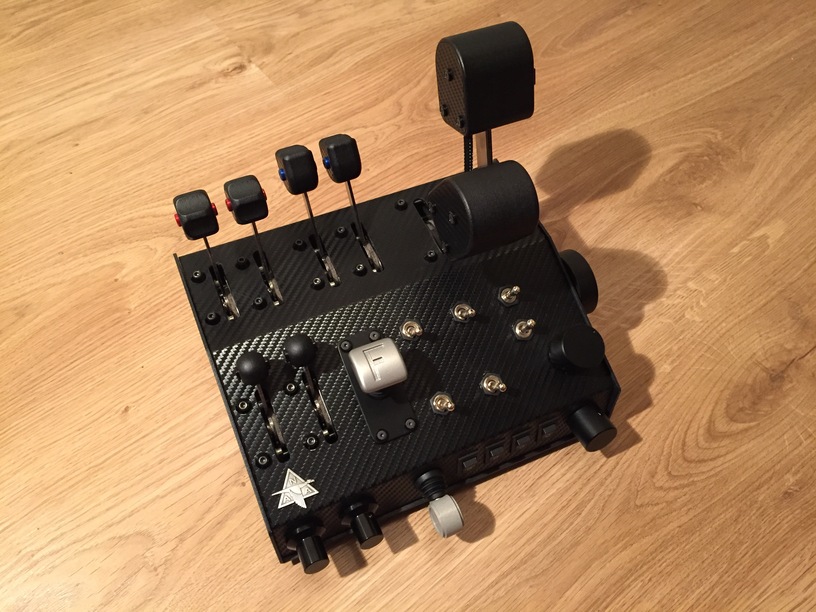
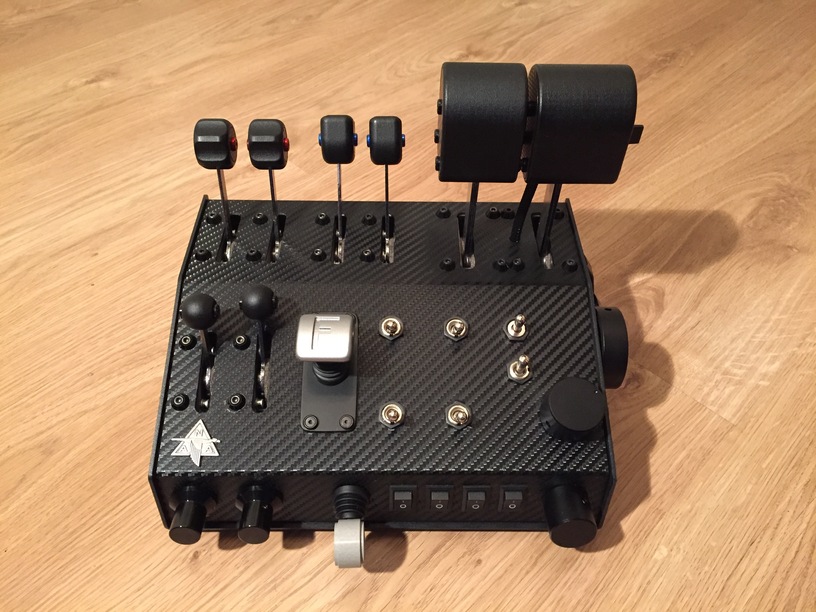
Anyway, I wanted to build a controller with dual throttle, propeller and mixture for use in FSX, X-Plane and IL-2 BoS/M/K. DirectInput has a limit at 8 axes and 32 buttons, so I went with that.

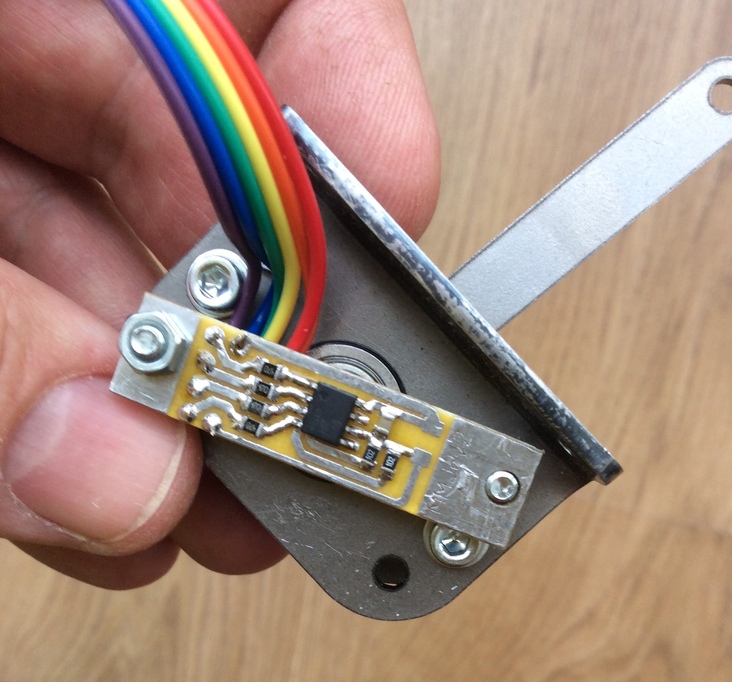
I bought the lever mechanisms from a DVik on the IL2 boards. They are very compact and sturdy.
He sells them with or without TLE5010/11 magnetic sensors that are incredibly precise. Highly recommended!
The handles are my designs, 3D printed from Shapeways.com.

This is DVik’s small lever mechanics with the TLE5010 sensor mounted.
Behind the chip, there’s a magnet, mounted on the screw that makes up the axis of the mechanism.

I spent a lot of time on a CAD software, testing different designs. This is filed under the same category as “measure twice, cut once”. :wink:

The brains of the outfit is a Teensy ++2 controller with MMJoy2 firmware, on a PCB I designed myself. It’s a button matrix setup. Same principle as a keyboard. MMJoy2 can deal with shift registers like those found inside a Thrustmaster stick as well. Basically different ways of connecting 32 buttons to just a few pins on the controllers, without messing up the signals :wink:

I got DVik to cut the aluminum sides for my handles as well. Here’s the right hand throttle with the speed brake switch.

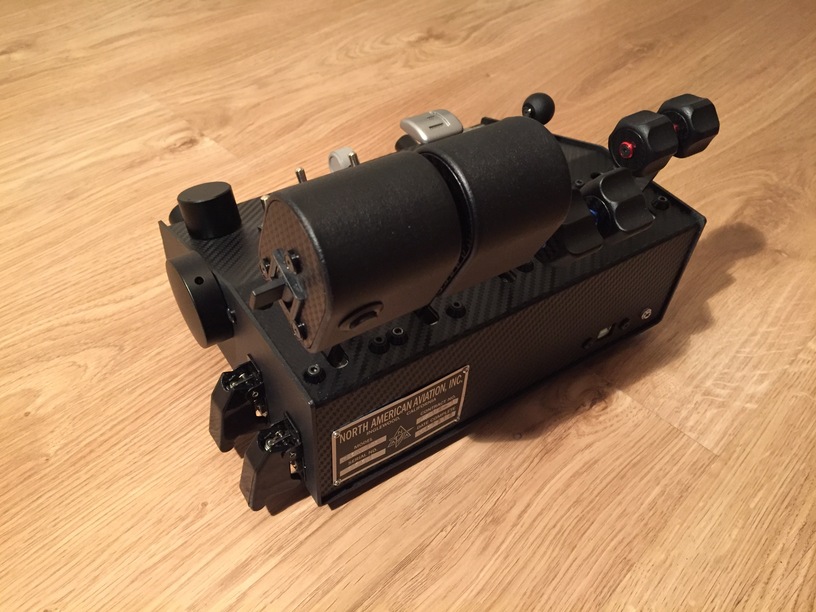
This is the aluminium electronics box I bought of Ebay. Covered it in textured carbon fibre vinyl from a car tune-up store. Holes and slits are drilled and cut. Aluminum is easy to work with.

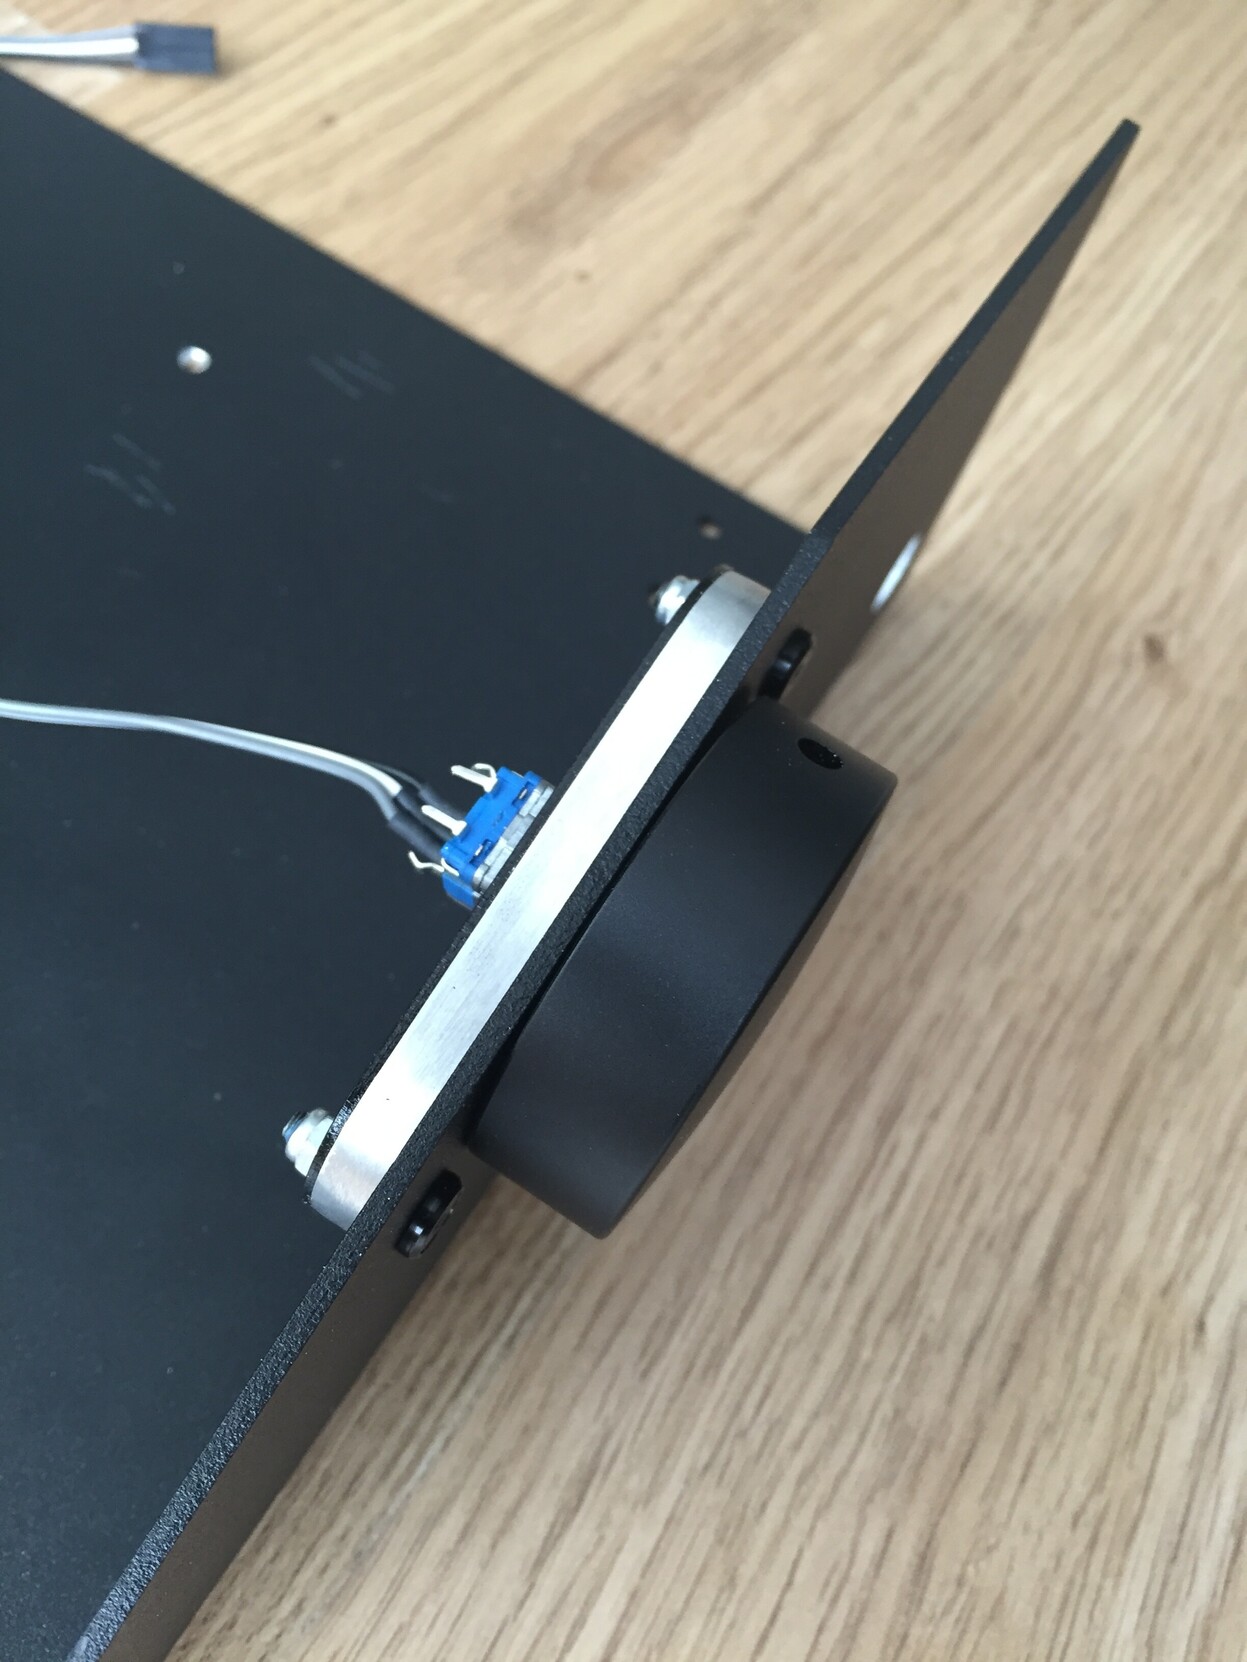
I’m using rotary encoders for elevator, aileron and rudder trims wheels, and another two for other use. Rotary encoders output a button press for each dent it is turned in either direction. Works really well for any control that use a button one way, and another button the other way, like trim. It’s just like assigning pitch trim to the PoV hat, but here it’s a wheel that does the same thing.
I gave the elevator trim wheel some extra support by offsetting it inside the box, and a bearing on the encoder neck.

I use two Honeywell “pull to operate” switches. One for landing gear and one for a 3-stage flap switch.
I replaced the spring with lighter ones, as the original ones are rather stiff.
The flap handle is my own design, 3D printed in aluminum.

https://youtu.be/zMP_Wd6xaw8

That’s the condenced history. :wink:
Feel free to ask me anything…

13 Likes

That’s really dang cool!

1 Like

Great stuff.

The only thing I have made is a cup of tea this morning, and I managed to spill milk all over the counter-top. :slight_smile:

How much did that cost, assuming you don’t have the printer!

3 Likes

Very impressive.

1 Like

Love it.

1 Like

As much as I love a simple matrix setup, would it not have been a lot quicker to just daisy chain a bunch of 165 or 595 shiftregisters? Or am I missing some voodoo behind your design that is not obvious to me? :wink:

1 Like

Shapeways is one of the bigger printers, this is their data sheet on aluminium:

They’ve hidden the price since I’ve last checked though, I wanna bet that is determined based on the model you upload instead of the more common price per volume.

Ehrm… $60…! Not, cheap, no. And this is the problem with me, and my projects. I learn new stuff and get carried away. I just want to try this, and then try that. :wink:

Probably. But a matrix was something I could wrap my head around, and understand. Who understands a shift register? :wink: But next time I will give shift registers a go.

It’s the same principle as the other materials:

$10.00 handling fee
$7.00 per cm3
$0.23 per bounding box cm3
$0.45 per surface area cm2

http://www.shapeways.com/materials/aluminum

1 Like

Haha, it’s very simple, think of it as having 3 lines. 1 line is where all the data goes through bit by bit. The other line is like the valve, if you put a little power on it, it will either read whatever is on the 8 ports, or sets the output on the ports(depending on if you have the output or input shiftregister). The last line is the clock line, evertime that rises and falls from high to low it will select the next place to read or write a bit to!

Really, the data sheets make it look tricky but it isn’t at all that much.

Yeah! :slight_smile:
It was also an issue of finding the right parts.

1 Like

This is cool!

I am looking for something that can go right next to my Warthog throttle to add a few more levers and switches - something that I can augment the warthog with. This gives me some ideas! :slight_smile:

How did you cut out the slots for the throttle/mixture/prop pitch levers?

1 Like

Aluminium is very easy to work with, you can use bigger drill bits to drill the holes at either end, then remove some of the middle with them too if you would want to, or just use a mill bit to cut through it sideways, then use a file to even it out.

Perhaps @Troll used another method though.

2 Likes

Nope! :slight_smile:
Troll drills the ends, and cut the middle with a dremel and a cutting wheel. I use a file to even out the cut.
Troll would like a CNC milling machine though… Or a laser…! :wink:

2 Likes

I knew the @TheAlmightySnark would take a keen interest to this thread - he has that engineering mindset too. Me - I’d very likely cut a finger or two off making that thing. And what a thing it is - form AND function…what a beautiful creation!

2 Likes

Even a drill press would be epic, been looking for a second hand one, just haven’t gotten around to picking one up yet. Really need it to since the drill I currently use has the chuck offcenter from the axis due to having had to suffer too much pressure during normal work! Makes it hard to accurately drill.

Laser engravers also have my fancy, makes building panels really really easy!

@BeachAV8R If you never try, you never know! Get a sheet of aluminium and some basic tools and play around! As Adam Savage says, you really need to build things twice, once to learn, and the second time to do it right. :slight_smile:

2 Likes

6 posts were split to a new topic: Suncom Talon Rewire As Warthog?

These look like the most complicated mechanical bits. Do you have a link?

Where do you have your rotary/axis mappings? On the PCB?

Also. What is this?

See I start thinking of this and I get lost in all of the details.

I ‘think’ this is one of the locking switches but it looks to be side mount. Would you need a momentary switch version? One that only fires the on ‘signal’ for a short time or would this version, which I think is on until you switch it off, be good enough if the software handled the momentary part (ie: a single key press instead of holding down the key? Is that a thing? A concern?)

Very very nice. Thanks for thepost

1 Like

I have got that! Best tool in my inventory.
Another hobby of mine is building radio controlled aircraft, so I have a bunch of nifty tools.

LoL! That’s so true! :heart_eyes:

This is actually my second throttle. The first one had DIY hall sensors and lever mechanisms. It got too big, in the end.

A few pics of my first:

2 Likes