ah, @Troll got my ribbon and silicon in. Maybe basic, but what was best method to stop the fraying? I have an epoxy and or maybe thinking to use my torch… Looks nice enough though. Not sure which way I’ll go on the connection. I was leaning on trying to crimp to a 6AWG ring terminal and a momentary heavy duty momentary, but even 14mm probably too big for that.
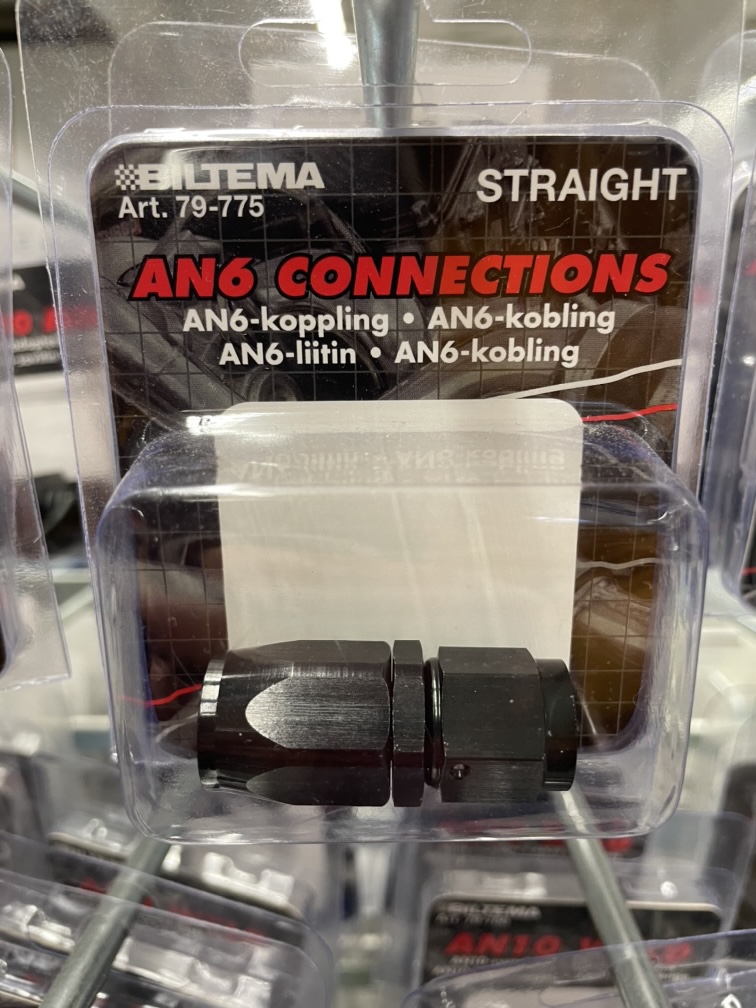
Depends on how you will attach the braided silicon tube. I used AN fittings like these:
So I pulled the braiding slightly long and melted the ends with a lighter.
On the earlier build I used heat shrink tube on the ends.
Do they have local “community access” TV Chanels here in Norway? If so, you should think about doing a program on all the different things you do building flight sim stuff. Call it “Flysimulatorbygg” or something like that. ![]()
Yeah, it’s called Youtube… ![]()
I’ve been fighting with my 3D printer (heat bed not heating… replaced that but still not heating so probably replacing the Melzi board next). Haven’t really had time to work on it but did this weekend. I think I ordered the wrong size hose (16mm OD) to go with the -10AN fittings and was wondering what was wrong, but I believe I need 16mm or 5/8 inch ID hose which is much bigger. I didn’t think the 16mm OD was all that stiff.
When you went to 14mm hose (ID?) were you able to use the same fittings or did you get new ones to match?
I’m not at home so I can’t check, but I think I used AN6 fittings…
@Troll Do you have a parts list? I am really interested in the design, however I will make some changes. Notably a different mechanism (cable & block vs magnetic switches).
@Uxi
Yep! AN6.
Not as such… The parts are documented in this thread.
But I used 14mm diameter silicon tube, 1/2” Wire braiding called FlexoPet Safety Stripe, from Technoflex.
A small extruded aluminium electronics box that I found on ebay, a regular alarm magnetic switch that are used for doors and windows.
The electronics is a Teensy 2 micro controller loaded with MMJoy2
Oh, and as mentioned above, I used AN6 fittings to attach the silicon tube.
I’ll be happy to answer any questions you might have and please post some progress pictures of your handle!
Welcome to Mudspike! ![]()
Welcome to Mudspike @Kake!
I haven’t started building, I just have designs. Thank you for the list it is really helpful.
@Troll just curious was the 14mm inner diameter or outer?
Outer diameter. I think it was a 2mm wall tube, so inner was 10mm.
That is what I figured, Thanks!
So for the 6AN fitting I found that the listed hose OD is 9.53mm, while the 8AN is listed as 12.7 and the 10AN is 15.88.
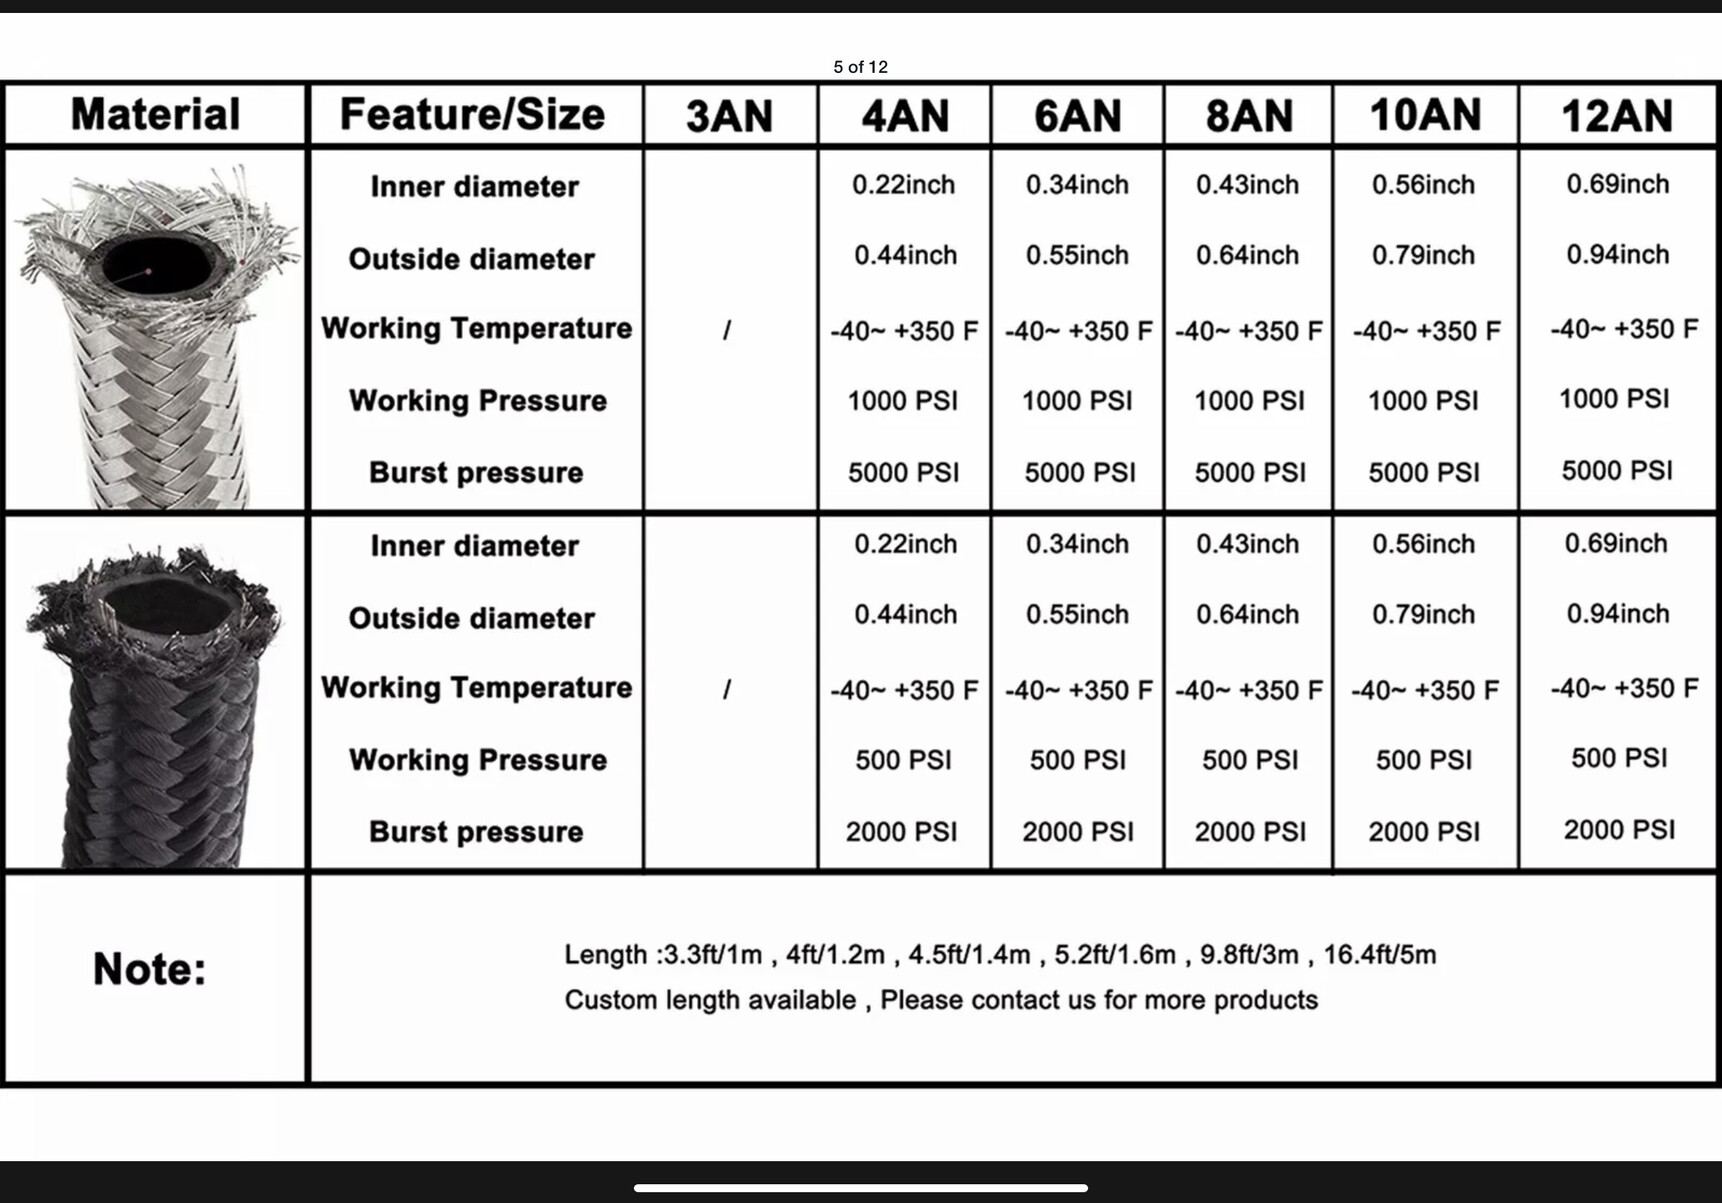
I got 10AN with 16mm hose based for the first attempt and just got the cable together this weekend. I’ll see about taking some pics tomorrow. Working on my safe/arm handle next and then the collar and mounting mechanism to my chair.
Please do!
This is an amazing project - Do you any examples if the teeny code??
Hi @Rolfez and welcome to Mudspike! ![]()
I just used the excellent MMJoy2 software available here:
Just install it on a teensy or arduino board and it becomes a USB game controller.
Maybe @gadget has ready made controllers that you can use too…
Just post back here if there’s anything I can help you with.
Thats great! Thank you.
I have a working prototype now. Just need to build the handle and I’m good to go!