Elite Dangerous. Wave scanner and you!

Understanding the wavescanner for dummies written by a dummy.

At the end of the post will be some summary bullet point helpers.

Before we get into a tutorial for best finding stuff on planet surfaces, did you know that your wave scanner can differentiate items that its picking up? Yep ! it can ! and this will help you greatly in deciding which targets you wish to hunt down.

This is a very key factor and before we delve any further, we need to understand how the wavescanner shows us what it is picking up.

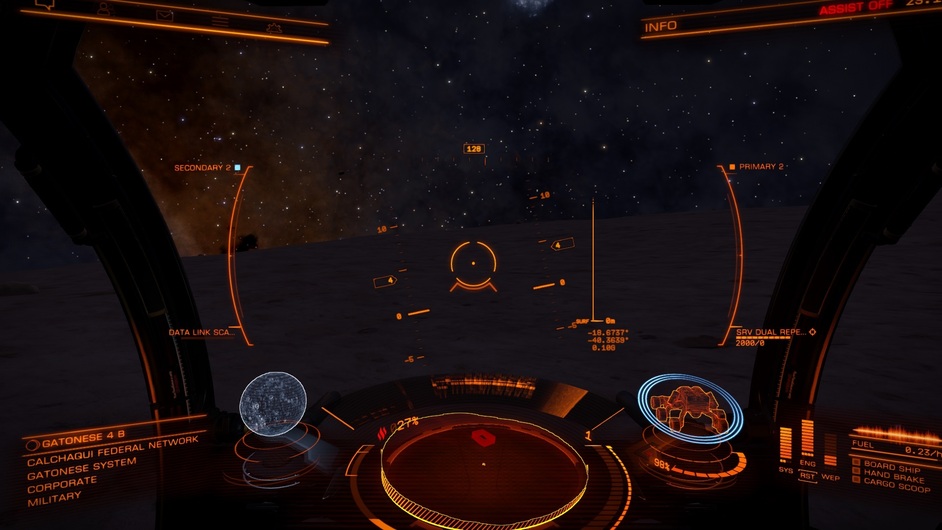
On the picture below is your wavescanner (disregard the return its picking up). It sweeps from left to right with a verticle bar that spans vertically the entire scanner from the very bottom to the very top of the scanner display (like a radar).

Now we want to divide in our mind the scanner into 4 equal sections from the bottom of the scanner to the top (as shown in the picture). I call these Bands and number 1 to 4 from bottom to top.

The following Bands represent the following returns.

BAND 1 (From bottom up - First quarter of the wavescanner) Mineral deposits from outcrops or landed asteroids used for construction or synthesis

BAND 2 (From bottom up - Second quarter of the wavescanner) Unknown, not found any returns in this band yet.

BAND 3 (From bottom up - Third quarter of the wavescanner) Ships, crash sites, canisters, buildings (the one you most often will likely follow)

BAND 4 (From bottom up - Top of the wavescanner)Transmitting beacons for collection of data.

Now you know what you are looking at, here is my steps for finding stuff on the surface.
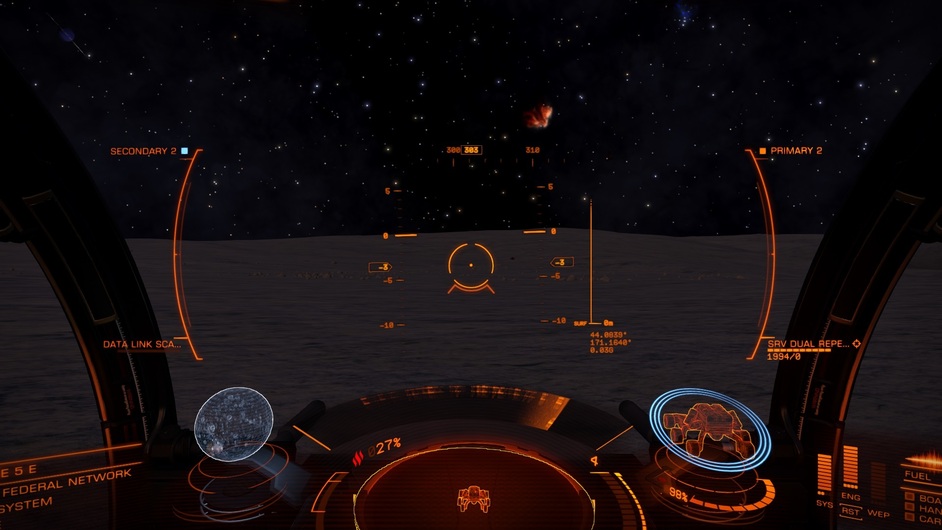
Fly above the surface MINIMUM 2klm (higher is ok, under 2klm and the pictures will fade from your screen. Just above 2klm is the ideal height.
Set your radar to maximum range to help you spot SOI’s.
on the next picture I am just above 2klm with max radar range and an SOI (blue disc) is just coming into scanner range.

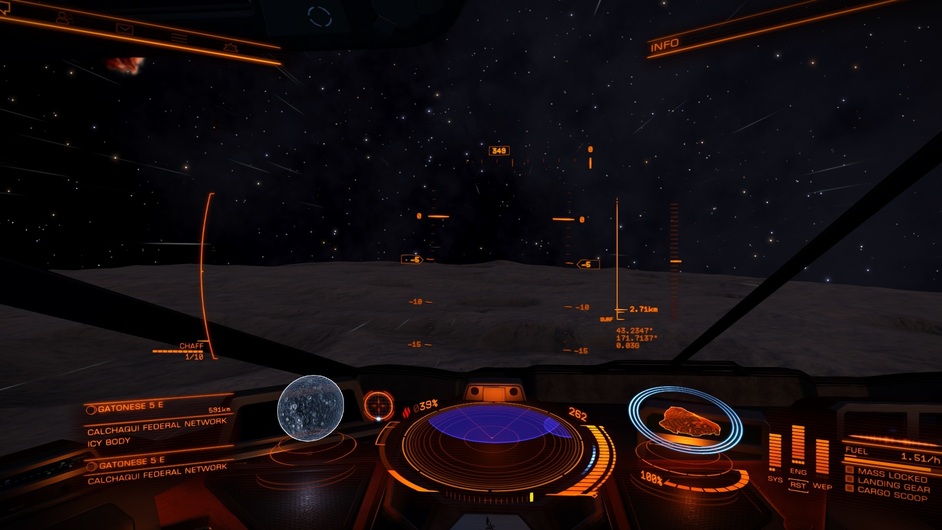
Now try to fly roughly to the centre of the blue disc, it will fill most of your scanner. Its hard to get it spot on, but you don’t have to be perfect, that is why we have a wave scanner. As best in the middle as possible. You want the middle as SOI’s can hold more than one item of interest so being in the middle will help you locate one or more. Once you think you are roughly in the right spot, head straight down to the surface rotating and looking out. Quite often large items or lights attached to items can be seen easily as in the picture below.

In the picture below, I am still over 2klms high roughly in the middle of the SOI and I can see an unknown installation easily.

More to come

7 Likes

But what if we don’t see anything on the way to the surface?

That is where our wavescanner shines!
Just land on the surface and deploy your SRV.
Best rule of thumb is to dismiss your ship as it can interfere with your returns.
Now slowly rotate 360 degrees noting down (mentally for the smart ones) the headings for any returns you have that are of interest to you.

Now the previous step is not the easiest as you may be some distance from any item of interest. You need to hone your eyeball for returns on the scanner that may be very faint. Firstly lets look at what may throw you off. That is large rocks that is of no interest to you, but can fool you into thinking you have a return.

Below is a picture of predominantly large rocks giving returns. Note how they look smudged and span almost every band on the wave scanner. Get to know these and what they look like as a single rock return can throw you off course from your target. Extremely faint on the picture below, but interspersed with the rocks is the faint return of an item of interest. Virtual cookies for the first person to point out the correct return

Items of interest at long ranges will not show much (if anything at all) on your scanner. You may just get a casual blip or maybe 2 or 3. But as you get closer you should see more blips on screen and then they will slowly join as you get closer to form a well define line. If you are not see this behaviour, then you are not tracking an item of interest.
On the picture below is an example of a band 1 mineral deposit at medium to long range.


And at the rock. notice that the wide spread line on the previous picture squeezed to make one small very defined return.

Long range return for Band 3. Its well defined but broken and very spread out. Notice the difference to these returns and the Large rocks.

Getting closer, its shrinking into a line and even more defined.

Now here we do something different. Band 3 and sometimes band 4 have a protected area around them. This protected area usually has various drones flying about that may want to kill you. So as soon as you know you are tracking something of interest then put your radar on max range. This will help you see the protected area well before you get there.
In the picture below I have maxed out my radar range and the protected box can be seen with a very defined return in the 3rd band.


Found a protected crash site with various goodies splattered around and protected by skimmers. Also notice a single large rock return in the left side of the wave scanner. Notice the difference.

3 Likes

Here we have a long range BAND 4 return (datapoint) at the top of the wavescanner

Getting closer. Notice again that the returns are well defined and are squeezing together to form a defined line. You must see this behaviour to know you are tracking well. Far off in the distance we can see the crashed probe.

Arrival at the probe. Note that on this picture I am also receiving a BAND 1 return on my left and medium range at a guess. And on the right is a very faint return for band 3 and also band 1. Its so faint as the scanner is just about to refresh the image and it is most likely very long range but its still well defined.

Helpful handy hints.
SOI’s can have many items of interest in them. Commonly of 4 or greater
SOI’s can overlap as on the picture below.


Try to land in the middle of the SOI (blue dot) and keep a very good eye out as you land. Mk 1 eyeball may pick it up.
Landing on the darkside of a planet MAY makes spotting things slightly easier (though not guaranteed)
Know what IS and ISN’T a return as shown in the pictures above
Make sure you get the behaviour of THE CLOSER YOU GET THE MORE BLIPS YOU GET OR THE START TO MERGE INTO A WELL DEFINED LINE
Scanner at max range looking for the red protected box’s.
AUDIO RETURNS MAY BE HEARD BEFORE ANYTHING HAS BEEN SEEN ON THE WAVESCANNER.


This is just a quick compilation and hopefully is not too rushed and unintelligable. If you have any questions, post away and I will be happy to go into more depth.

Happy hunting.
:f111:

8 Likes

Excellent stuff @Bogusheadbox - thanks!

2 Likes

Ok first @Bogusheadbox this is great and thank you!

I didn’t even notice the wavescanner display while driving around! Now I know how to use it.

I have many questions however, all stemming from the mission I struggled with and detailed in the other Elite thread. It vexed me so!

  1. I was tasked with destroying a generator, which I never found. I did find a camp with a datapoint and another antenna thing (can’t remember what its called). I got fixated that the generator had to be around the camp/datapoints. Should I have kept looking? Was I looking for just a generator out there amid all the other stuff that I came across?

  2. What are the rules of engagement out there? I came across a crash site with skimmers like you did in your shots. Can I shoot the skimmers? Do I want to? Are there penalties? Or am I ignoring all the other things that are going on and driving around for MY item only?

  3. I started to run out of fuel in the SRV. Reboarding the ship did not solve this problem. I read in the Elite forums that you can make/craft fuel out there by finding minerals and …what? (there were also many posts by angry SRV drivers that their ship doesn’t have an extra fuel tank…)

  4. Does my SRV get repaired and refueled at space stations along with my ship? Or am I still flying around with an SRV that has a dry tank?

1 Like

G’day mate. I will do my best to help answer.

1. By the sounds of it, the generator was your primary objective. Scanning the datapoint is a bonus. Some missions have scanning the datapoints as the objective and dropping the generator disables the security for a small amount of time. The generator can be cleverly hidden. Make good use of your jump jets and maybe sit on top of a building. You never know what you will find or see from up there. The gen should be inside or in close proximity to the building complex. Not done a base mission in a while so unsure if anything has changed.

2. Firstly the protected box will show in your radar under the wave scanner. If you enter the protected zone you will have a limited amount of time to exit before everything turns hostile. If the protected area is aligned with a faction and NOT wanted, you can get a fine for trespass. Obviously shooting at a skimmer will anger it directing its focus to you (but basic skimmers are easy to kill, there are however on rare occasions armoured skimmers that spam missiles that can prove quite fatal). Best thing to do is sit outside of the protected box and lock up a skimmer, it should tell you if they are wanted Red (kill it) a mission objective Red (kill it) Aligned to an authority Green (don’t kill it unless you like upsetting the law) You can however use the small amount of time to retrieve any goodies or cannisters that are inside the protected box by one of two ways. Firstly Ramming. Just zoom through the protected box and ram whatever it is that you are after. If you hit it hard enough and the gravity is not too strong you will knock it out of the protected area and you can pick it up at your leisure. Secondly is the zoom grab. Open your cargo bay, target a canister or item then zoom in a straight line over it and exit the protected area on the other side at high speed . You can usually make it through without triggering the alert. One word of caution though always check the status of the cargo you pick up. Some canister may tag as stolen so you will need the black market.

3. Yes you can refuel your buggy on the ground. Its called synthesis. Its a sub tab in your cargo screen on the right panel. You can synthesis lots of things from a boost to your jump drive to ammo to refuelling. In the event of synthesising ammo or jump range you can also construct basic medium and high end versions of such things. Synthesis requires materials that you will obtain through hunting down meteorites or outcrops (band 1 on your wave scanner) alternatively when mining or destroying enemy, these drop randomly as well.
In the picture below you can see my materials tab and some of my collected materials. There is a limit to what you can carry.

In the next picture you can see the synthesis tab. When you have gathered enough materials for something to be synthesized a box will be checked against the item that can be made. On the right hand side of the screen near the top is 3 arrows. Small arrow for standard grade, medium arrow for higher grade and largest arrow for Highest grade.
On my synthesis tab you can see have enough materials to make “Basic” SRV ammo restock, “Basic” and “highest” quality SRV repair as well as “Basic” Srv refuel

4. Your SRV should get repaired when you enter your ship. But it won’t get refuelled until you dock at a station (unless you synthesize it). clicking on restock all in station will also replenish your SRV, alternatively you can select SRV under restock option and do it individually.

Grabbing materials will be a necessity in later stages of game play as materials are very important when you start visiting Engineers. Also they help when you get low on fuel or want to make a bigger jump than normal or make more potent ammo etc.

3 Likes

Really helpful post thanks very much. Comparing the various bands from afar and near is very useful. I used the fly into the POI at an angle method when the blue circle reaches the V lines in the radar but as I said somewhere else with very little success. I’ll try your method of getting to the centre and going straight down.

Do you recommend putting the SRV scanner on max range as soon as it’s deployed or keeping it short?
Once a POI has been searched and looted is that it forever or can you return later to find new things? Just thinking of if I log out in the vicinity is it worth redoing the area?

New to this so sorry for daft questions.

1 Like

Yeah, put the SRV scanner on max straight away, it wont hurt. Your wave scanner will pick stuff up well before you will see it on the SRV scanner map thingy.

As for the looting of an SOI. I am unsure. The game does have a small bug where if you find a nice asteroid and mine it, you can log off and back on and the asteroid will be replenished.

Personally though, I don’t bother with that as SOI’s are so plentiful it doesn’t take long to get another. Plus I like the chase of the wavescanner. You can tell if you have depleted the SOI, by taking off and getting above 2klm and there is no longer the blue disc.

1 Like

Great and helpful post!

I know I am late to the party, just wanted to thank you for the post @Bogusheadbox, excellent guide! BTW have things changed with E:D updates since you wrote it?

1 Like

Sorry for the late reply @Baltic_Dragon . Missed the post.

It seems to work the same.