My TM T16000m DIY mods

My TM T16000m DIY mods

This is a rewrite of my previous T16000m threads.

June 2017

Pictures on Flickr

[Album] TM T.16000m

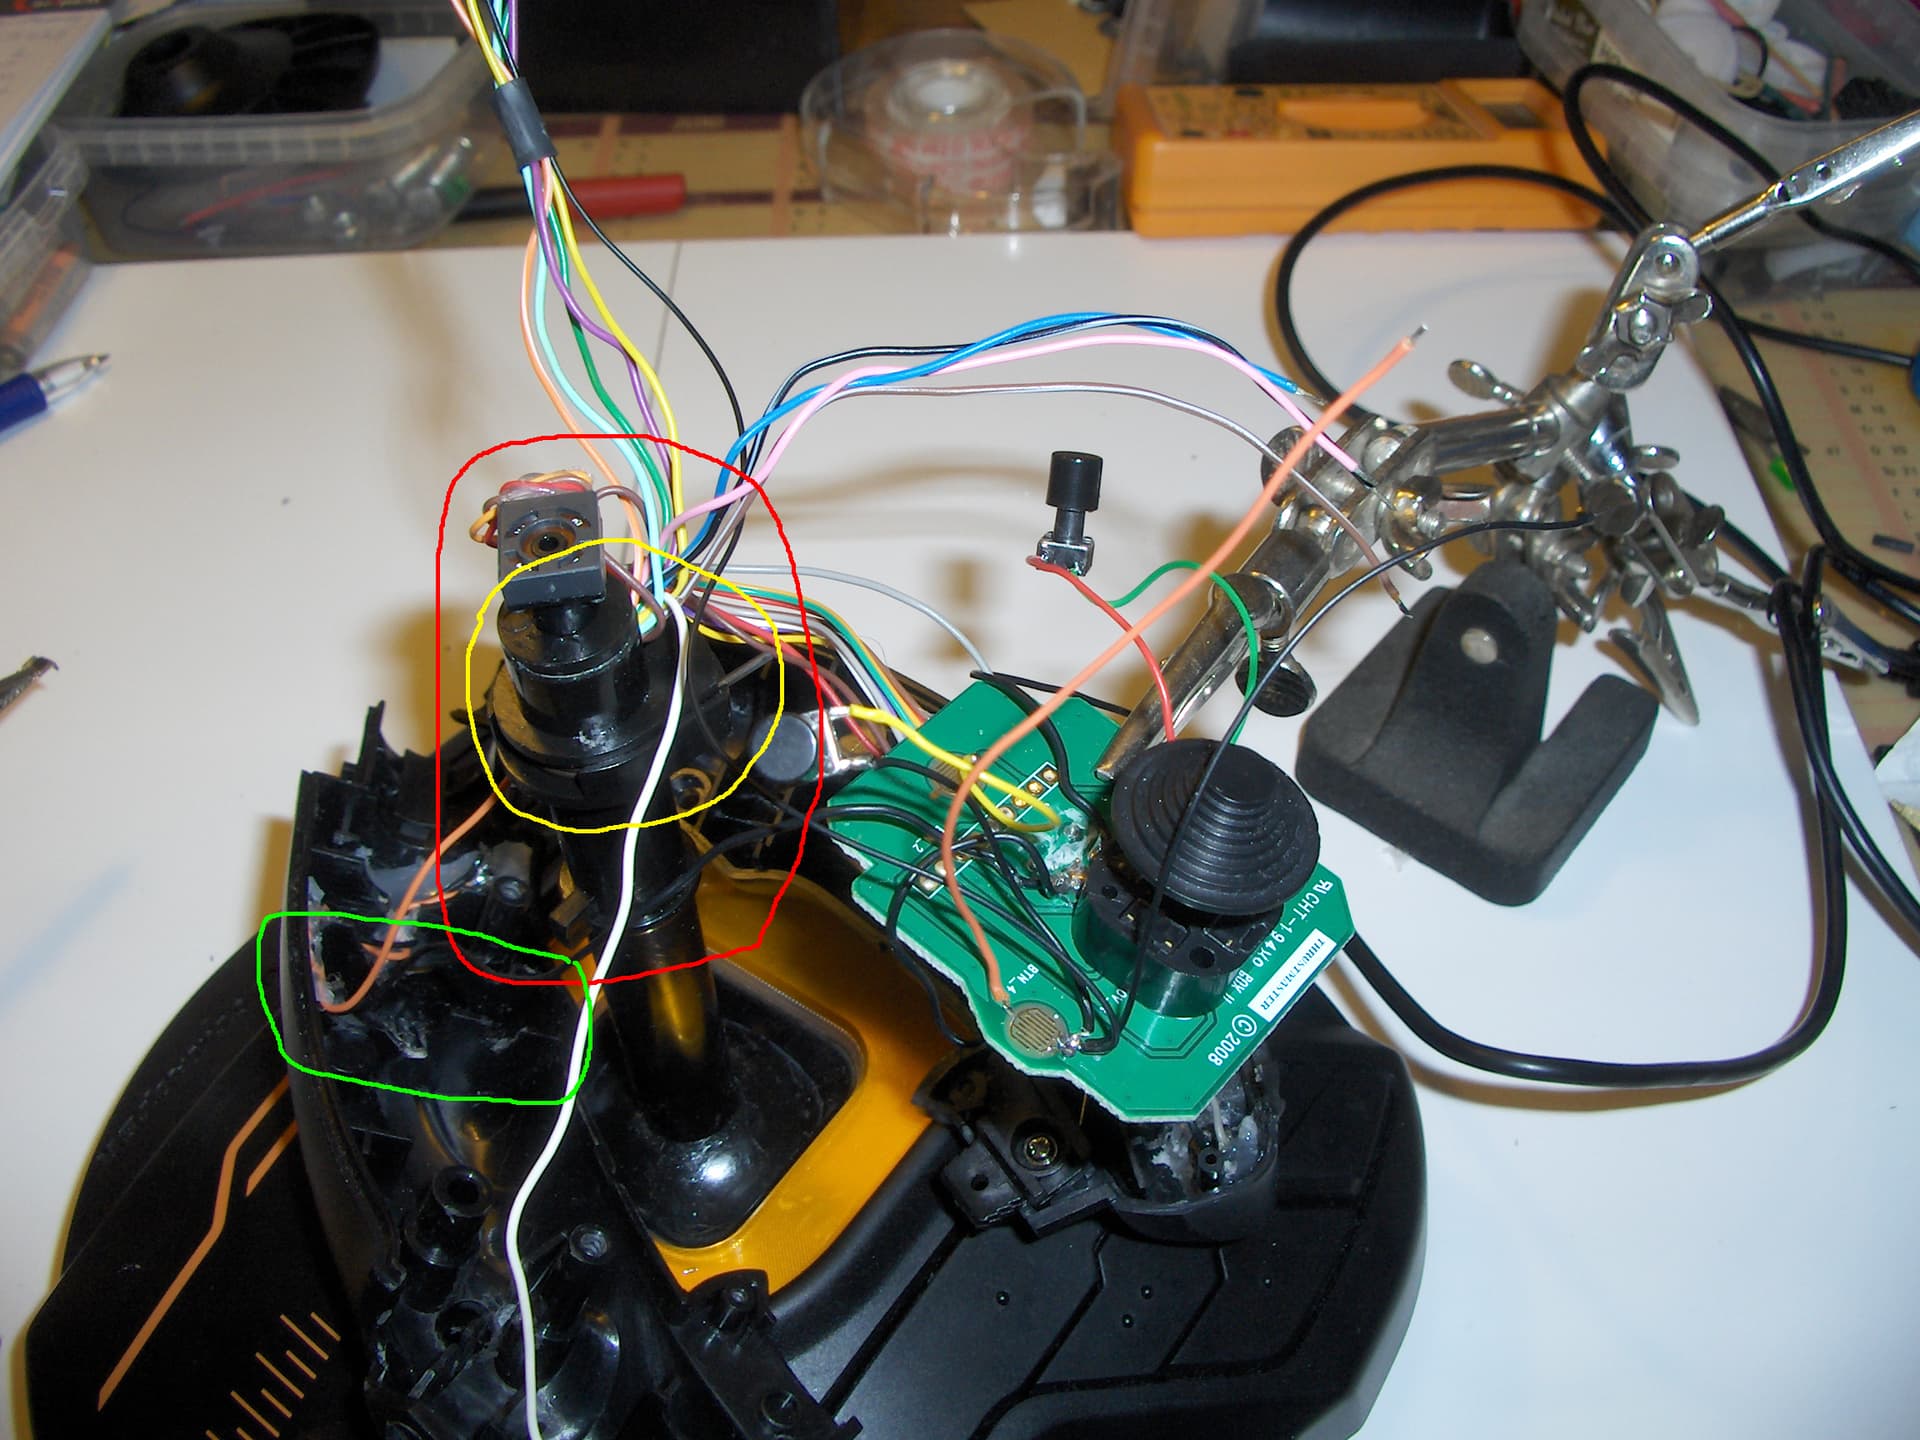
2 stage trigger, pointy finger switch and pinky finger swich added first.

Later on I added 1 5 way switch on the thumb rest, 1 5 way switch on the top and replaced the 2 sidebuttons with tactile switches. Finished June 2017.

Added better tops for the 5 way switches 14/1 2020

All the buttons on the base still works.

I would strongly recommend to collect the needed parts first,plan ahead, drill all holes before any assembly.

I would also very strongly recommend to have longer wire ends in the handle than I had.
Some of them where close to claustrofobic to work with.

14/1 2020

I have at long last put the finishing touches on my first modded T16000m.

I began using it June 2017, so it was about time.

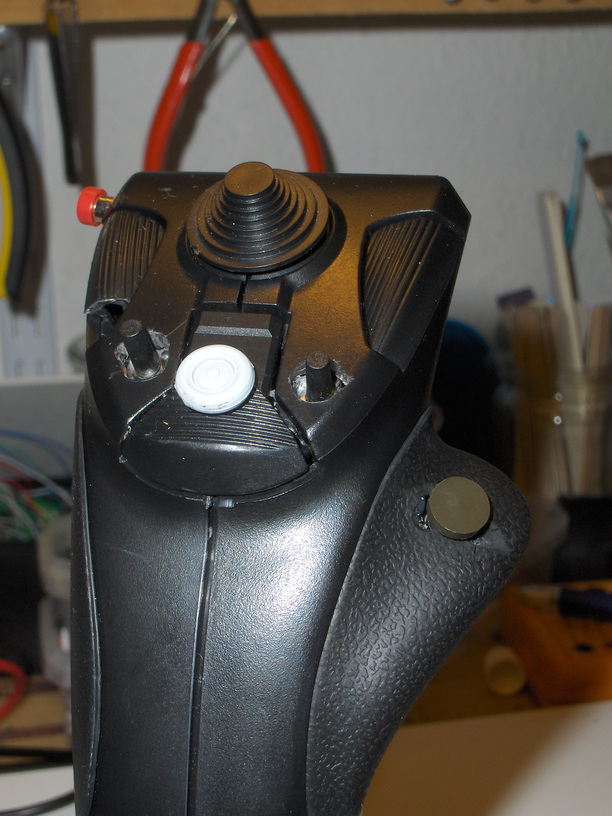
At the time I used these for my 5 way switches.

The grey one is a wheel from the Hasegawa 1/72 US Aerospace Ground Equipment Set.

The green one is a roller from a ROCO Minitanks set. Both drilled to fit.

Most annoying thing about them, is that I had to push on the sides to use Up/Down and Left/Right.

Add something! But What?

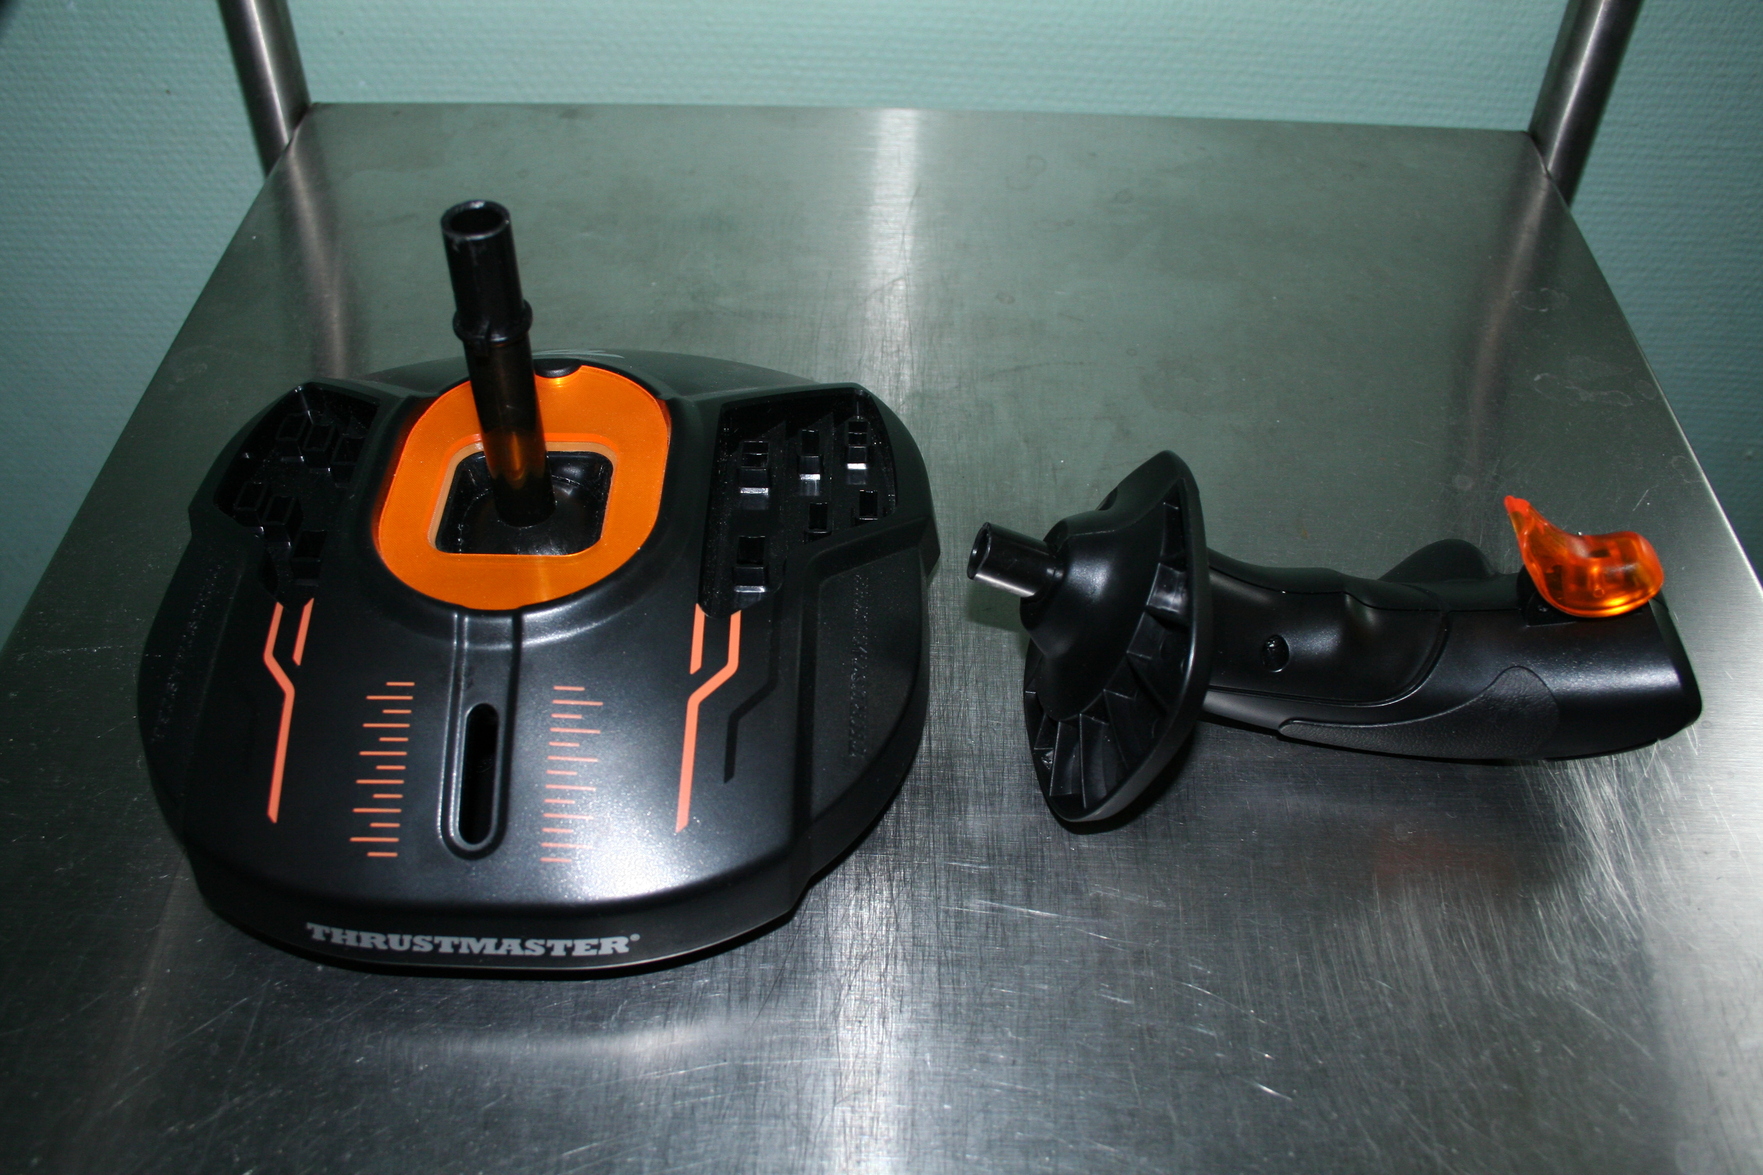
A looong time ago, I killed the minijoystick on a TM TWCS throttle, when trying to remove it from the PCB. I’m just saying “Don’t apply to much heat!”

I cut the top off the TWCS thumbstick and from another model replacement thumbstick, I have bought in anticipation of my controller projects

Having cut off the top I cleaned it with Acetone and it got all sticky.

“Hey great, Acetone is the Glue!”

I propped up the stick, so the button surface was as horizontal as possible, dabbed enough Acetone on the gluesurfaces to keep them moist, waited for a bit to let the Acetone work, while keeping to ad small amounts of Acetone to keep moist, then carefully placing the new top on the button and press hard for a while.
The most important thing is to be patient and not move stuff around until the Acetone has evaporated and the bond has set.

Now it is a breeze to flick the 5 ways around.

16/1-2020

I thought that my T16000m modding was done, but!

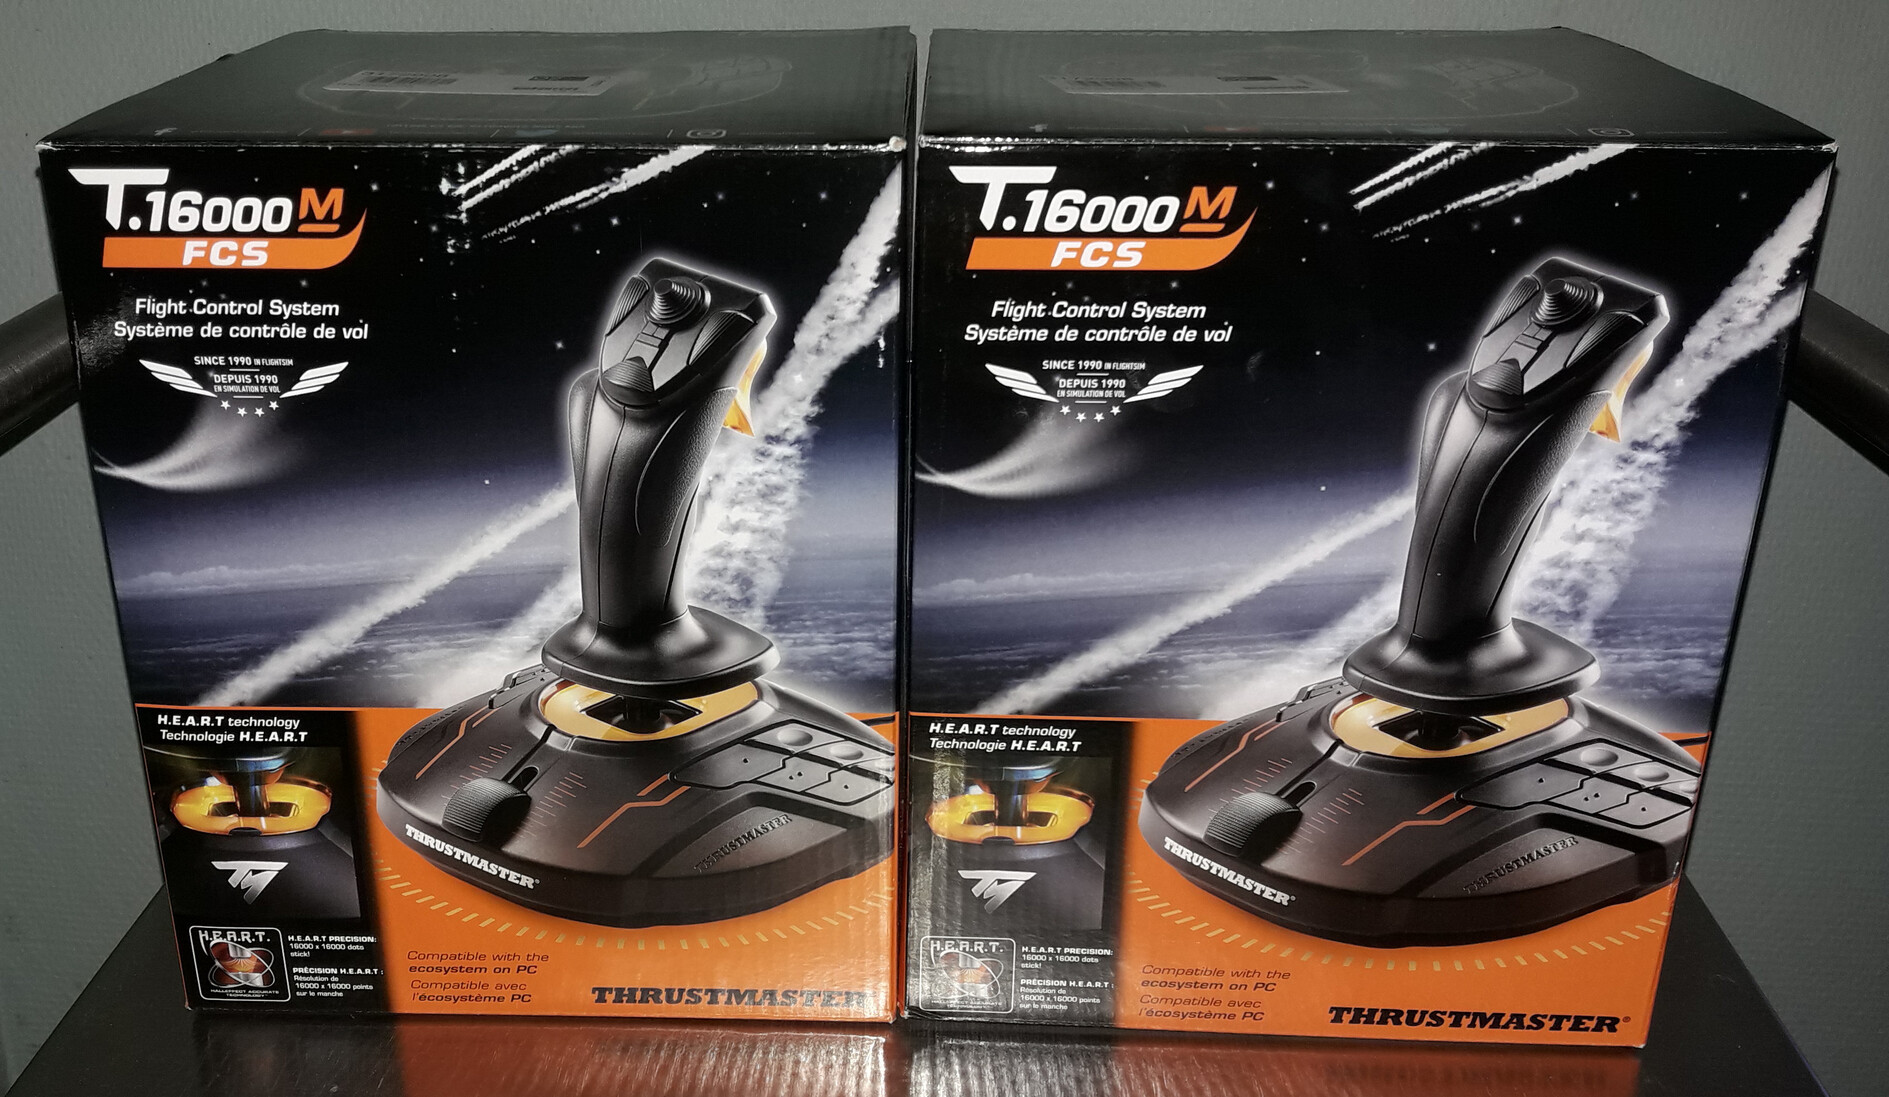
I just picked up these:

Both will get the buttons on top treatment avoiding the mistakes I did with the first one.

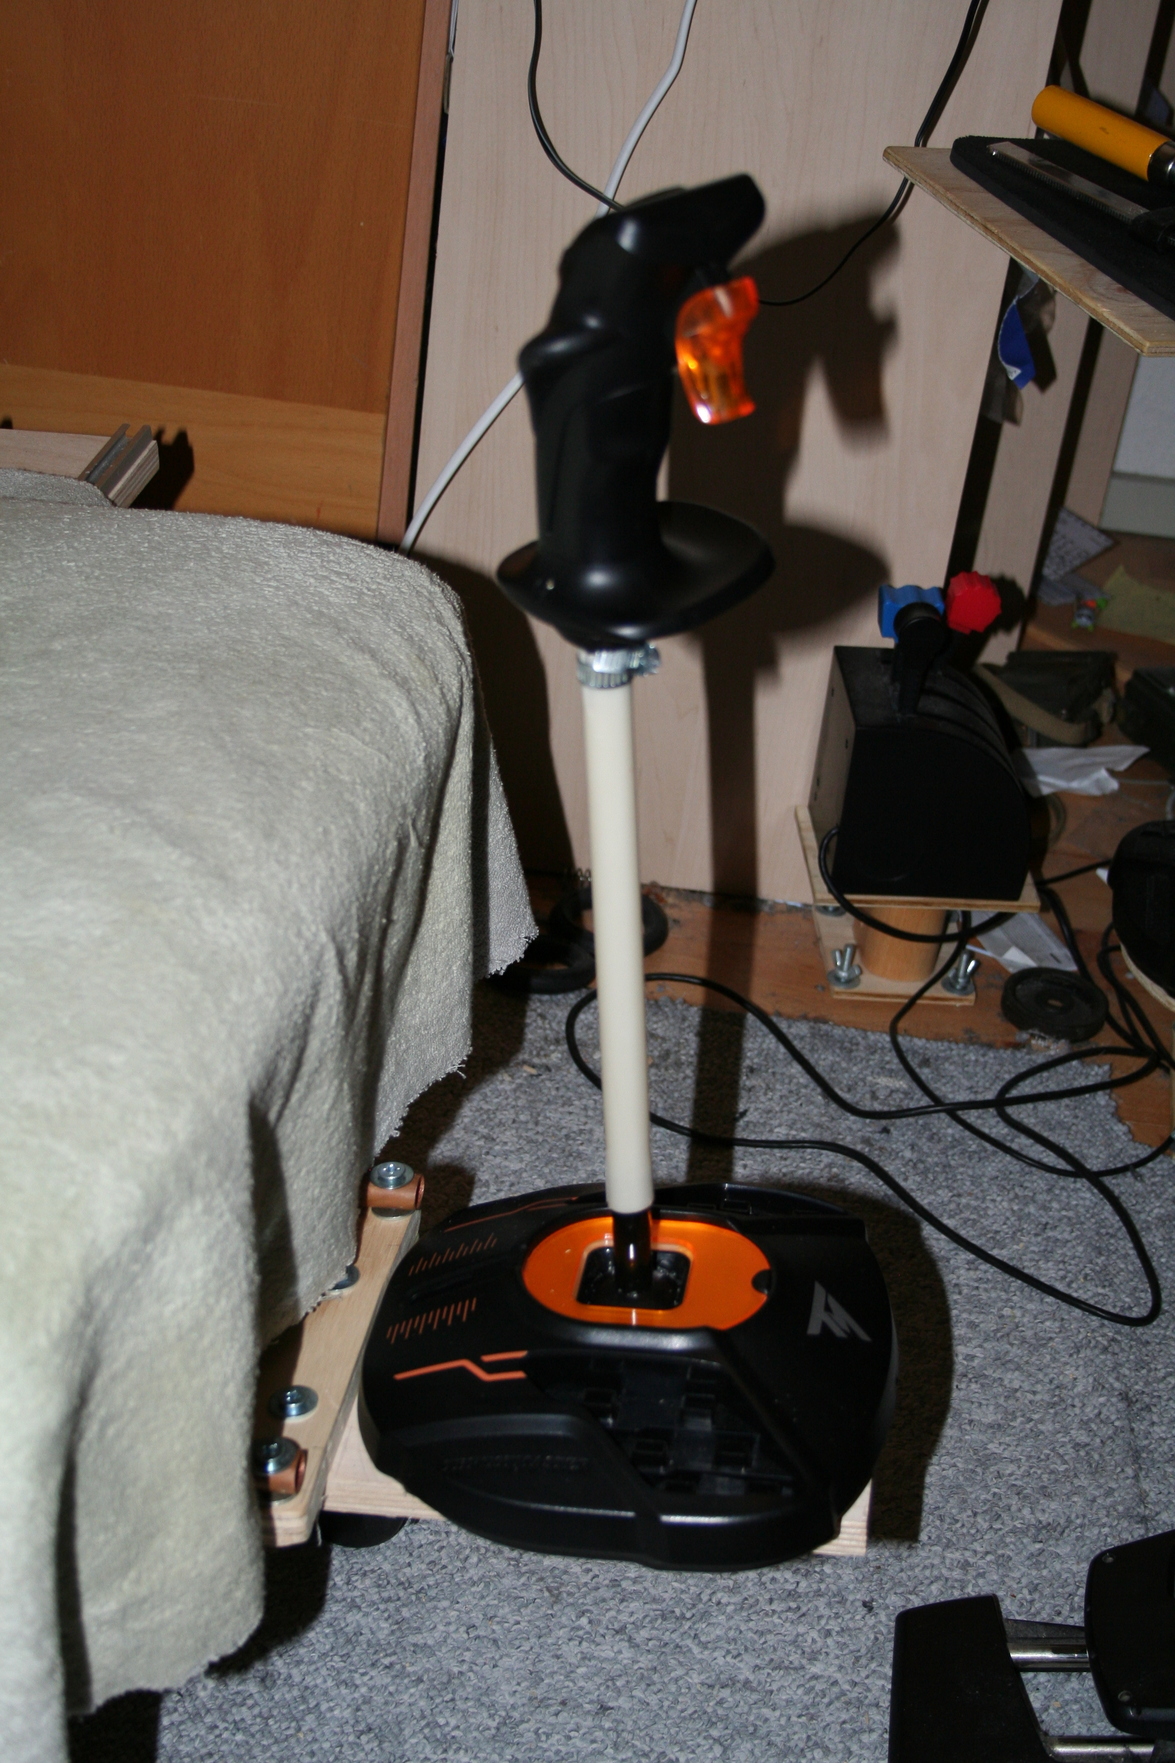
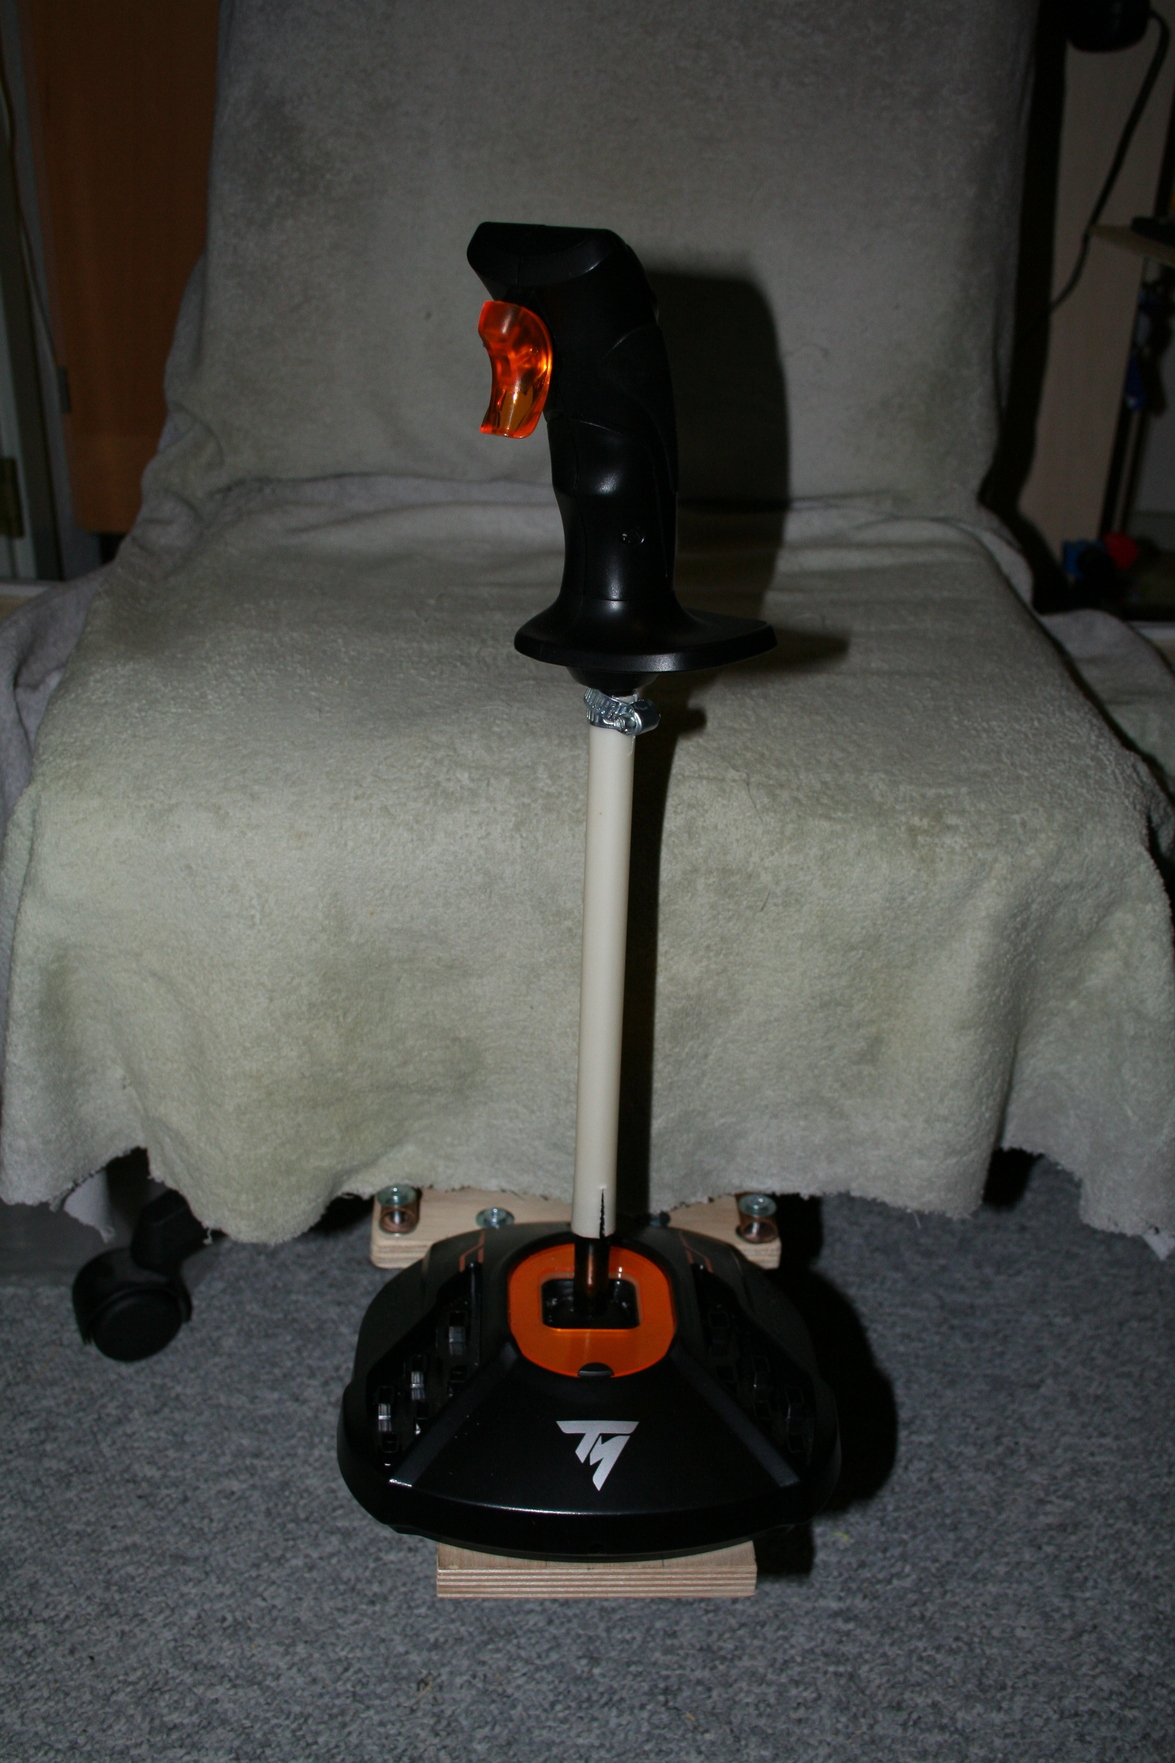
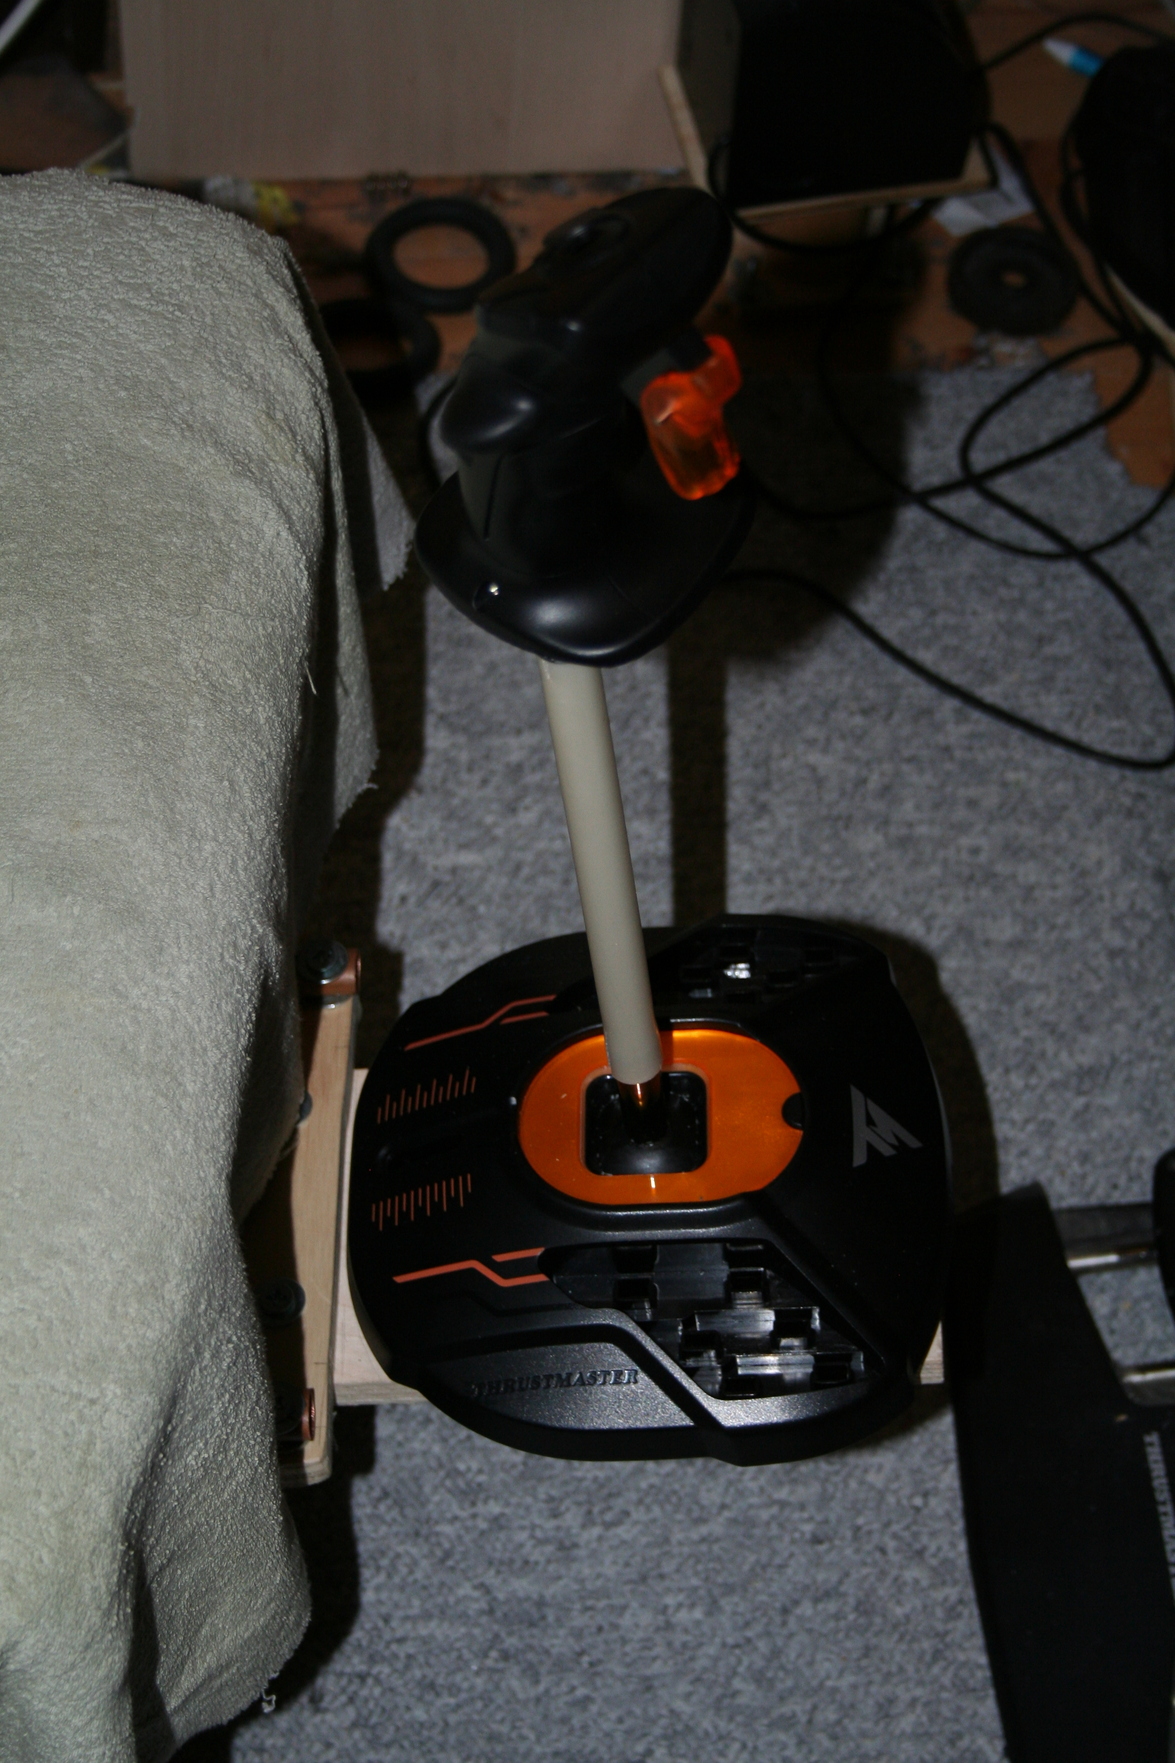
One will be a right hand version, to replace my CH FlightStick Pro and the other one will be a lefty and get an extension, so I can use it as a center stick.

I think that the biggest challenges at this point will be the extension, as I wish to retain the twist and may be making it lockable. The next is the center chairmount, as I have no idea about how I want to do it. I may end up cutting of the sides of base and rearrange the PCB’s in a new box. Well. We will see.

Happy Simming

5 Likes

Have you had issues with the twist axis? Mine went crazy. Other than that the stick is great for the price.

Holy duck that’s amazing! Nice work man.

I haven’t really used the twist axis that much, so I can’t really say. Yea it is great and fairly easy to mod.

Okay.

Settle in. You may be here for a while. You may as well get a glass or bottle of your favorite beverage to enjoy.

Hmmm.

I have had simwithdrawal for a while. I Broke my T16000m back in the end of may and having had to prioritize other things afterwards.

I have only now found the time for repairing it and have just finished it. I am very happy!

It took me several hours over 2 days.

The cap for the center 5 way switch fell off.
Note to self. Do not try to move any DIY controllers around by grabbing a glued on button.

In trying to put it back on with CA glue, I failed to turn it upside down, so glue got into the switch.
Note to self! Whenever you are using easy flowing glues, turn the objects so it flows away from moving parts!

Back and Center Push was stuck. I managed to loosen the back push, but when pressing center very hard, all 4 direction switches would activate and still no reaction from the center switch.

Time for a replacement.

That went fairly well but there where a couple of snags.
Another note to self! Hotglue is great for keeping stuff in place, but can be a pain when you need to remove it again!

One more note to self! Always be careful with a knife! It can cut you up faster than you can blink when it slips! That ¤%&/&(/ hotglue!

I misaligned the switch so I had to cut it out again.
More note to self! There is a high chance of ruining electronic components when trying to install them with hotglue multiple times or using to much at the wrong place! It still works but 2 of the buttons have a lessened clicky feel.

Fire up the PC and test if it works. Yes it did.

Carefully glue the button top to the switch and let the glue settle.

Test again. Succes!

Time for assembly.

I couldn’t remember how to route the cabling inside so I fiddled with that for more than an hour. Then I discovered that one of the wires soldered to the switch points on the PCB had snapped. Oh well, soldered back on.

More fiddling including screwdrivers to push wires away from the bodyjoints.

Ahh! Finally assembled! Another test and then slip the piece with the center 5 way into place (That piece was the center switch before the modding.) and test.

What! No!

Whenever the center press on the new 5 way was activated, button 1 would activate. Carefully prying out the piece and push the wires in the hole around. Okay, now it works so slip it in again.

Blargh! 1 is still activating.

Okay disassemble again.

Turns out that 2 wires connected to one of the ground pins on button 1 where frayed. When the 5 way piece was pushed down, they would rub against one of the live pins and thereby short the switch.

The PCB with button 1 pins (white) and snappy wire (red)

I found the main ground connection on the PCB and after burning of the lacquer I soldered on a wire and connected that to the repaired wires instead.

The wire have snapped of from the switch point again.

Test.

More assembly wire fiddling.

There are 23 wires in the handle and not much space for them to fit into. 11 for the original buttons and the twist pot plus the 12 I added for the mod.

Ohh great. That wire have snapped again. Now it is very short.

Self Note! When using hotglue on contact points, don’t use to much as you may need to get it off for repairs.

Test.

Fiddly assembly.

Test.

Slip 5 way piece in.

Test.

Succes!

Time spent. Between 8 to 10 hours over 2 days, most of it spent on assembly fiddling. Those wires just seem to love being snagged between the grip halves.

Sorry, due to frustrations I have not taken any pictures of the repairs. At times I was ready to hurl everything into the wall and attack it with a hammer. Hey! I meant the stick! Not the Wall! :sunglasses:

I am happy and relieved that I have it up and running again.

Happy Simming

3 Likes

Nice work. The t16000 really is a great stick. All it needs is some of those 12 buttons on the base moved to a more accessible location…

I have been creative :sunglasses:

Proff of Concept (There are no electronics in there)

Note that this is 2 T16000m’s. One cut off just above the ball and the other cut of just below the twist return spring dodad.

More details to come.

Happy Simming

4 Likes

Your joystick., It is drunk!

2 Likes

Check out this guide, for about $9 of parts you can replace the shitty carbon trace potentiometer with a hall effect sensor. Will never have ghost inputs, and will center easily every time you plug it in: https://www.dropbox.com/s/o1nisqsh2itbngz/yaw_modding.pdf?dl=0

1 Like

Requires only very minor soldering skills and a hot glue gun (plus parts)

How do you go about mapping your extra inputs to the output of the joystick? I am a novice in terms of joystick modding, having only performed Hall yaw fix on the t16000m so far, but looking for ways to continue improving what is a cheap and excellent (if slightly flawed) stick

1 Like

Hi afisher
Welcome to mudspike.

Thank you for that hallsensor guide.

I am not really using the twist option and is considering to lock the movement so it is not for me.

There is no remapping as i just mounted the wires for the extra switches onto existing switch points and wire conections. All of the buttons uses the same common ground.

If i want to rearrange buttons and/or axes i use UCR Universal Controller Remapper and/or joytokey.

Joytokey is my goto when i want to map keycombinations to joystick buttons as it supports up to 4 keys at the same time.

Happy Simming.

Well. It has sobered up again! :smile:

The chair mount for my DIY extended/base buttons in grip T16000m mod is almost done. I just need to replace some of the M6 bolts with the correct lengths.

T16000m test pieces.

I put M6 Tee nuts into 3 of the existing holes on the back of each of my controller mounts. (From when I had them on a different chair.)

To find out where to drill the holes on the mount plate, I had some bolts sticking out from the Tee nuts and drilled the first hole in the mount plate. Then I slipped that hole onto the correct bolt and aligned the plate to my satisfaction and wriggled it hard against the other bolts, so they made indentures I could drill into.

The block is mounted with 4x 6x60mm lag screws in each end and the first one was to short.

The pipes are from a scrapyard, the white some hard metal and the other is copper. The coppers are not movable and the whites has some side to side give, as that makes it easier to join up the parts.

In situ. Okay. I am scraping my legs on this. It is to wide and the stick is to far forward.

Narrower all over. (Ran out of correct length of M6 bolts)

T16000m base mounted to swap plate. (Somehow this reminds me of a NCC1701 thingie). The notch is to clear the lag screws in the block. I have cut off the top of the gimbal stick so it have a better height.

Narrower 2 and YES! It fits!

Turns out that the bendy thing is not needed, so after some testing I ended up with this length of electrical piping.

Now I know the needed wire lengths so I can get on with the electronics.

Happy Simming!

5 Likes

I have decided to abandon the center modded T16000m with extension project.

In part because after a while the Y axis on my modded T16000M wouldn’t use the full range of the stick motion. It helped when I replaced the stick hall sensor.
Also I don’t think that my button work is that solid and I am not having much faith in the extension solidness.

The main reason is that i will get another tax return in the beginning of April and I have decided, that I will use it to get 2 Virpil VPC Constellation ALPHA-L grips and 2 VPC MongoosT-50CM2 bases.

1 as a sidestick and the other with extensions as a center stick. Keeping the existing mounts and adjust as needed.

I will still be doing the right hand Dual throttle and Collective.

Happy Simming

4 Likes

Hi. How did you remove twist mechanism?

Hi dek.
Welcome to Mudspike.

I didn’t. It is still there and working.

I took one look at it when i started the project and couldn’t get my head around to disable the twist, so i decided that i could live with it.

Here is a couple of pics of the workings.

Red is the twist parts on the base pipe.

Yellow is the centering spring dodad.

Green is where the centering spring is nested in the grip.

The pot on top is nested in the grip.

Happy Simming

1 Like

Thanks for replying!
Sorry I wasn’t clear enough. I was refering to this post from October the 28th 2020.:
e876d63fd775cc27dea2aab67e4a56935afb9404_2_690x460

Unless I am mistaken the twist mechanism is removed there?

1 Like

Ohh my mistake.

I have forgotten to mention that it is actually 2 T16000m’s. One cut off just above the ball and the other cut of just below the twist return spring dodad.

Troll could this line please be added to the post below.

Proff of Concept (There are no electronics in there)

Note that this is 2 T16000m’s. One cut off just above the ball and the other cut of just below the twist return spring dodad.

Happy Simming

You should be able to edit your post? Isn’t there a small pencil icon at the bottom of your post?