Wife just sent me this for your northern based modellers. My mate neil runs it.
5 Likes
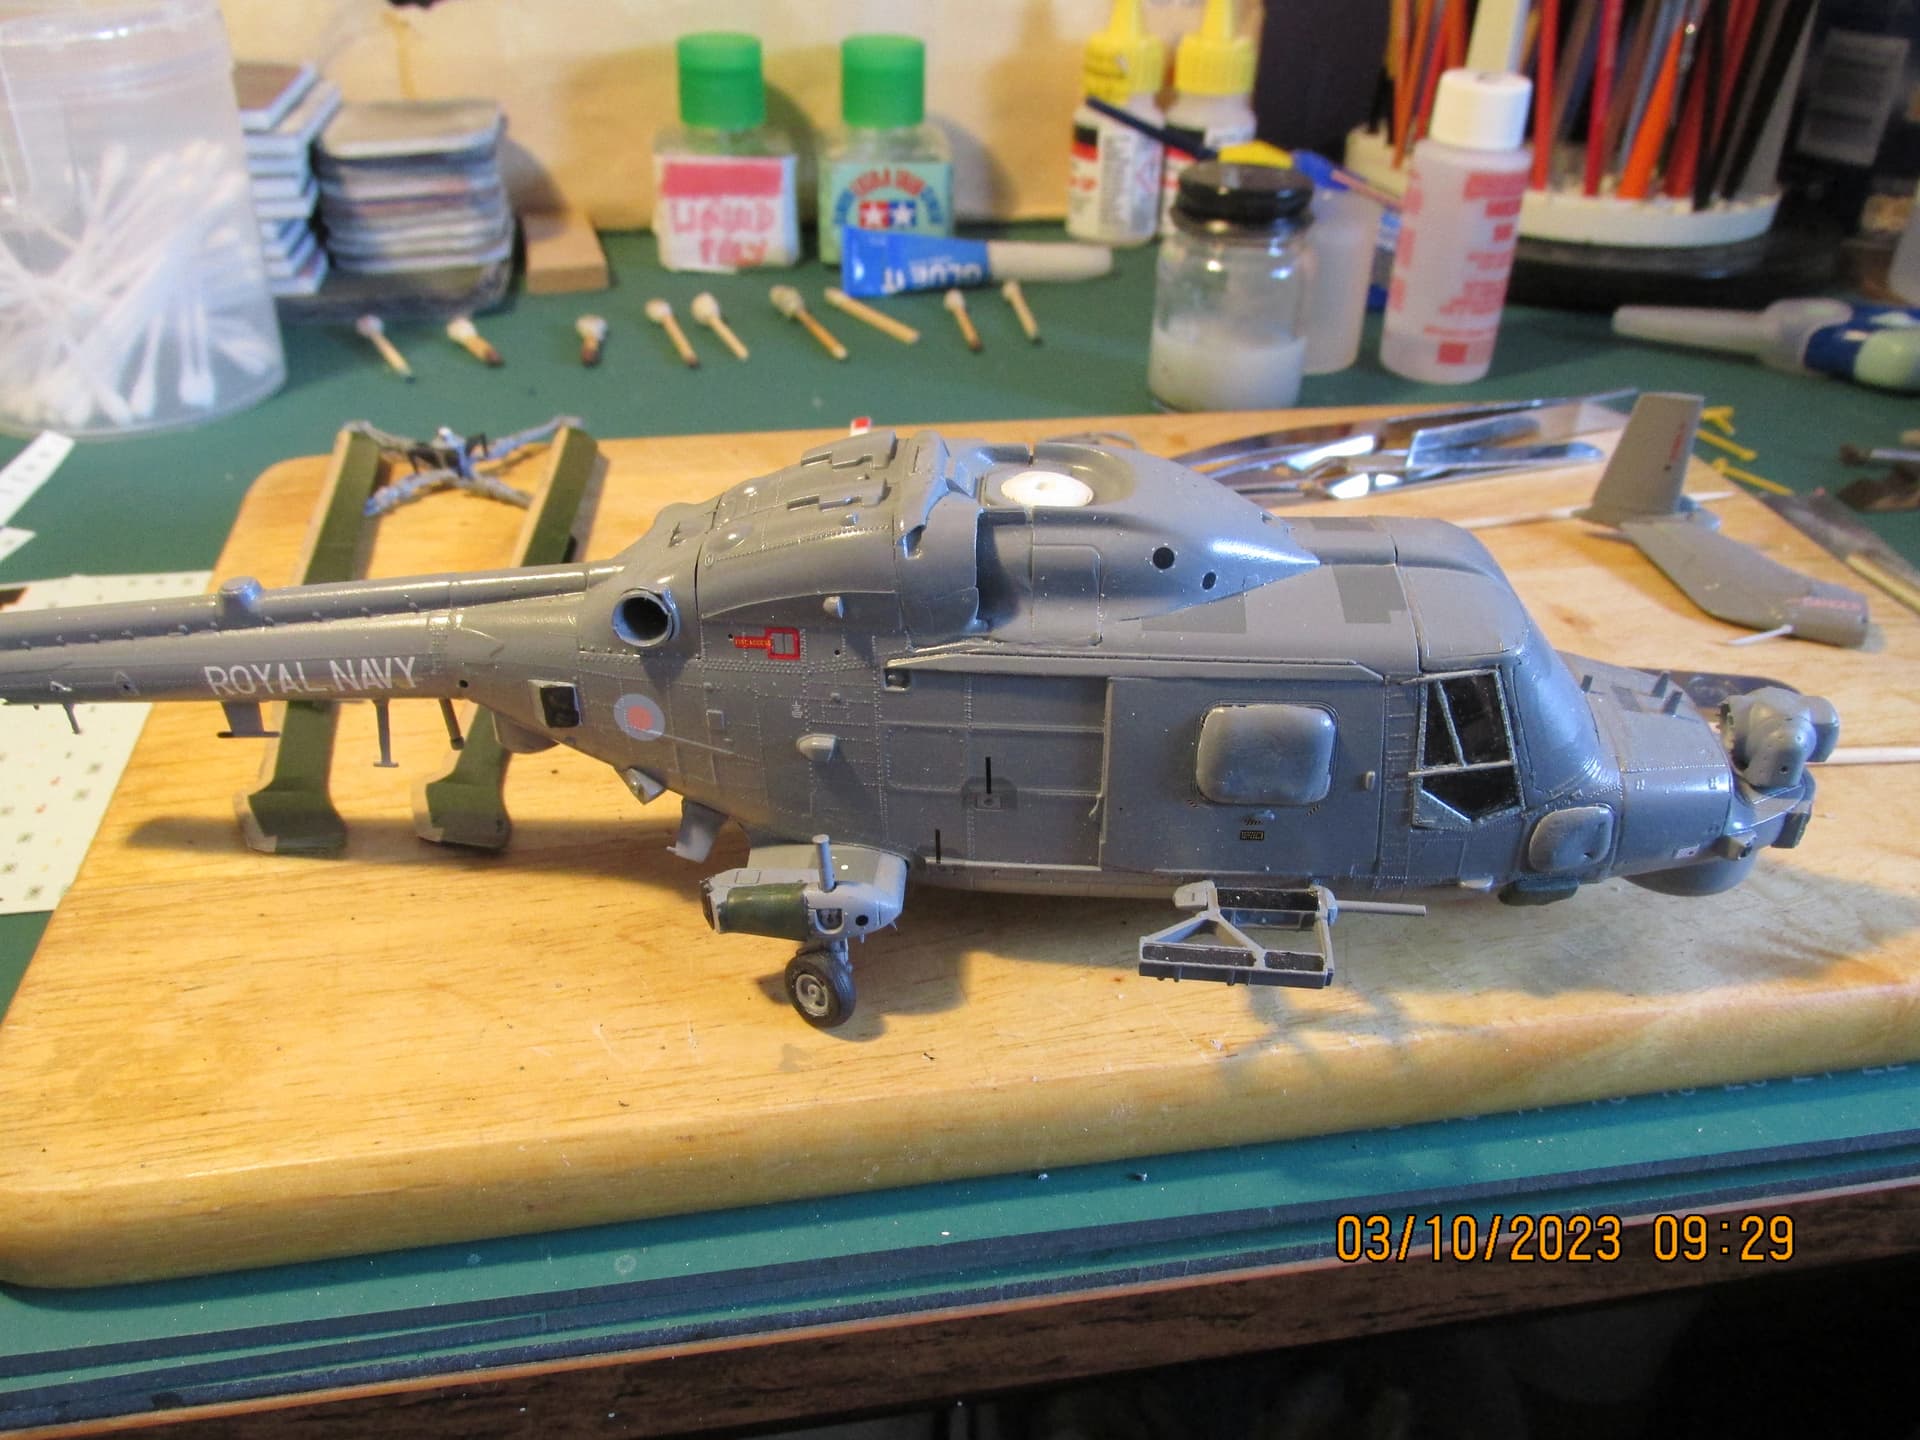
An update on the Lynx HMA8
When I took a break from my pooter, I decided to do more on this model that has sat in various stages of build on my bench for over a year now.
I hadn’t done much after building the main fuselage etc cos I was concerned about messing the rest up, but this time, once I got started, I began to really enjoy it and get into the mood.
However, this also made me notice several errors - not just with the kit, but with some early build decisions I had made.
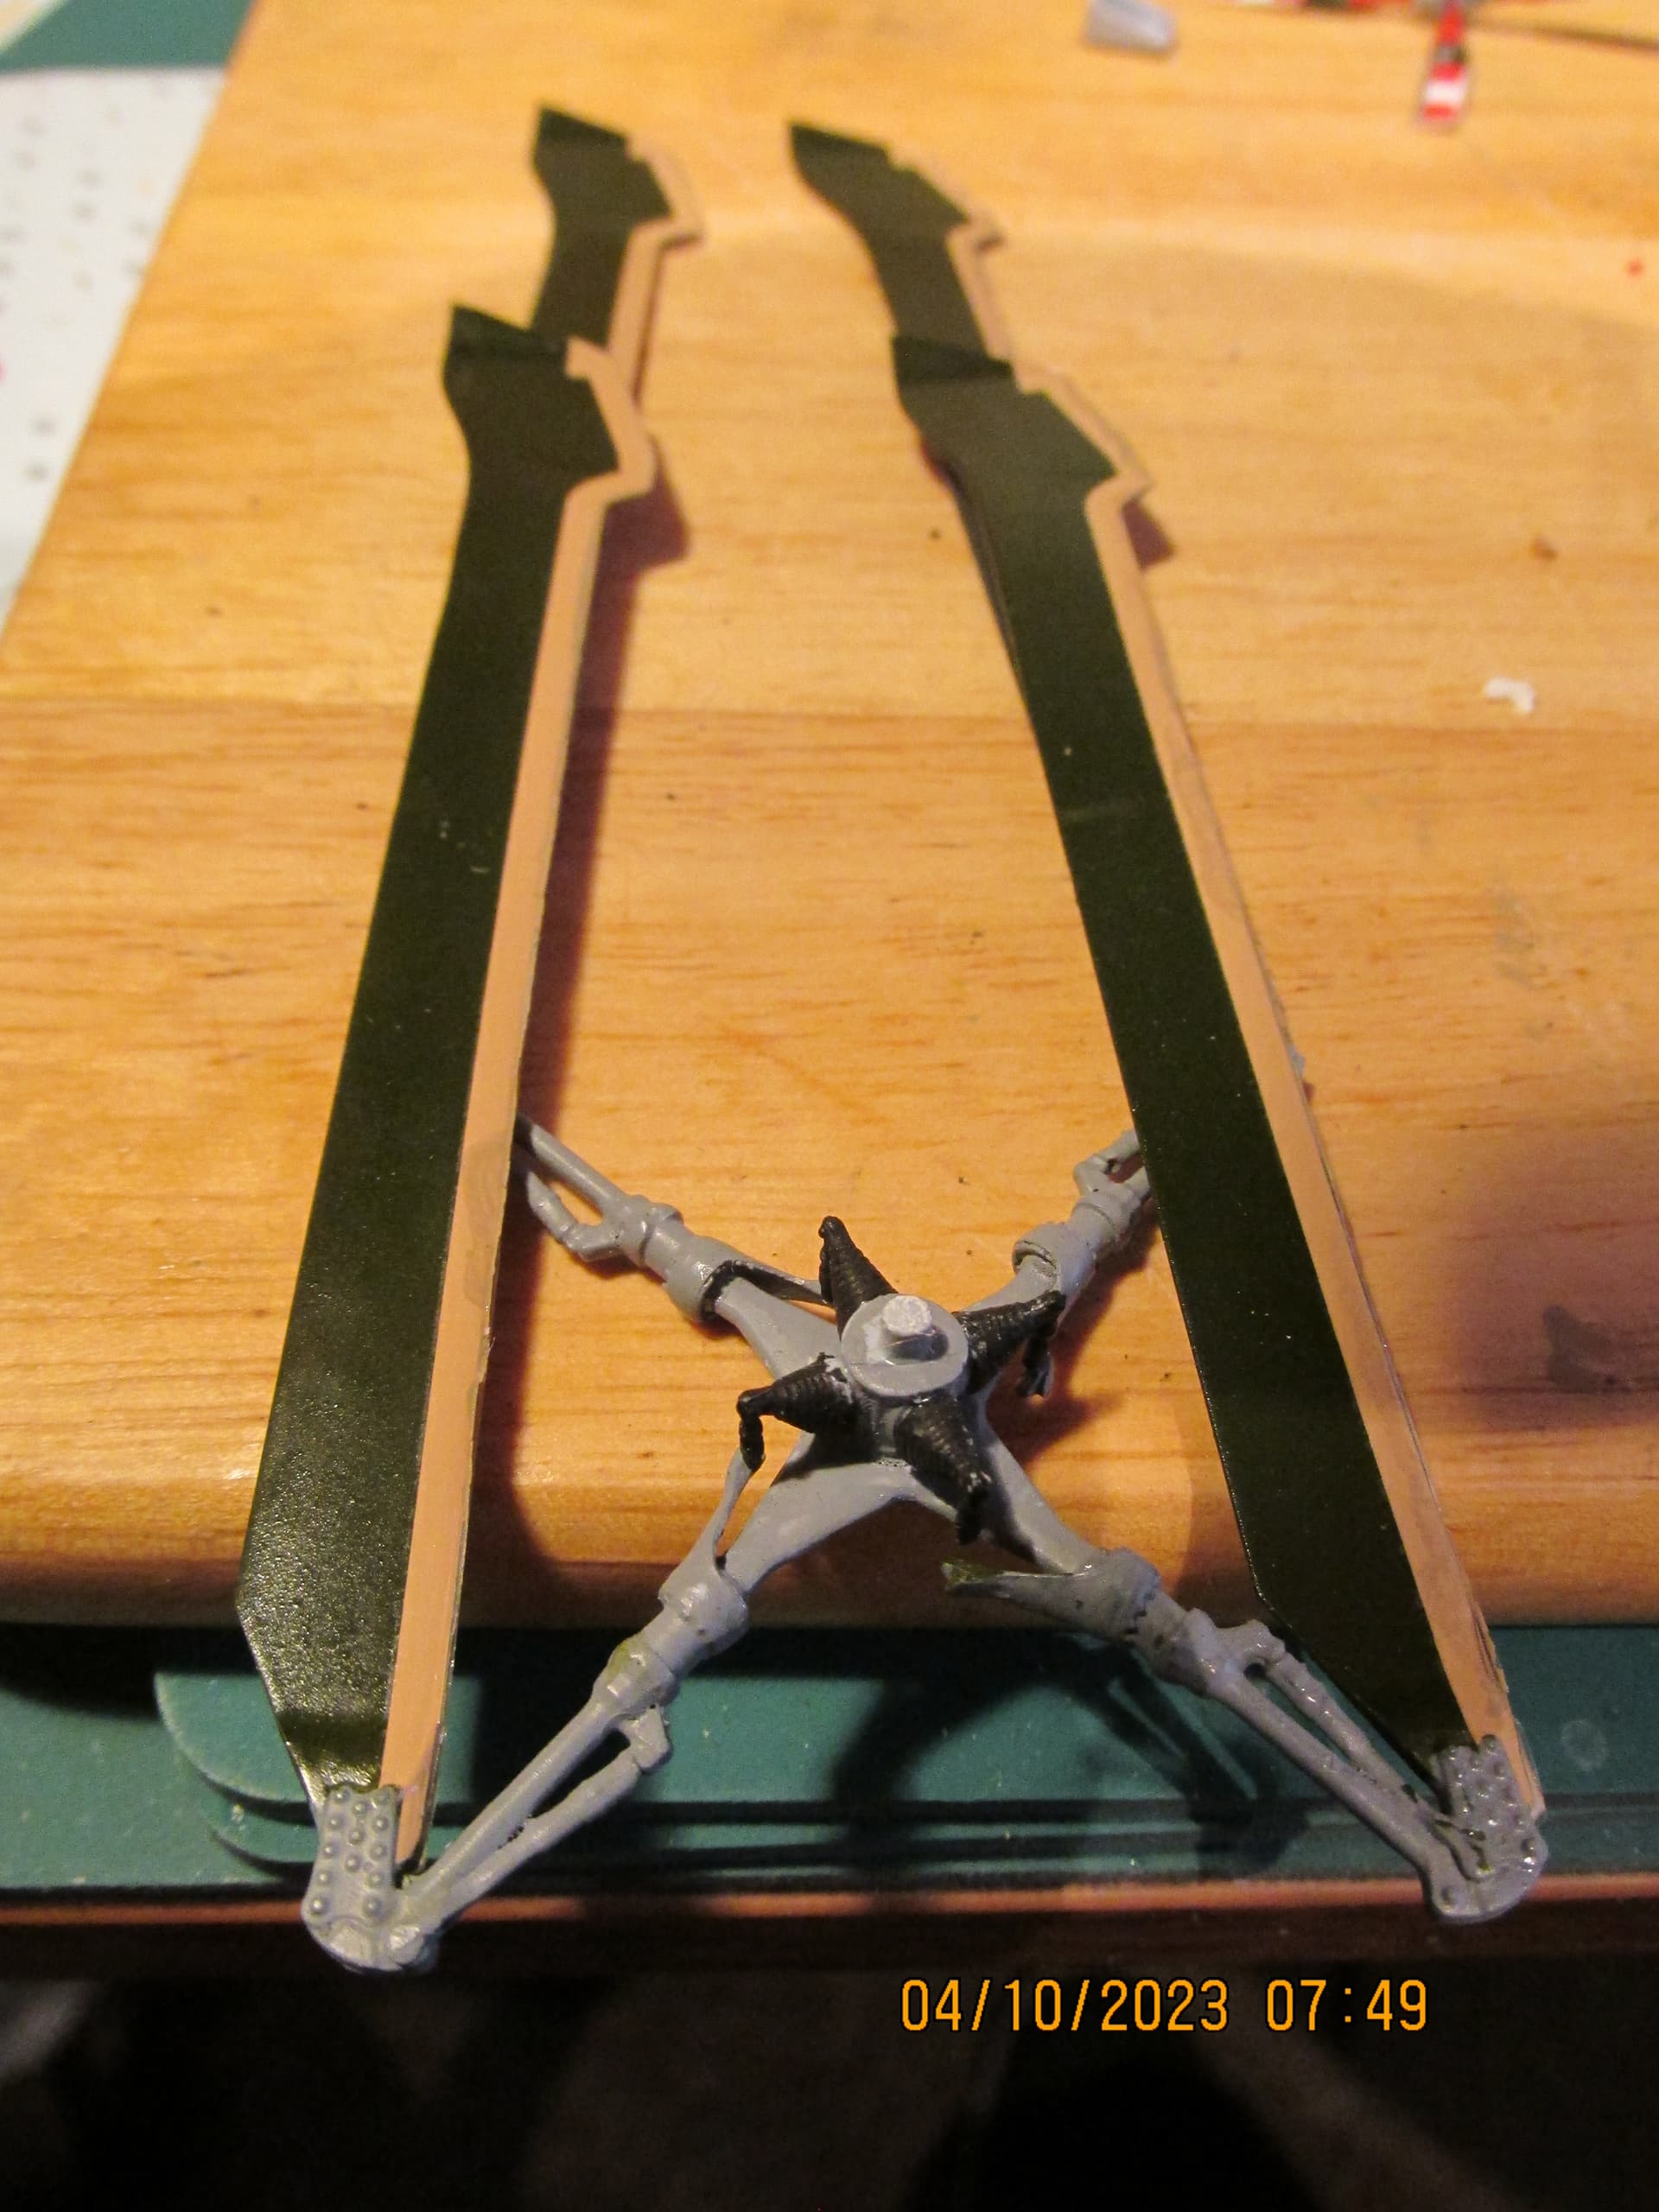
The first of which is those horrid rotor blade decals I mentioned before. It’s not the application that bothered me, but the colour of them now. They just look wrong - and when I looked in the instructions, even they showed them in a different shade!
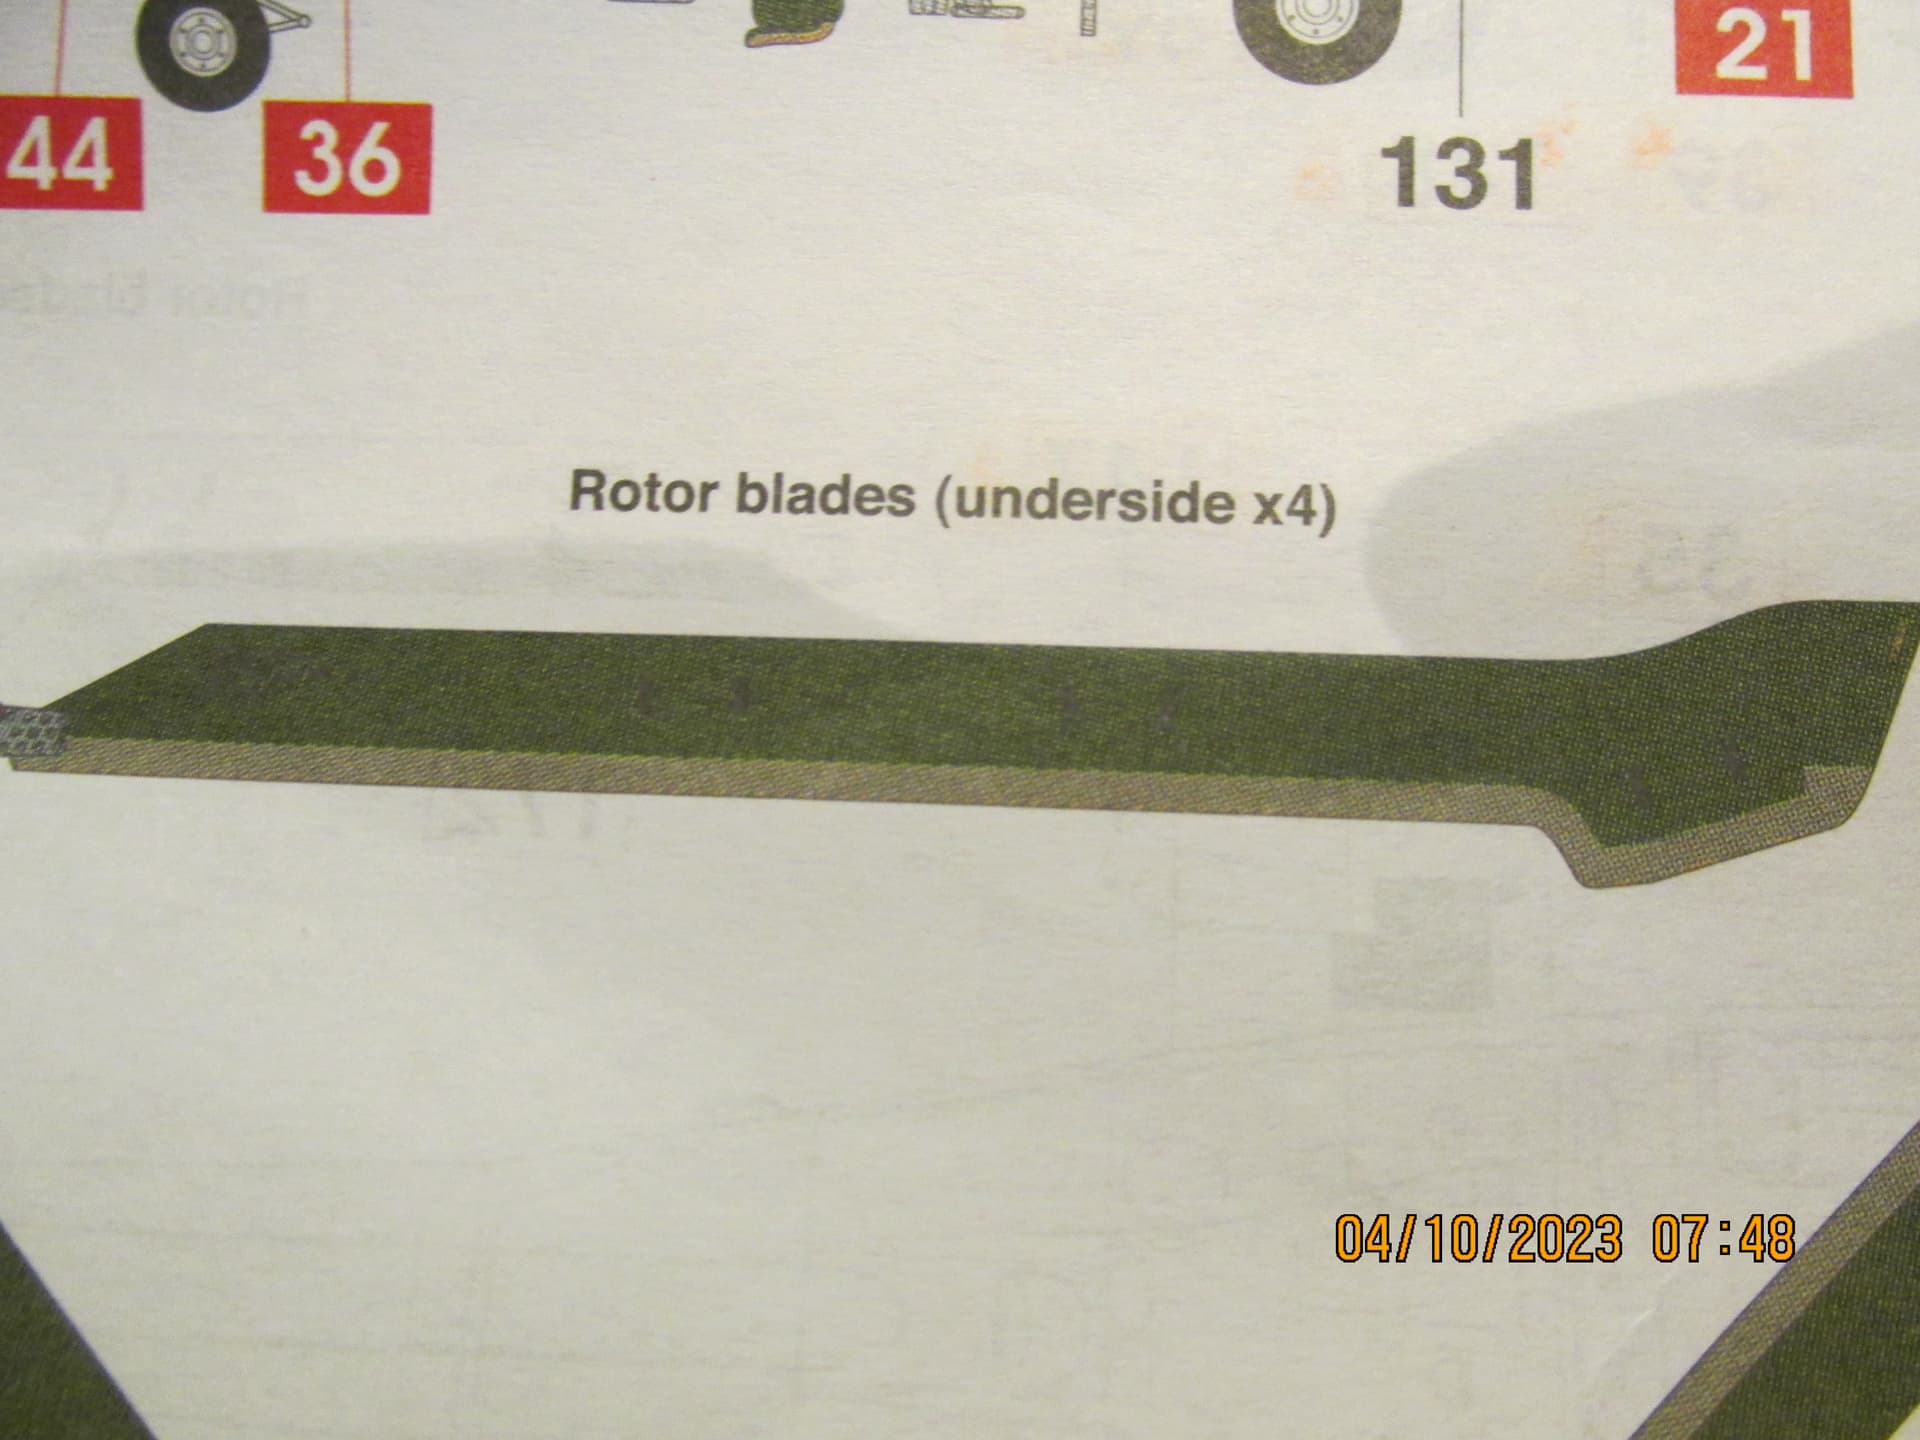
I was abit angry with myself, because earlier in the build I had downloaded a couple of dozen photographs from the internet to use for reference. I had used them for that, as far as external add-on bits go, such as antennas, lights and radar etc, but for some reason that completely eludes me now, I didn’t use them to check the rotor leading edge colours. Had I done that, I would have seen that the decal colour was clearly not right.
That’s not all, though! I also, for some unkown reason, didn’t bother checking that the Airfix colour indications for the cockpit were correct - and guess what? Yup - they are completely wrong!
I think I just thought it must be a navy thing, being used to building RAF aircraft.
Anyway - now I have two choices that I have to make - do I rub down the rotors and paint them correctly (or maybe make covers for them?) Plus, do I break off the canopy/windscreens and paint the console etc the correct shade of grey?
Unfortunately, the calamaties don’t end there! I just bought a new, but cheap airbrush. I bought it solely to use for things like varnish and weathering/washes - the kind of thing that can mess up an airbrush and I don’t want spraying through my Harder and Steenbecks! I’d been using an Iwata Neo CN up to now for that, but it was showing its age.
Of course, I didn’t test the airbrush before I started spraying the matte varnish on my Lynx, with perhaps predictable results, given how the build had gone up until then!
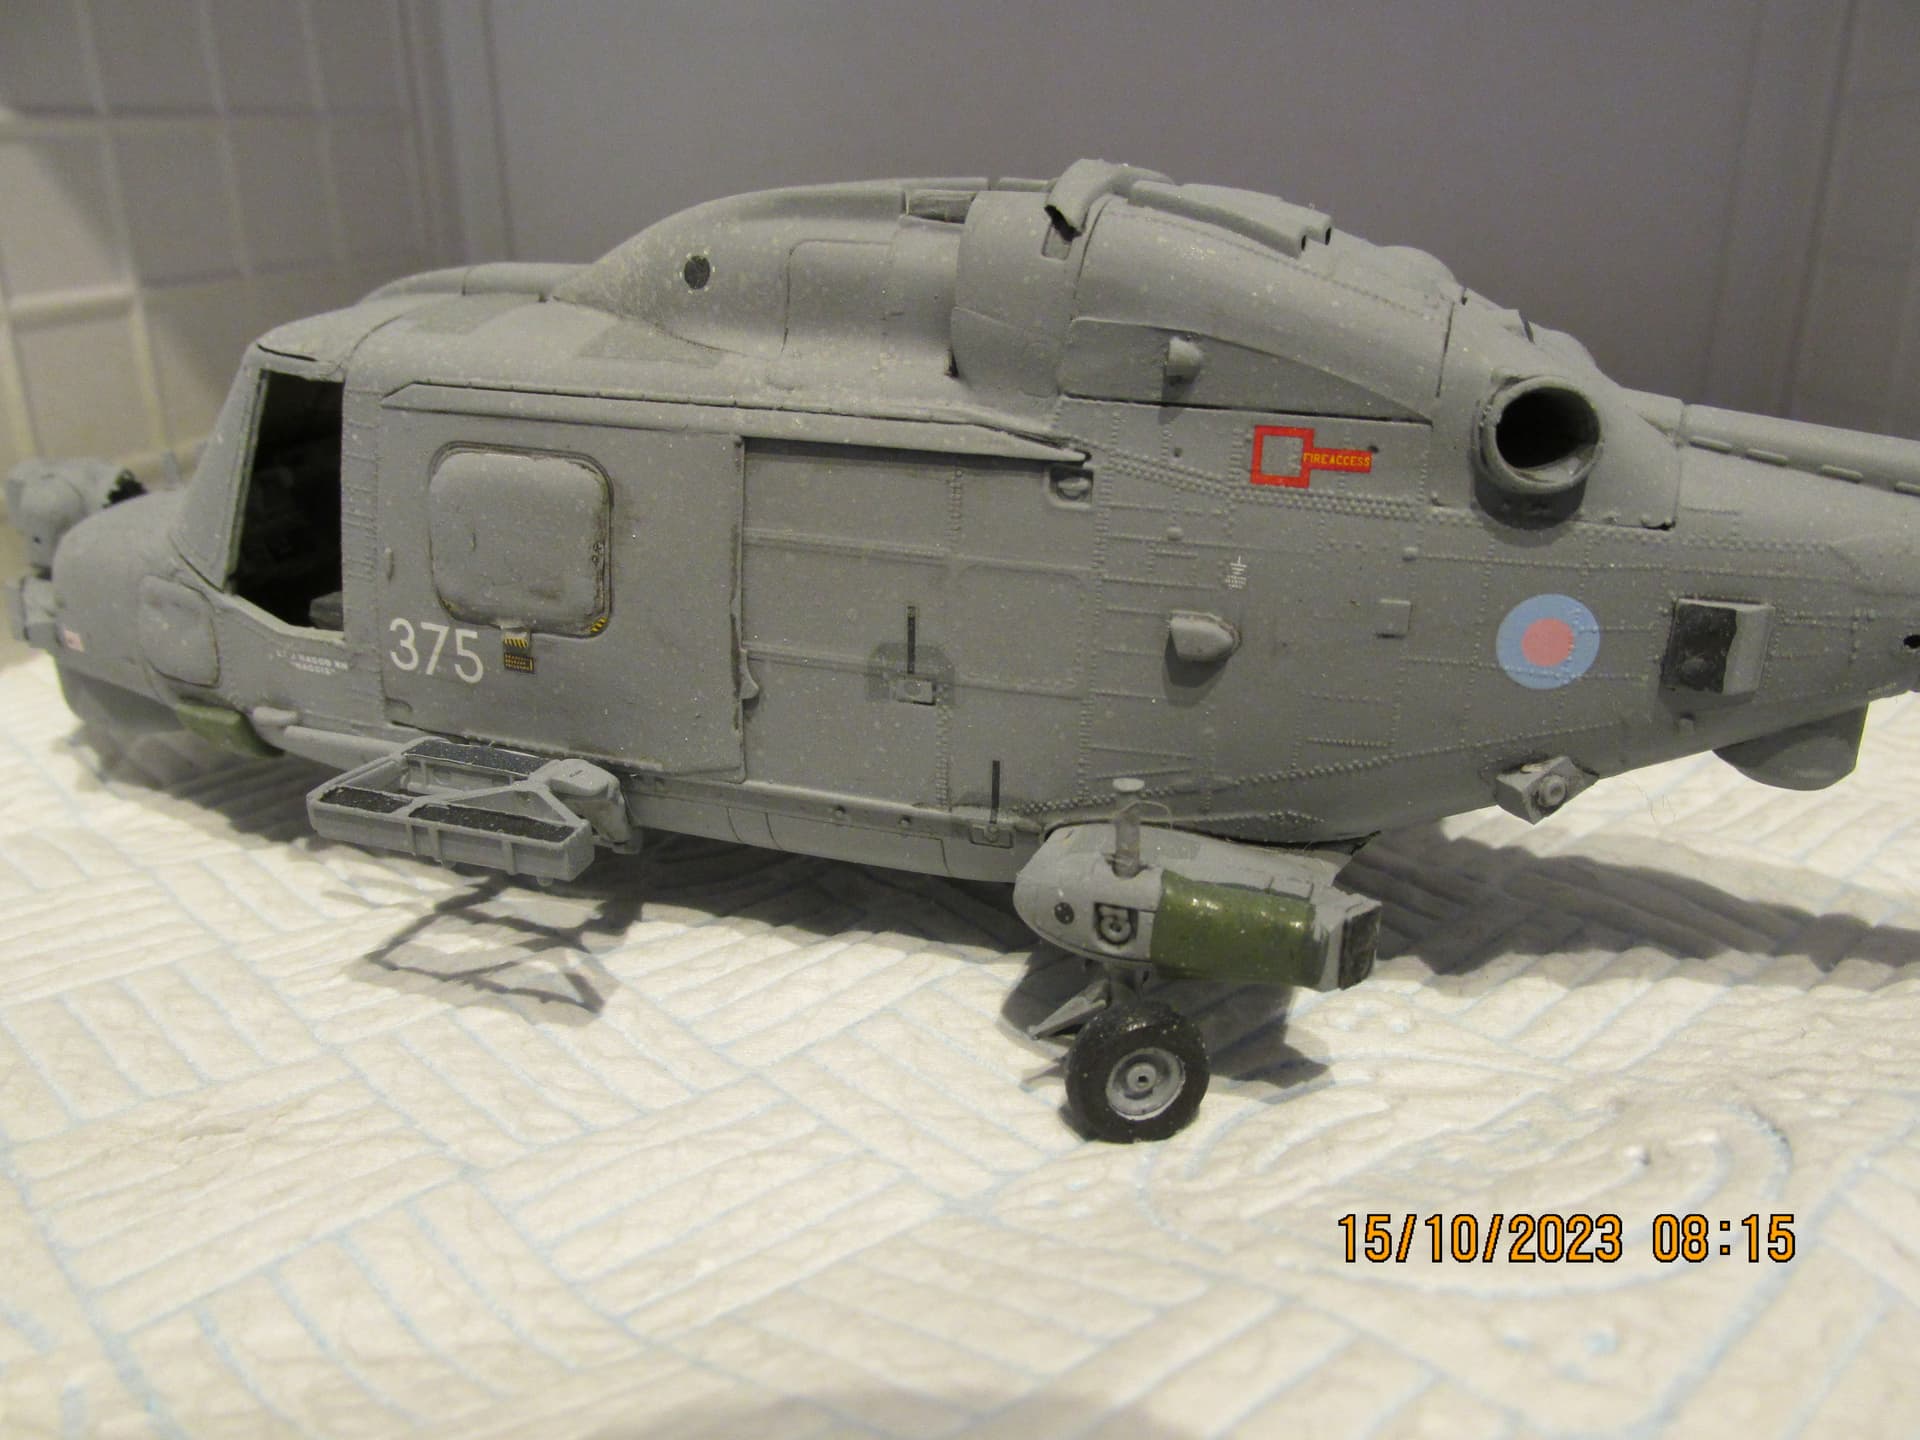
In the right diorama, that would look pretty good, giving a nice salty sea-spattered effect! But this isn’t one of those, so I used a light brush to paint on extra layer, which actually worked very well. Phew!
Here’s more of the salty effect, plus that awful light-grey cockpit:
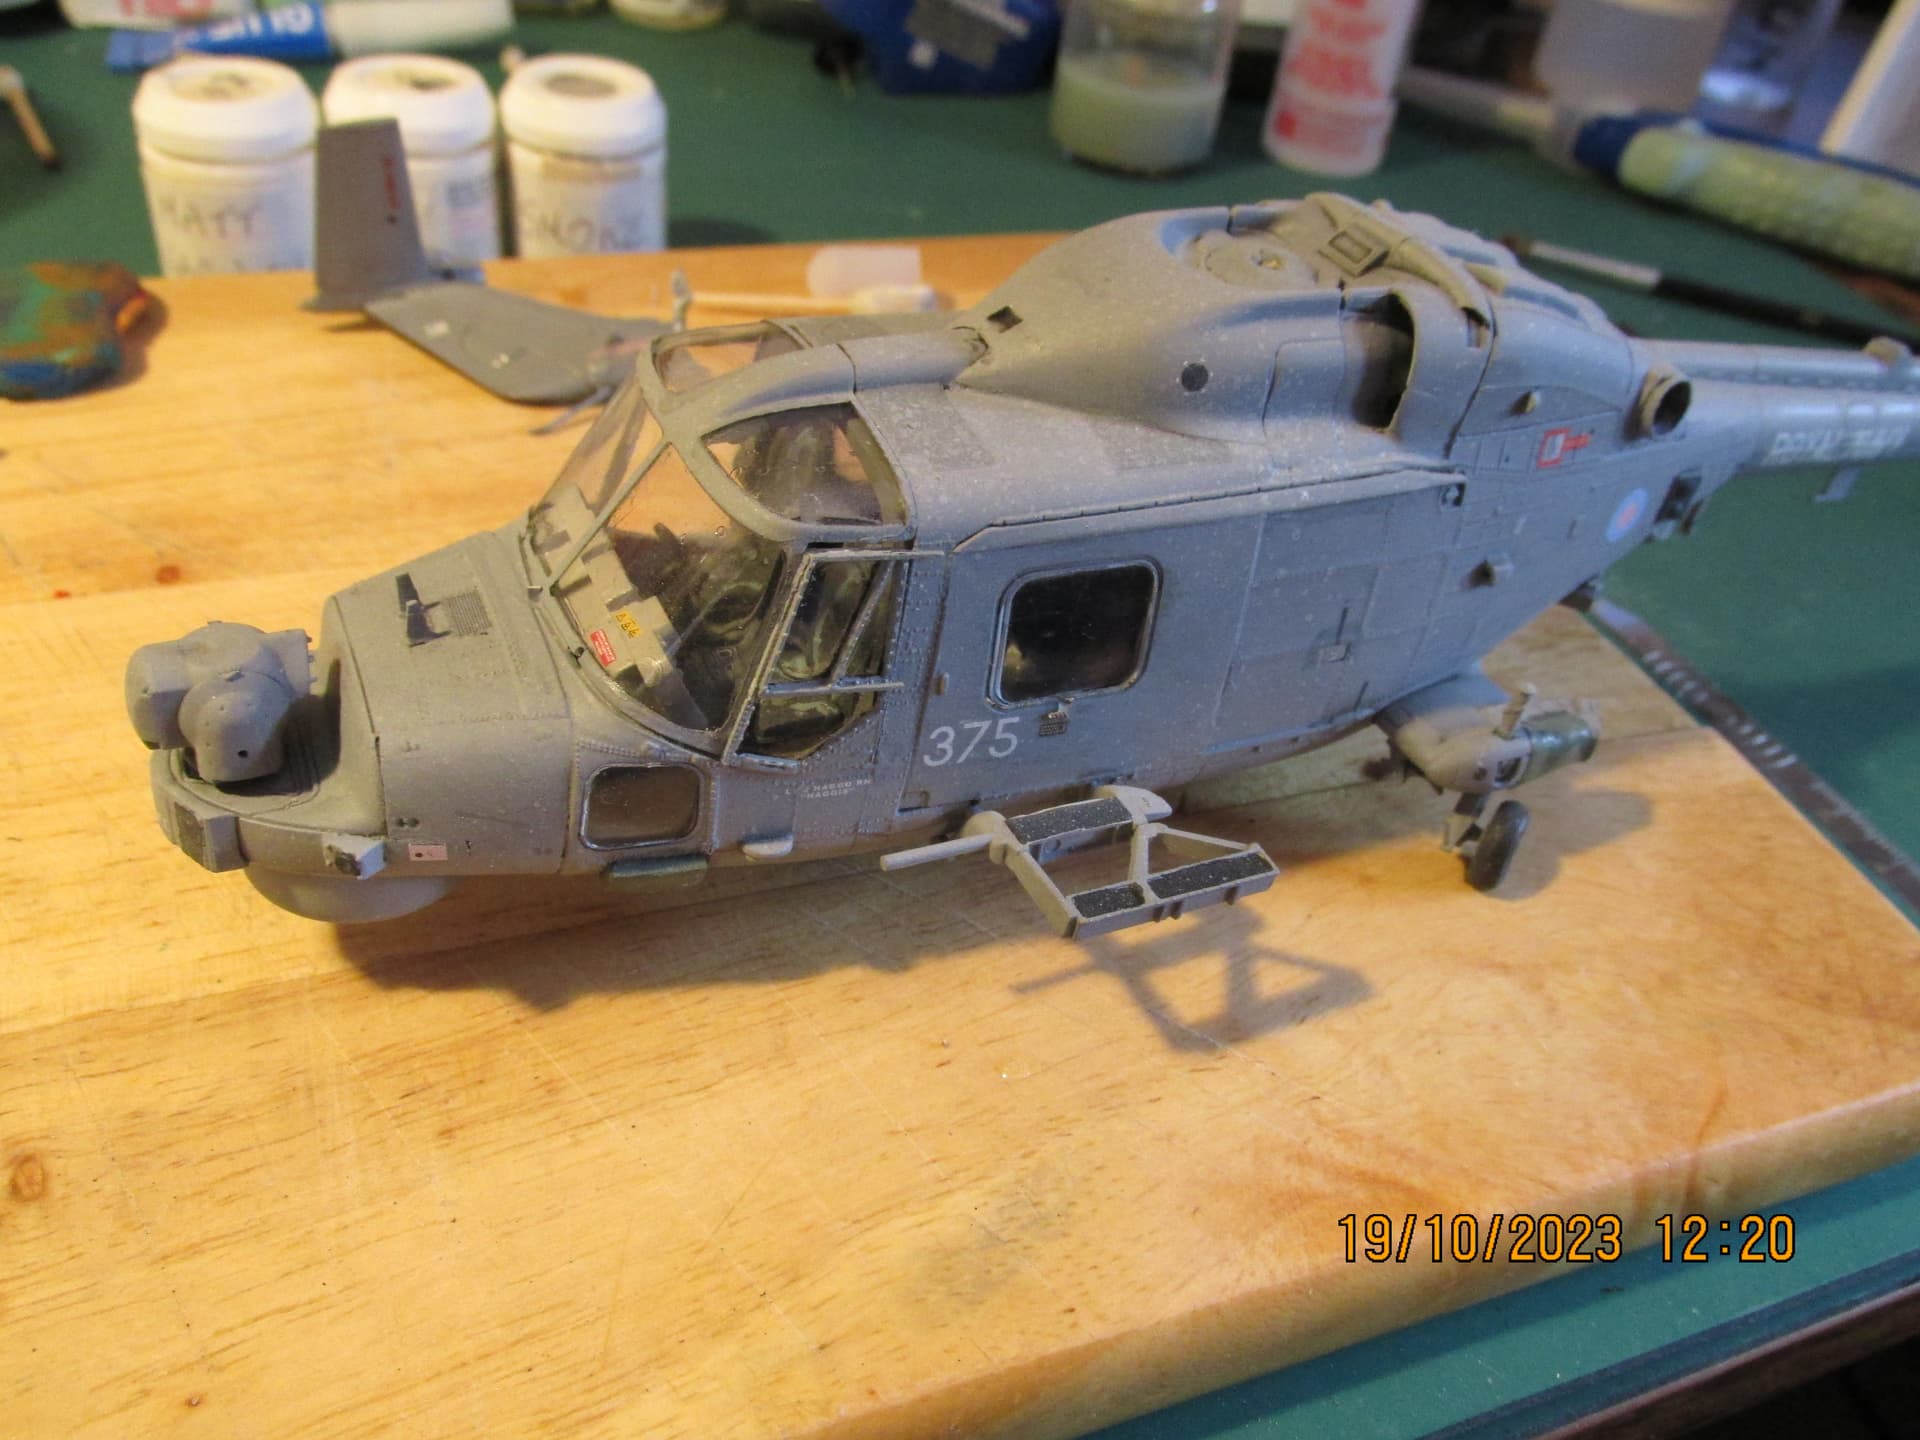
You see, for the last many months I’ve had all the windows masked up - so didn’t spot the error long ago. Oh well.
Spot the replacement part I made from milliput on top of the engine, complete with receptor hole for the rotorhead ![]()
At least I did that well enough…
The good bit is I’m back enjoying model building again! The bad bit is trying to find the time… ![]()
9 Likes
if your particular Lynx is not destined for competition then wrong shades of colours would not bother me.
dealing with the same on my current build.
most of the time we are the worst enemies of our own work. its good for best results but usually the slight mistakes are not going to be noticed by anyone else except us. so I am trying to look at the results from perspective of the others too.
great you are still enjoying it.
2 Likes
You’re right, of course. I think I’ll just leave it for this one and learn for the next one. I have so many kits in my stash waiting to be built, it’s not worth stressing over. I’ll just do what I can with what I have to finish the build.
One thing I have noticed is that adding dark weathering, which was mainly just to get some shadow effect around panels and joints, has also made a few bits look like they are not put together very well. A good example is the lower left edge of the windshield. Looks like there’s a horrendous gap, but it didn’t look like that before the wash was applied and I’m cautious about digging in there to clean it out.
I did notice a few models on the 'net looked the same, though. When I first saw them, that was my immediate impression: “Wow, he hasn’t put that together particularly well” before I realised it was the same with all of them - and even some aircraft photo’s I saw backed this up.
3 Likes
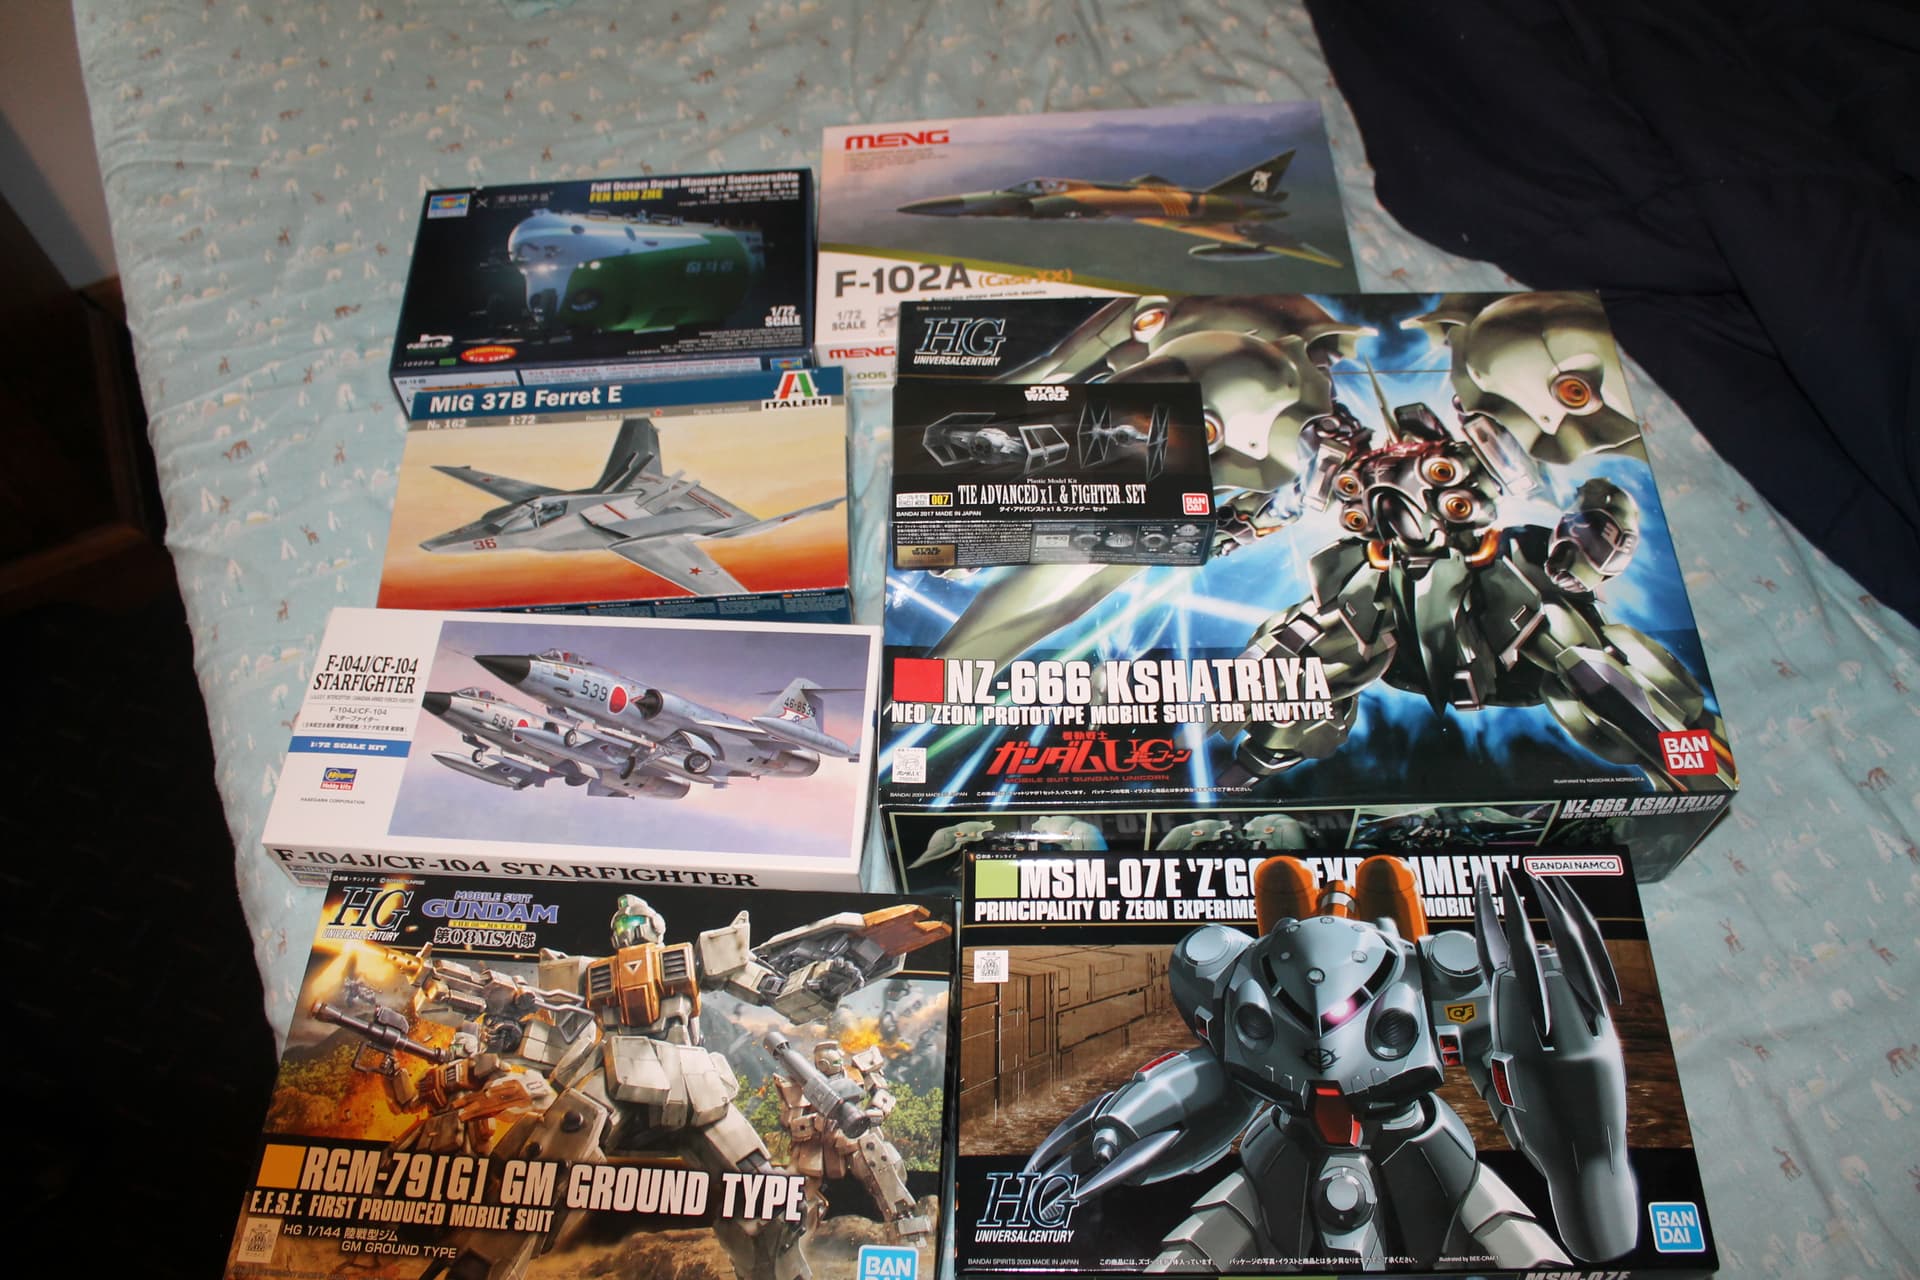
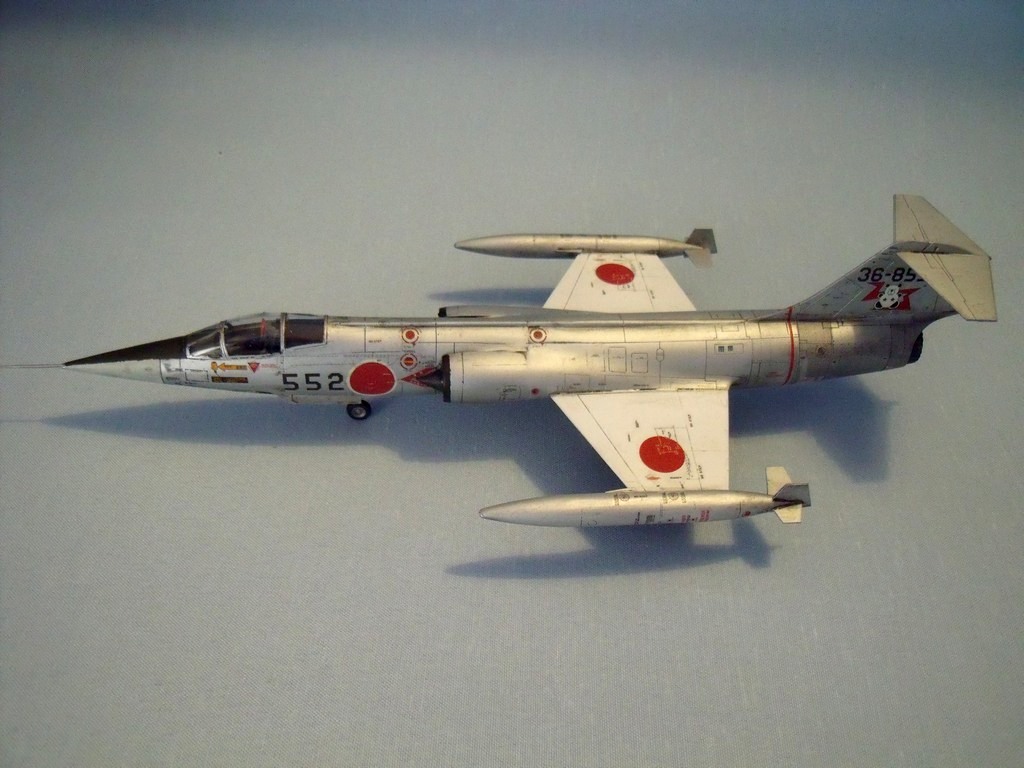
Great! I think I built that Starfighter and have it on my shelf - lovely model. Was reluctant cos I had big issues with a zipper I built a few years back, but had no issues with that one.
I don’t buy that many Hasegawa these days cos i think they are frequently overpriced - especially considering how much the cheaper opposition have caught up. this was a slightly older model and so at an acceptable price.
11 Likes
If I can get mine to look half as handsome as that one, I’ll be happy.
I’m working through the TIE Fighters right now since I really need to unlearn some old 40k techniques. I thought I’d just prime black, then paint on the details of the panels.
That is tedious and not very good looking, so for the second TIE? I’m just priming black, basing grey, then outlining the panels with a fine tipped brush to create a perimeter, then just fill in the rest.
2 Likes
Thanks - it turned out a lot better than I thought it would and the build is pretty straight forward - shouldn’t give you any issues.
1 Like
Same zipper kit I built a few months ago! The only slight issue I had with it was the front half/aft half fuselage split. My first try attaching it wasn’t strong enough and it easily popped in half.
1 Like
Much like @Johnny , I also picked up a stranded half-finished model of a Navy helicopter built by Westland.
Notable differences:
- scale, mine is 1:72
- modeler skill and experience
- colors: I am painting it as it was flown by the Belgian Air Force
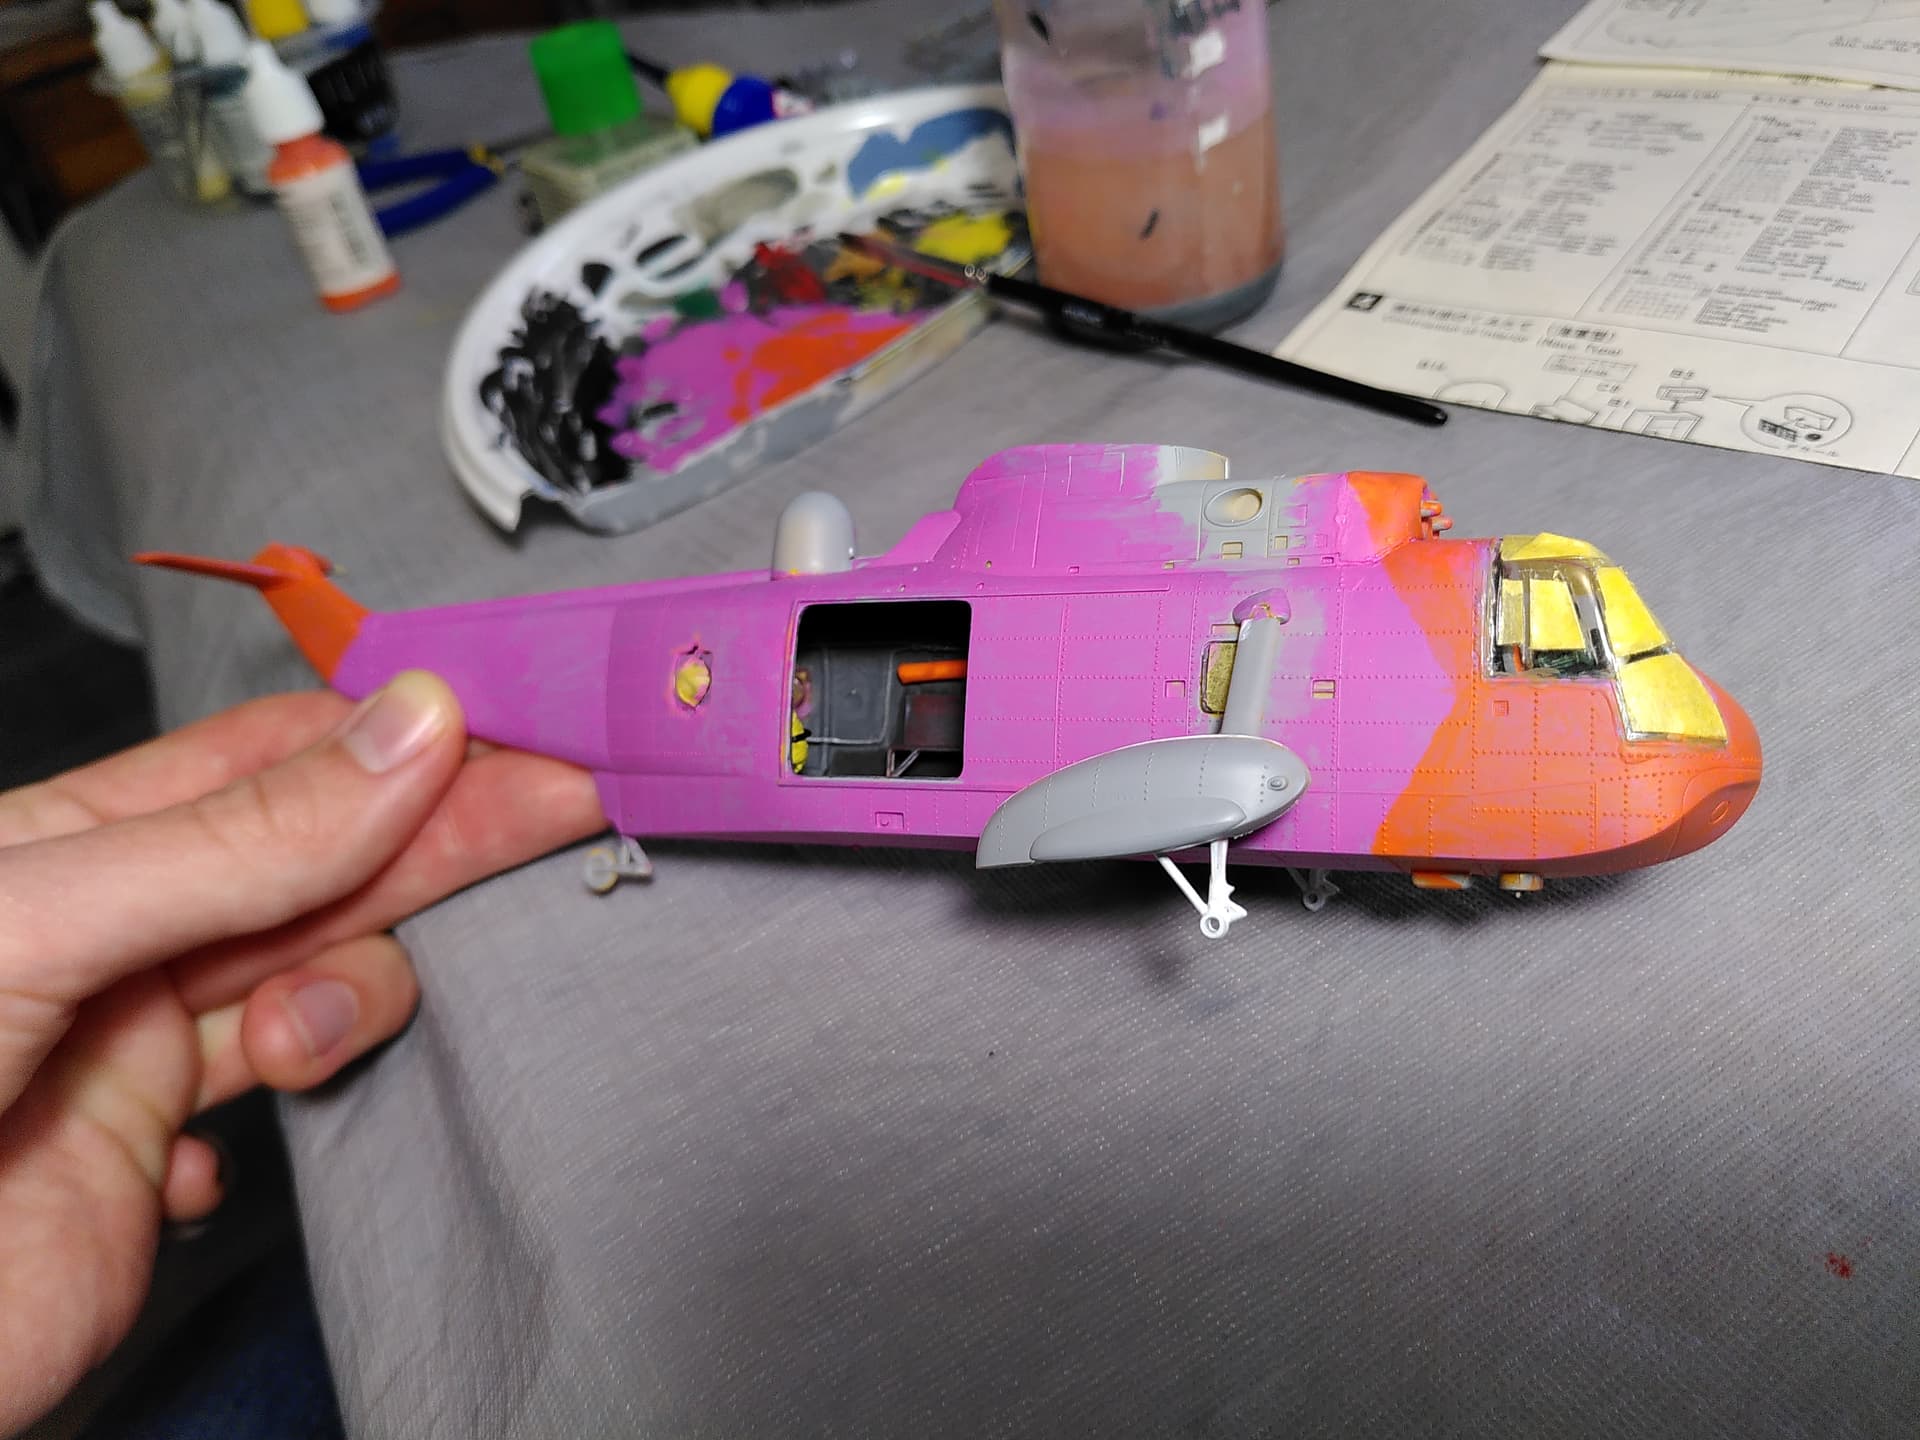
I have not done a lot of modeling but enough (especially with my girlfriend’s SAR UH-1D model) to know that orange is a terrible colour to paint.
Since I have been religiously scrolling scalemates.com, I learned that a pink base helps to make the orange nice and bright. It also helps with sand colour, which is also not an easy one as I found out on the RAF Tornado GR.1 last year.
This is my first attempt at pink basing and I can already tell the huge difference it is making. It already looks orange even after just 1 thin layer!

Full album at scalemates:
4 Likes
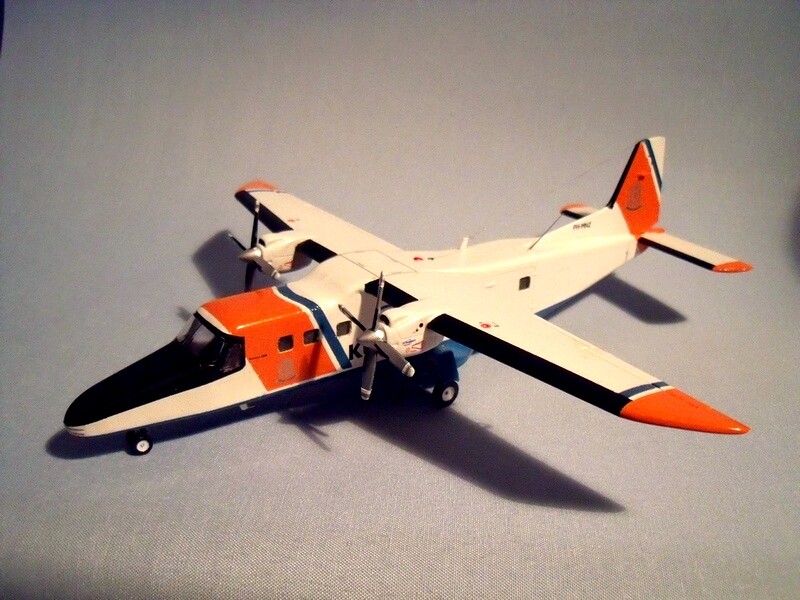
Nice - yes, orange (and yellow) can be tough jobs. I built a Dutch Coast Guard Do228 a while ago, which is mostly white with blue and orange bits - I was so concerned about it I chose to paint it with enamel paint. the only model I’ve built for a very long time now that I used enamels on.
Worked great, though - and I didn’t ruin the airbrush, either. I used an acrylic beige primer.
Good luck with the Sea King ![]()
4 Likes
Wow, that’s an incredibly clean model! I love the subject too, always saw it on beach days in my youth (nowadays it’s a Dash 8) and once did a very non-credible Christmas Flight in it in X-Plane 11
1 Like
I built it when I was a member of Flory’s little ‘club’/forum and he showed it in one of his videos and was on about it being too clean - but I had checked many photo’s online and in all of them the aircraft were like factory fresh, so I didn’t use any weathering at all.
I always used to fly this livery with the Carenado Do228 in FSX & P3D - it’s my favourite ![]()
*like this one:
3 Likes
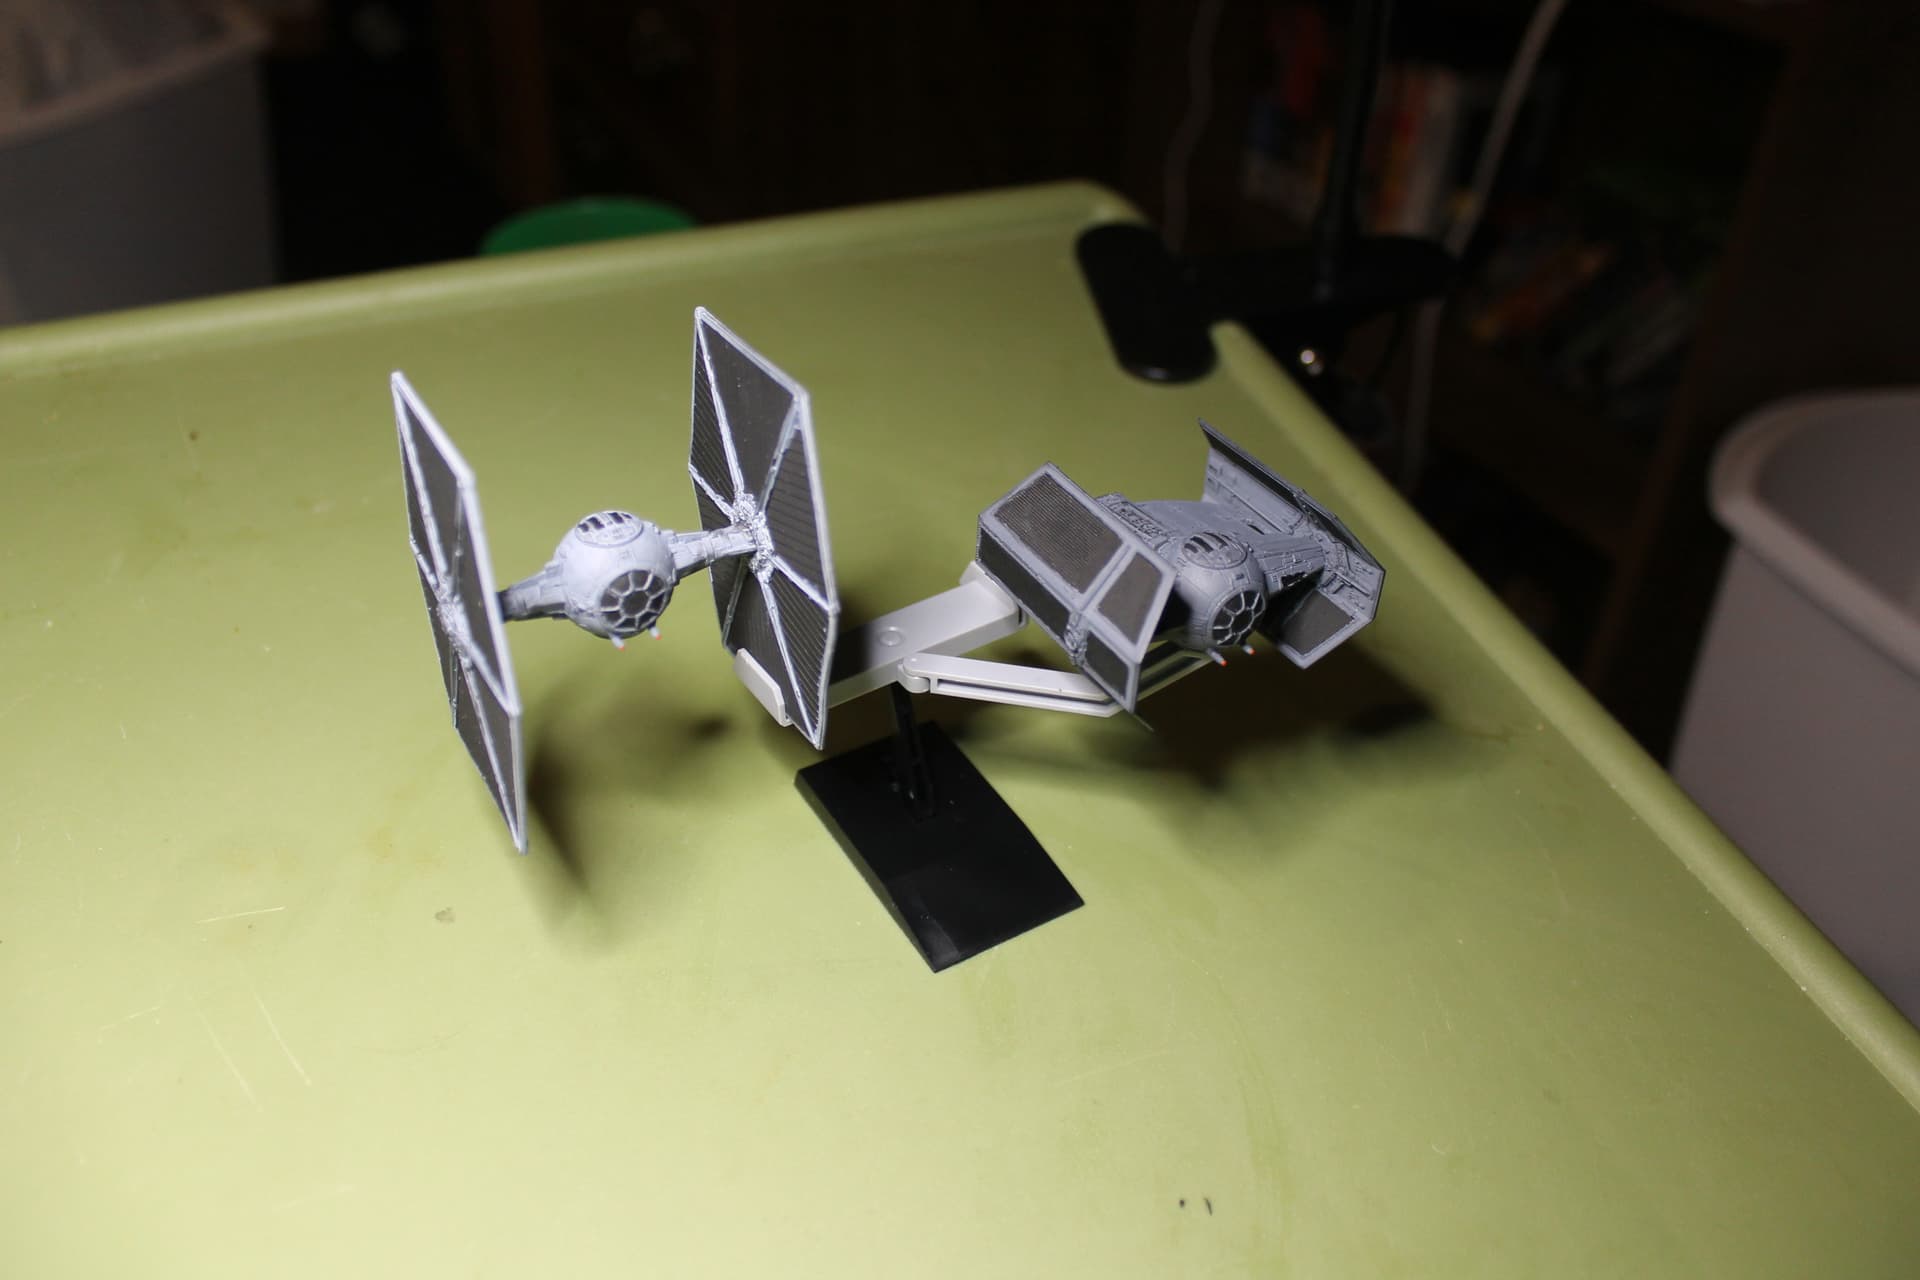
Picking up and relearning things. Like patience. I was using a hair dryer to dry paint faster, but melted the TIE Fighter’s port panel a bit.
Still, pretty happy.
6 Likes
Let’s be honest given the lack of shield and long patrol time, it’s so normal to see the the heat of stars (especially of Binary or Trinary systems) damaging the Tie Fighters’ solar collectors.
6 Likes
No excuse though! That Tie pilot should be force choked!

1 Like
AFTER he brings back his TIE. We can’t have him losing valuable Imperial property!
3 Likes
I’ve been meaning to share this for more than a year. I’ve typed, revised, and deleted my post multiple times. Not quite sure why but I think because I’m avoiding sharing my frustration in what is a positive thread. Anyway, here goes my story and model.
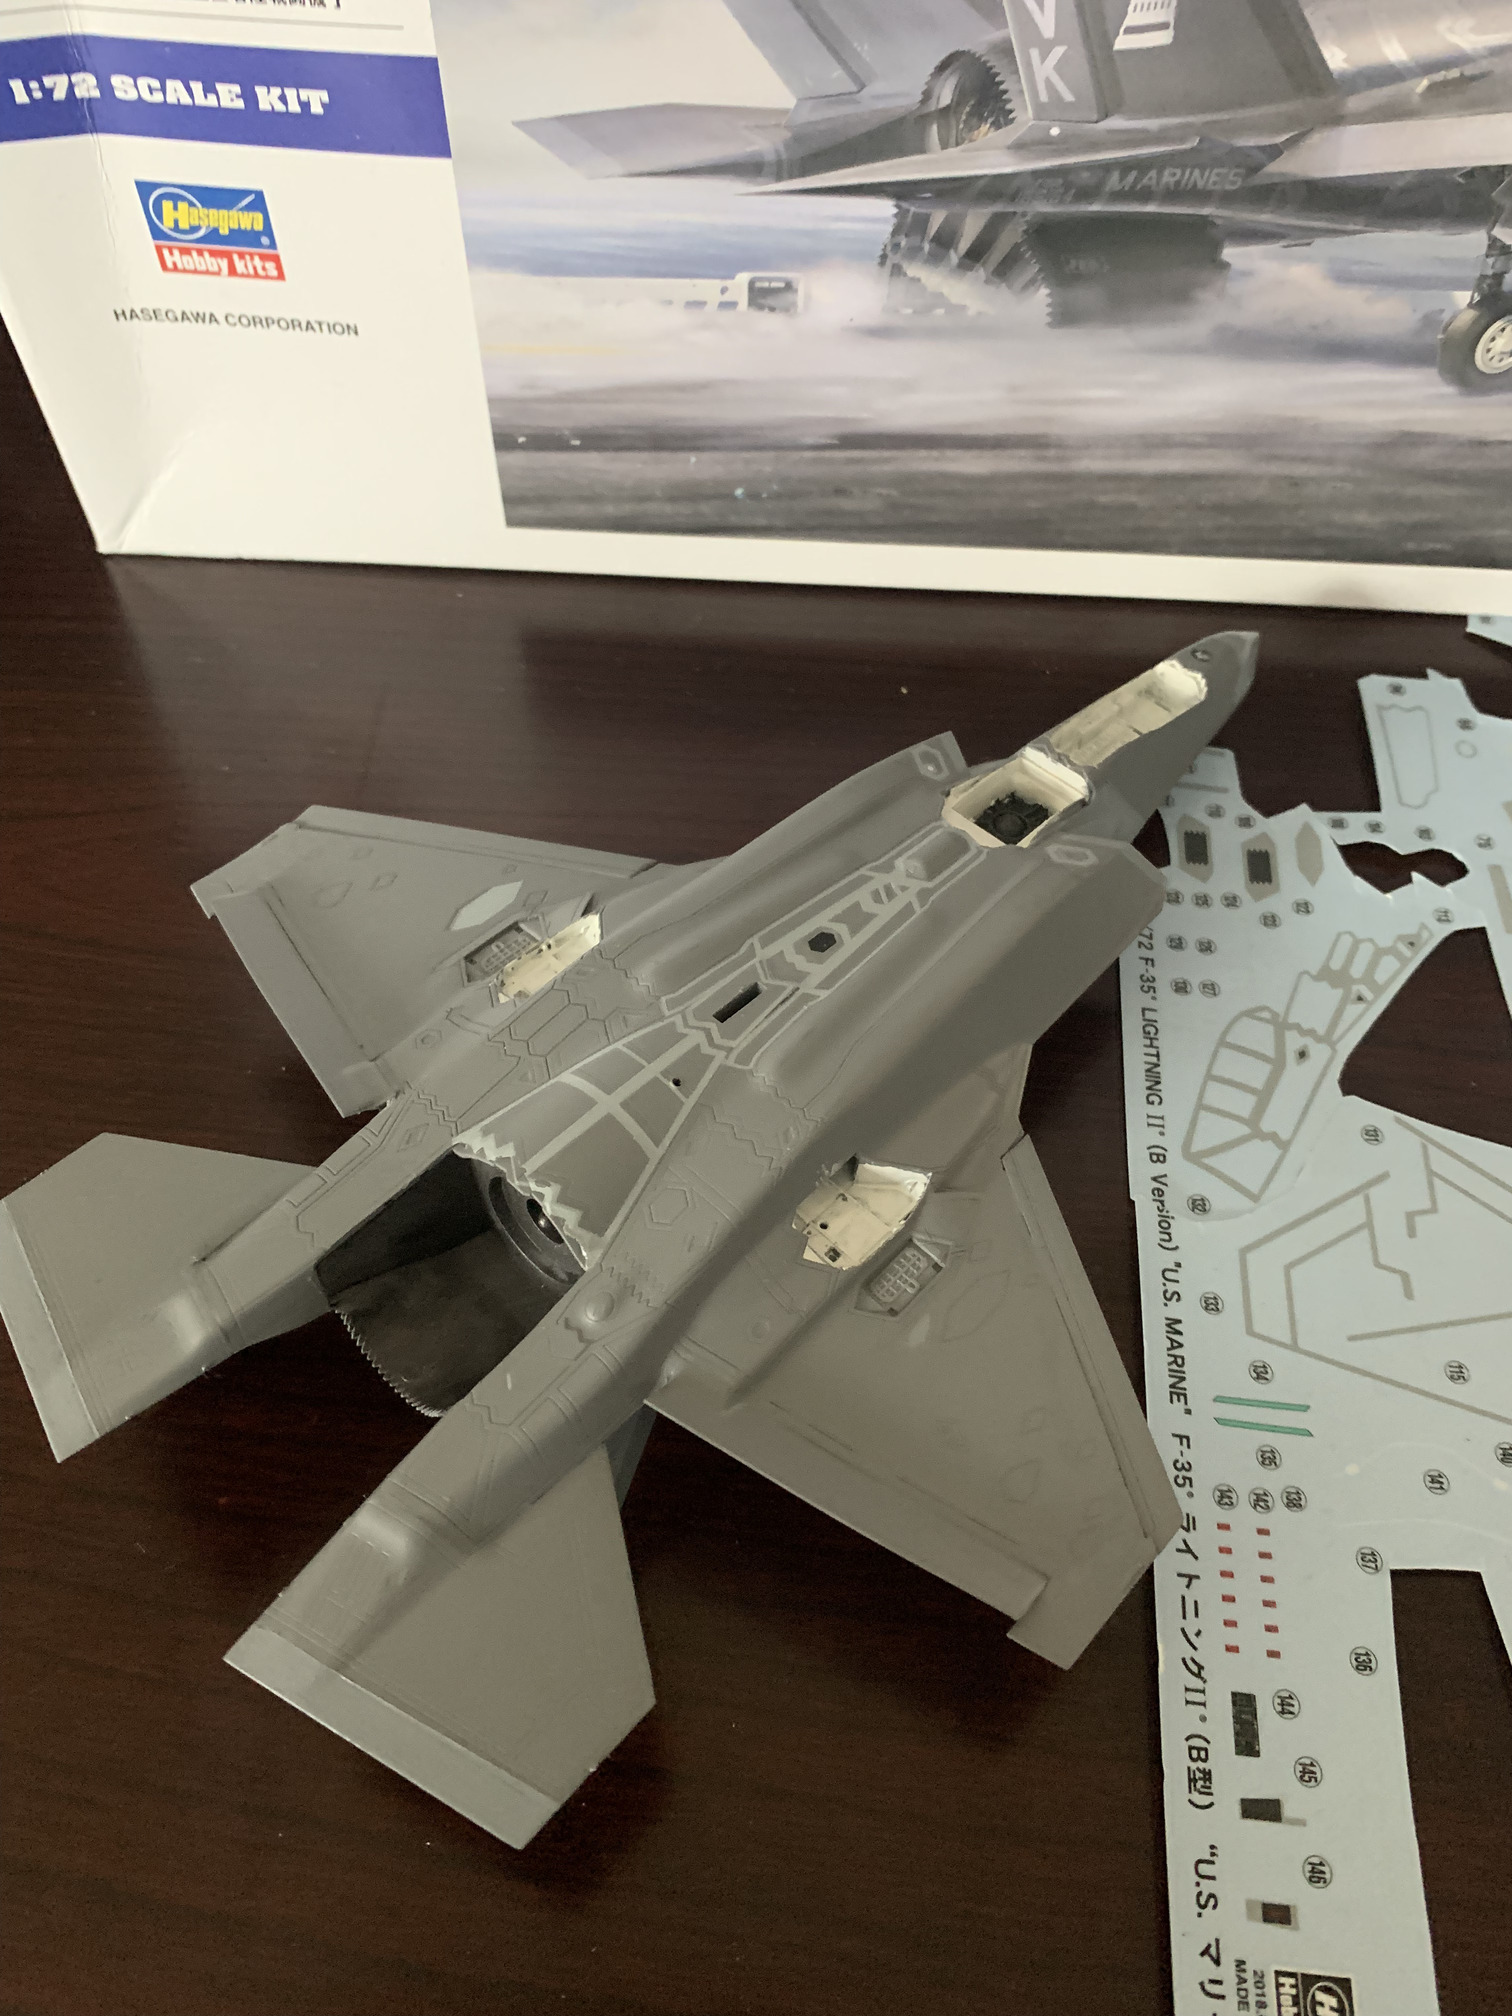
I meant to post this a while back but felt it was a bit on the negative side. I don’t want to ruin the vibe of this thread. Well, my son got me a 1:72 scale model of the F-35 from his last squadron, and I’ve been working on it for a bit. I started some of the decal work but stalled because it was a bit daunting. Lots of lines!!! I don’t have hands or eyes like I did 20 years ago, plus it’s been about that long since I completed a model.
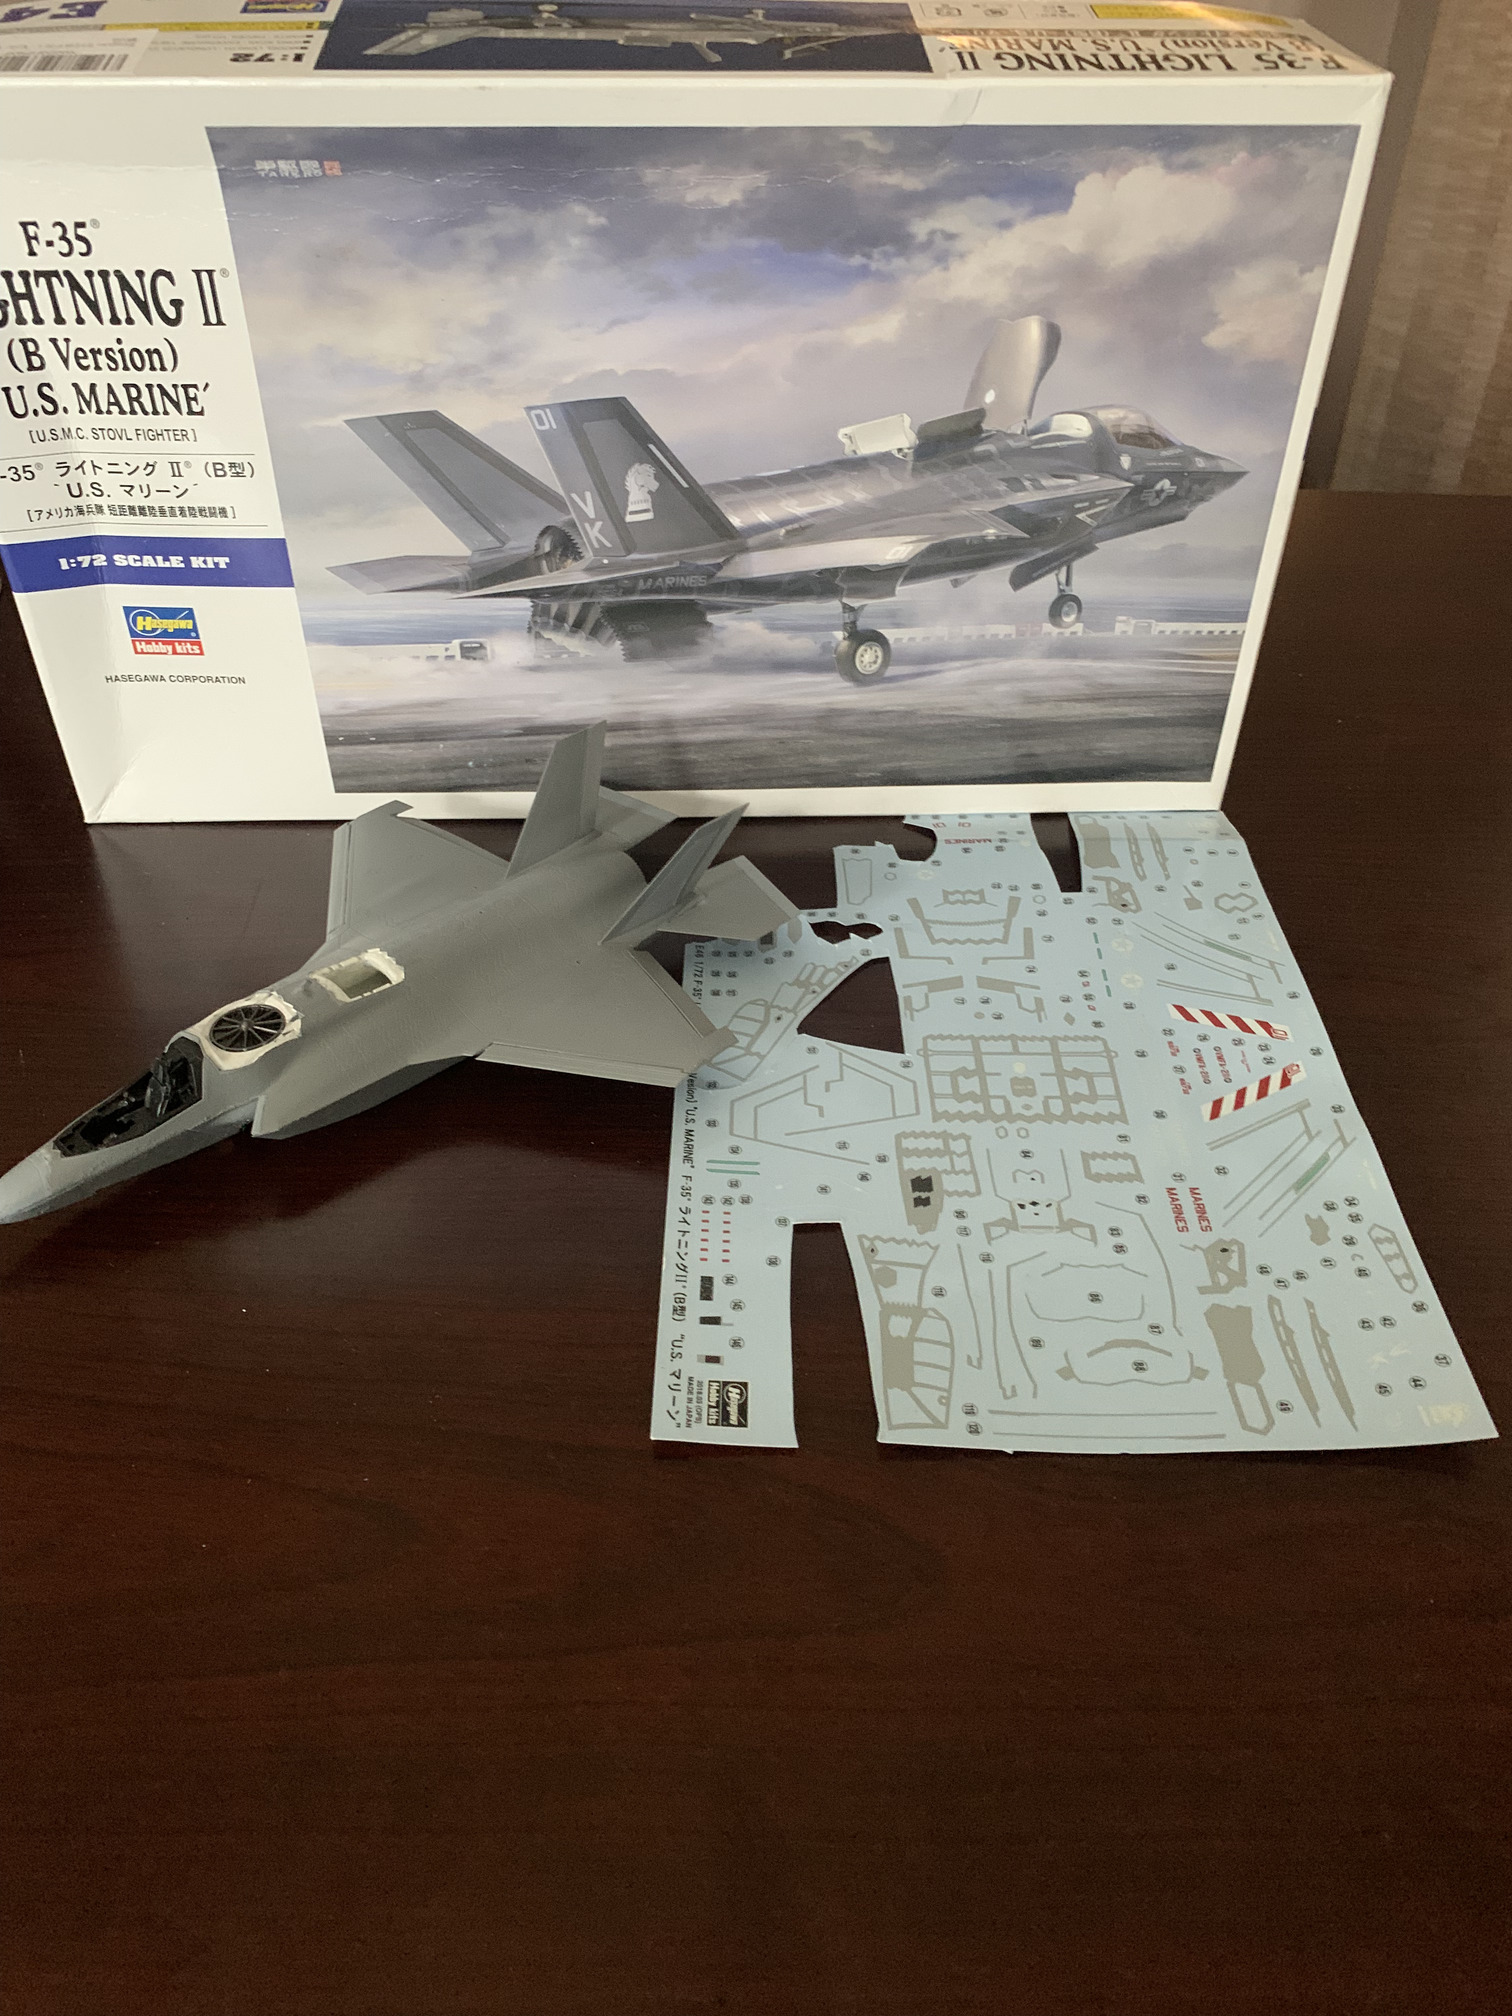
Anyway, I managed to get part of the underside of the main fuselage completed but the panel lines are intimidating. I completed an F-16 for practice and made a ton of mistakes, but it prepared me for the F-35. Well, that was until I started the decal work.
That said, I now absolutely hate 1:72 scale. ![]() It was not a problem when I was younger but time has not been kind and the scale is simply too small for me. That said, I bought a 1:48 scale Viper and Hornet to work on when I eventually complete this F-35.
It was not a problem when I was younger but time has not been kind and the scale is simply too small for me. That said, I bought a 1:48 scale Viper and Hornet to work on when I eventually complete this F-35.
I’ll take any tips that can help me overcome the detail work. My biggest worry is tearing the panel line decals. Placing them hasn’t been as easy as I thought it would be.
5 Likes
I have outstanding vision. During my physical this year, I got 20/10 vision distant and excellent near vision. I’m in my mid thirties.
And, honestly, for the panel line decals? I wouldn’t. I’d first get the whole paint job done, then tape off the areas for the decals, mix up paint to match the decals, and lay down some nice long brush strokes.
If you’re not keen on that? Then I’d go out and grab some kind of clear gloss coat (I use Rustoleum 2x), finish up all the paint work you want save for panel washes, then hit that thing with a gloss coat. After you’ve let it sit for 24hrs, go ahead and trudge through the decal application little by little. Once that’s done? That’s when you apply the finishing touches like panel washes and weathering. The gloss coat makes the surface smoother, so you get flatter decal application, and then less bubbles forming down the road. If you’re going to go through that kind of work for those hellish looking decals? It’s already going to take a while, you might as well protect your work best you can.
4 Likes
Thanks for the advice. I’m still fairly steady with a brush and my masking isn’t bad as long as I’m patient. ![]()
1 Like