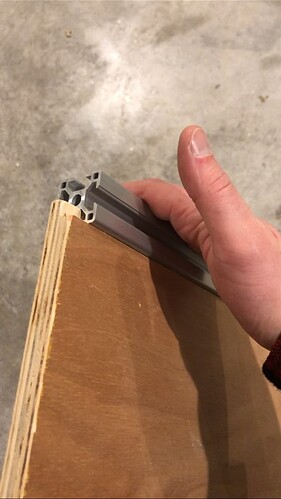
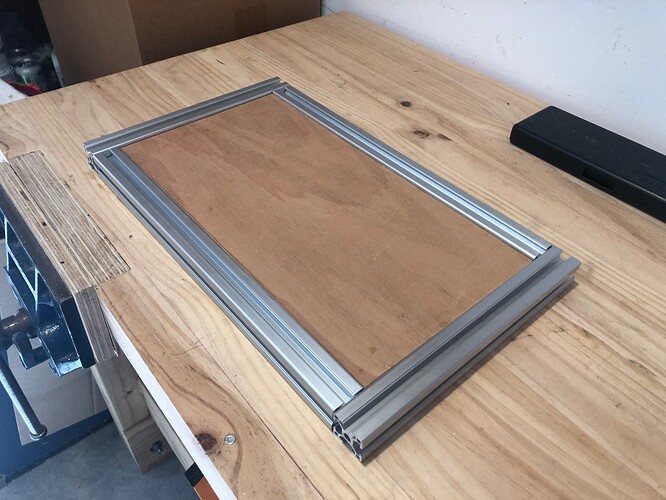
Okay so the problem here is that the vertical beams(in the photo) need to transfer the load to the horizontal beams. How do they do that? Through 4 bolts and T-nuts each… What you want to do is get it all a tad more snugly together, so that the beams make direct contact and the nuts are only there to catch the shear loads.
Now they do, yes. @Bearhedge started out with just two bolts and nuts, per beam. That created a moment arm since the bolt is offset in relation to the load on the beam. Doubling up on the brackets and bolts takes care of the issue.
The same moment is still there though, since you are transferring the load through the brackets. You want to transfer it through the beams so getting them snugly up against eachother would do. Right now you still run the risk of having the same effect happening, though it’ll probably take more effort due to an increase in friction.
EDIT: I am an idiot, I see what you mean @Troll and that has definitely fixed it.
I made a little base for the PC to get it off the floor, reduce dust accumulation a tad. Don’t have a lot of space above it so had to make the legs very short but every little bit helps.
That looks nice Bearhedge!
Kudos to all the spouses and partners that patiently put up with this, often in the middle of their living rooms…
Mine can identify with that!
I am a bit confused. Is that word a synonym for “begrudgingly”?
![]()
Joking. You are quite right, kudos indeed!
3D printed a hornet panel using Jself’s files from the other forums (search 3D printed hornet front panel), I think it turned out pretty cool. Now I have to mount it, figure out finishing touches for the UFC screens, and print a couple more knobs here and there, but I got it all programmed in DCS last night.
W0000t!
How did you do all the steam gauges?!

Printed photos of hornet gauges I found on Google images, and then stuck them behind plastic I sourced locally and cut.
Simple but convincing! ![]()
![]()
Brilliant!
Once again, all credit to Jself on the ED forums for demonstrating the idea.
I will use exclusively in VR, so really the only reason to have them is because they’re pretty. I intend to use my very patient wife’s criket machine to cut vinyl labels for all the buttons and switches, just like Jself did. I can’t really justify why I should go to the effort of doing so since I won’t see them in VR, except that they’re pretty and will make it look more finished. And maybe for initial cockpit familiarization if someone else is giving it a try…
A couple other changes I made from the original: Instead of using a microswitch to detect the Spin Recovery switch guard position, I’ve used a 3-position momentary switch. When the guard is down it sends an input. I’ve created a Voice Attack command that detects whether the switch is down or not, and tells DCS. Same for the fire buttons, instead of having another physical switch to control the guard, I’m just using VA to detect when the button is pressed and then send two commands to DCS:
- Raise the cover,
- Push the switch.
…and the reverse for when the switch is pressed again, I guess. I haven’t gotten that far.
I still need to get it mounted. I’m working on sketching out an 80/20 mounting solution; I need something that allows some adjustment forward/backward and up/down because I’m not intellectually gifted enough to design a fixed mount that will be perfectly positioned in VR the first time. Instead I’m going to mount it on an 80/20 track that will let it slide forward/back a few inches, and then allow it to tilt back and forth. The original design has the entire panel slide down onto two 1/2" square tubing, so it already accommodates some vertical adjustment. I just need to be able to tweak it in VR to get it just right.
I have a 6-day recurrent next week, and am flying all the rest of this week/weekend, so I’m not sure when I’ll have a chance to actually mount it and get to fly with it, but it gives me something to look forward to I guess.
Man, that looks fracking amazing. Is your MPCD functional by any chance? It looks so sharp.
Thanks! No, it’s just a photo behind clear plastic. I fly in VR so all I wanted was the physical controls. You could sandwich a suitable screen behind the Thrustmaster Cougar bezel if you wanted to modify the design, but I’m totally dedicated to VR, and the Reverb G2 is clear enough to actually see the AMPCD, for a change.
Yeah, that makes sense. I prefer flying in VR as well.
So, it could be something like this and you could still complete the mission? ![]()
I guess so, lol!
I wonder how well this matches up with the virtual cockpit. Do you still need to probe with your hands for the physical controls or is it spot on with what you see in VR regarding distance and location?
I honestly don’t know yet. Once I get it mounted I’ll be able to tell; I know it won’t be 100% 1:1 because the TM Cougars are smaller than a real DDI, but I’m hoping it will be close. The UFC should be right on.


