To carry over from our discussion in the GOTHQ Viggen thread, we’re going to be doing some testing in command of various Sovet SAG setups, versus a variety of NATO and non-aligned nations ASuW attempts.
So @Hangar200 and @MBot our experimental SAG for a Harpoon test should consist of:
1 major surface combatant - Kirov for our purposes to up the SAM capability
2-3 AAA shooters - Sovremennyys in this case
3-5 ASW - 2 Udaloys and 2 Krivavk IIs?
1 AOR of some kind - a Boris Chilikin
Also @MBot what year do you want me to use? Command has pretty much everything from post WW2 on, and you can actually select specific hulls in some cases.
Also approximate spacing? 10-15 NM for the ASW asssests from the Kirov, and 5-6 NM for the AAA?
The plan for our USN air strike is 14 A-6’s with 4 Harpoons each, whatever the latest version is of that year.
I can run one against the expected Baltic opposition with a swarm of Viggens and RB-04’s or RB-15s too if you want. Just give me briefing on what ships to make the Soviet group composed of.
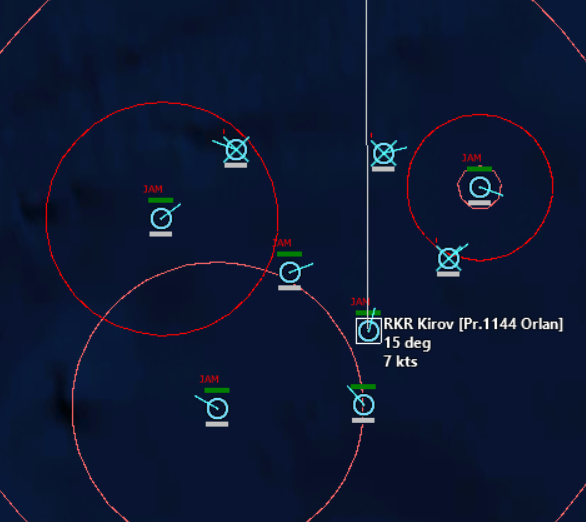
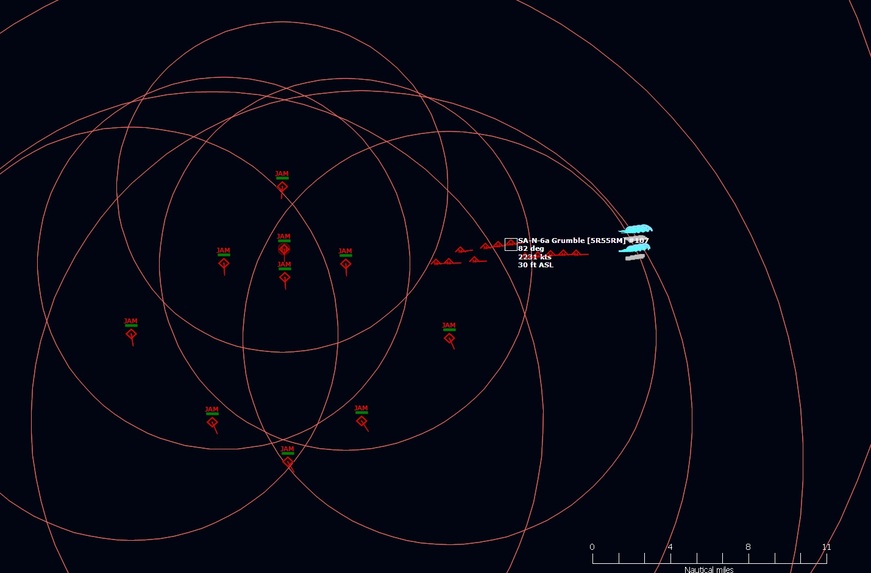
In theory the SAG commander is worried about a potential submarine threat ahead of the formation, his ASW assests are about 15-16 nm ahead. The lone Krivak on the left flank is there as closer ASW asset if needed. Our two AAA guided missle destroyers are in close to the Kirov, with no particular threat orientation, and the AOR is at the back of the formation.
Ah, options upon options. It’s like a kid in the candy store
A couple of weeks ago I actually researched a couple of SAG options for the Pacific fleet in 1986 (scouting scenarios for the upcoming DCS Marianas map and DCS A-7E). I set them up in Command for visualization but didn’t actually run any engagements. Let’s have a look.
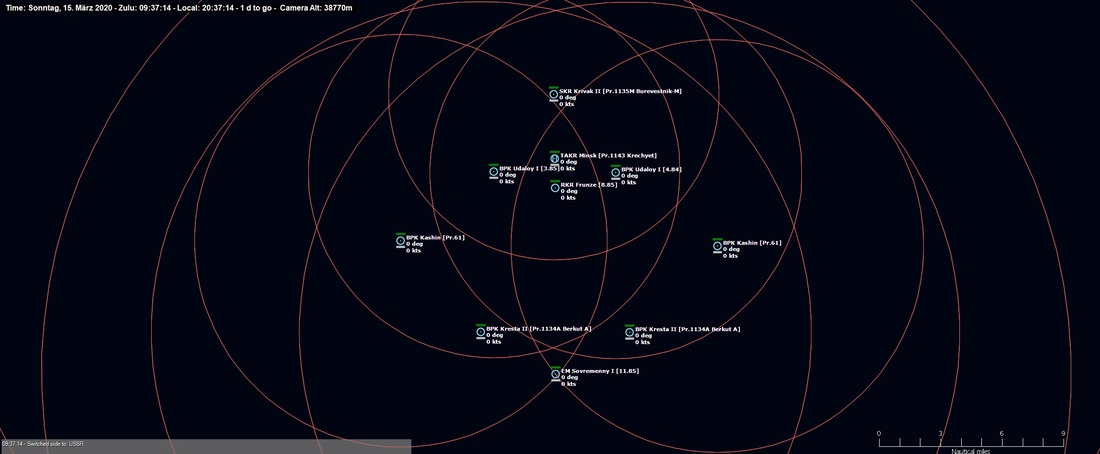
I have chosen 1986 because this is still in the midst of the Cold War and that is the year the Pacific fleet had their first Kirov CGN in service (Frunze). I took the actual OOB of the Pacific Fleet in 1986, selected the bulk of major units (about 2/3 of total strength) for a sortie into the Pacific while leaving sufficient units behind to form a reserve SAG based on a Kiev carrier and sufficient escorts to perform a major amphibious landing.
From the combat units that would sortie forwards I built two SAGs for a pincer attack with major cruise missile shooters.
This is the primary SAG based around the Minsk (Kiev class) and the Frunze (Kirov class). Both have a strong SS-N-12/19 armament, the Kirov provides area air defense for the SAG while the Minsk supplements fighters to fend of shadowing maritime patrol aircraft and provides anti-submarine cover with its helicopters. Two Kresta II CGs move ahead as ASW screen and a single Sovremenny provides anti-missile protection for them. Of note are the two Udaloys, which I have placed close to the HVUs to act as ASM goalkeepers with their SA-N-9 (the only available in the SAG) instead of doing ASW. The formation is rounded by two Kashin DDGs on the flanks and a single plane-guard Krivak frigate at the rear.
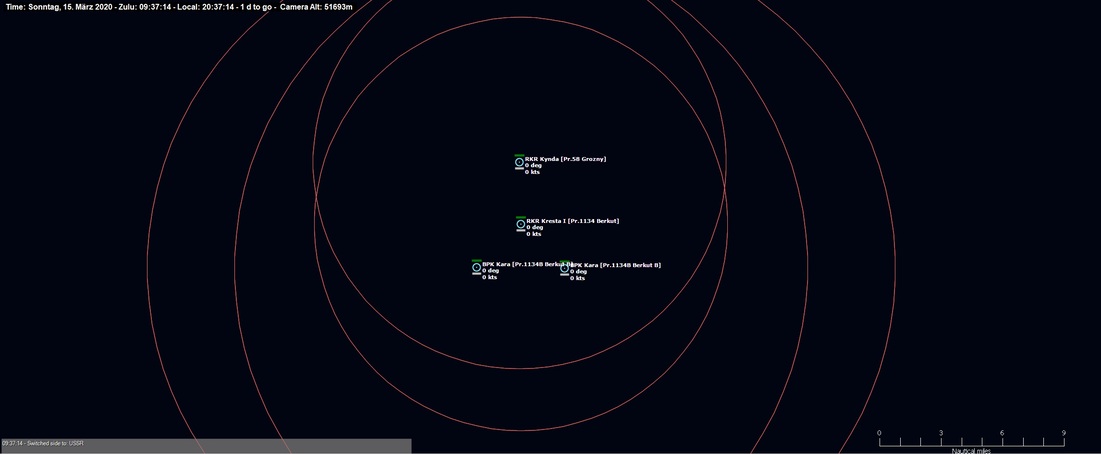
This is the secondary SAG for the pincer, built around a Kynda CG and a Kresta I CG each with SS-N-3 missiles. Limited AAW and ASW escort is provided by two Kara CG.
I also allocated 3 Krivaks as escort for a supply group that would sortie with the force.
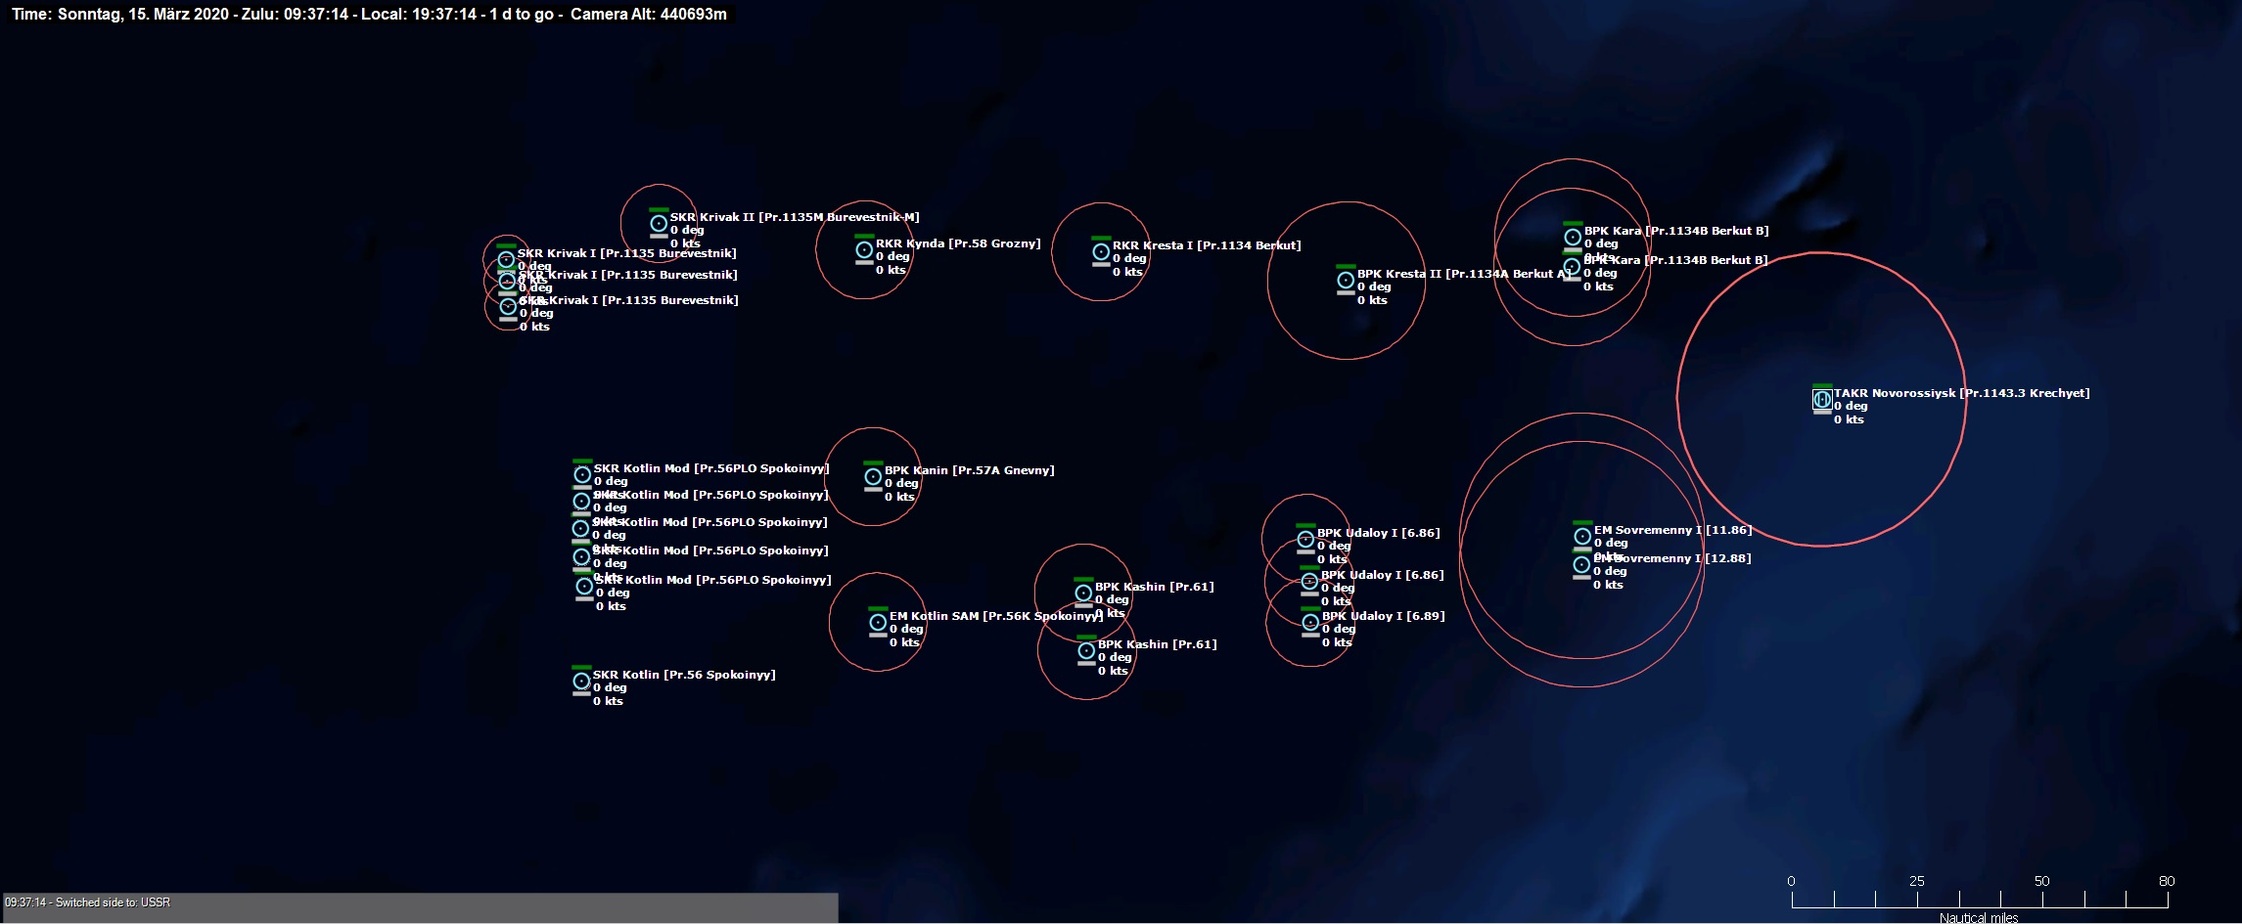
These are the actual ships that would be left over (the Udaloys and Sovremennys additional have months/year when they were assigned to the Pacific Fleet).
I guess I should actually run some scenarios in Command
3 hits on Kirov - minor damage, still combat effective
sunk Krivak II
run 3
4 hits on Kirov - mod damage, heavy fire, damaged SS-N-14 launcher, sunk after an hour due to the fires
run 4
9 hits on Kirov - sunk
sunk Boris Chilikin
run 5
9 hits on Kirov - sunk
sunk Boris Chilikin
run 6
9 hits on Kirov - sunk
sunk Boris Chilikin
run 7
7 hits on Kirov - heavy damange, heavy fire, sunk shortly after last missile hit
1 hit on Krivak II heavy fire and flooding
run 8
9 hits on Kirov - sunk
sunk Boris Chilikin
run 9
9 hits on Kirov - sunk
sunk Boris Chilikin
run 10
9 hits on Kirov - sunk
sunk Boris Chilikin
So only on 2/10 did the Kirov survive to fight another day. Now this is with zero AEW (which I have no clue was a standard feature of the Soviet Navy, if anyone can advise what platform was used I’ll add it). In general the Intruders get in and out undetected, and the Harpoons are just too close to pick up the last 10-12 to survive and they take out the Kirov.
Very nice. The Forgers had short legs but zipping out to shoo away a P-3 isa good mission.
The Udaloys likely had the most modern ASW systems at the time, to include a “tail”; a towed array sonar. Also had Ka-25/Ka-27 capability. So more likely they would be dedicated for ASW. Again, this becomes very situation dependent.
LOL. The Kirov’s AAW Search and track radar was their AEW (Top Plate? Top Steer? One of those) Theoretically they could try to put an AN-50 Mainstyay out there…but to get it into a position where it was effective would have been at the bitter end of fighter (Su-27) coverage.
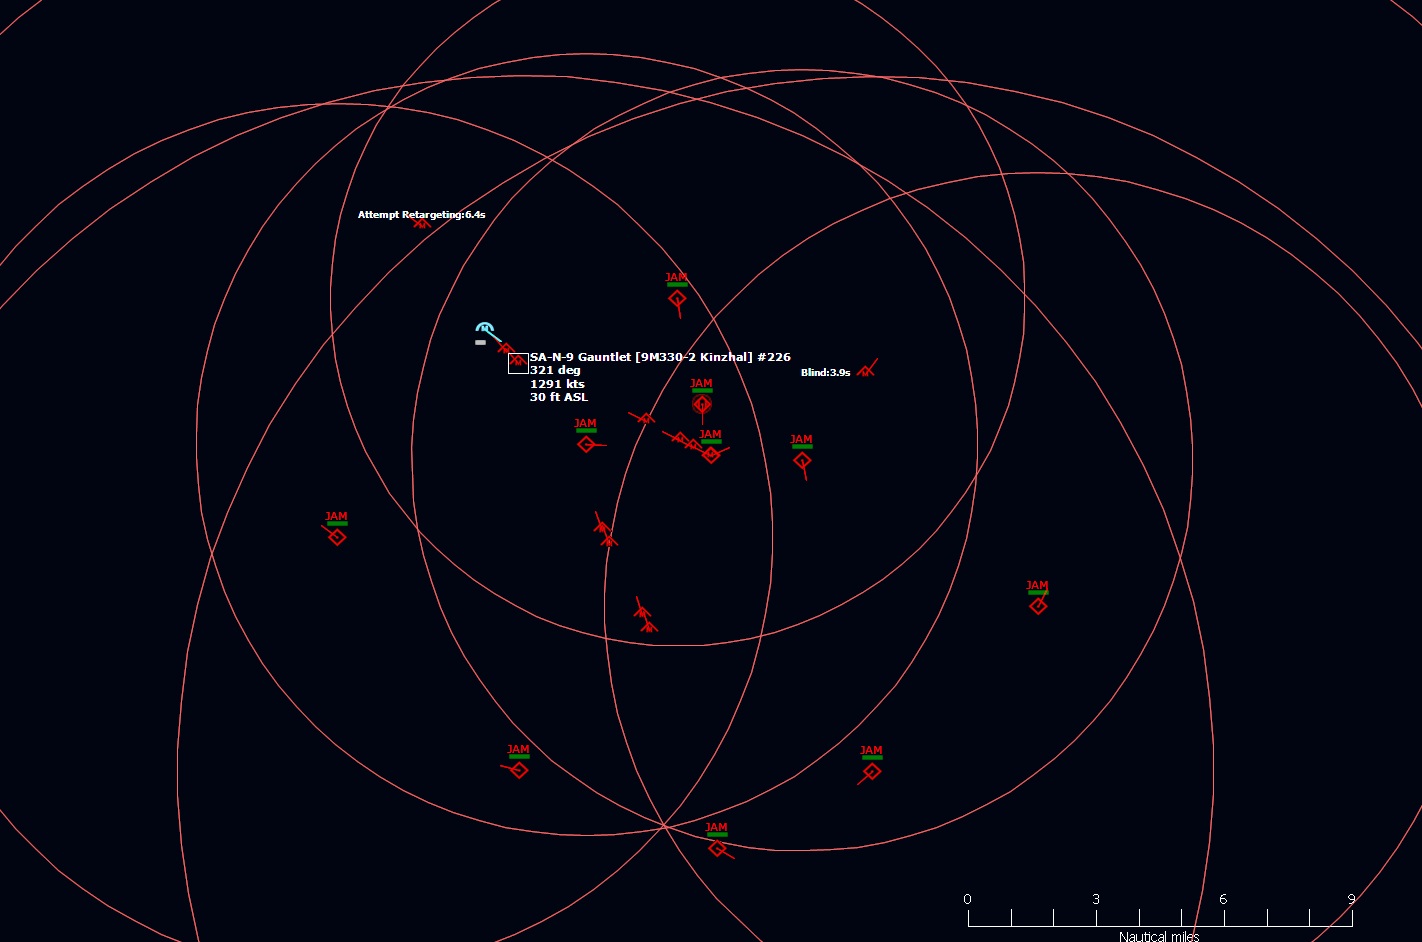
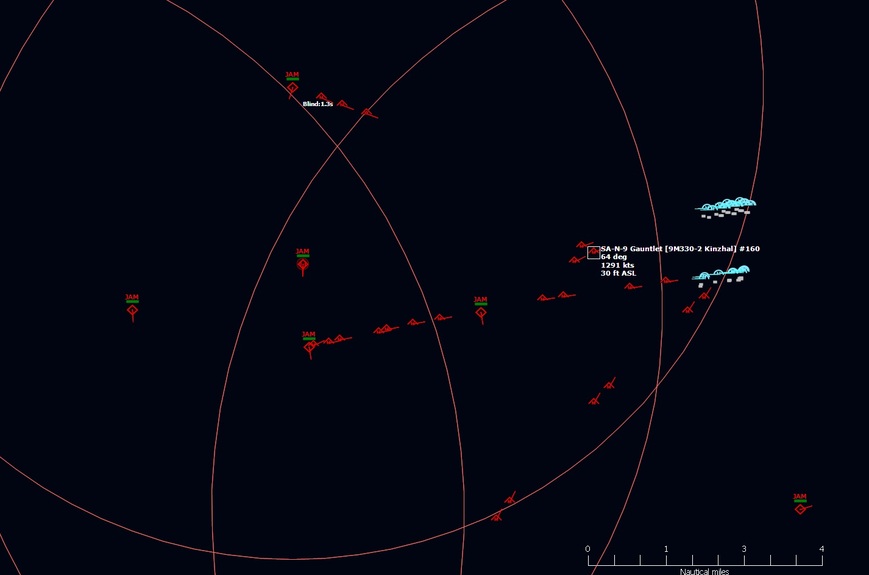
Our deployment still has the two Udaloy’s out front, but we’ve pulled the Krivak’s in the easternmost line, with the Sovermenny’s next and closest to the Kirov.
Our air attack is coming from due east. Again, missiles are well on their way before the SAG detects them and can engage.
run 1
1 hit on Kirov, minor damage, combat effective
run 2
no hits
run 3
no hits
run 4
1 hit on Kirov, minor damage, combat effective
run 5
1 hit on Kirov, minor damange, heavy flooding, combat effective
run 6
7 hits on Kirov sunk
run 7
1 hit on Kirov, minor damage, combat effective
run 8
no hits
run 9
2 hits on Kirov, minor damage, combat effective
run 10
No hits
So only 1/10 was the Kirov sunk or rendered combat ineffective. It was only minorly damaged 5/10 times. Overall there is a low chance of having an acceptable result in the worst case scenario.
I took the inspiration from the Royal Navy, which during the Falklands War used their Type 22 ASW frigates as anti-aircraft bodyguards for the carriers, due to their superior Seawolf short-range SAM. I guess it all depends what evaluate to be the biggest threat at the time.
Alright so I updated everything to the tail end of the cold war (so basically about 95’ish for most units) tech. I did try it with both the Udaloys out front in a normal ASW posture and in close as a “goal keeper.” For a straight on attack at the head of the formation, they did excellent work from the ASW location. Overall no missile strikes at all on 8/10, with 2/10 only having 1 hit on the Kirov each time.
Moving the late model Udaloys to a close in goal keeper position didn’t change their performance much from their ASW position for a straight on saturation attack. They did good work and splashed a lot of missiles. Due to moving them back in the formation, they actually got less engagements compared to being at the ASW position. 8/10 no hits, 2/10 single hits.
With a multi-prong attack, or single axis attack from behind the 3/9 midline of the formation, from the ASW position they contributed significantly less. On average only being able to engage at the very end of missiles flight, and usually not managing to splash more than one harpoon. Here Blue did much better, getting at a minimum 2 hits on every run. 5/10 the Kirov to significant damage, with 4/10 being a sunk ship.
The multi-prong or single axis attack behind the midline with the Udaloys in tight they did a lot of good. They seemed to engage just about the same time the Sovremenny’s did. In Command there isn’t a way that I know of to decrease the engagement range of a unit, to make them focus on closer range targets. I suppose I could have pushed the Sovremenny’s out further so they got the first shoots, possibly something to play with later. However the extra firepower in close wasn’t quiet enough. There were 2 no hits, 3 minor damage, 3 serious damage, and 2 sinkings. So a significant improvement, but still a 50% chance of rendering the Kirov mission ineffective.
Also I ran a 48 Viggen RB-04E strike against the 1980’s group, 3 with strikes group attacking along multiple axis. It was a mess all around. With the RB-04 the Viggen has to approach way to close to launch. Even with a less than stellar air search radar capability against low flying targets, SAM’s were in the air before missiles came off the rails. The first set of of SAM’s started to hit about the same time the RB-04’s were launched. On average 1/2-2/3 of the Viggens were destroyed for a trade off in 0-3 hits on the Kirov. Tomorrow I might try RB-15’s versus the 80’s and late 90’s group to see how that changes things.
Ok, I have run some missile attack against my 1986 Frunze-Minsk SAG detailed above. All attacks were flown with 10 A-6E launching 4 AGM-84D Harpoon each for a total of 40 missiles. 20 missiles were targeted at Minsk, 20 at Frunze.
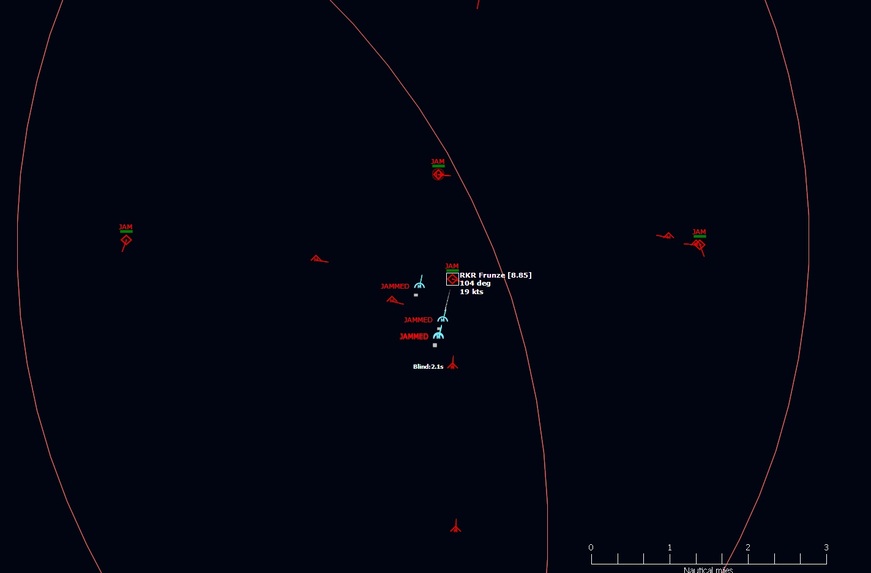
Now the N-W and N-E groups are getting eliminated too. The two Udaloys left and right of the HVU engage engage with SA-N-9 and the single Krivak at the rear adds some SA-N-4.
The last Harpoons are taken out, no weapons got anywhere close to the SAG center.
SAM expenditure of the SAG (before and after). Frunze expended about 2/3 of its SA-N-6, the Sovremenny about 3/4 of its SA-N-7. The two Kashins (SA-N-1), two Kresta II (SA-N-3a) and Minsk (SA-N-3b) did not contribute at all, as they their missiles are unable to target sea skimmers.
If the 10 Intruders would return to the carrier, rearm and repeat the strike, the SAG would be easily wiped out due to SAM shortage.
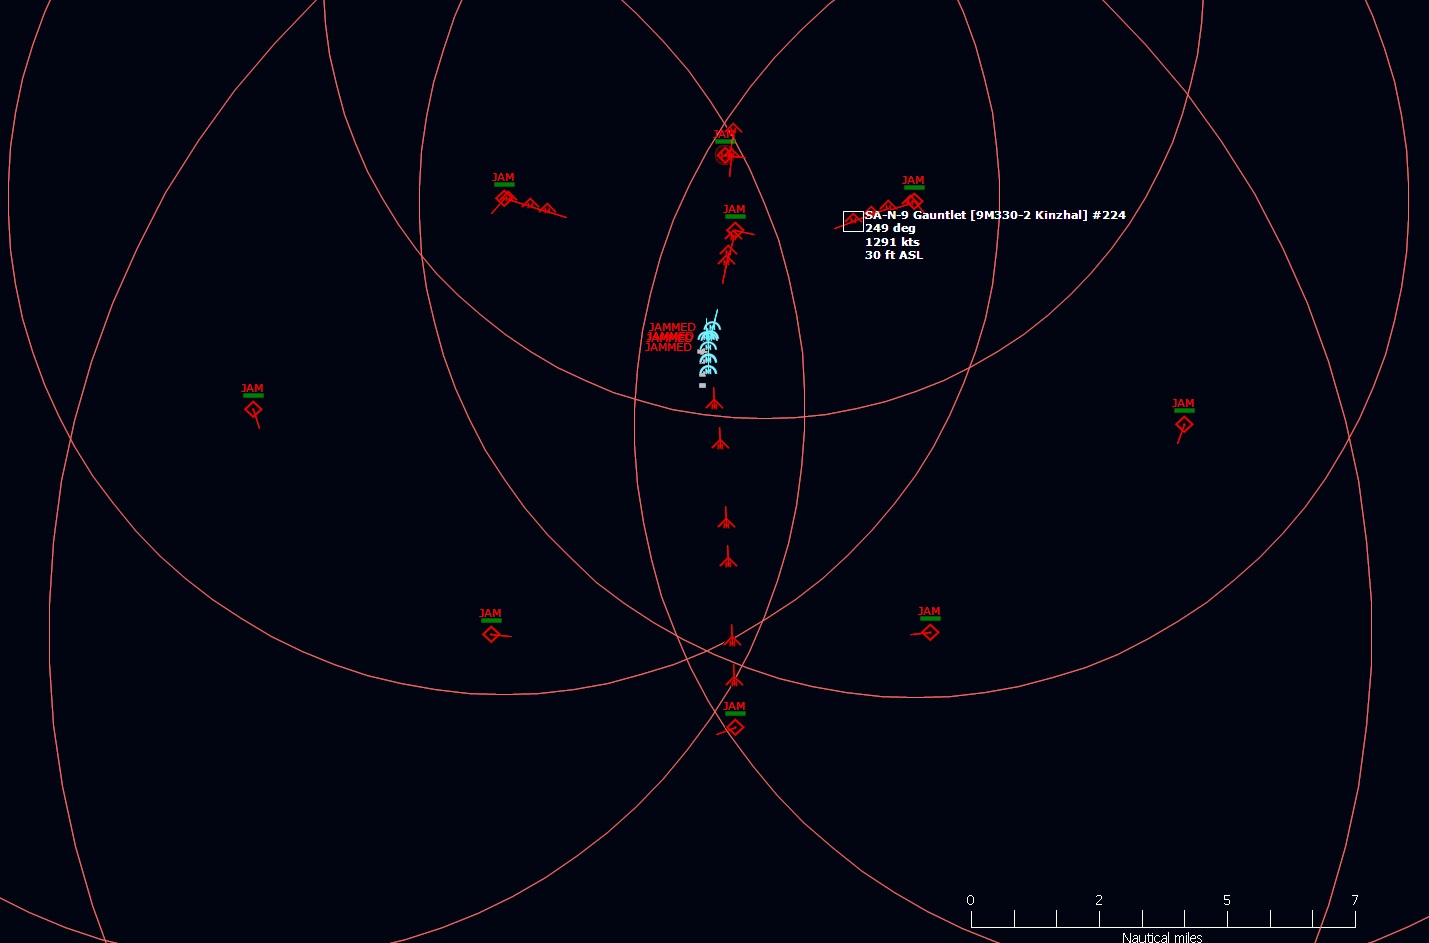
As the Harpoons pass the Sovremenny, it engages the close passing missiles with AK-630 CIWS. Frunze continues a stream of SA-N-6 guided by itsf orward and aft Top Dome FCR.
The goalkeeper Udaloys engage with SA-N-9 but with disadvantageous flank shots. The Sovremenny shoots SA-N-7 from the rear but with little effect (Command considers target aspect and crossing angle for hit probabilities). The Harpoons enter terminal mode.
Minsk is struck by two Harpoons, a 3rd gets decoyed by chaff and a 4th is taken down by CIWS.
SAM expenditure.
My conclusion, at least in regards to playing Command: Massed single axis attacks into weak spots are more effective then spreading out firepower over multiple defensive systems.
To add a little more analysis. Frunze is always effective because it is a killer ship and is in the center of the SAG. The Sovermenny DDG is also an extremely effective area defense ship, but if in the AAW screen needs to be positioned in the right quarter to have high probability engagements. The Udaloys are also highly effective ships in the close-in defense but also needs to be up-threat to be effective. All the other Soviet ships are basically helpless against sea skimmers.
Scenario 2 was effective because it denied both Udaloys good shot opportunities. Scenario 3 was effective because it denied the Soveremenny and the down-threat Udaloy good shot opportunities. Scenario 1 was ineffective because it distributed fire across all air-defense-capable ships and gave everybody an opportunity to down a part of the total Harpoon number.
Yep, that is the whole point of the “game”. If the sub threat has been neutralized (or essentially nonexistent as it was in the Falklandsj, using the Udaloys in a goal keeper role is the smart move.
However, using the same scenario, try adding a couple Los Angeles SSNs into the mix. You can move the Udaloys to cover the SSN threat or keep them close to cover the ASCM threat. Compromise? Split the force in the presence of the enemy? Not a good idea unless your name is Robert E Lee. Put them in a “half-way” position trying to cover both threats? Probably won’t be in position to cover either threat effectively.
It comes down to meeting the most immediate threat / most dangerous threat now with a plan to quickly shift assets if a more immediate and dangerous threat materializes. …and prioritize. You will have to gladly give up a Krivak or even a Sovremennyy if it means saving the HVU.
Isn’t this fun! A heck less stressful than it was sitting on our HVU and playing it.
Just a little unrelated trivia, but there is a fascinating story around the Argentine submarine San Luis.
"The San Luis was no super-submarine, nor did it have a super-crew. Yet, benefiting from a competent commander using ordinary tactics, it still managed to run circles around a dozen antisubmarine frigates from one of the most capable navies in the world, and might easily have sunk several warships had its torpedoes functioned as intended.
The Royal Navy, for its part, expended hundreds of expensive antisubmarine munitions and dispatched 2,253 helicopter sorties chasing false contacts—without detecting the San Luis on either occasion it closed within firing range."