Thrustmaster HOTAS Cougar - let's get mechanical

First, let me say that I love my Thrustmaster HOTAS Cougar, but it has a few teething problems. Most of these problems are related to how the physical interface works in relation the X and Y axis. The design is not inherently wrong but the material choice has left me wondering “Why” most of the time.

This gimbal system has been redesigned a multitude of times by people over the past decade and a half. Unfortunately most of them are either out of production or increasingly expensive to acquire, if at all.

Well, my Cougar developed a play around a center, which meant that I could move the stick quite a bit in all directions without any, or jittery input on the potentiometers.

I opted to open it all up and disassemble it in the knowledge that this stick is very moddable and probably easy to fix with some of the shelf components.

My shopping list includes:

Aluminium Tape(reduce play X axis)
shimmy rings(very thin rings, 0.1mm thick, reduce play Y axis)
Ball Bearing grease(Lithium based non acidic).

Note that I also ordered some extra bits since I am also building an extension for the stick, but I consider that outside the scope of this little report .

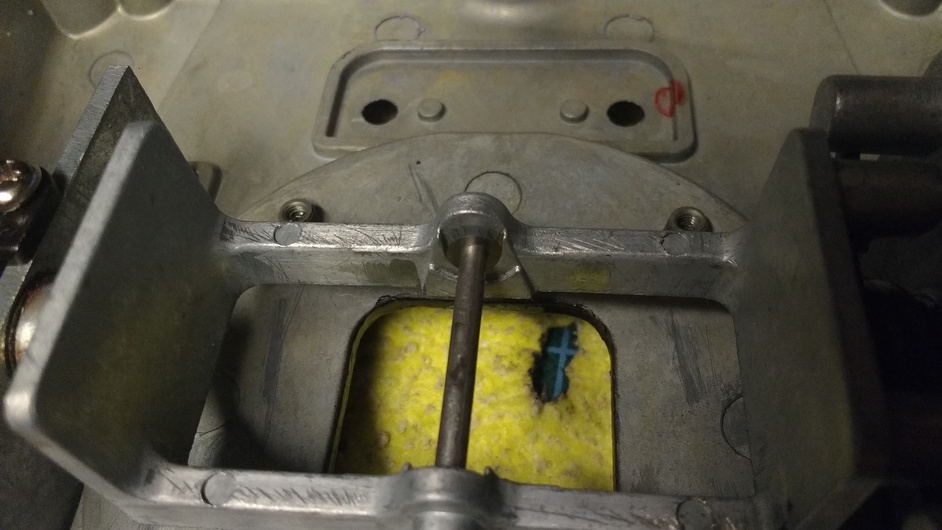
Stick opened up, you can clearly see the simplicity of the gimbal design, can’t say I dislike it as many people do.

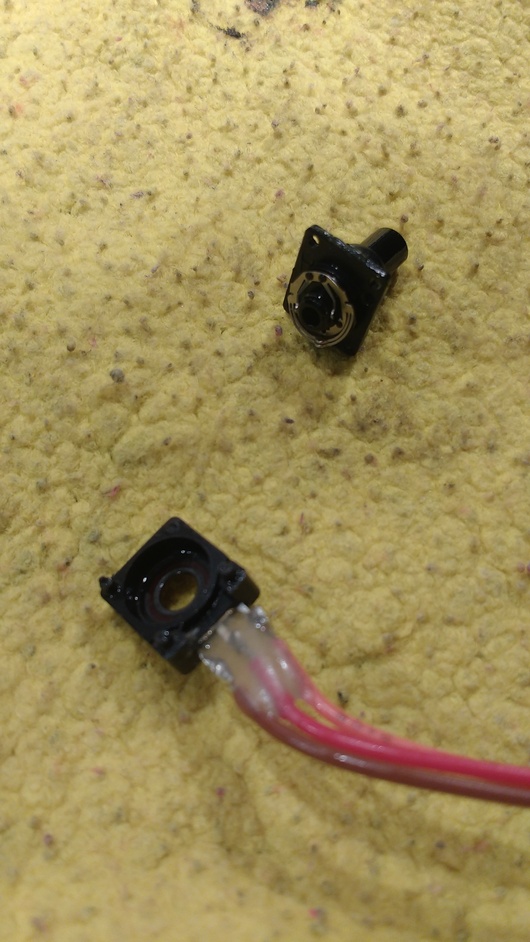
Removing the setup is rather simple, you need a Hex/Allen Key to stop the bolt from turning and a plier(it’s not very firmly connected) to remove the little nut. First start my removing the roll axis(north to south in this picture)

Roll axis removed, don’t forget to put all the parts in a container with a lid of sorts.

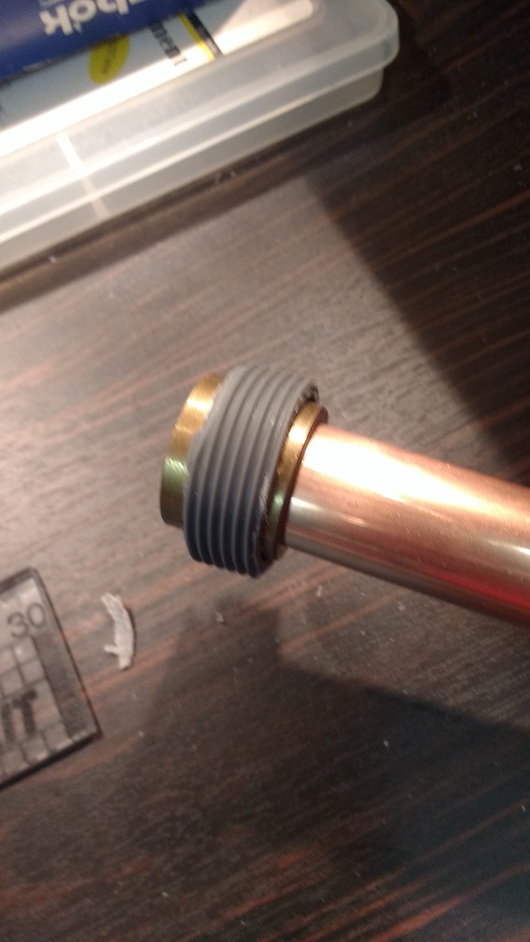
For the pitch axis we first need to remove the base of the stick, it goes through the casing and has the mounting thread/adapter for the stick itself attached. This one is connected with a rather thin axle that has a tiny locking ring on it.

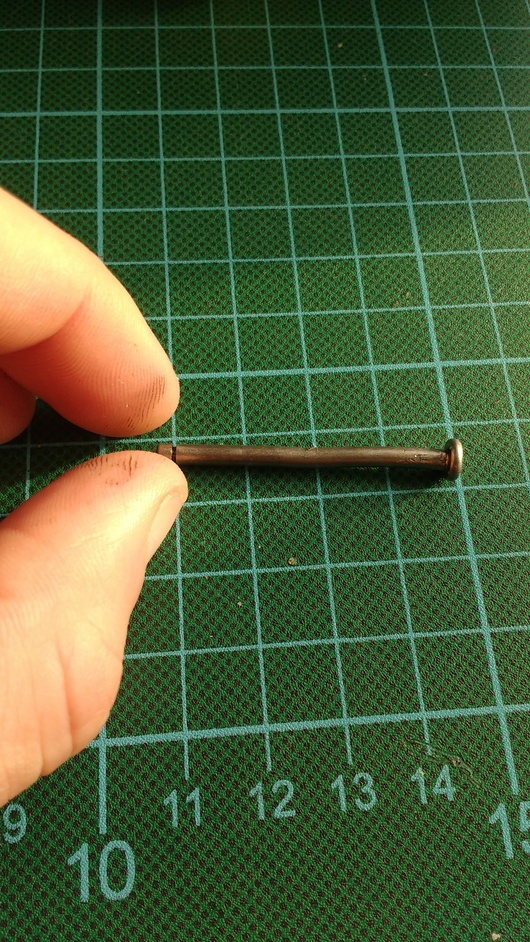
We can already clearly see the wear on base… Ouch…

Removing this axle turned out to be a little bit of a challenge. Turns out it has suffered some damage(no idea when) and thus is bent…

Now, for measuring the wear roll axis… drum roll

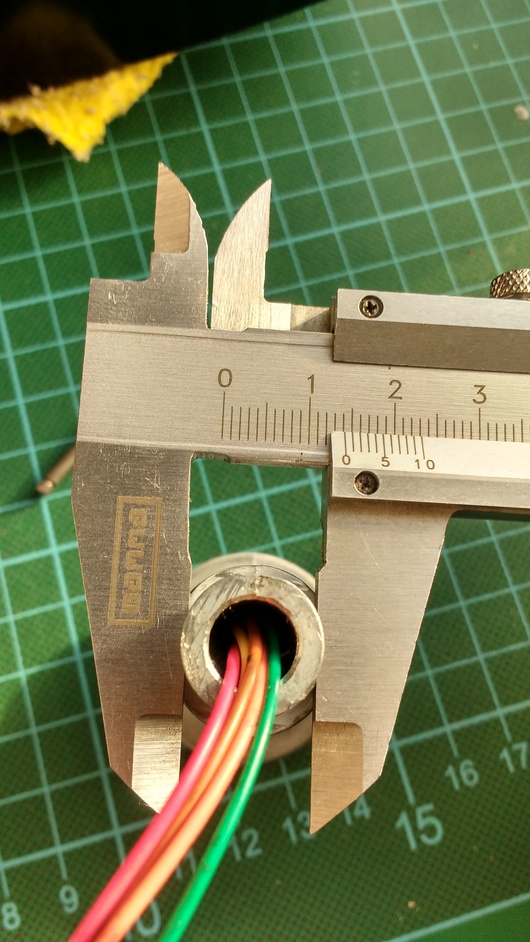
The original measure is 14.1mm, not bad.

Aaaand 13.7mm!

That means we’ve gained .4mm of play total! roughly .2mm on either side. That’s massive!

Well, right now I am waiting for the parts to show up and then I can start assembling again. Hopefully this fix will work.

4 Likes

Good read @TheAlmightySnark. I’ll be interested to see how this turns out.

WARTHOG content
Having done the lithium grease fix, which significantly smoothed out the feel, my stick is now developing looseness in that I can twist it slightly, as if the stick had yaw input. It’s not detectable looking at response curves, and is more of an annoyance only because I know that it’s there. But eventually it will compel me to action. Waiting for a good base replacement, perhaps with HAL sensors. I really love the switch panel on the throttle, with the ability to program the most commonly used items (fuel, starter, battery, gear, flaps, etc). Would be lost without it.

Are you talking about the Warthog? The Cougar doesn’t have a switchpanel! :smiley:

The only way you could feel yaw input on the Cougar would be if either the thread of the stick and the base was damaged, or if the little axle is severely damaged.

Just applied the aluminium tape. Seems to work great, about 0.1mm thick. I wonder if it will hold long enough though. Time will tell.

Good stuff. Need address to send my x52 to you. :smile:

1 Like

Oh that’s my next project, mess about with my old X-52 and see if I can make something heli-focussed out of it!

2 feet planted firmly in own facial oriface.

1 Like

Gotta do something on my day off and waiting for the shimmy rings. So, let’s open one of those pots and see if it’s fixable.

Stanley knife to wedge it open and cut away the glue, then slowly wiggle it open!

Used a vice to hold the base, unfortunately one of the stubs broke… Spoiler, it still fits fine!

Cleaned it with compressed air, and applied a liberal amount of contact spray. That cleaned out a bunch of black stuff, carbon from the traces. My multimeter still shows a little jumpy so… Yeah.

Quick test, so far it seems to be quite jitter free!

Shimmy’s came in!

1 Like

Ze Germans :grin:

I spy with my little eyes product plaecment…

2 Likes

Hah, nah. it’s expensive as hell but the only supplier that could get it to me into less then 100> pieces :smile:

Reassembly time, this is where the small rings will go.

Axle back in, 1 bigger ring on either side, helps a ton but could use some extra I’ve discovered.

Other assembly with a dab of bearing grease added on all corners. This will leave a nice film

So yeah… I screwed up. I should have placed the pitch axis 180 around… Wooops… But hey it works!

The good news is, is that it feels smoooooooth, the ball bearing grease is a happy choice.

The bad news, there’s still a little play. i’ll have to dig a bit further on where to improve. Possibly rings and extra tape.

Going to open it up again later this week, first the viggen :wink:

1 Like

Wut? I was talking about the Mudspike mug! :grin:

That’s like, in 50% of all the pictures I take :smile: perhaps I am a sucker for mugs :wink:

1 Like

Spend an hour flipping the pitch axis that I fubar’d, and I added the aluminium tape with 1 later on the gimbal and one on the axis. then liberally greased it up with ball bearing grease. So far it’s tight as can be but I have my doubts about that fix… oh well.

Fresh in from the USA, the magical Gardena 5/8 gardenhose fix and Cougar/warthog extension connector!

All joking aside, it’s probably cheaper to whip up a cad file for a machine shop and have them modify a pipe. That’s a 10 minute job for professionals.

1 Like

Liberated the thread, off to the hardware shop to find some find some fitting pipes.

EDIT: In a hunch looked at shapeways.com(3d printing company) to see if someone took the liberty of building a new gimbal for the cougar. AND THEY DID! Ton’s of stuff from that author in this ED forum thread:

Still gonna see if I can build a stick extension in a cad program though.

Did some shopping today, got a 28mm to 22mm brass connector that you can solder copper pipes in. I can soldered a copper pipe of 50mm in the 22mm end, then I put the glorious Gardena connector over it. Oh, I also found a Gardena connector much like this one from the USA in my local shop… So bugger me with a fishfork, I missed that the first time round. I’ve also measure off a comfy length which comes down to about 39cm.

Oh, and ordered magnets and HAL sensors and I’ve got half a mind to order that 3D printed gimbal. So, lots of movement on the modding front today :wink:

Neat how the forum has placed these images innit?!

1 Like

Is your mug alright? I heard some … rumors…

1 Like

Yes, finished my coffee early this evening so it’s already in the are allocated for items to be cleaned in a hot wash!

Currently 80% through a fine beer!

1 Like