IL-2 Desert Wings – Tobruk (Part 3) – The Aircraft
By @Chuck_Owl - September 17, 2020
Originally published at: Articles - Mudspike Forums

Introduction
In this episode, Chuck takes us through all of the flyable aircraft available in this, honestly, massive add on to IL-2 Sturmovik: Cliffs of Dover. The Tobruk add-on provides a broad, exhaustive list of new aircraft, with a little something for almost everyone.
If you missed one of the earlier sections, here is a reference list of what was covered (with links) and what is coming up in a future episodes.
-
Part 1 - The Desert War - An overview of the history of the North Africa Desert War covered by Tobruk;
-
Part 2 - “I Don’t Like Sand” - A review of the map, environments and units you will encounter;
-
Part 3 - The Aircraft - Which I think that you can guess, is about the aircraft that you get to fly;
-
Part 4 - Under the Hood & Final Thoughts;
Note: this article/review is not sponsored and reflects the thoughts and opinions of the author only.
PART 3 - The Aircraft
List of all in game flyable aircraft.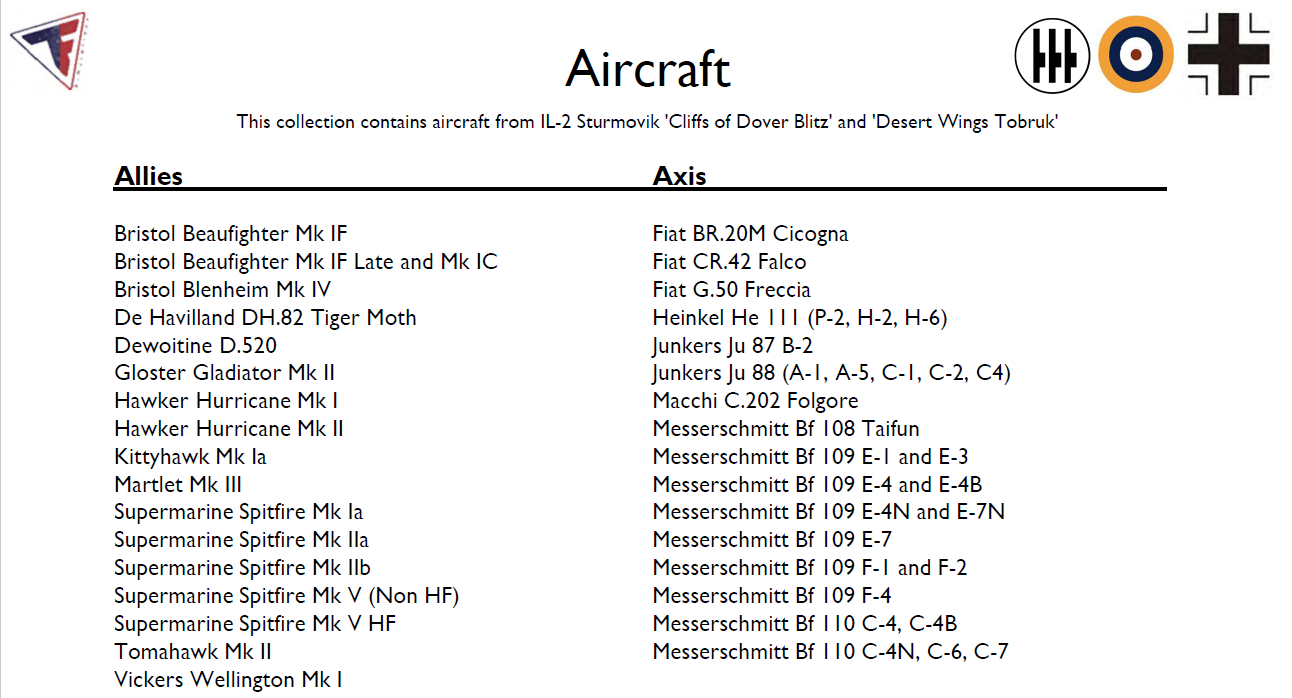
3.1 - L’Armée de l’Air
Dewoitine D.520
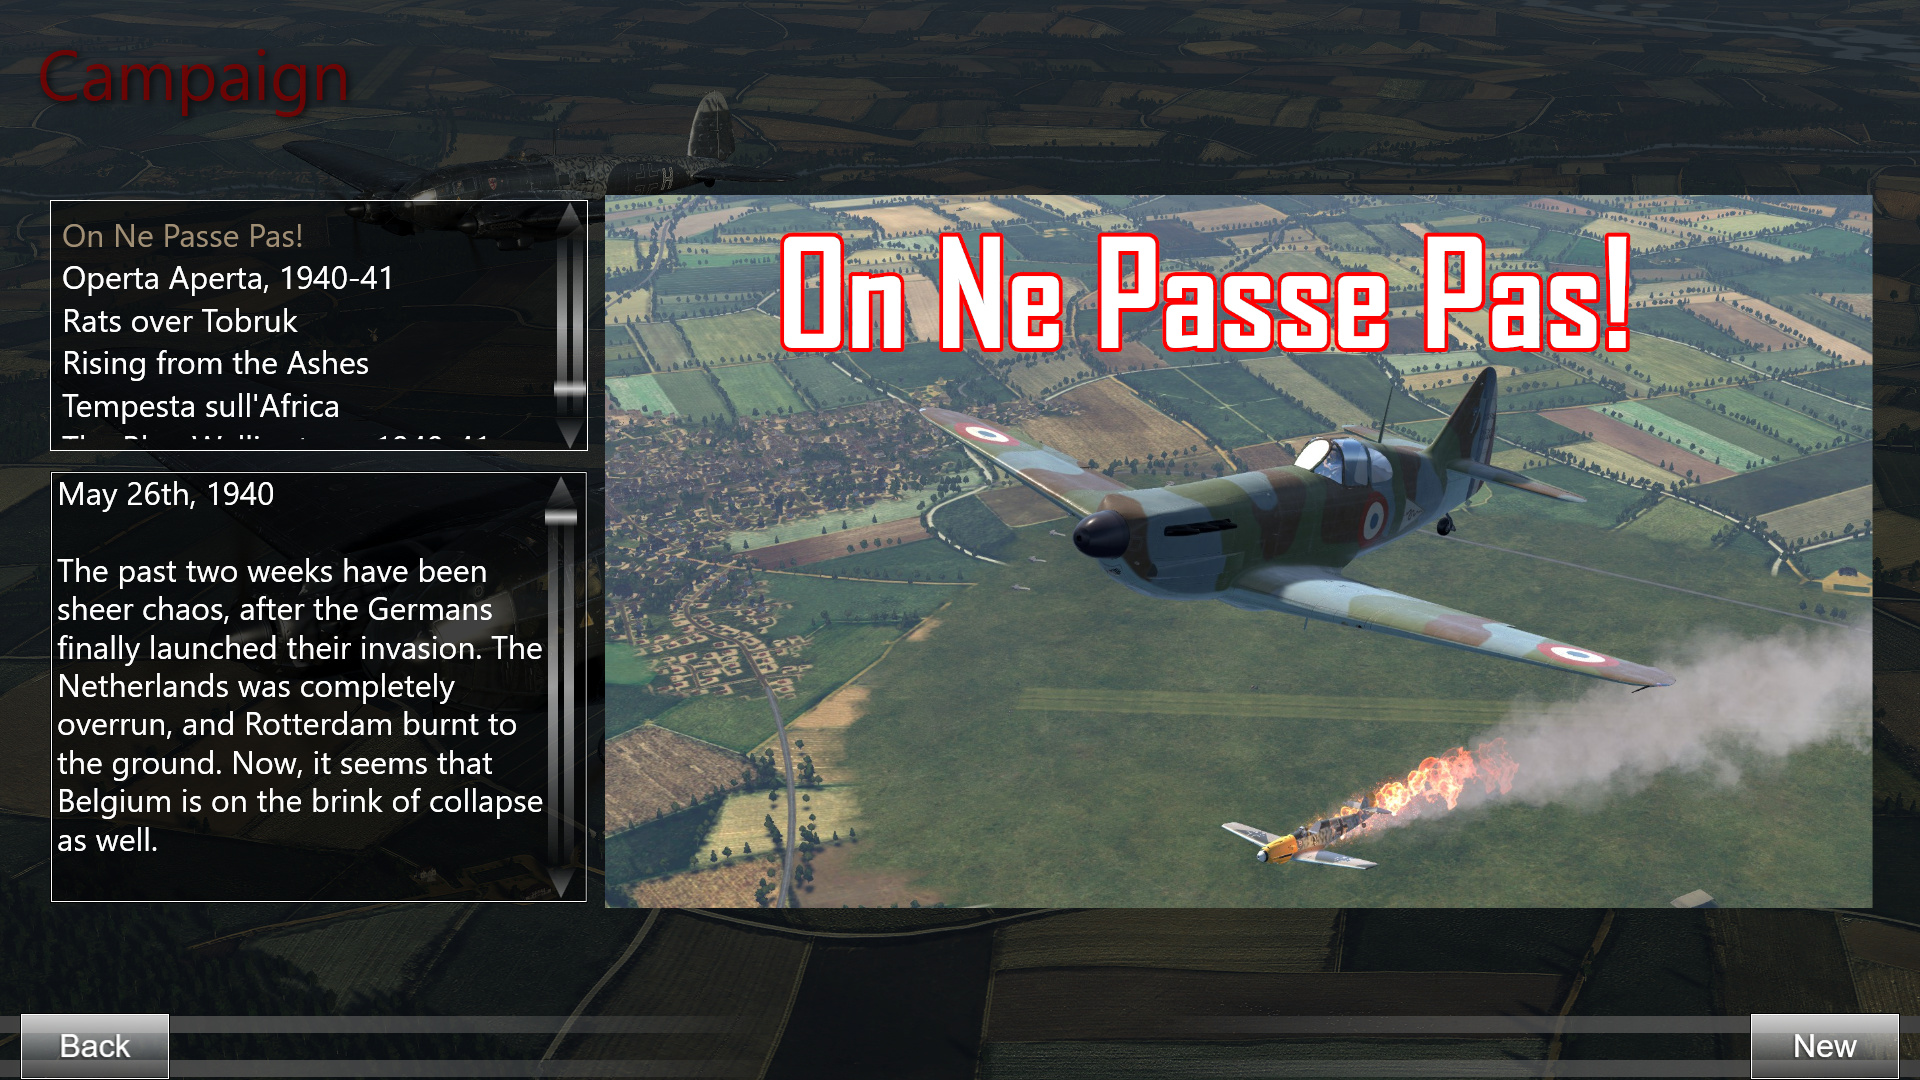
While most of the advertisement for Desert Wings was made for the Tobruk map, an important addition is often being overlooked. The french Dewoitine D.520 is now available, and with it comes a new campaign called “On Ne Passe Pas!”, which takes place at the onset of Operation Dynamo (also known as the Dunkirk Evacuation) from May to June 1940 at Grandvilliers with the Groupe de Chasse I/3. The German panzers have punched through the Ardennes, trapped most of the British Expeditionary Force (BEF) and you fight against impossible odds. It’s a desperate battle where the french Armée de l’Air fights tooth and nail to buy time, and there isn’t a single mission where you will not have this sinking feeling that you are trapped in the midst of a hopeless battle.
Map depicting the Area of Operations for the D.520 campaign in Northern France
The D.520 was very much on par with the Bf.109E in terms of performance. By 1940 standards, it was one of the most modern planes designed, including an automatic propeller governor. Even if the aircraft itself was flown by some of the “creme de la creme” of french fighter pilots (which were themselves a very skilled, professional force), the aircraft production started too late in the war to equip sufficient squadrons to face the Luftwaffe. Cliffs of Dover gave us a mostly British aspect of the Battle of France, but thanks to Team Fusion’s hard work we now have a chance to experience a different perspective. There are stories of french pilots dogfighting until they ran out of fuel… and then managing to land near a gas station mere kilometers from the frontline, fill 'er up and go back in the air.
A flight of D.520 fighters.
Allied pilots will be delighted to learn that the D.520 is armed with a single 20 mm nose cannon and four wing machineguns (7.5 mm / 0.295 in), which is an appreciable change from the British 0.303s available at that time. The cockpit itself is very elegant and clean. It has some “unusual” design choices such as a throttle that is reversed in relationship to American, British and German design conventions. The recreation of the Dewoitine is a tremendous achievement in itself due to the fact that very few technical documents survived the war.
D.520 cockpit Pair of D.520 fighers on their way to intercept a flight of Bf110s A D.520 in a hard turn


3.2 - Royal Air Force
Beaufighter Mk IC/F
Beaufighter rhymes with firepower.
The Bristol Beaufighter is back, and an appreciable number of bugfixes with it! The engine warm-up is finally fixed, and the aircraft now feels like a more polished product. Armed with four 20 mm cannons in the nose and six 0.303 in machineguns in the wings, the Beau packs one of the scariest amount of firepower ever. This aircraft was used extensively by the RAF and RAAF in many theaters and it earned the reputation of being one of the most effective ground attack aircraft of the war.
Beaufighter diving on an unsuspecting Jerry
In April/May 1941, the long-range IC variant of the Beaufighter entered squadron service in a detachment from 252 Squadron operating from Malta. This inaugural deployment with the squadron proved to be highly successful, leading to the type being retained in that theatre throughout the remainder of the war. In comparison to the IF variant, the IC (“C” for “Coastal Command”) also had bomb racks added that allowed for the installation of either 250 lbs or 500 lbs bombs.
Inside the Beau.
The “Rising From the Ashes” campaign is set in May 1941 and features the Night Fighter variant of the Beau with No. 219 Squadron, operating from Tangmere in night missions. This campaign is set during either night or low light conditions and is surprisingly fun and challenging.
Beaufighter campaign. Beaufighter gun-sight at dawn. Beaufighter dawn patrol.

Gladiator Mk II
Gladiator over the water.
The Gloster Gladiator, despite being obsolete with the rise of monoplane aircraft, remains one of the most fun additions to the Desert Wings roster. It sounds like a plane built for the wrong war with an upper wing that more often than not blocks your view from the “perfect shot”, yet it’s a plane that grows on you since it can out turn almost anything.
Inside the Gladiator.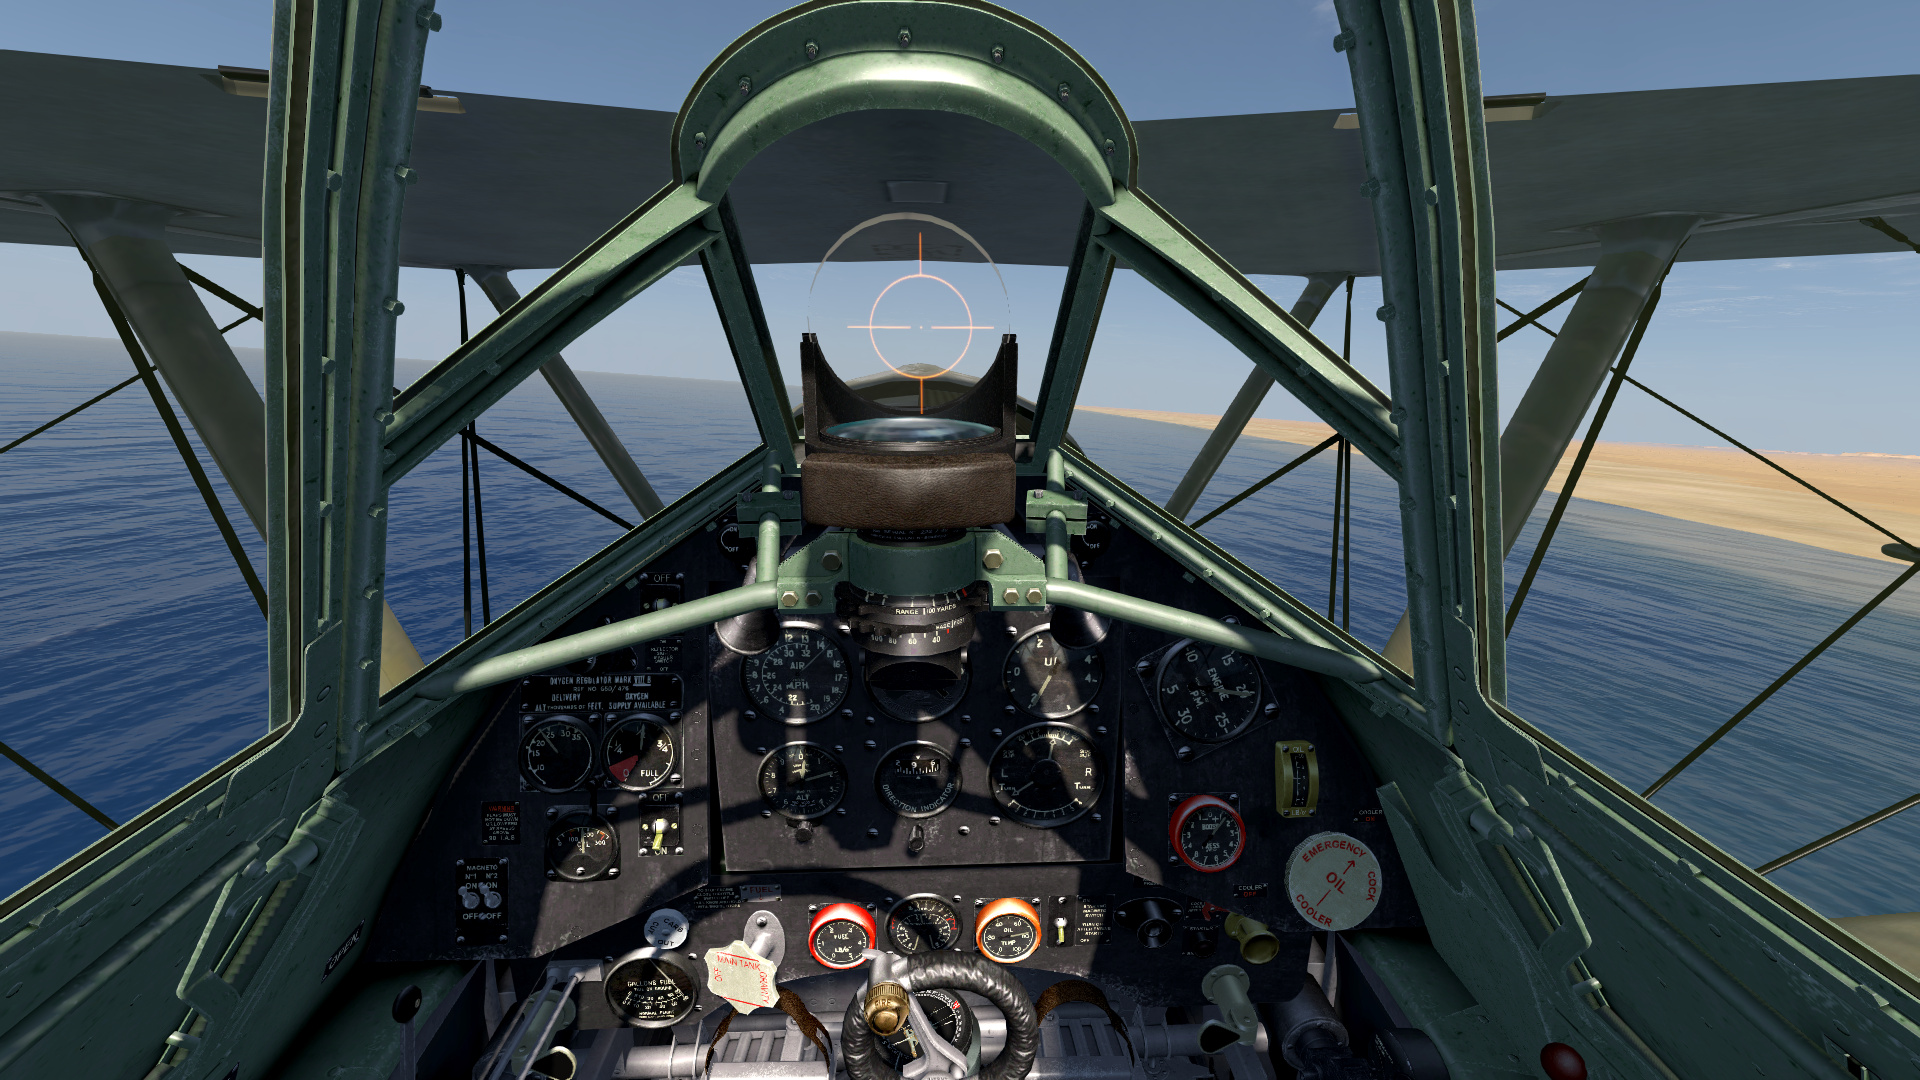
In North Africa, Gladiators had to face Italian Fiat CR.42 Falco biplanes, the performance of which was slightly superior to that of the Gladiator at higher altitudes. However, the Gladiator had superior low-altitude overall performance, including speed and a markedly superior horizontal manoeuvrability over its Italian opponent. Armed with two 0.303 in guns in the nose and two 0.303 in guns in the wings, the Gladiator can certainly hold its own in the right circumstances. After all, the South African pilot Marmaduke “Pat” Pattle was the top Gladiator ace with 15 victories with the type.
A pair of Gladiators during Operation Compass
The Operta Aperta campaign features the RAAF No. 3 Squadron during Operation Compass, which conducted combat patrols from the Bir el Malla South (LG76) airfield. This campaign is specifically intereresting since it is based on the combat reports of the real No. 3 Squadron.
Gladiator campaign.
Hurricane Mk II
Hurricane Mk II equipped with bombs.
While the Hawker Hurricane Mk I was the real RAF workhorse of the Battle of Britain, it was overshadowed by the legendary Spitfire. However, the Mk IIb gives the Hurry a much needed “oomph” with its twelve 0.303 in machineguns. But it doesn’t end here! All Cliffs of Dover players that cursed the 0.303 guns will rejoice to see the Mk IIc, which has four 20 mm cannons. They hurt. They hurt bad. You can’t help but laugh maniacally once you cut a wing in half. It’s glorious… but it still doesn’t end here!
Hurricane Mk IIc and its mighty 4 x 20mm cannons. The Hurricane’s pilot view and instrument panel.

Team Fusion also provides us with the Mk IId Tank Buster variant, aptly nicknamed the “Flying Can Opener” with its two 40 mm cannons and two 0.303 machineguns. Oh, and wing bomb racks are also available. Isn’t that awesome?
Hurricane ‘tank buster’ Mk IId model.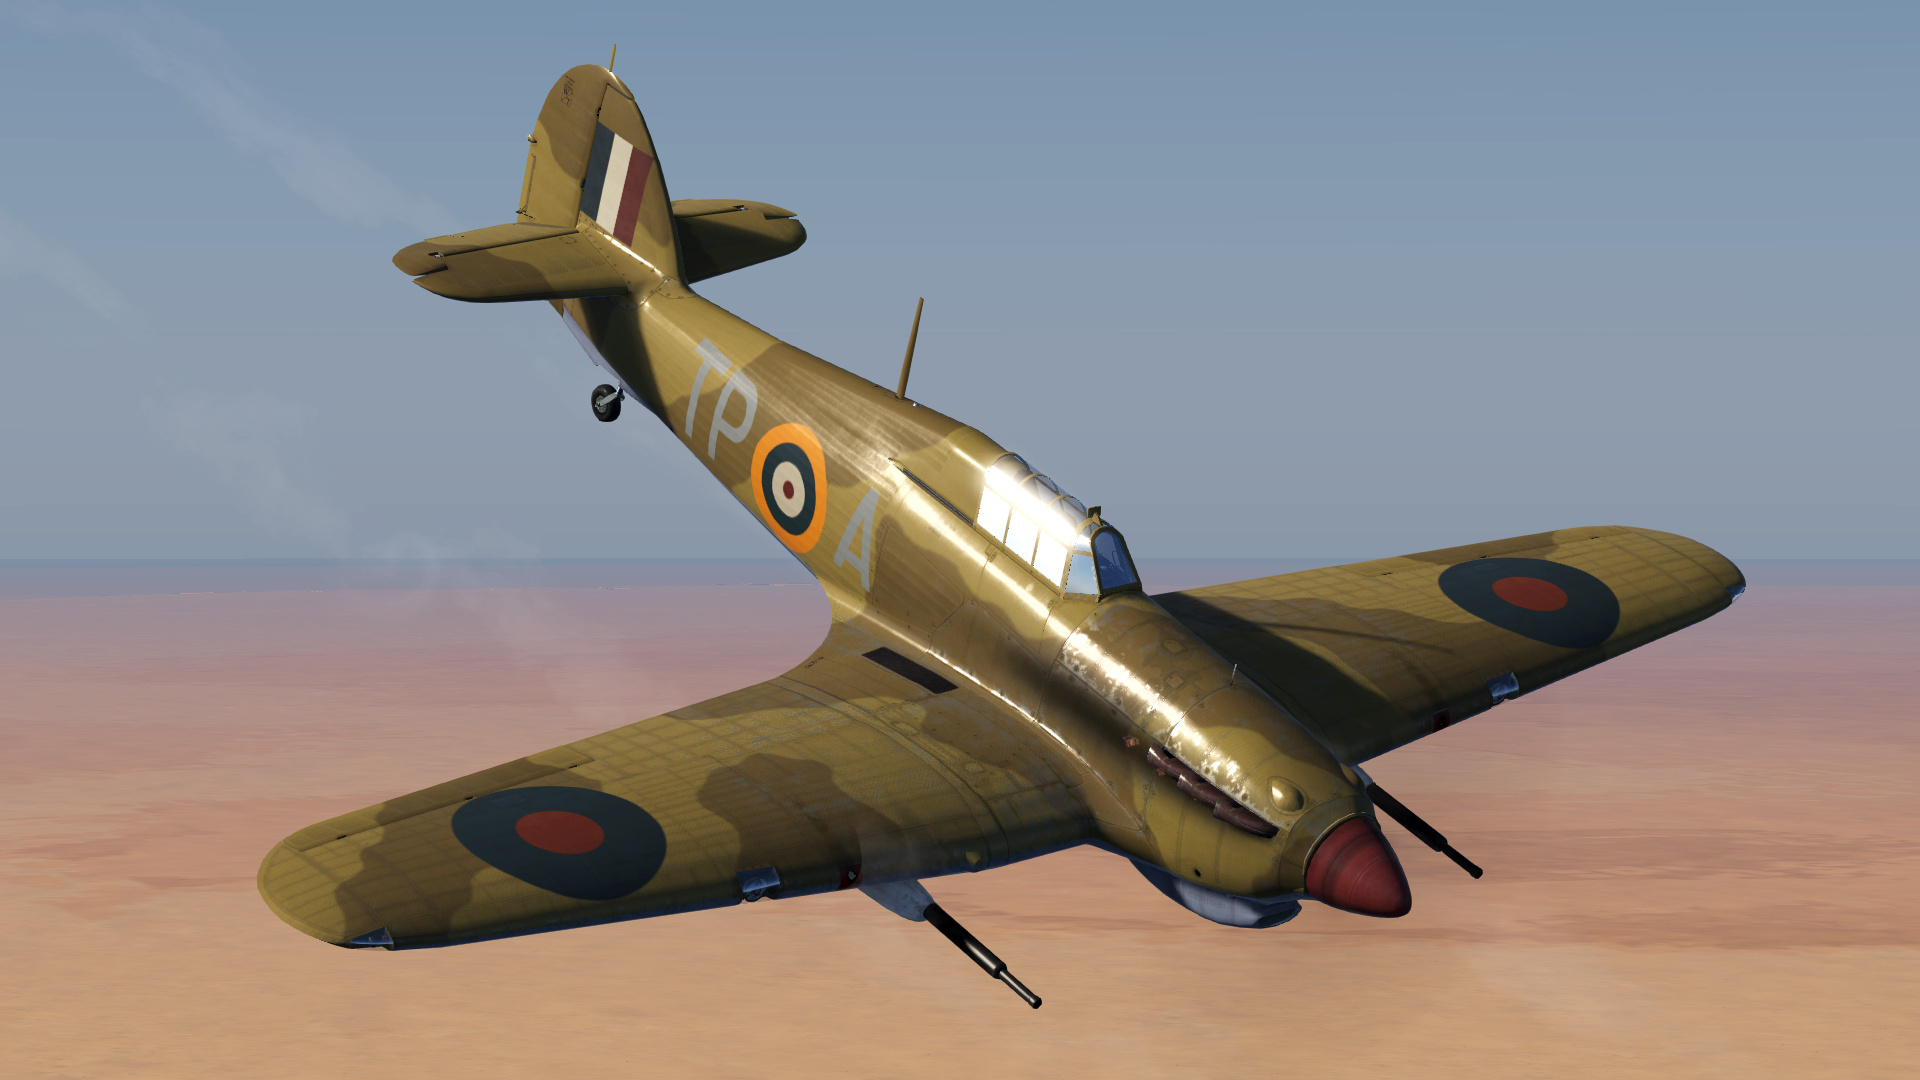
The Hurricane variants available are much more interesting and give you some much needed options. Just like in the Battle of Britain, the Hurricane proved to be a very dependable aircraft for the Desert War and was used extensively to defend Tobruk. The “Rats Over Tobruk” campaign features the RAF No. 73 Squadron, Hurricanes, ground strikes from El Gubbi airfield and a lot of panzers to wreck.
Hurricane campaign.
Spitfire Mk V
The Spitfire Mk Vb.
The Supermarine Spitfire gets a new set of fangs with the Mk Vb: a pair of 20 mm cannons and four 0.303 in machineguns. There isn’t much to say about the Spitfire that you don’t already know. The basic Mk V was a Mk I with the Merlin 45 series engine. With this Vb variant, the “B wing” was fitted as standard and a large “tropical” Vokes air filter was fitted under the nose. The reduced speed of the air to the supercharger had a detrimental effect on the performance of the aircraft, reducing the top speed by 8 mph and the climb rate by 600 ft/min, but the decreased performance was deemed acceptable since the aircraft had to operate in such a harsh environment. The Mark Vb was also fitted with a larger oil tank and desert survival gear behind the pilot’s seat.
Spitfire cockpit view. Spitfire over the North African coast.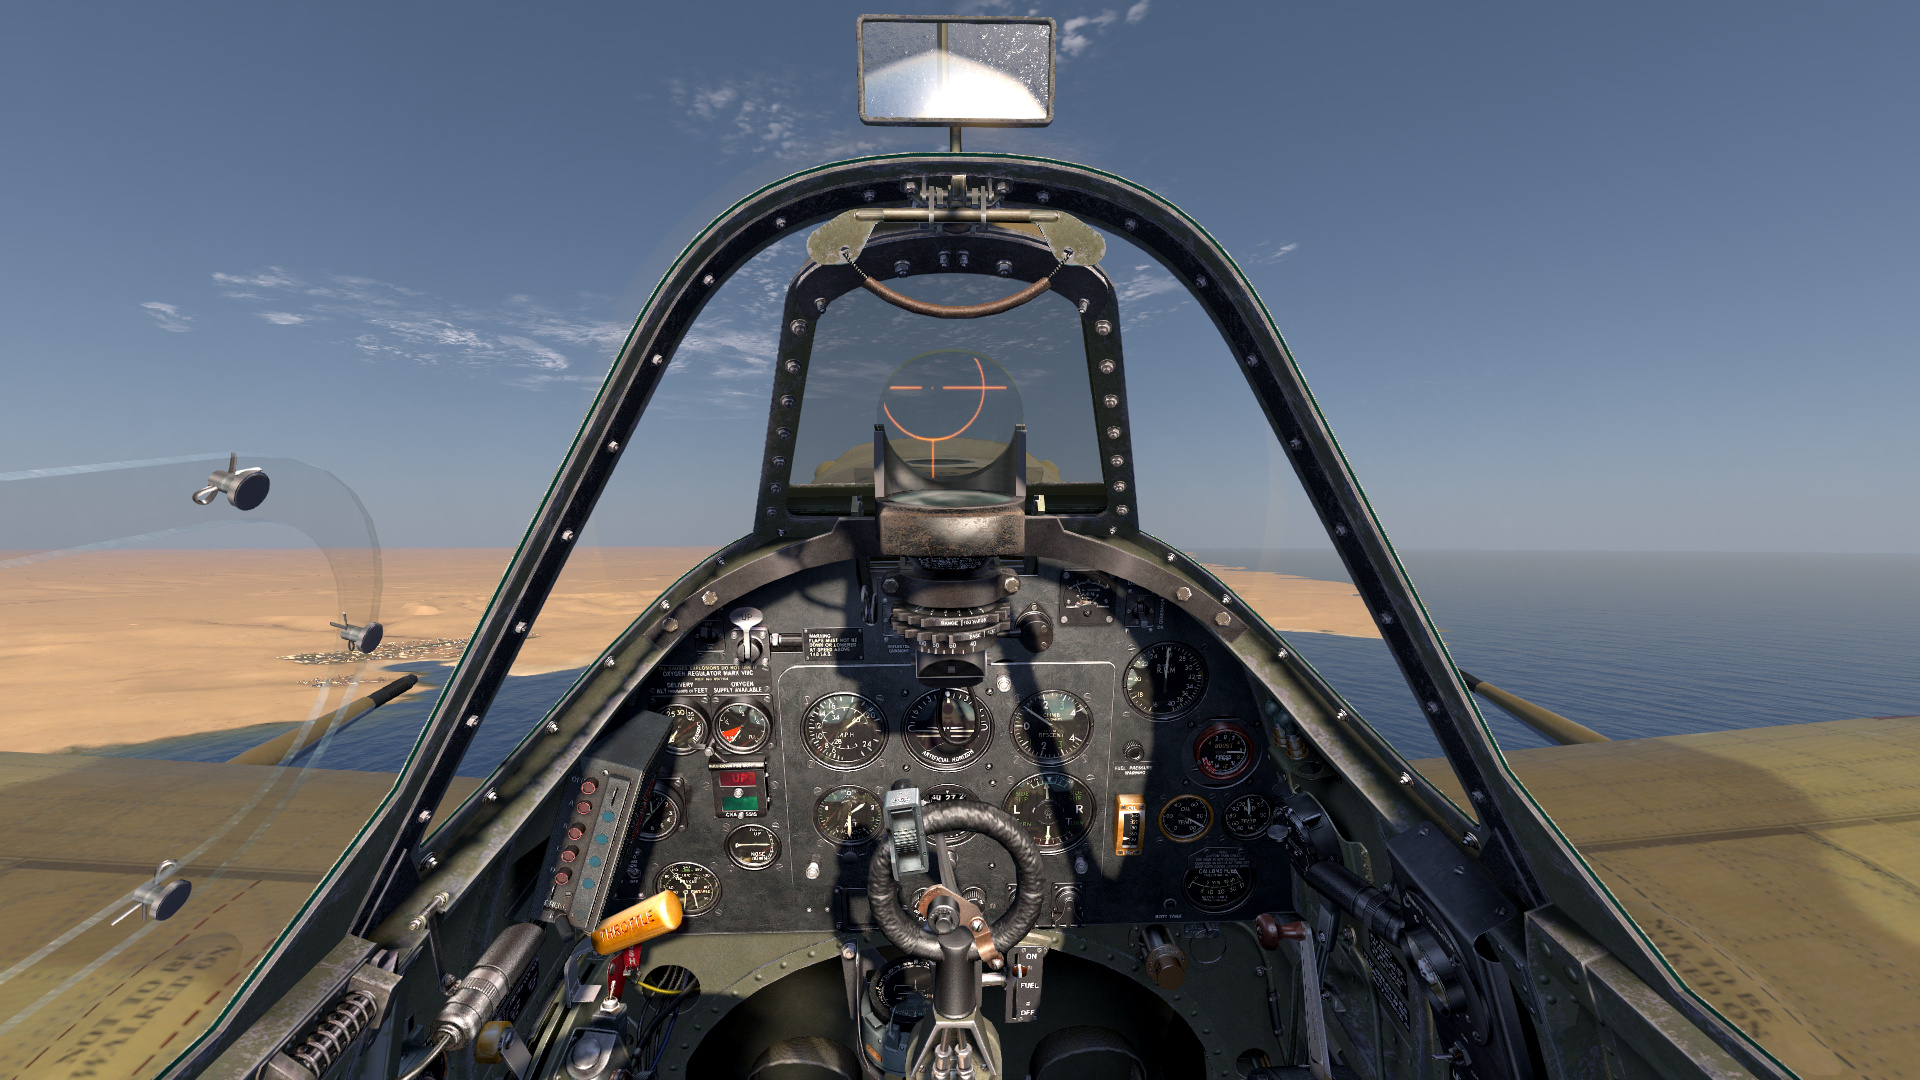

The Mk Vb also has a “HF” version available, which stands for “High Altitude Fighter”. This version has a different engine rating better suited for altitudes above 20,000 ft. Most Spitfires employed in high altitude operations were used against high flying German reconnaissance aircraft and thus were not really meant for fighter combat but instead for interceptor operations at higher altitudes.
Following Battle of Britain tradition, a Spitfire shoots down a Bf109.
An interesting point about the Spitfire Mk V is that while its better armament increased its combat effectiveness, its performance rapidly started to become an issue against later Bf.109 variants and the FW190, which completely outclassed the Mk V at the time of its operational use. This forced the engineers at Supermarine and Rolls-Royce to go back to the drawing board and come up with a new Spitfire variant that could stand a chance against the “Butcher Bird”. These efforts eventually culminated in the Spitfire Mk IX.
Tomahawk Mk II (P-40B/C)
The Curtiss P-40 is one of the most fun additions to the North African theater. These american aircraft were provided to the Commonwealth forces under the Lend-Lease policy. In all, Eighteen Royal Air Force (RAF) squadrons, four Royal Canadian Air Force (RCAF), three South African Air Force (SAAF) and two Royal Australian Air Force (RAAF) squadrons serving with RAF formations, used P-40s. Though strongly built, the early P-40A variant was poorly protected and lacked armor and self sealing tanks. This was partly rectified with the P-40B, which had additional armor behind the cockpit, but fuel system and control line vulnerability remained a problem to some extent with all Tomahawk types.
[caption id=“” align=“aligncenter” width=“690”]
Tomahawk over Derna.[/caption]
In contrast to the “three-point landing” commonly employed with British types, P-40 pilots had to use a “wheels landing”: a longer, low angle approach that touched down on the main wheels first. The Tomahawk’s Allison V-1710-33 engine, with its single-stage, low altitude rated supercharger, worked best at 15,000 ft or lower. The aircraft is armed two 0.50 in caliber machineguns in the nose and four 0.303 in caliber machineguns in the wings, which provide decent firepower. The Tomahawk has two machineguns in the nose and four in the wings, which makes aiming a little confusing at times. Overall, Team Fusion modelled a plane that looks great, sounds great (the Allison sounds throaty and menacing) and feels great.
[caption id=“” align=“aligncenter” width=“690”]
Tomahawk cockpit.[/caption]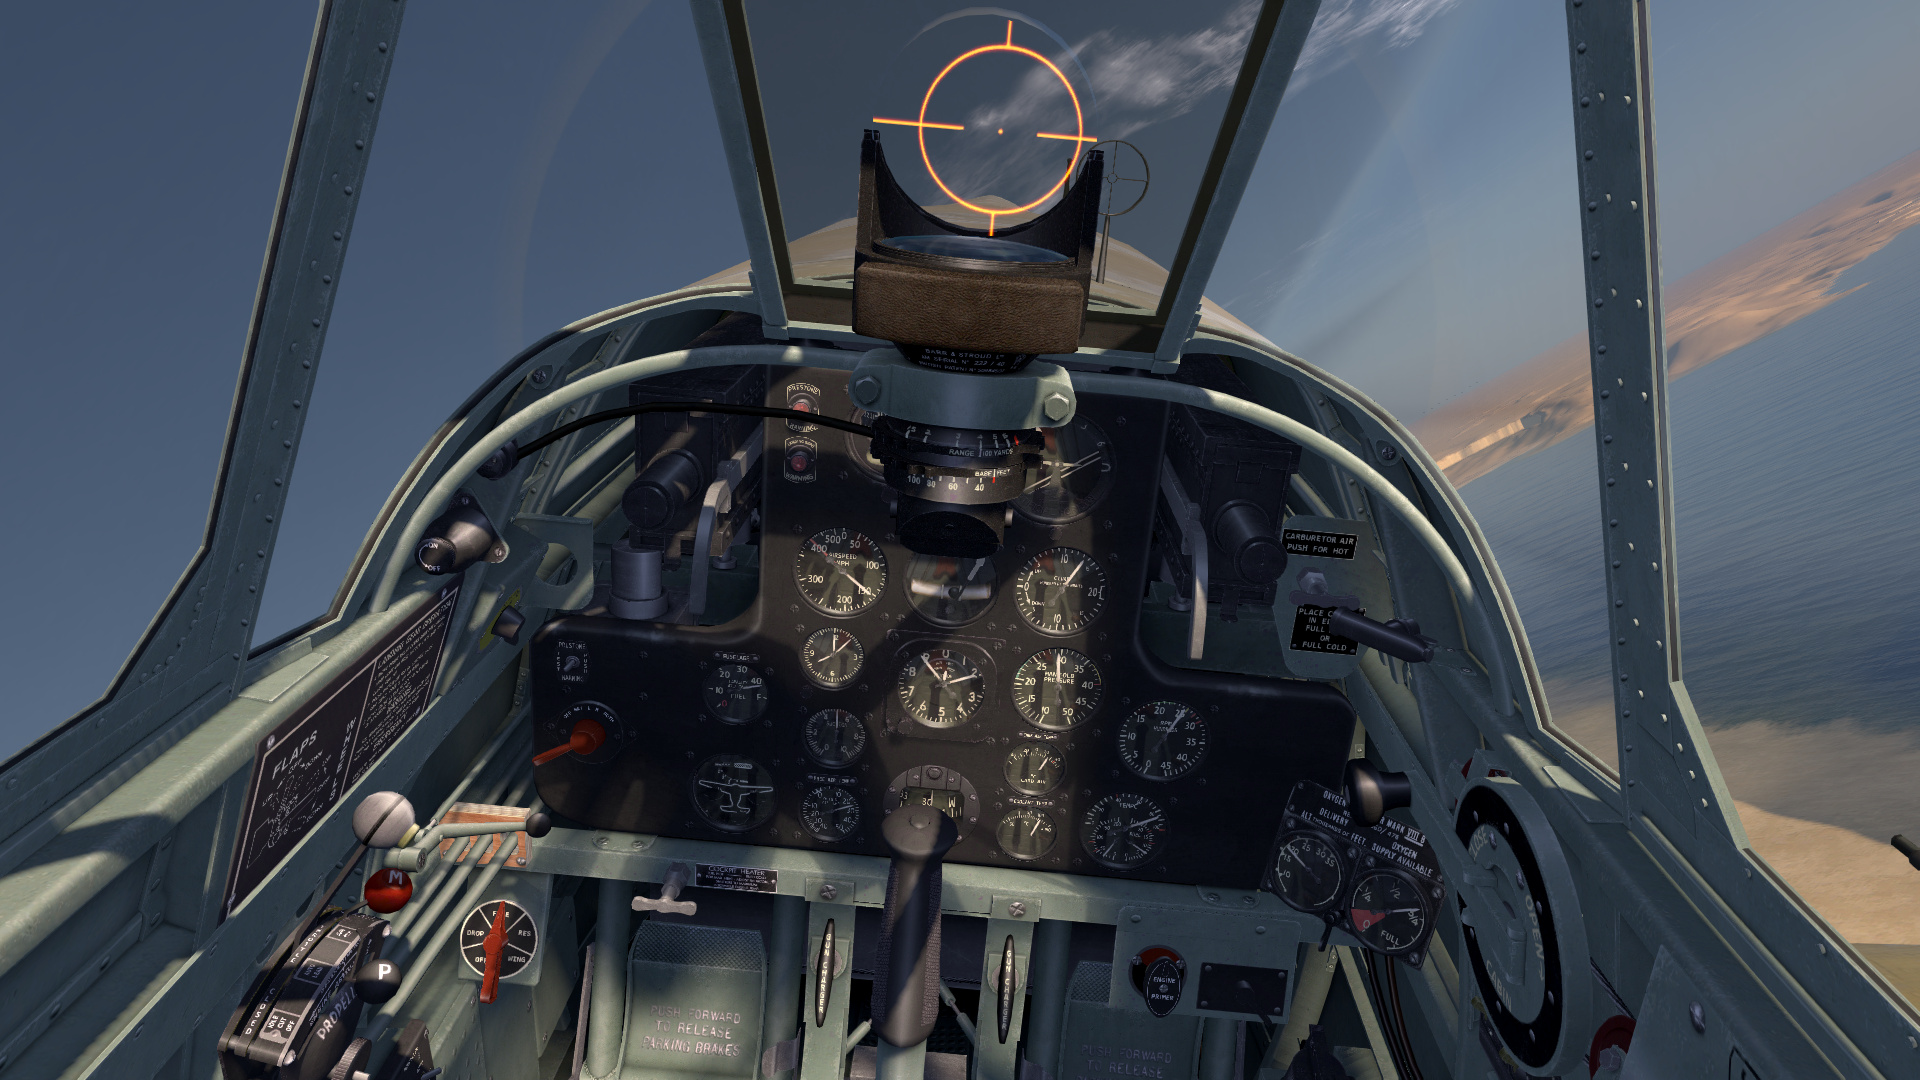
Nothing about the Tomahawk feels like a mere mod: it’s a full blown new plane of its own… from the cockpit to the external model.
[caption id=“” align=“aligncenter” width=“690”]
Tomahawk, chasing a burning Bf110.[/caption]
The “Desert Hawks” campaign brings you in the shoes of a RAAF pilot flying with No. 3 Squadron. You will participate in fierce dogfights over Tobruk right after Operation Crusader in December 1941.
[caption id=“” align=“aligncenter” width=“690”]
Tomahawk campaign.[/caption]
The Tomahawk was superseded in North Africa by the more powerful Kittyhawk (“D”-mark onwards) types from early 1942, though some Tomahawks remained in service until 1943. To me, this aircraft has some strong character and is one of the more stylish members of the RAF roster. I especially love the Royal Air Force No. 112 Squadron’s “Shark Mouth” nose art motif that is often associated with the AVG (American Volunteer Group) Flying Tigers, but that was originally inspired by the Bf.110s flown by ZG76 over Crete.
[caption id=“” align=“aligncenter” width=“690”]
The shark mouth.[/caption]
[caption id=“” align=“aligncenter” width=“690”]
RAF No.112 Squadron.[/caption]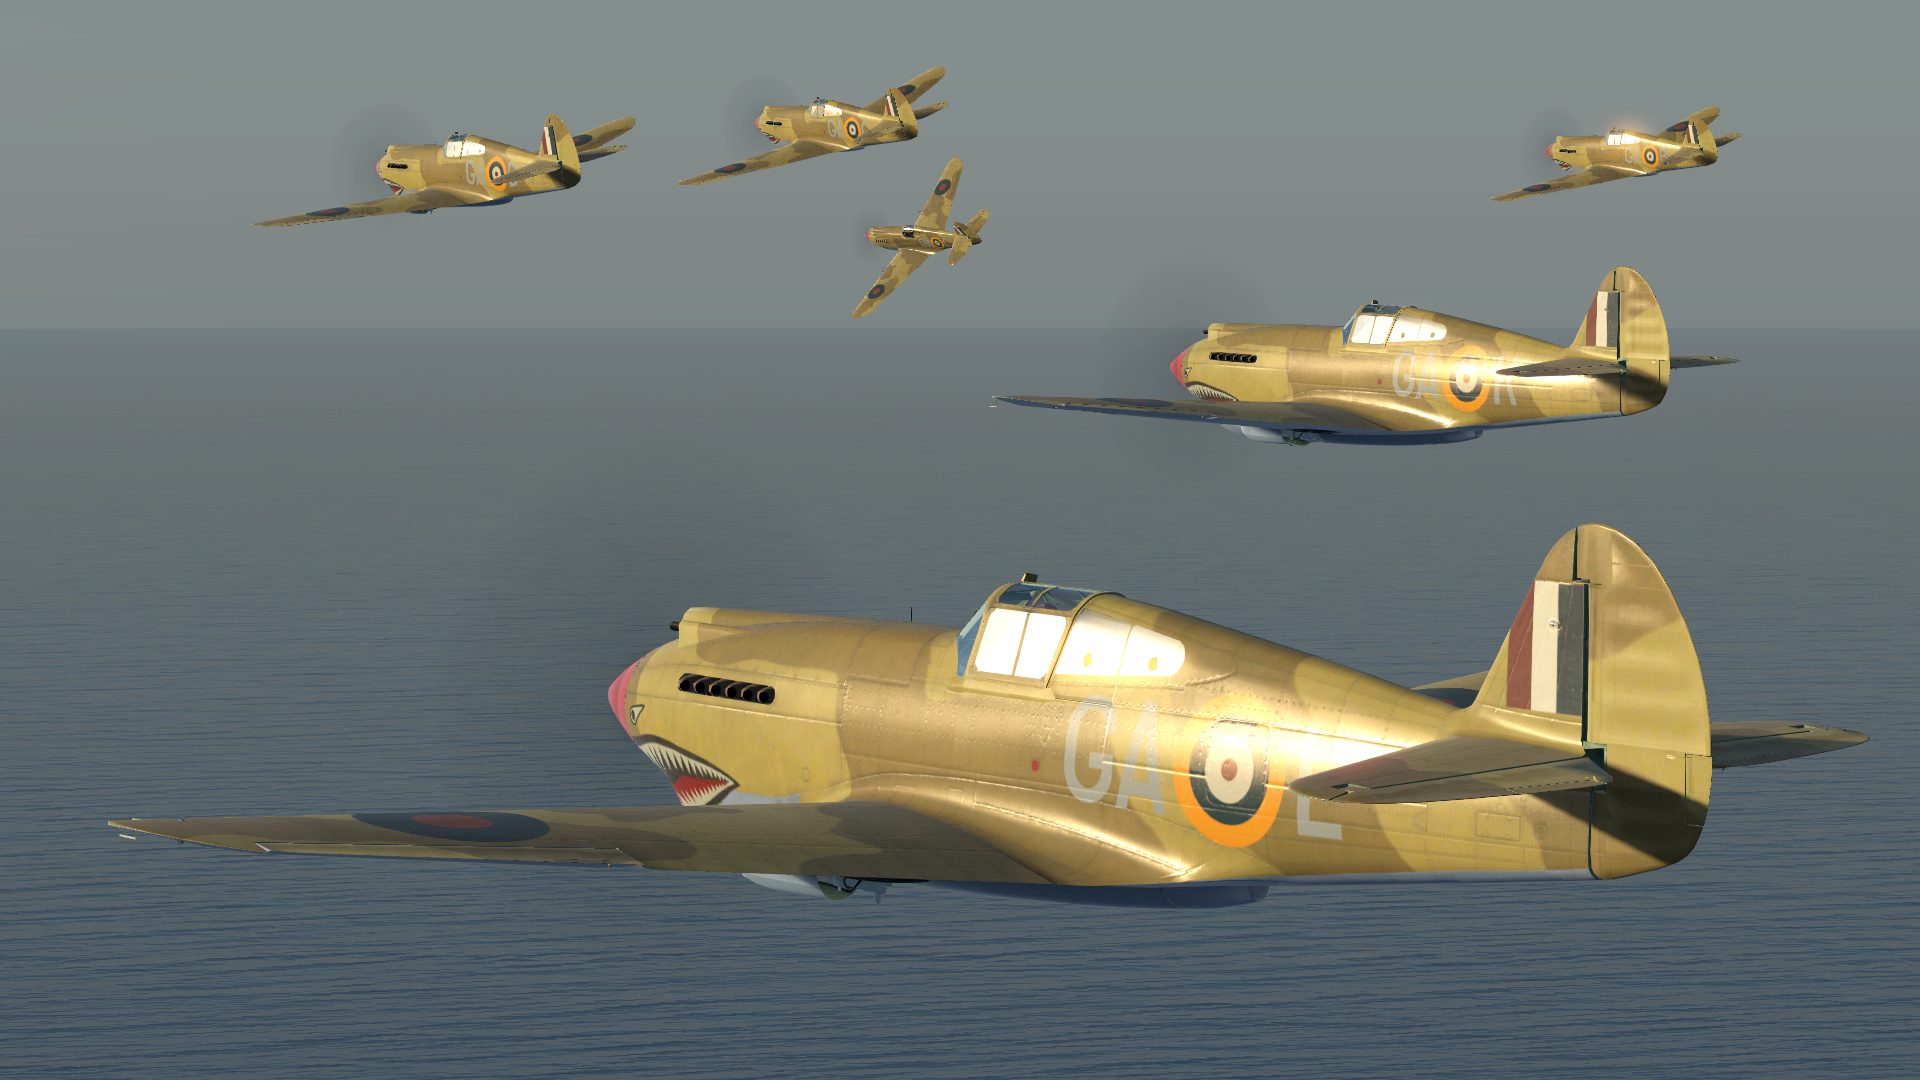
Kittyhawk Mk Ia (P-40E)
[caption id=“” align=“aligncenter” width=“690”]
The Kittyhawk.[/caption]
The “Kittyhawk” was the british designation for the Curtiss P-40E1, which was similar in most respects to the P-40D, except for a slightly more powerful engine (Allison V-1710-39) and an extra 0.50 in machinegun in each wing instead of the nose. The Kittyhawk was the variant that bore the brunt of air-to-air combat by the type in the key period of early to mid 1942,
[caption id=“” align=“aligncenter” width=“690”]
A flight of Kittyhawks about to bounce italian bombers.[/caption]
When the Kittyhawk went into service, several problems were discovered. When maneuvering in high G turns the guns would often jam due to the way the ammunition was stored. Another problem was that engine and trim management were both somewhat complex and taxing with earlier P-40’s required strong rudder pressure to offset engine torque and frequent trim adjustments were needed during rapid speed changes. Both these problems were remedied sometime late in production by enlarging the vertical stabilizer and changing how the ammunition was stored.
[caption id=“” align=“aligncenter” width=“690”]
Kittyhawk cockpit, which differs greatly from the Tomahawk’s.[/caption]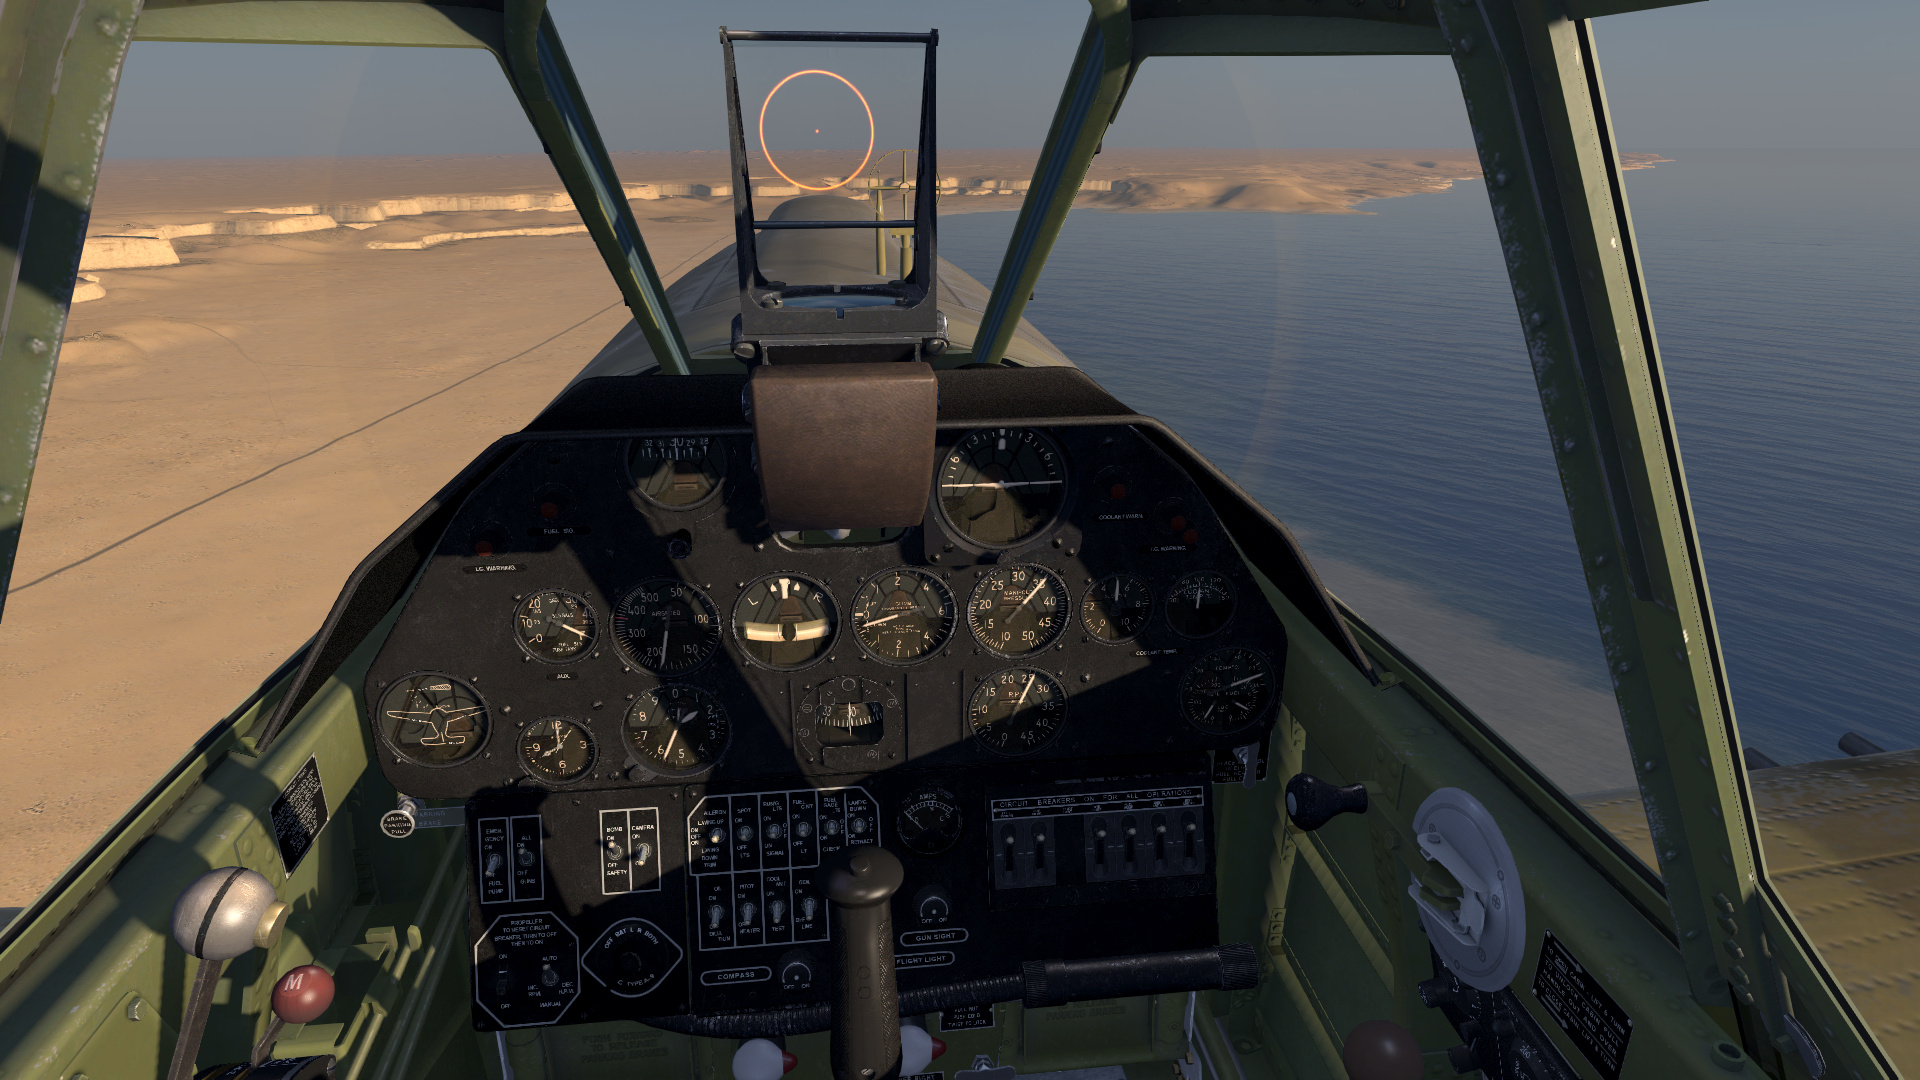
Compared to the Tomahawk, the Kittyhawk’s cockpit is much cleaner and the gun pattern is a bit more intuitive to predict due to the placement of all six machineguns in the wings. It isn’t just a carbon copy of the Tomahawk… its differences in performance, cockpit ergonomy makes you feel like you are flying two genuinely different planes with their own quirks.
Martlet Mk III
The Grumman “Martlet” (British designation for the F4F Wildcat) is yet another product of the Lend-Lease policy. Armed with four Browning 0.50 in caliber machineguns, the Martlet can also equip two 250 lbs bombs on its wing racks.
[caption id=“” align=“aligncenter” width=“690”]
Tropical Martlet Mk III.[/caption]
The first 30 F4F-3As were released for sale to Greece, after the Italian invasion in November 1940. However, at the defeat of Greece in April 1941 the aircraft had only reached Gibraltar. They were taken over by the British Fleet Air Arm as Martlet Mk III(B). As these aircraft did not have folding wings, they were only used from land bases and served in a shore-based role in the Western Desert.
[caption id=“” align=“aligncenter” width=“690”]
Martlet cockpit.[/caption]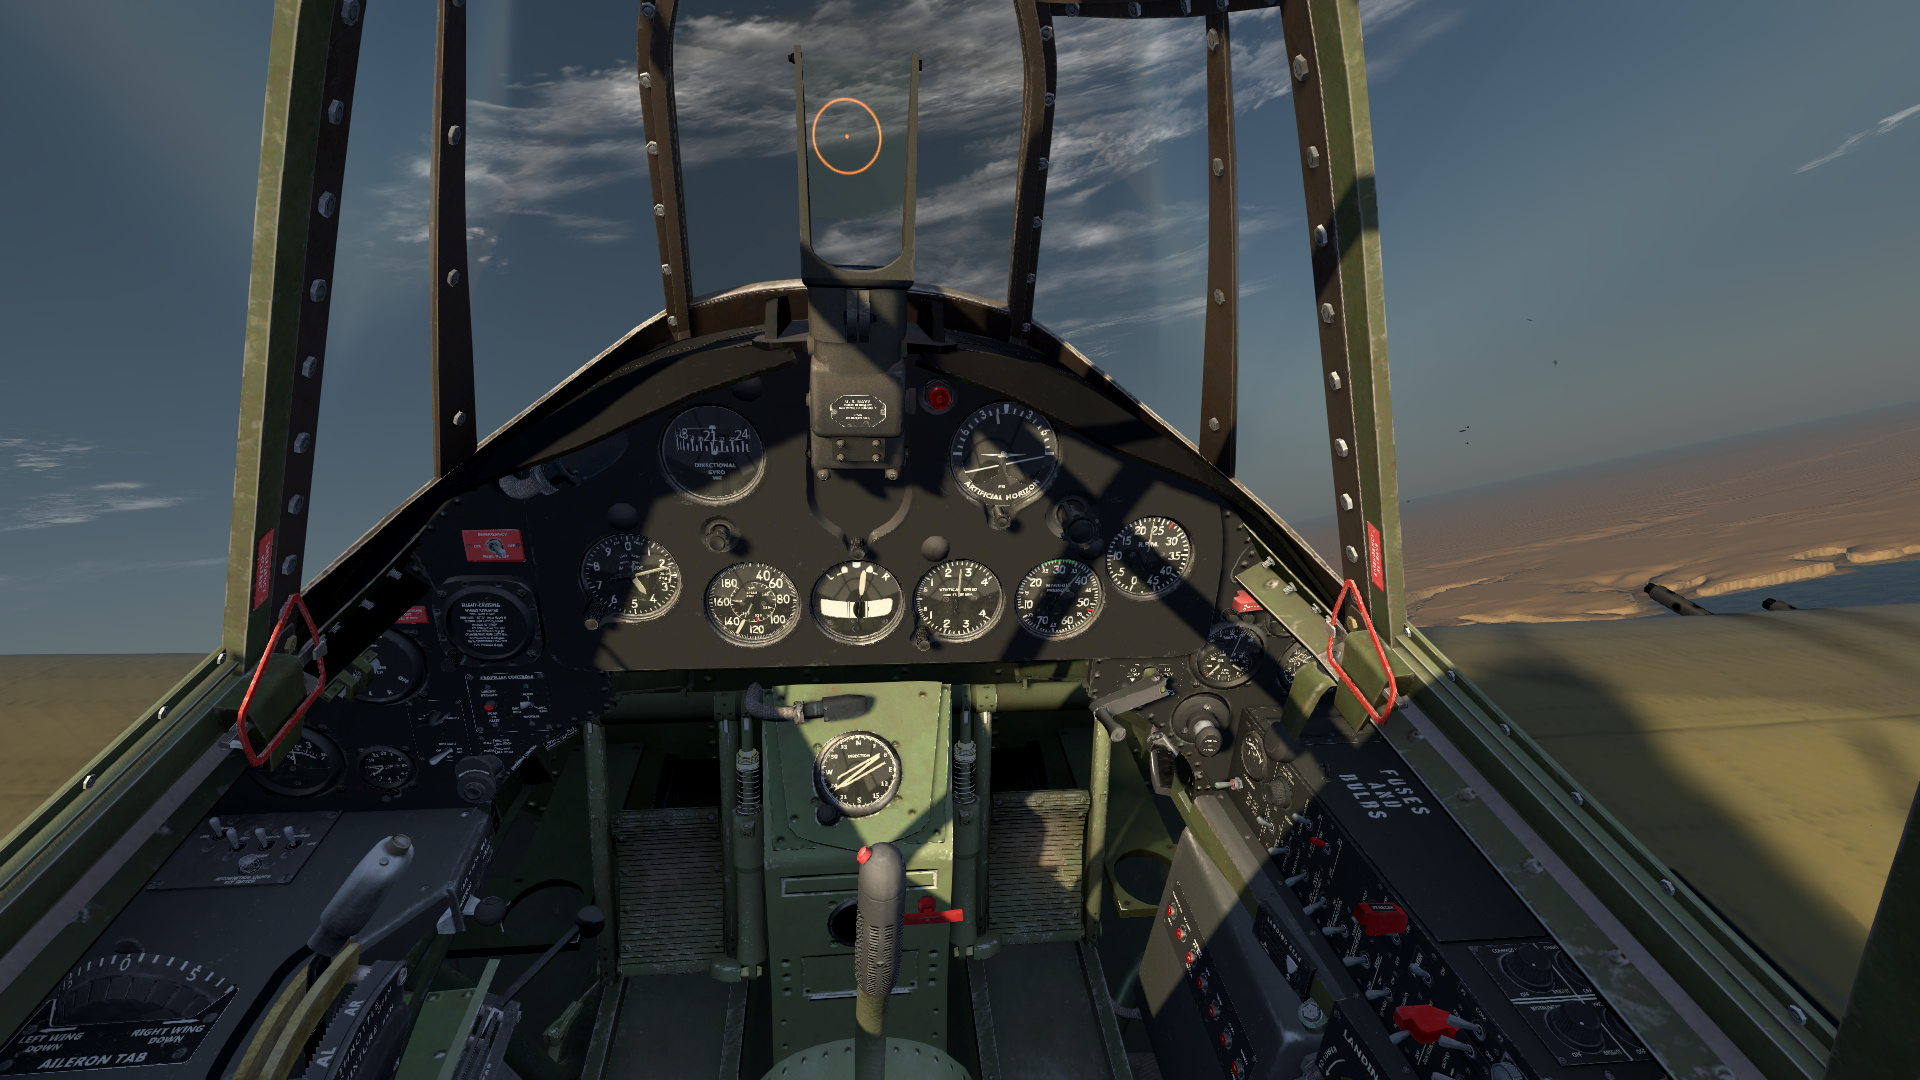
The Martlet’s cockpit is alien to most of everything we’ve seen in Cliffs of Dover… but in the most beautiful way. Team Fusion modelled this aircraft and cockpit from scratch and the overall result is nothing short of impressive. No parts in the pit seem to follow any sort of standard. The cockpit feels cramped, cluttered, but strangely enough roomy enough so that no space seems to be wasted. It’s a hard feeling to describe… you really have to hop in it to know what I mean. The aircraft itself is chock full of interesting technology that will make engine management interesting: a two-stage supercharger, cowling flaps, a propeller RPM control, a manual and automatic propeller governor mode… and much more.
[caption id=“” align=“aligncenter” width=“690”]
Martlet with a paintjob adapted for the English Channel.[/caption]
Provided that you didn’t forget to lock your tailwheel prior to takeoff and didn’t crash in a pile of twisted metal and shame… once in the air, the Martlet’s radial engine purrs. The sound design is phenomenal; I can sometimes waste a few minutes in multiplayer, idling on the ground while listening to the angry growl of the Pratt & Whitney Twin Wasp.
[caption id=“” align=“aligncenter” width=“690”]
An in game screenshot of a Martlet from the pilot position showing the right side panel and the landing gear crank.[/caption]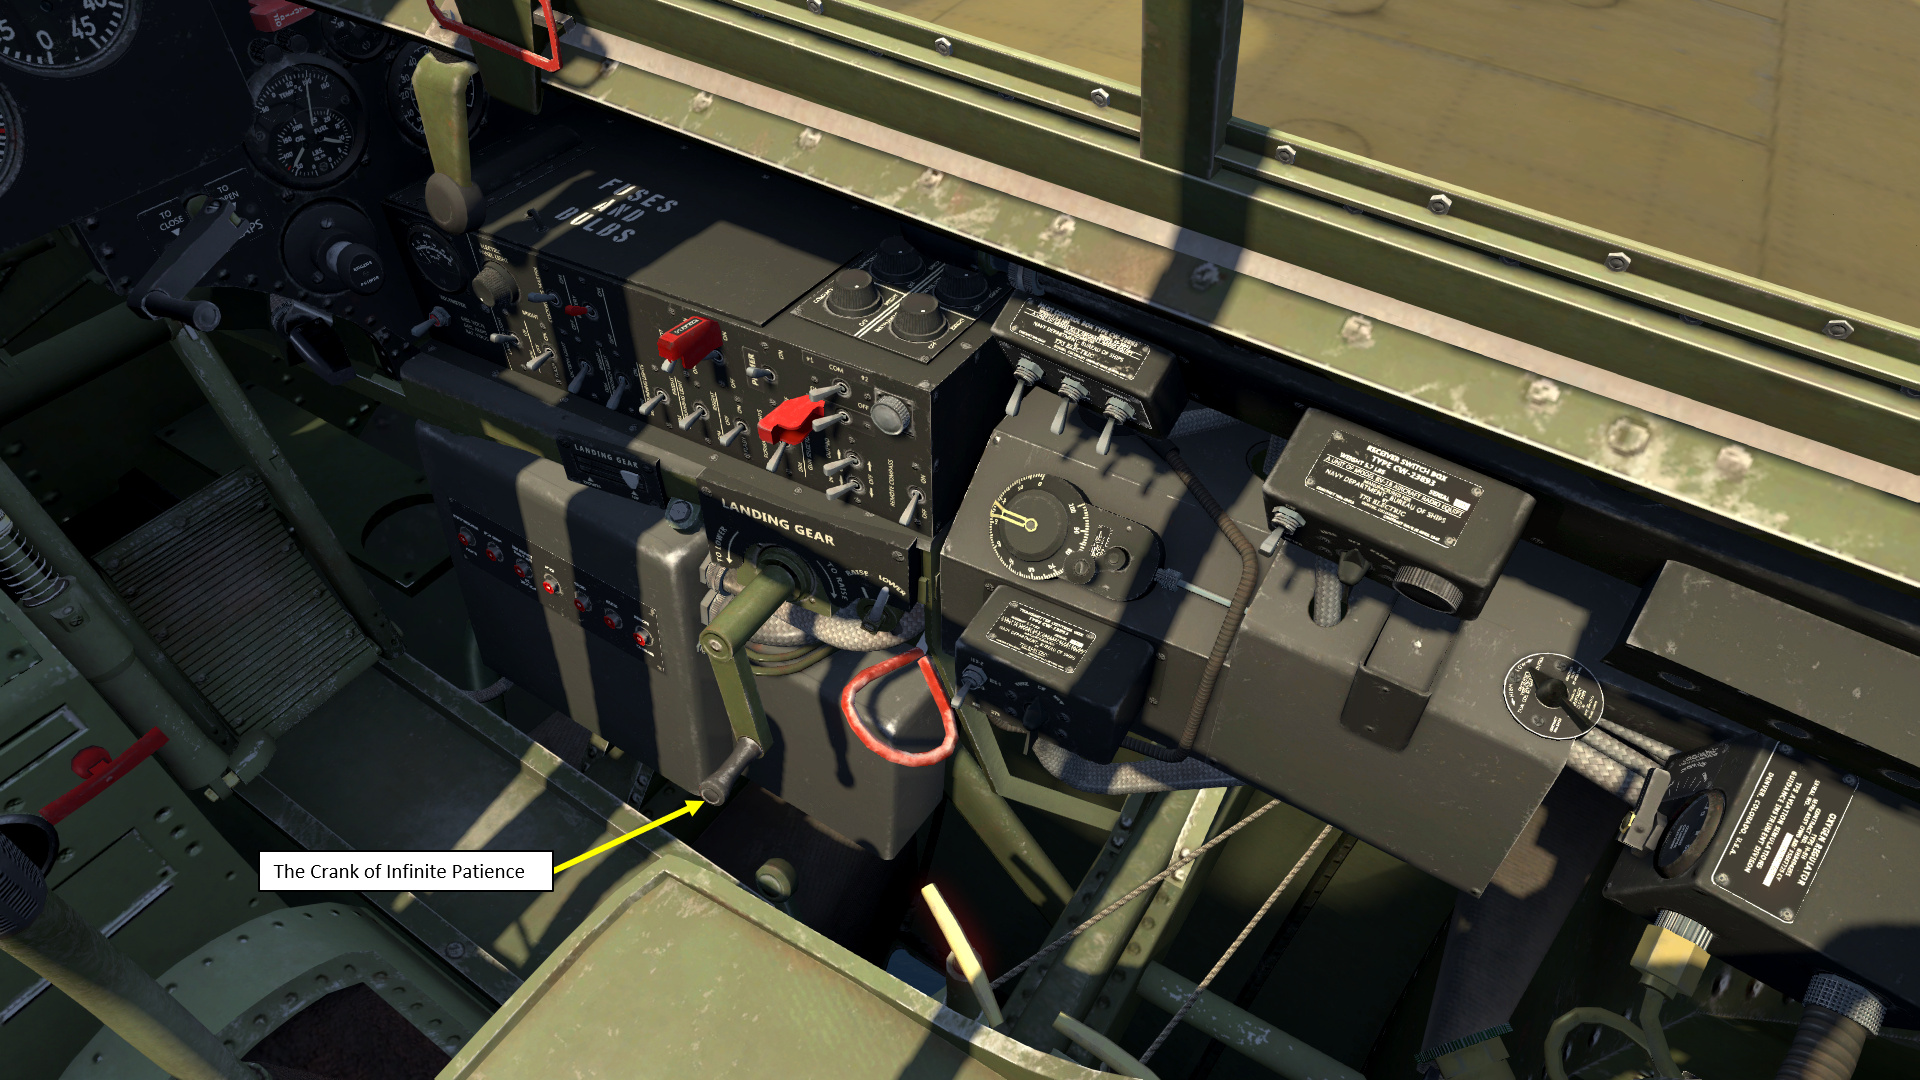
To raise the landing gear, a crank needs to be manually turned for what seems to be forever (I counted 34 turns… I-16 pilots will understand that very specific kind of pain). I call this crank the “Crank of Infinite Patience”. For the Martlet, a specific binding (“Manually Raise/Lower Undercarriage”) different from the “Toggle Undercarriage” usually used for most airplanes is necessary to successfully turn the landing gear crank.
[caption id=“” align=“aligncenter” width=“690”]
A Martlet engages a German He-111 bomber off the African coast.[/caption]
Mark my words: this plane will become a fan favourite for adepts of “Boom and Zoom” tactics.
DH.82 Tiger Moth
Everyone’s favourite plane from De Havilland now comes with its own tropical version! Flying a reconnaissance/trainer plane in the hopes of not being blown to smithereens by Bf.109s has never been more fun!
[caption id=“” align=“aligncenter” width=“690”]
A tropicalized Tiger Moth flies low over an African road.[/caption]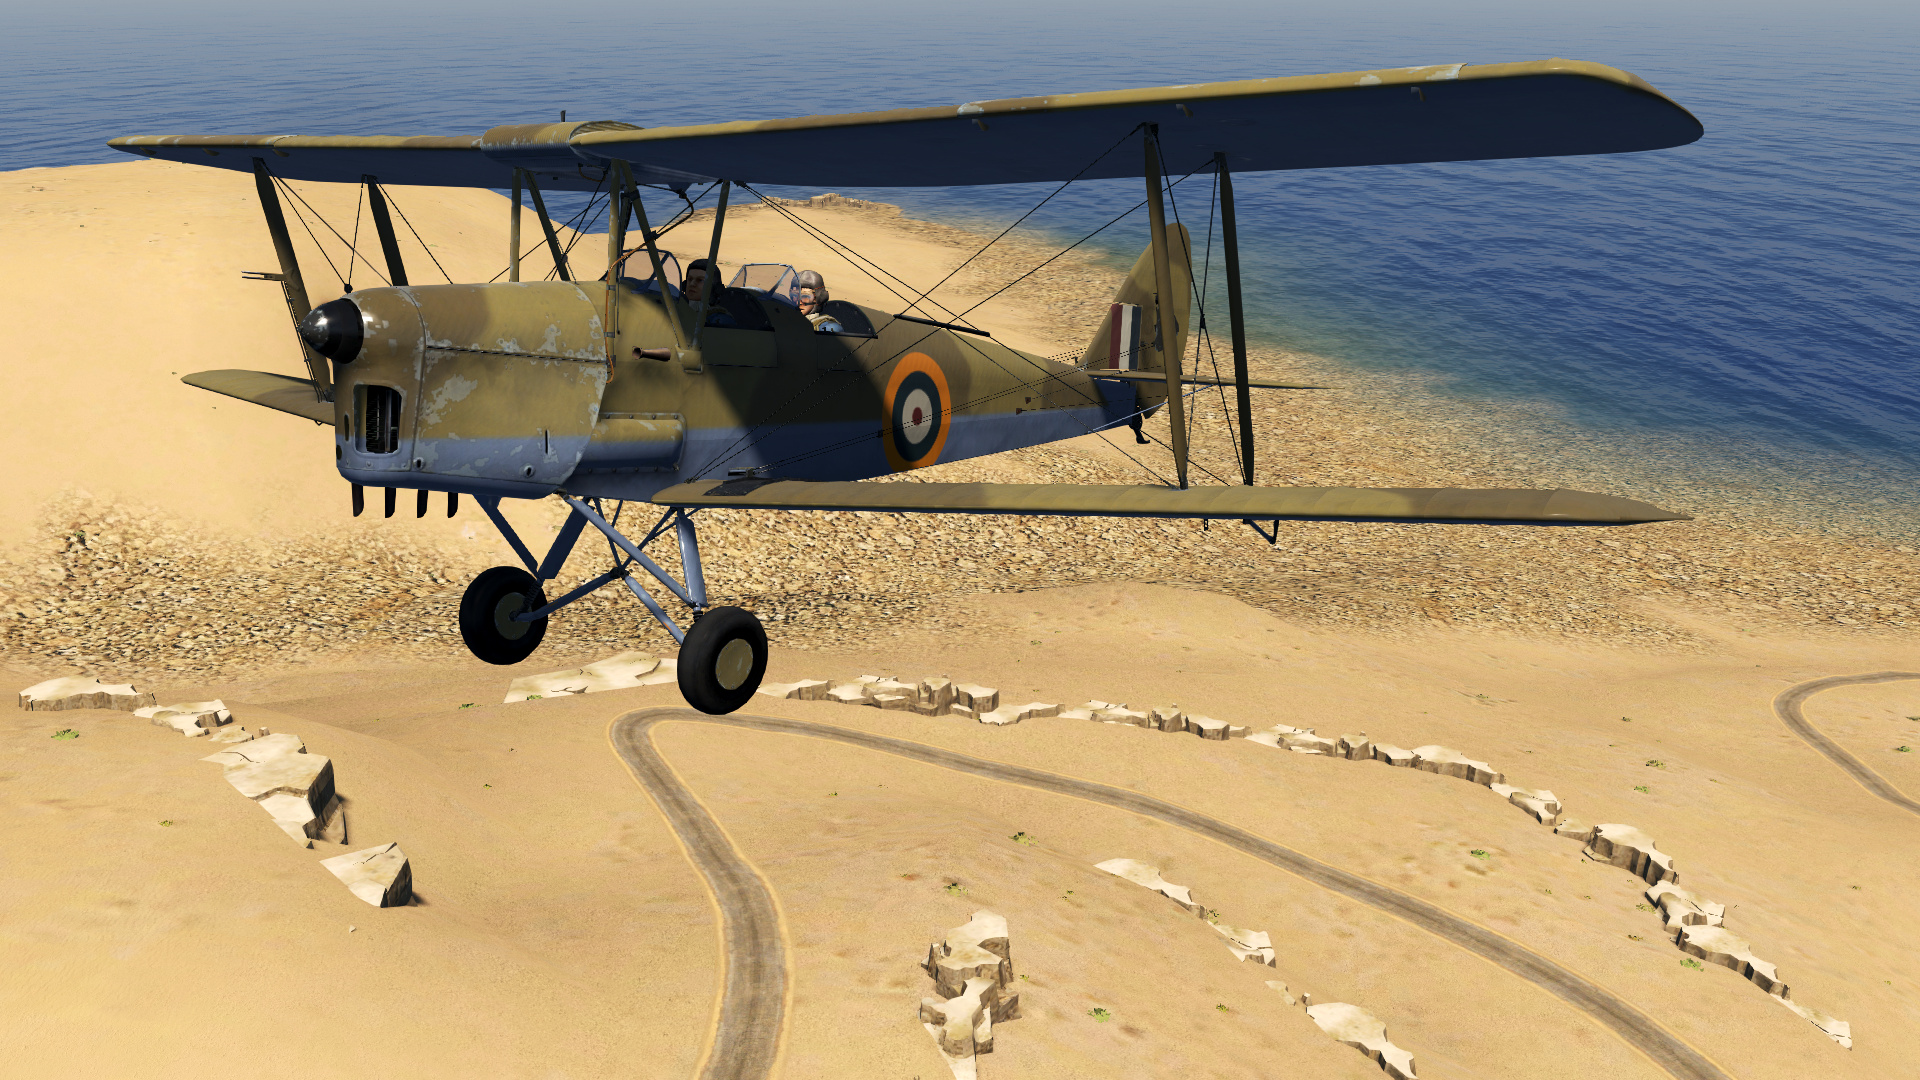
But wait… there’s more! If you call within the next 30 minutes, Team Fusion will provide with its own single-seat A-2 variant, with a single machine-gun mounted on the nose and a rack for 20 lbs bomb!
[caption id=“” align=“aligncenter” width=“690”]
Tiger Moth A-2 variant, cockpit view[/caption]
[caption id=“” align=“aligncenter” width=“690”]
Tiger Moth A-2 variant, external view.[/caption]
Blenheim Mk IV
“Hello darkness my old friend…”
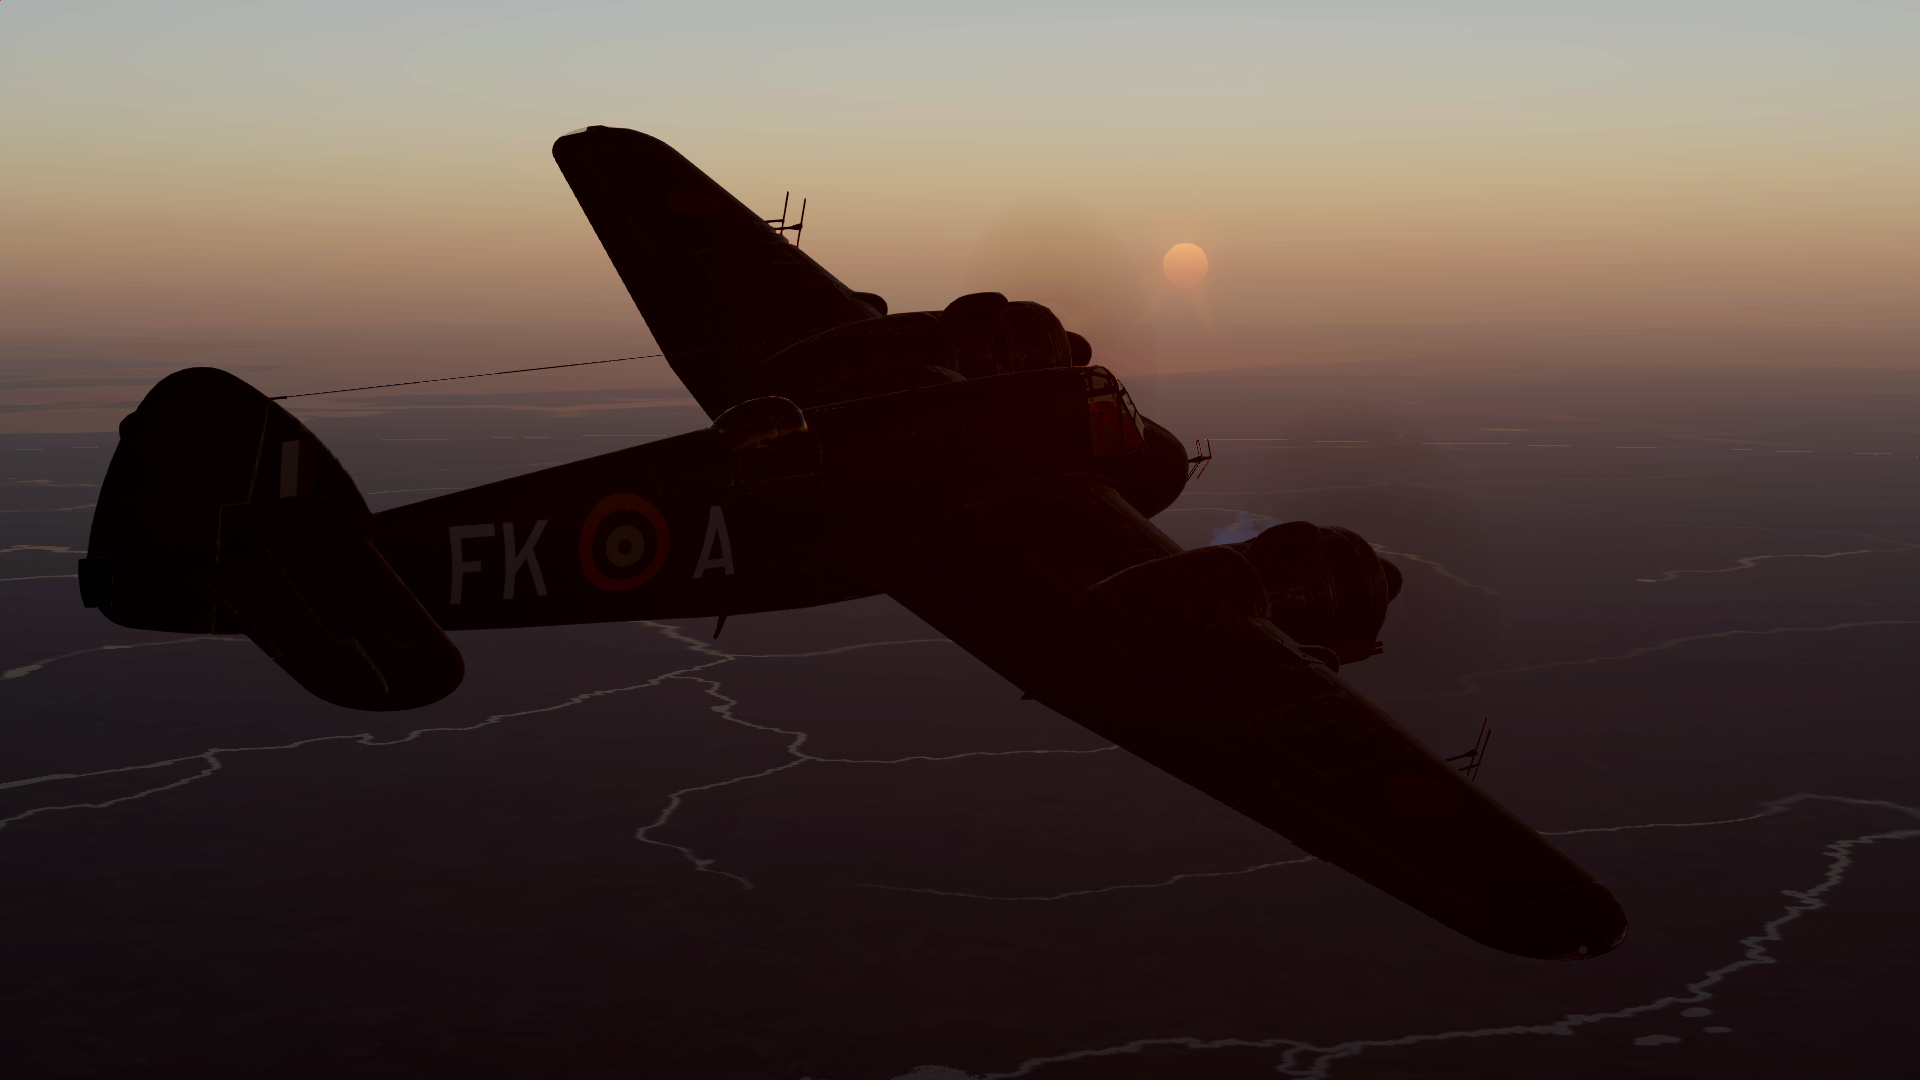
[caption id=“” align=“aligncenter” width=“690”]
A flight of three Blenheims over the water.[/caption]
The Bristol Blenheim is one of these planes I just loved to hate. For years and years, this was the only bomber available for Allied players in Cliffs of Dover. It was woefully underpowered, carried a meagre four bombs and I am sure its turret machinegun was switched with a broomstick at some point.
[caption id=“” align=“aligncenter” width=“690”]
Beware of the Hun in the sun.[/caption]
By the end of 1940, a total of three RAF squadrons equipped with Blenheim IV aircraft were performing anti-shipping, bombing, and reconnaissance missions in support of Allied ground forces in North Africa. In the latter half of 1941, several Blenheim squadrons were flown out to Malta, many being stationed there into early 1942 before mainly being absorbed in the Western Desert air operations.
[caption id=“” align=“aligncenter” width=“690”]
Blenheims on a bombing run.[/caption]
The interior cockpit of the Blenheim hasn’t changed much since Cliffs of Dover… however we now have Team Fusion to thank for a brand new suite of equipment and ordnance. The new twin-gun 0.303 turret is a much needed addition.
[caption id=“” align=“aligncenter” width=“690”]
The new turret.[/caption]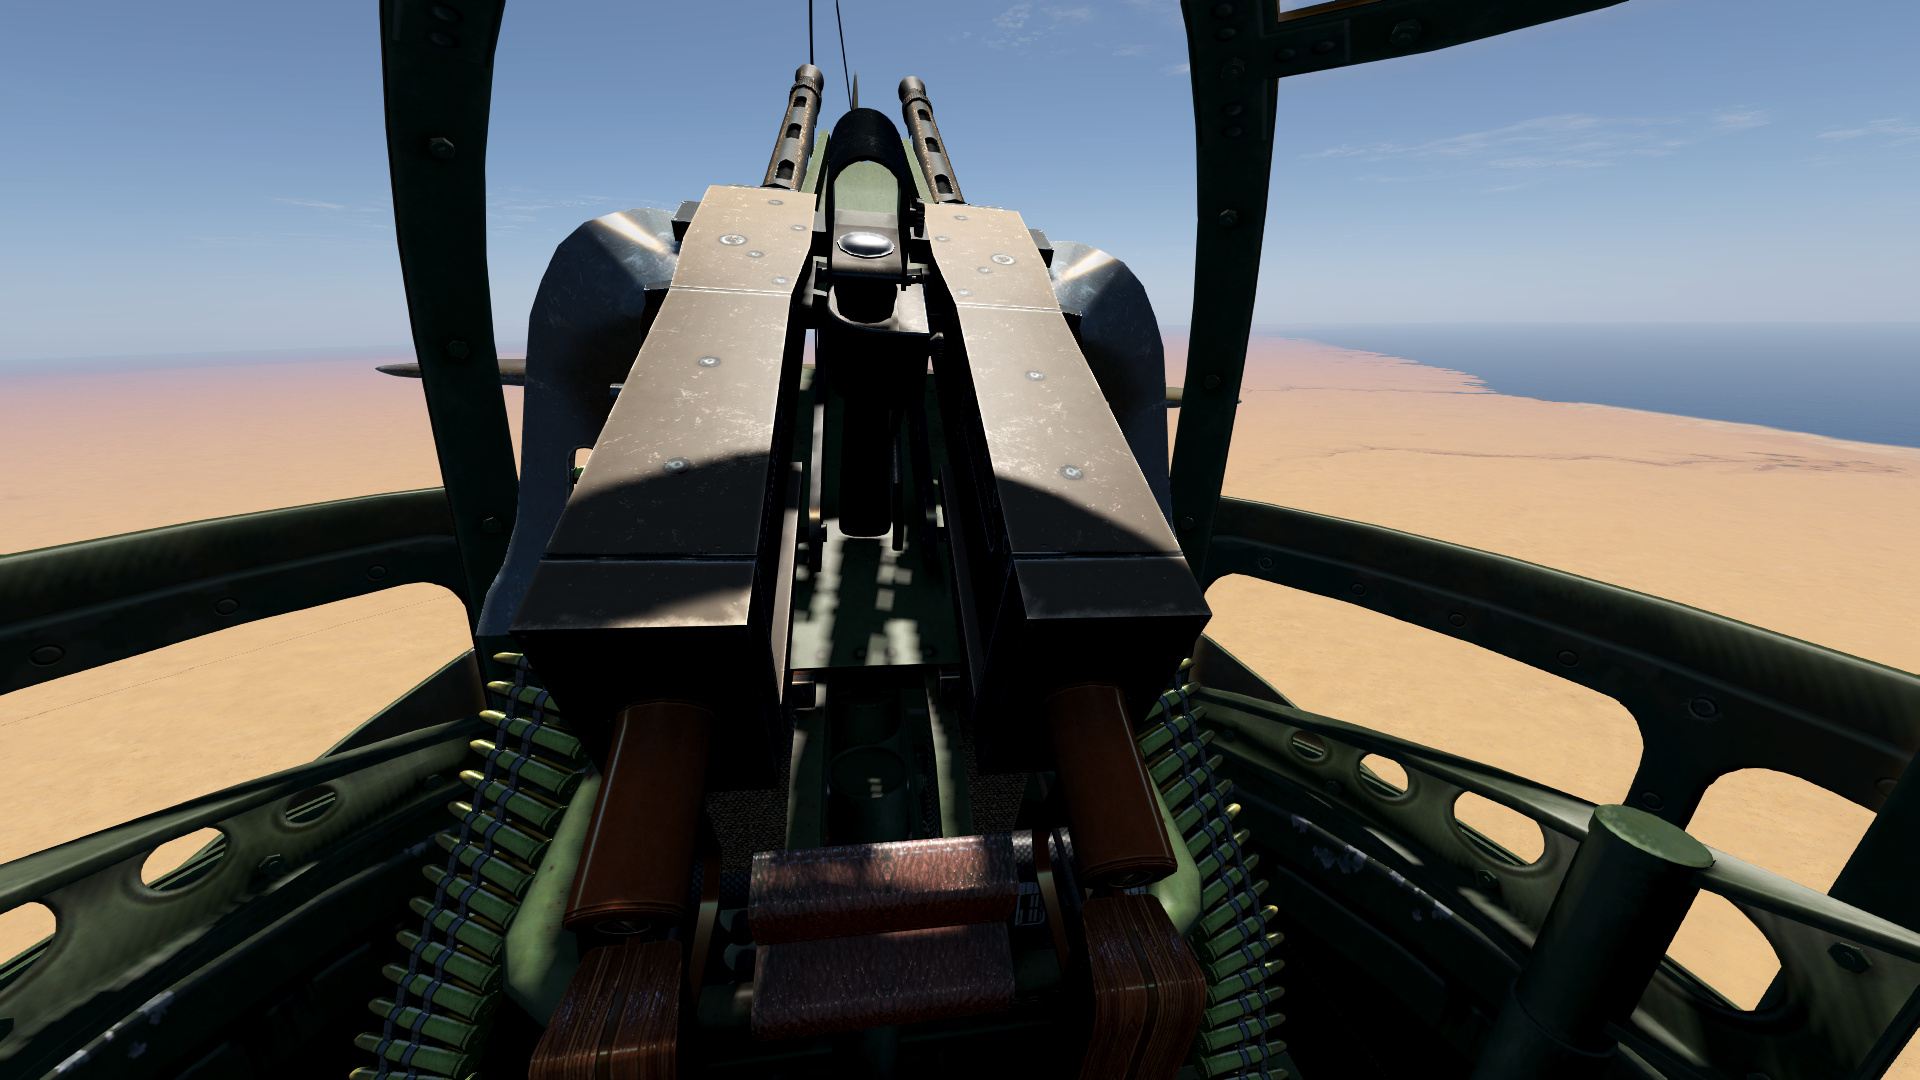
An improved bomb load is also available, which makes the Blennie more effective for skip bombing and carpet bombing operations. However, the installation of of tropical filters under the engines has a noticeable negative effect on engine performance.
[caption id=“” align=“aligncenter” width=“690”]
Blenheim additional bombs and tropical filters.[/caption]
Wellington Mk I
The Vickers Wellington is the one plane I was the most excited about, and the result did not disappoint at all. The Mk Ia, Ic Early, Ic Late and Torpedo variants are available.
[caption id=“” align=“aligncenter” width=“690”]
Behold, the mighty Wimpy.[/caption]
The cockpit modelling in the Wimpy is a work of art. Within the flight sim industry, developers typically don’t want to do bombers because of the immense work involved with modelling the cockpit, the bomb aimer station and turrets. That is pretty much three to four times as much modelling work for a single plane that will probably not be as popular as a single-seat fighter plane. To me, the fact that a single plane can have up to four people manning different stations is something that is very valuable.
[caption id=“” align=“aligncenter” width=“690”]
An in game screenshot of a Wellington bomber from the pilot position looking down at the instrument panel.[/caption]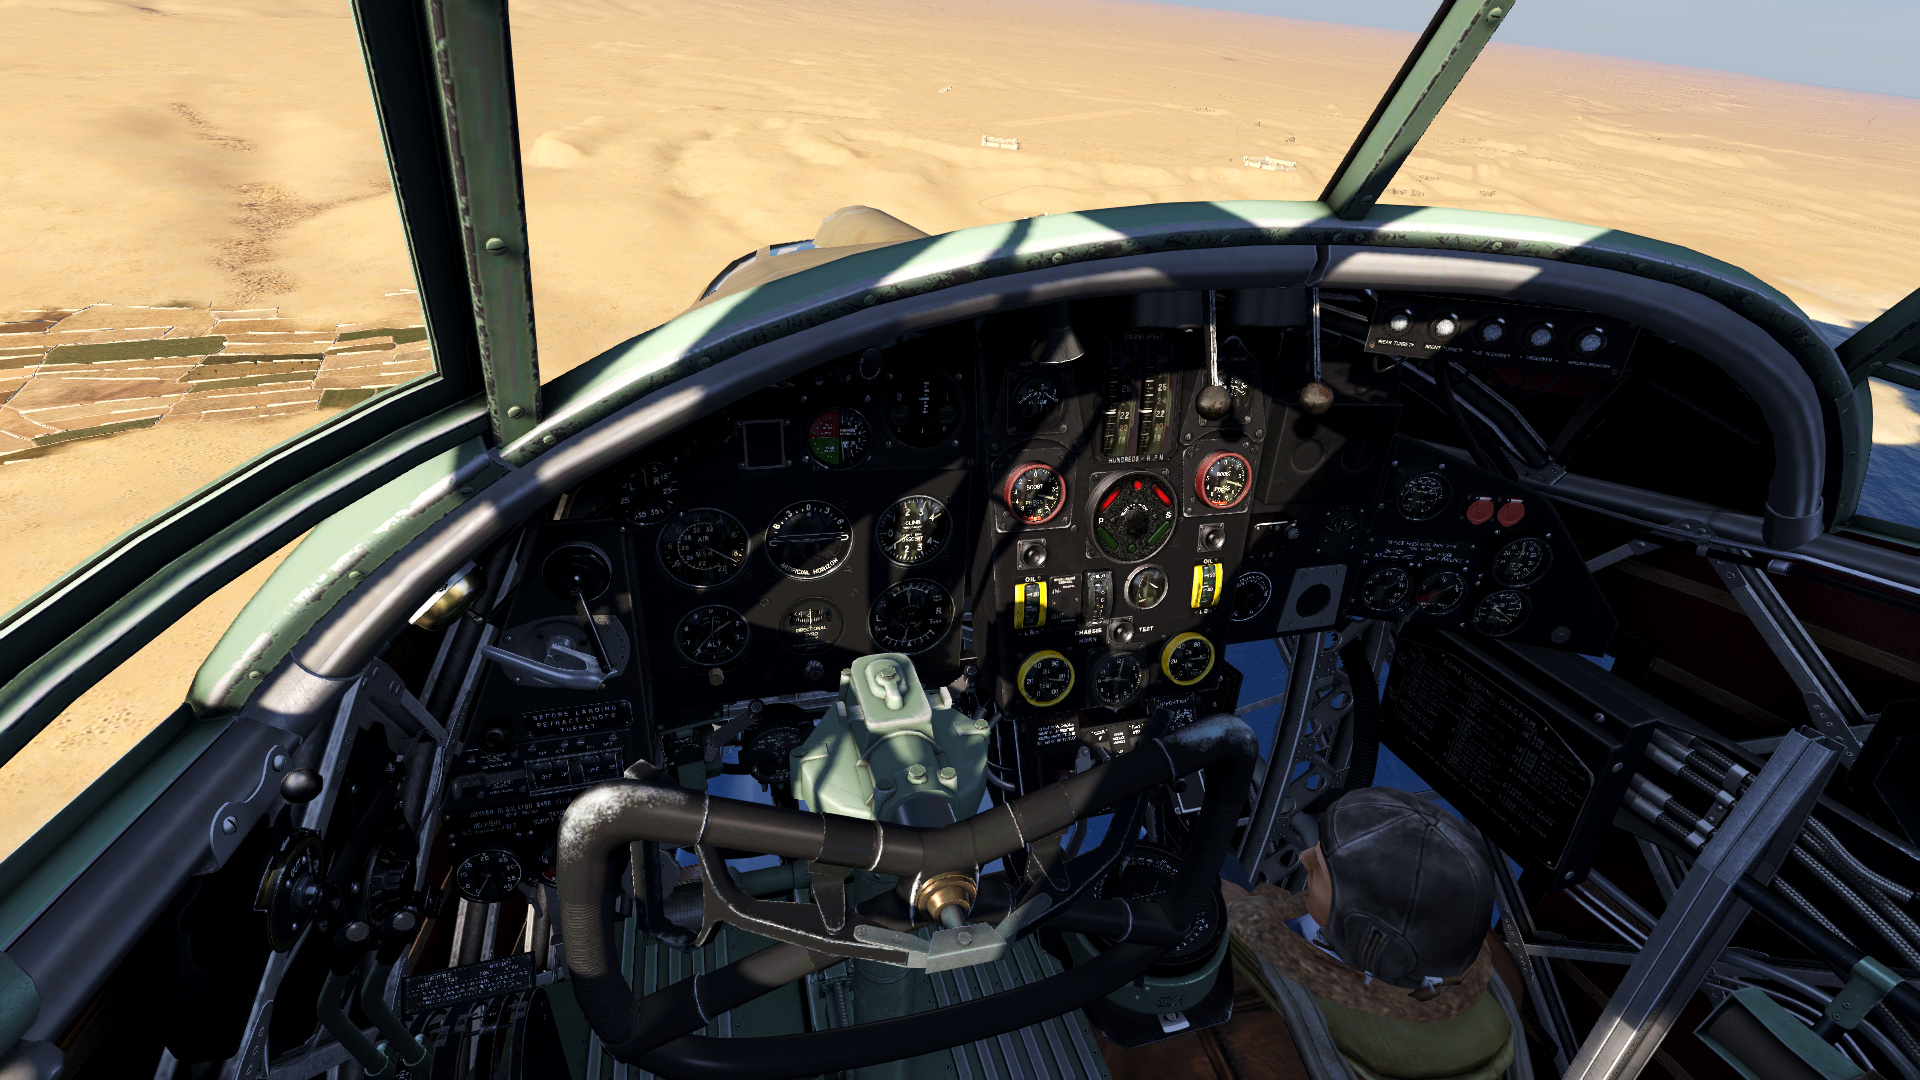
Compared to the Blenheim, the Wellington Mk Ia is a flying fortress. Two turrets with twin 0.303 machineguns protect your nose and tail, which can be manned by either the AI or another player. The Mk Ic adds two waist gunners (gunners are not playable). When a “Wimpy” formation is flying nice and tight, incoming fighters will have to think twice before attacking since they will be welcomed by a hail of gunfire.
[caption id=“” align=“aligncenter” width=“690”]
The crew of the Wellington bomber.[/caption]
The bomb load is nothing to sneer at: the bomb bay can hold up to 9 500-lbs bombs or 18 250-lbs bombs… or even two 2000-lbs tank busters… which is comparable to having one of these mighty 4000-lbs “Cookie” blockbuster bombs equipped in the Avro Lancaster.
[caption id=“” align=“aligncenter” width=“690”]
“Open bomb bay doors”.[/caption]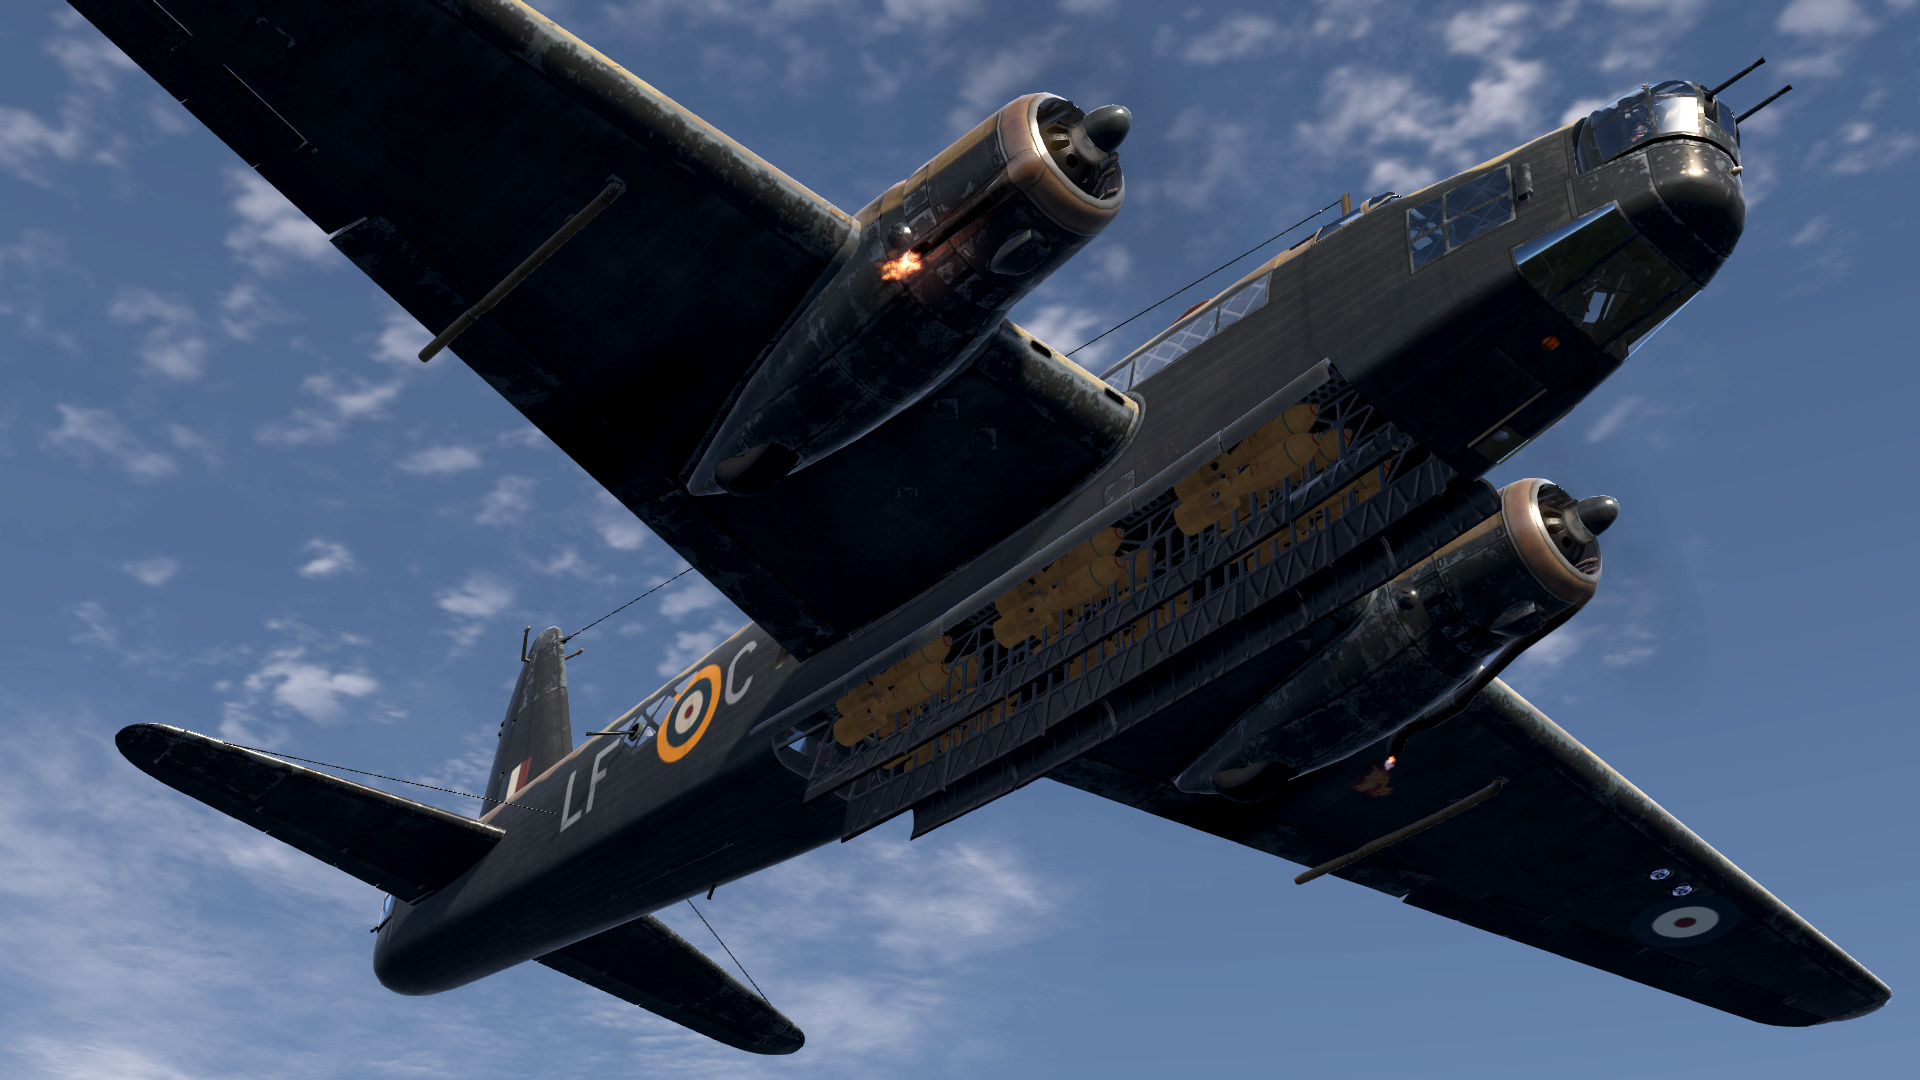
Bombing in the Wellington is tricky. The pilot has a limited view that’s obstructed by the front gunner turret. Therefore, lining up the target when bombing at high altitudes requires some coordination between the front gunner (which has the best frontal view) and the bomb aimer (which has a poor visibility of what’s in front of the plane at best).
[caption id=“” align=“aligncenter” width=“690”]
Wellington front turret.[/caption]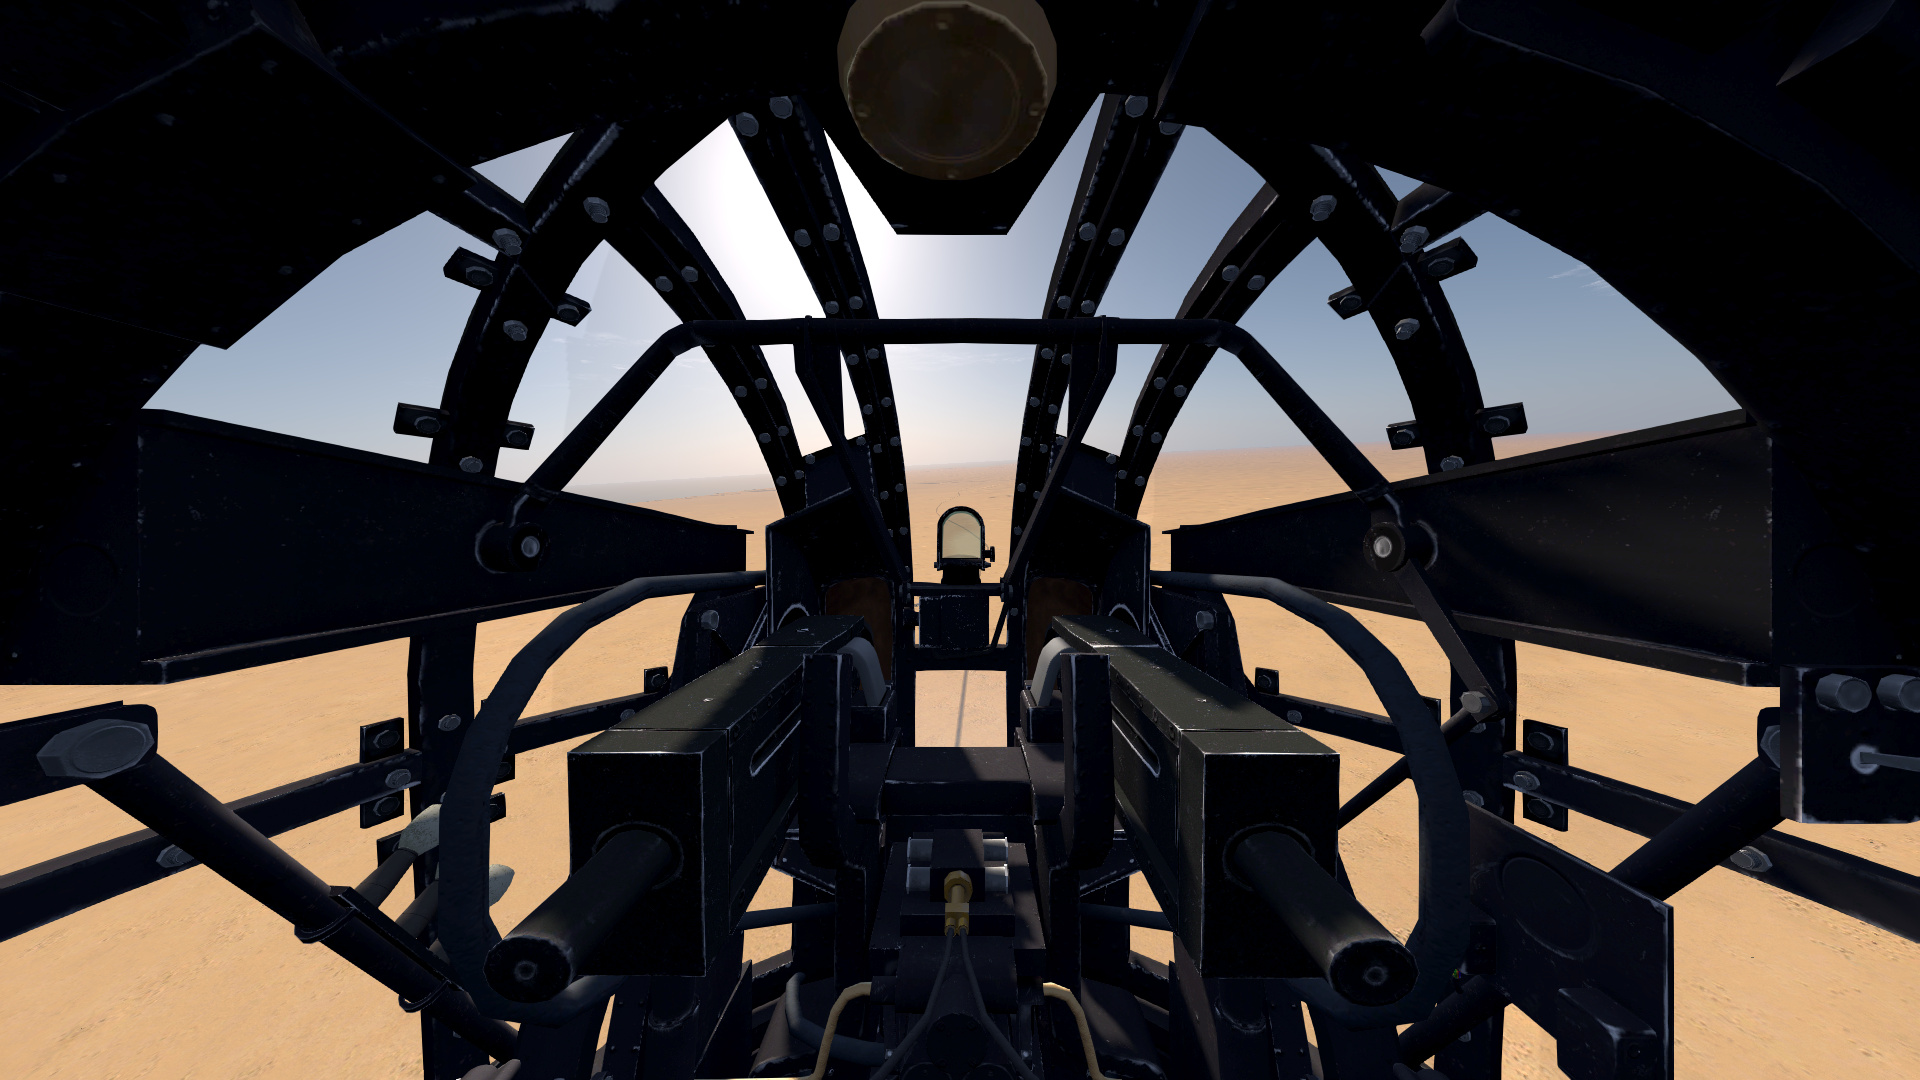
The early Mk I variant of the Wellington has a “Wimperis” Course Setting Bomb Sight (CSBS), which is available on the Blenheim as well. You still have to input airspeed and altitude and steer the aircraft to “put the thing on the thing”.
[caption id=“” align=“aligncenter” width=“690”]
“Wimperis” Course Setting Bomb Sight (early Mk I).[/caption]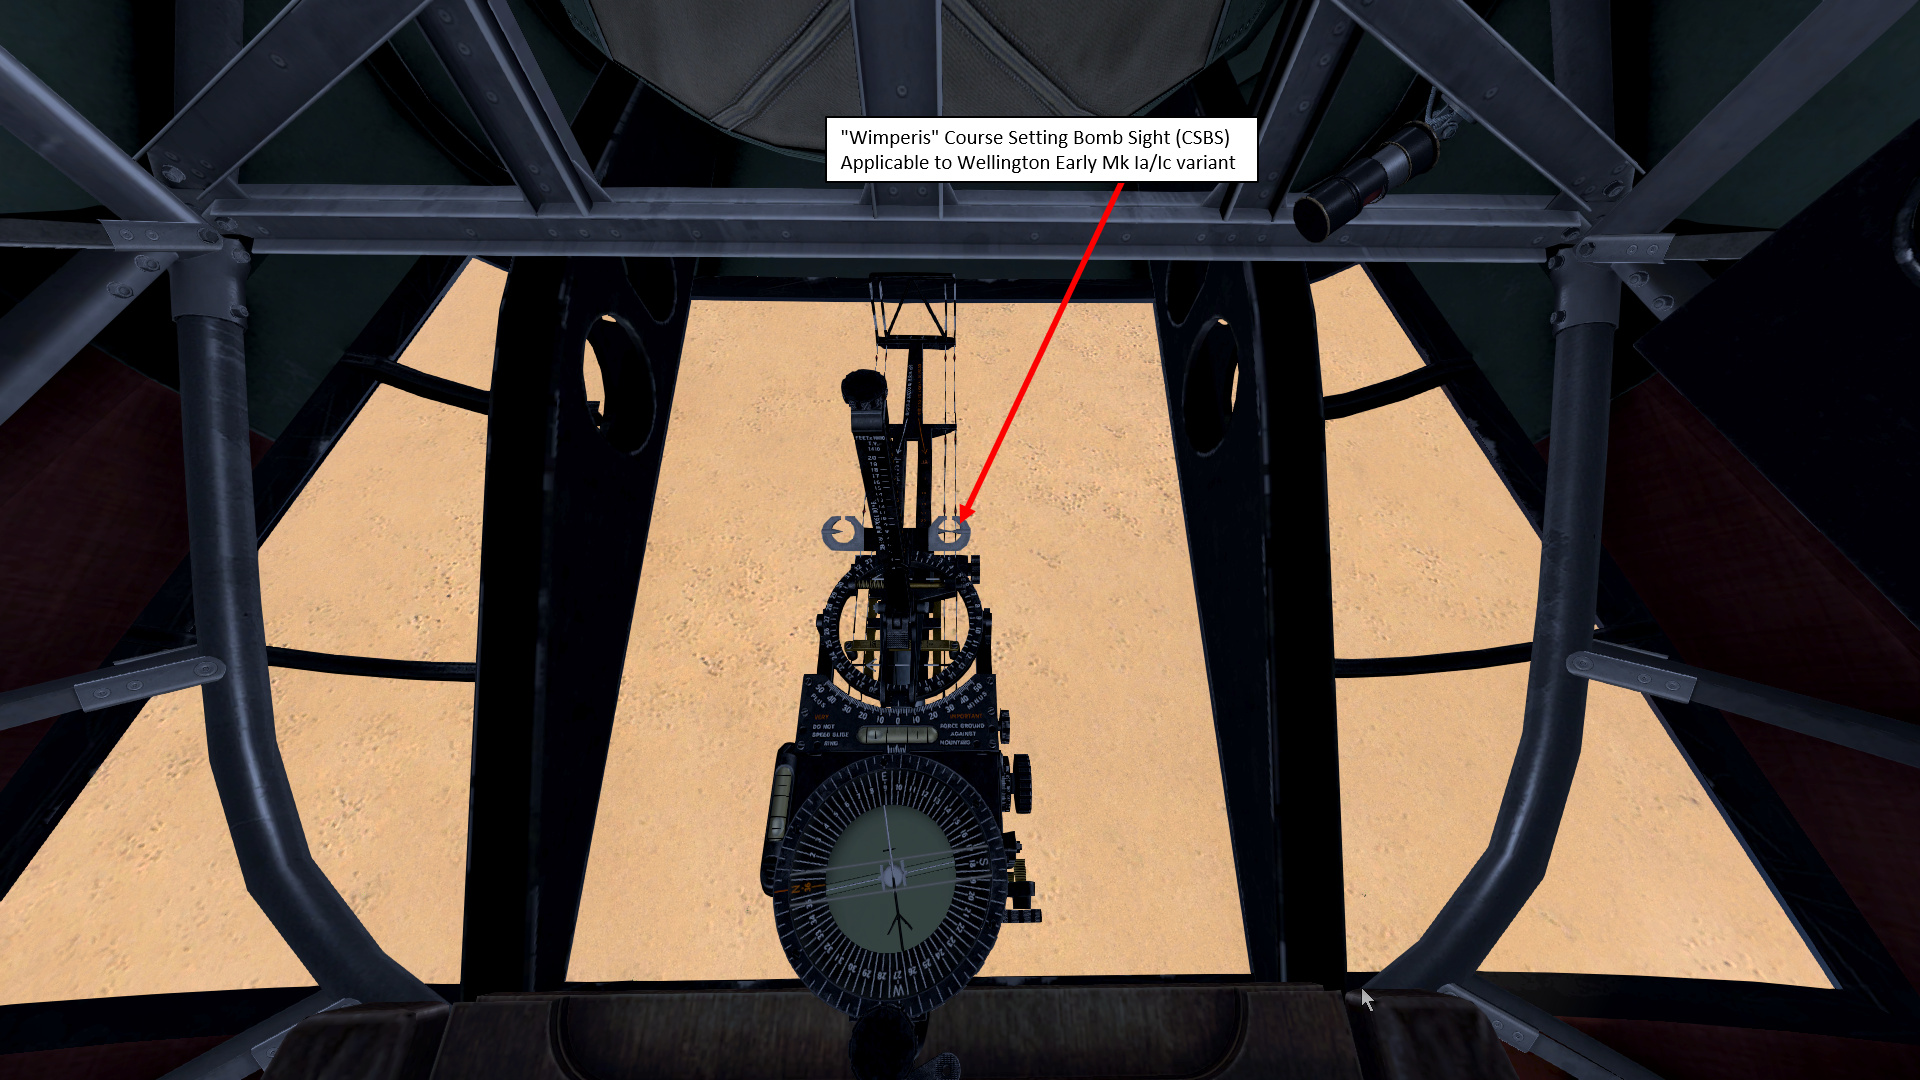
[caption id=“” align=“aligncenter” width=“690”]
Bomber aimer control panel (early Mk I).[/caption]
However, the late Mk I variant has the “Mark XIV bomb sight”, which was also known as the “Blackett Sight”. The Mk. XIV was essentially an automated version of the Course Setting sight, using a mechanical computer to update the sights in real-time as conditions changed. The Mk. XIV required only 10 seconds of straight flight before the drop and automatically accounted for shallow climbs and dives. More importantly, the Mk. XIV sighting unit was much smaller than the Course Setting sight, which allowed it to contain a gyro stabilization platform. This kept the sight pointed at the target even as the bomber manoeuvred, dramatically increasing its accuracy and ease of sighting. The Mk. XIV was theoretically less accurate than the contemporary Norden bombsight. However, it was smaller, easier to use, faster-acting, and better suited to night bombing. In practice, it demonstrated accuracy roughly equal to the Norden’s. It equipped the majority of the RAF bomber fleet during the second half of the war, especially the mighty Lancaster.
[caption id=“” align=“aligncenter” width=“690”]
“Blackett" Mk. XIV Bomb Sight (Mk I Late).[/caption]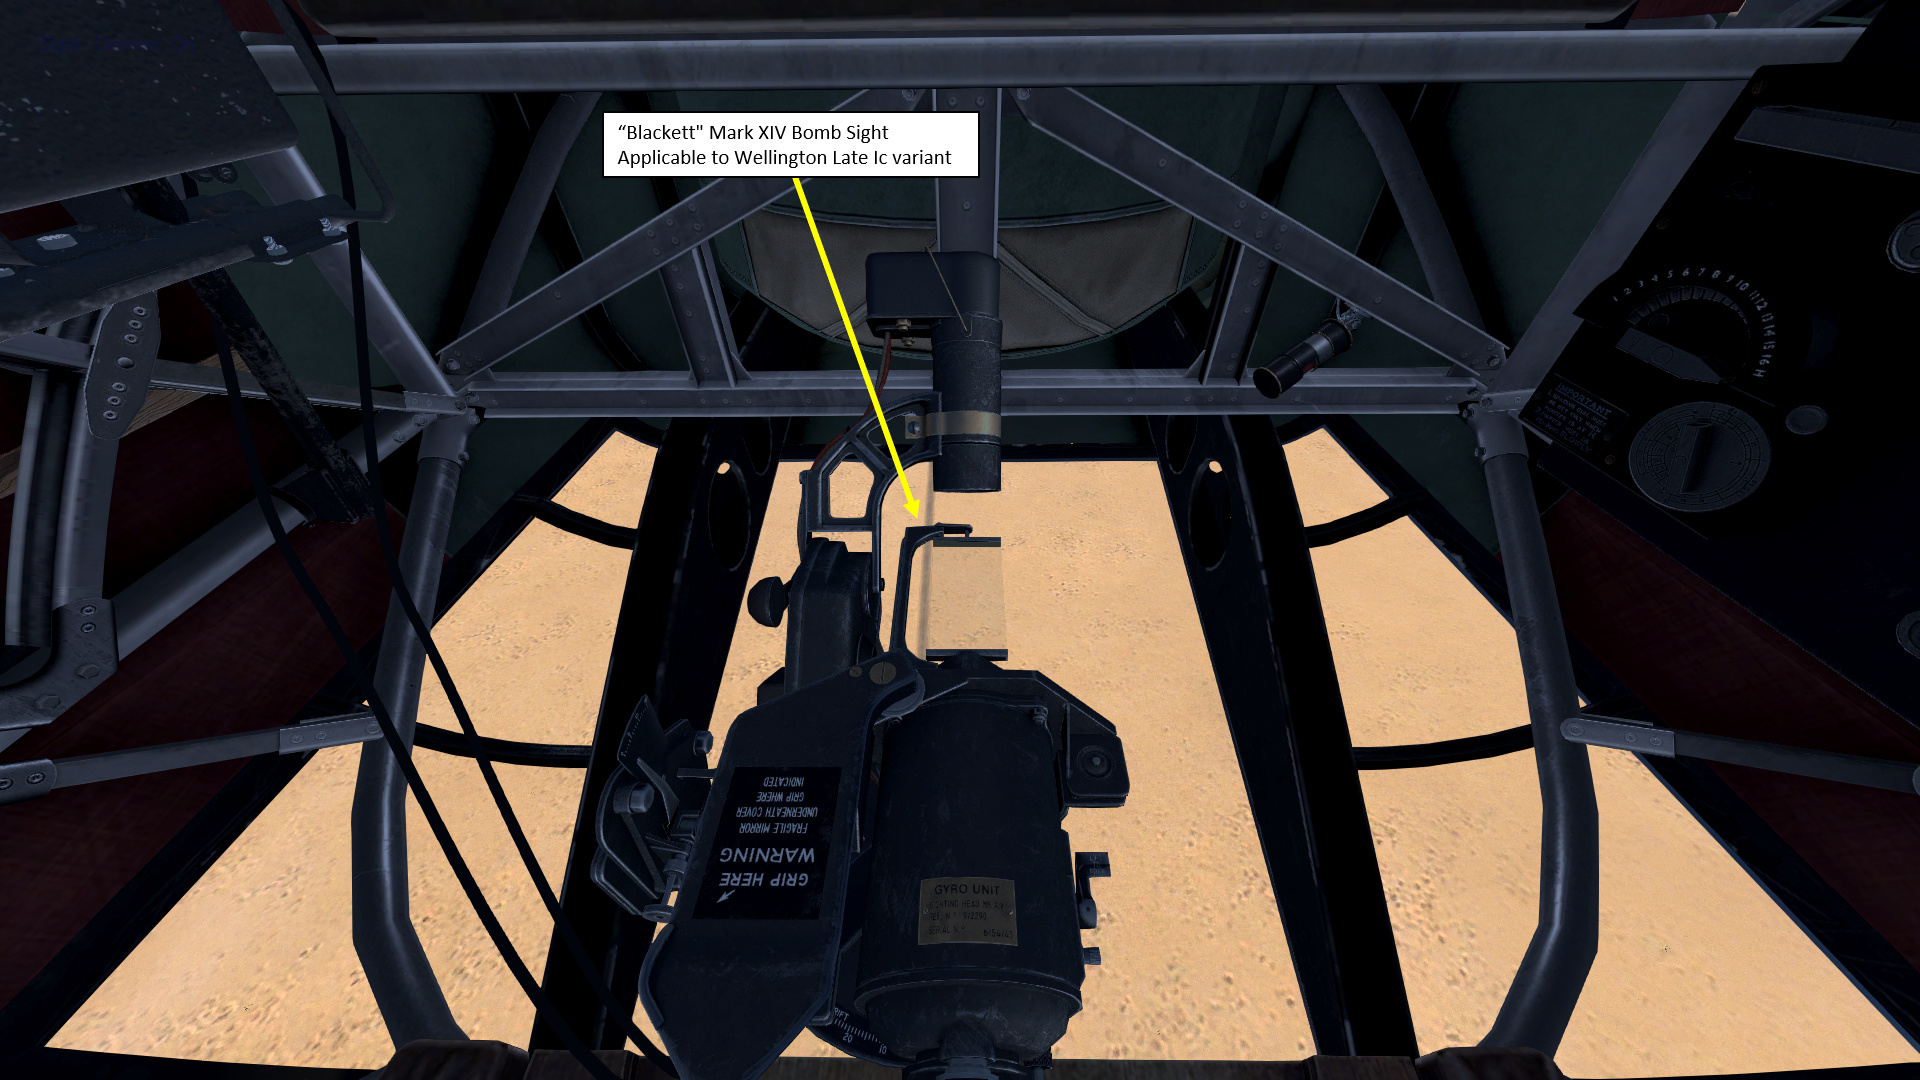
[caption id=“” align=“aligncenter” width=“690”]
Bomb aimer control panel (Mk I Late).[/caption]
The Mk XIV’s Computor is also usable, which is very cool. The wind speed and direction are set on the blue dials, the bomb’s terminal velocity and the target altitude on the green dials.
[caption id=“” align=“aligncenter” width=“690”]
The “Blackett" Mk. XIV Bomb Sight Computor Panel (Mk I Late).[/caption]
The Wellington is one of these planes I cannot stop talking about since it was so versatile and so interesting in various aspects of its design. You could go low and fast or use altitude to your advantage (these two-stage superchargers come in very handy during the climb). The geodesic airframe structure can absorb a remarkable amount of punishment. However, it is certainly not imprevious to cannons or the hellfire unleashed by patrolling battleships of destroyers.
[caption id=“” align=“aligncenter” width=“690”]
The geodesic airframe structure is quite visible once the aircraft gets shot at.[/caption]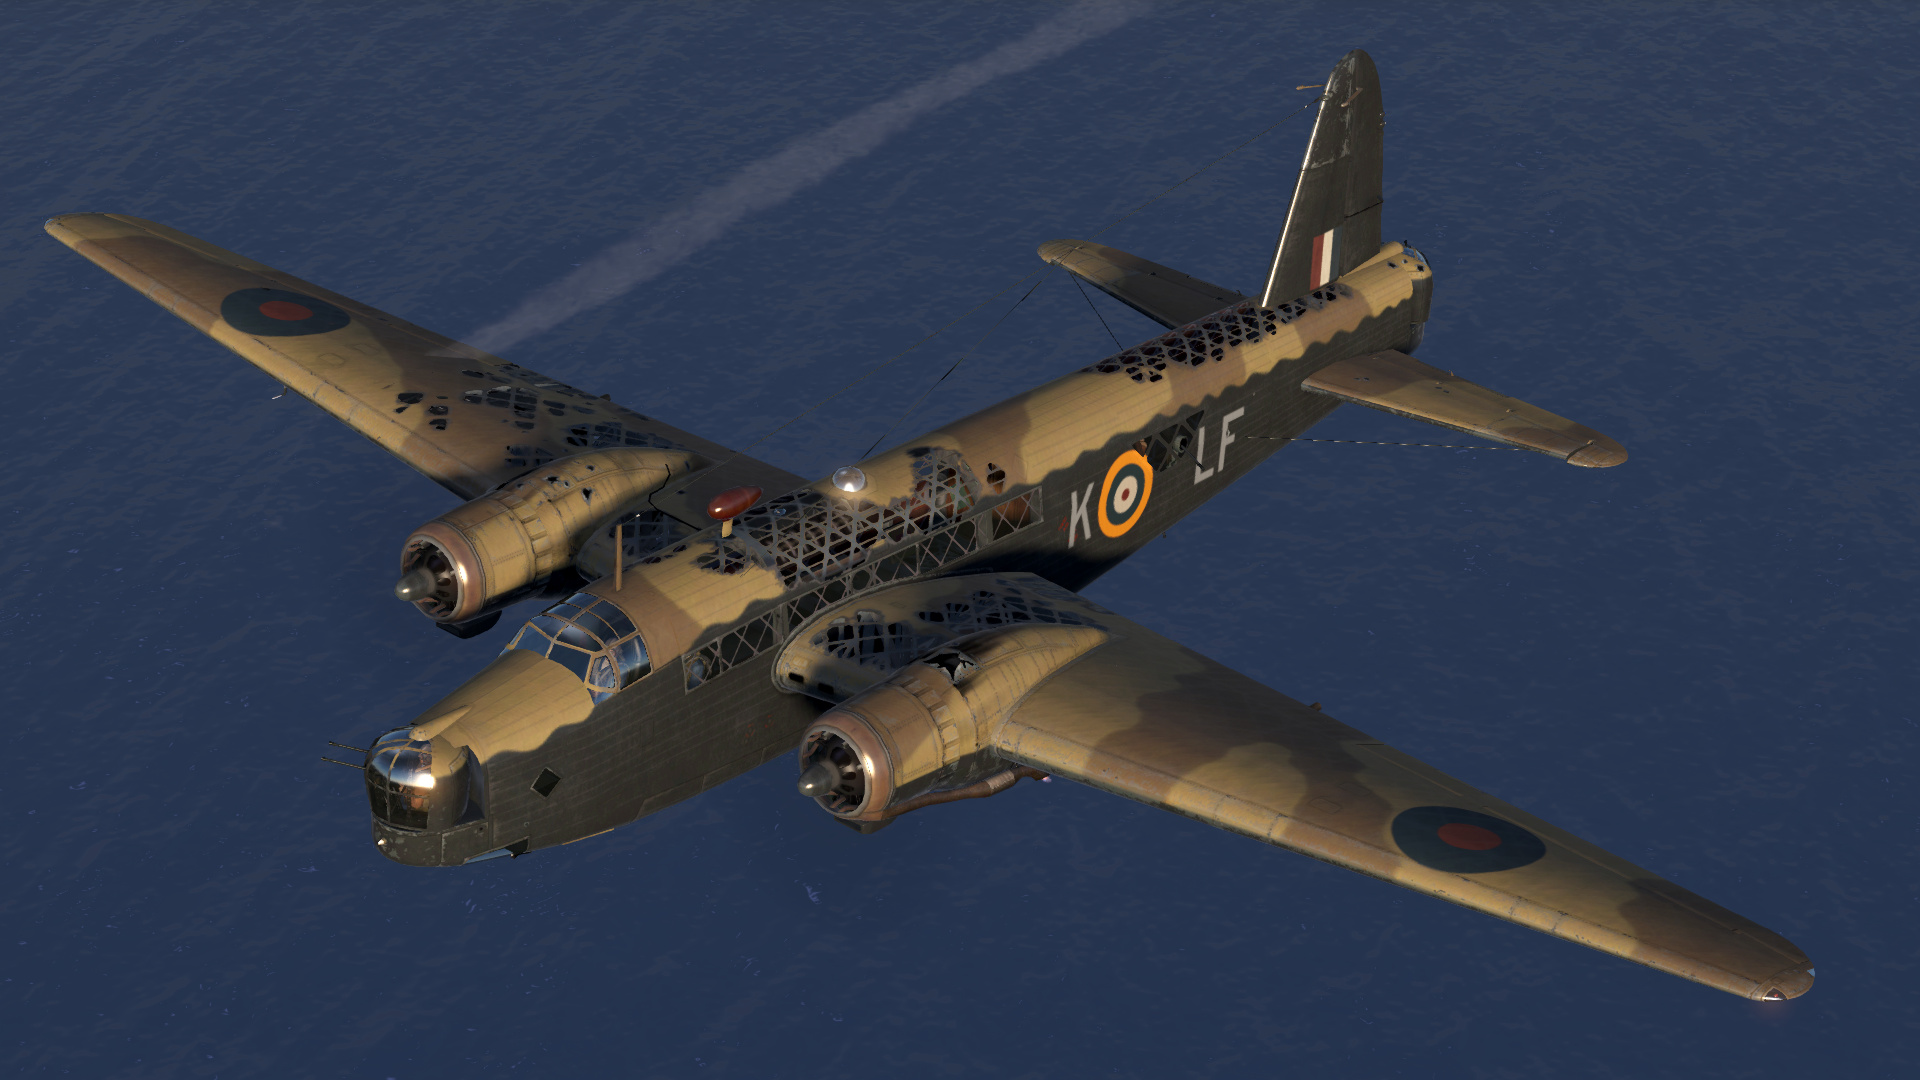
A Torpedo variant of the Wellington is also available, and I appreciate the fact that Team Fusion went to great lengths to make it accurate. It’s not just a Mk Ic that drops torpedoes; the front turret is removed, the bomb aimer station is stripped and parts of the lower fuselage section are removed to make room for two torpedos in the ventral bomb bay. Torpedo attacks are tons of fun against lightly defended convoys, but they are a horrifying and often deadly experience against battleships or destroyers since their armament can shoot entire squadrons out of the sky. Attacking a naval convoy requires numbers and good planning, and the sense of achievement when sinking a battleship is one of the most exhilarating experiences I’ve had in Desert Wings.
[caption id=“” align=“aligncenter” width=“690”]
Wellington torpedo bomber.[/caption]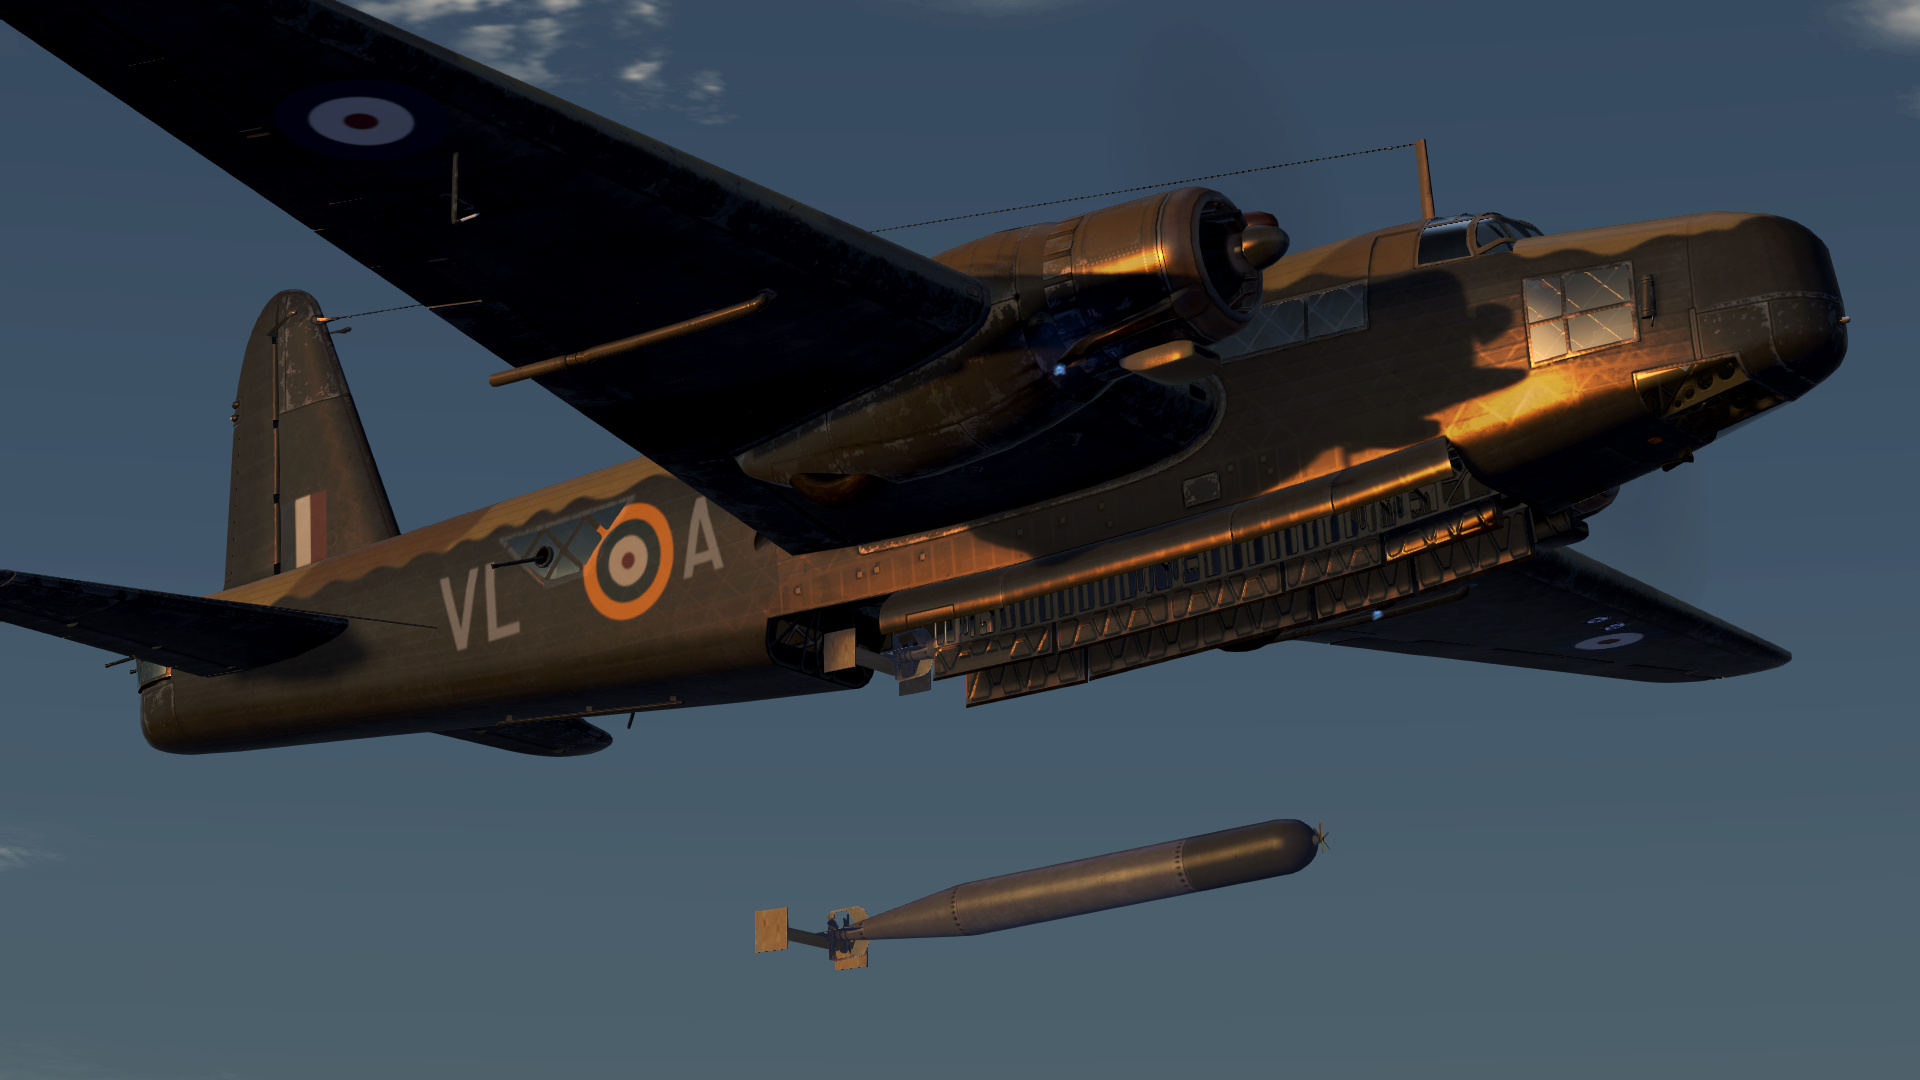
[caption id=“” align=“aligncenter” width=“690”]
A successful convoy attack.[/caption]
The “Blue Wellingtons” campaign features the RAF No. 37 Squadron during Operation Compass. Historically, the majority of Wellington missions were night attacks… but the campaign consists of six re-created day missions. Your base of operation is Bir el Malla North and your targets are varied enough to keep you on your toes. An interesting challenge for sure.
[caption id=“” align=“aligncenter” width=“690”]
Wellington campaign.[/caption]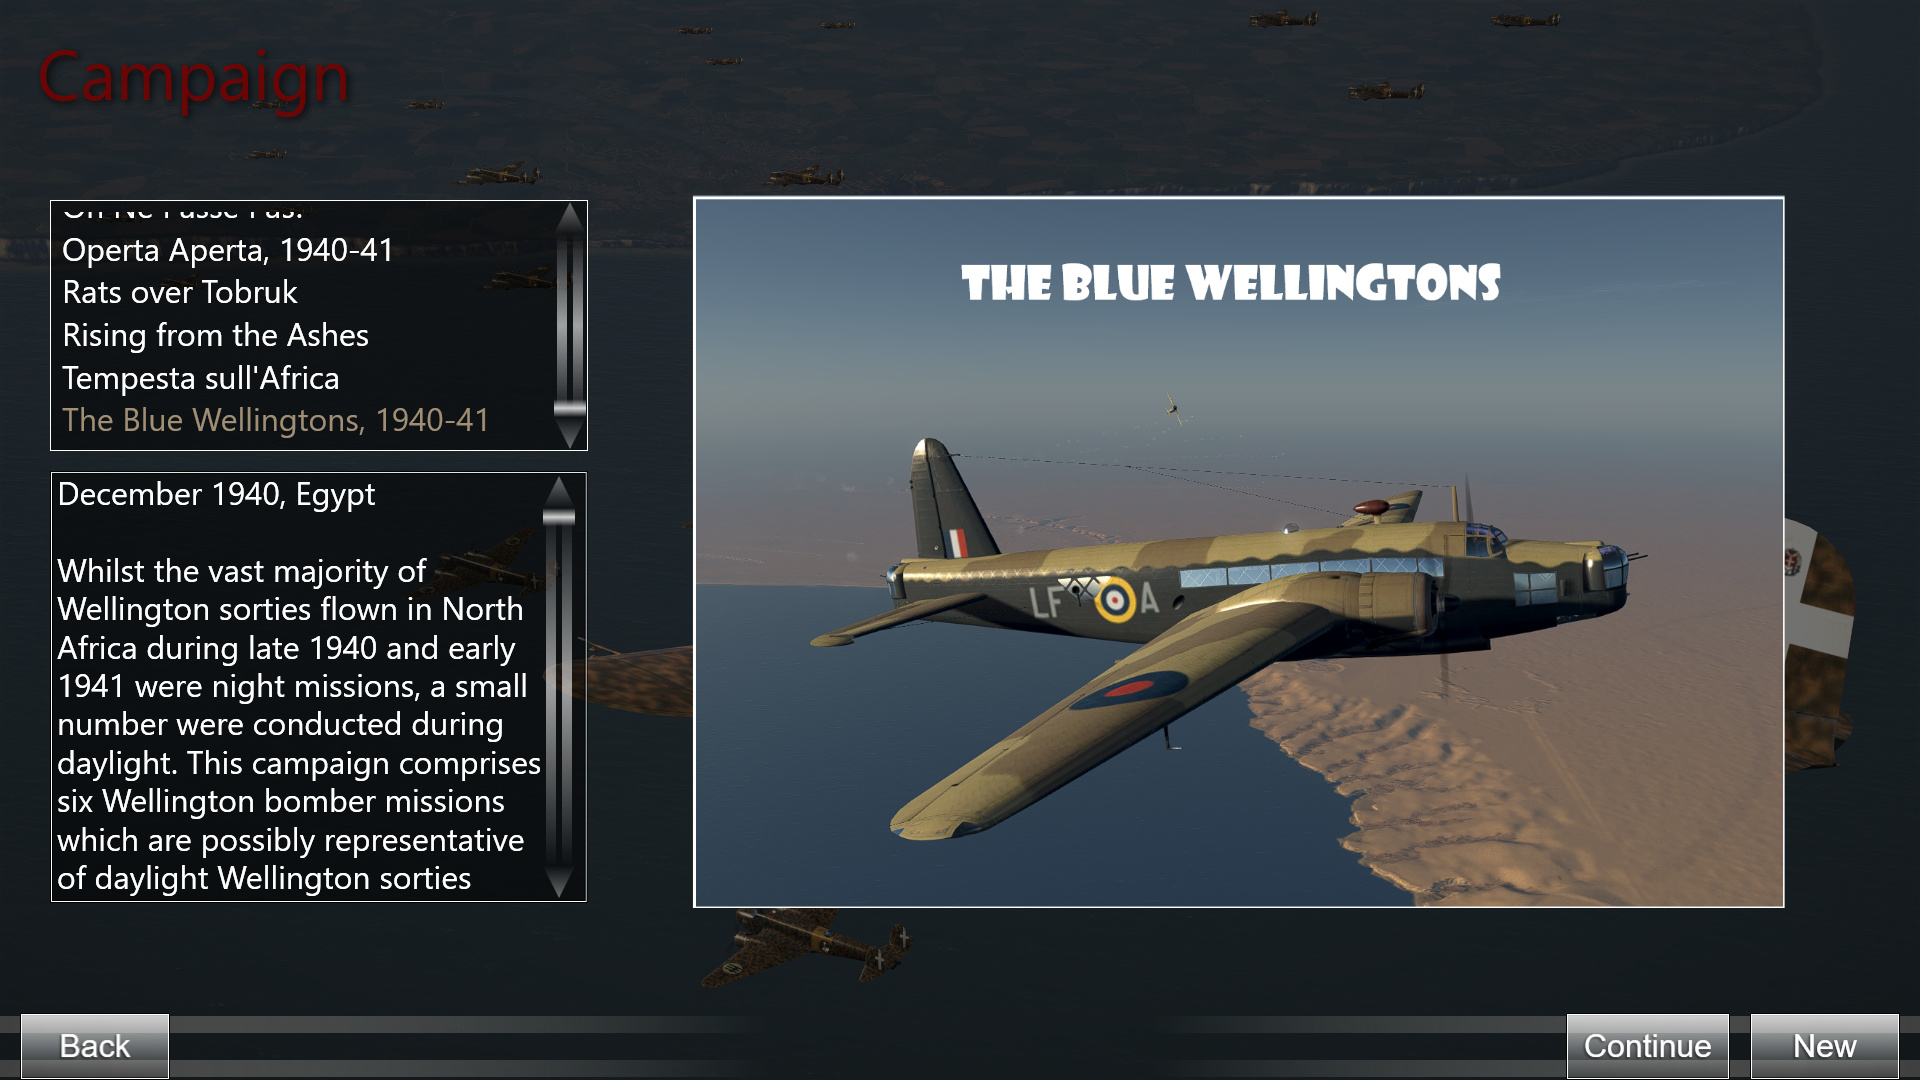
3.3 - Luftwaffe
Bf 108 Taifun
[caption id=“” align=“aligncenter” width=“690”]
A weathered Bf-108 Taifun over northern France.[/caption]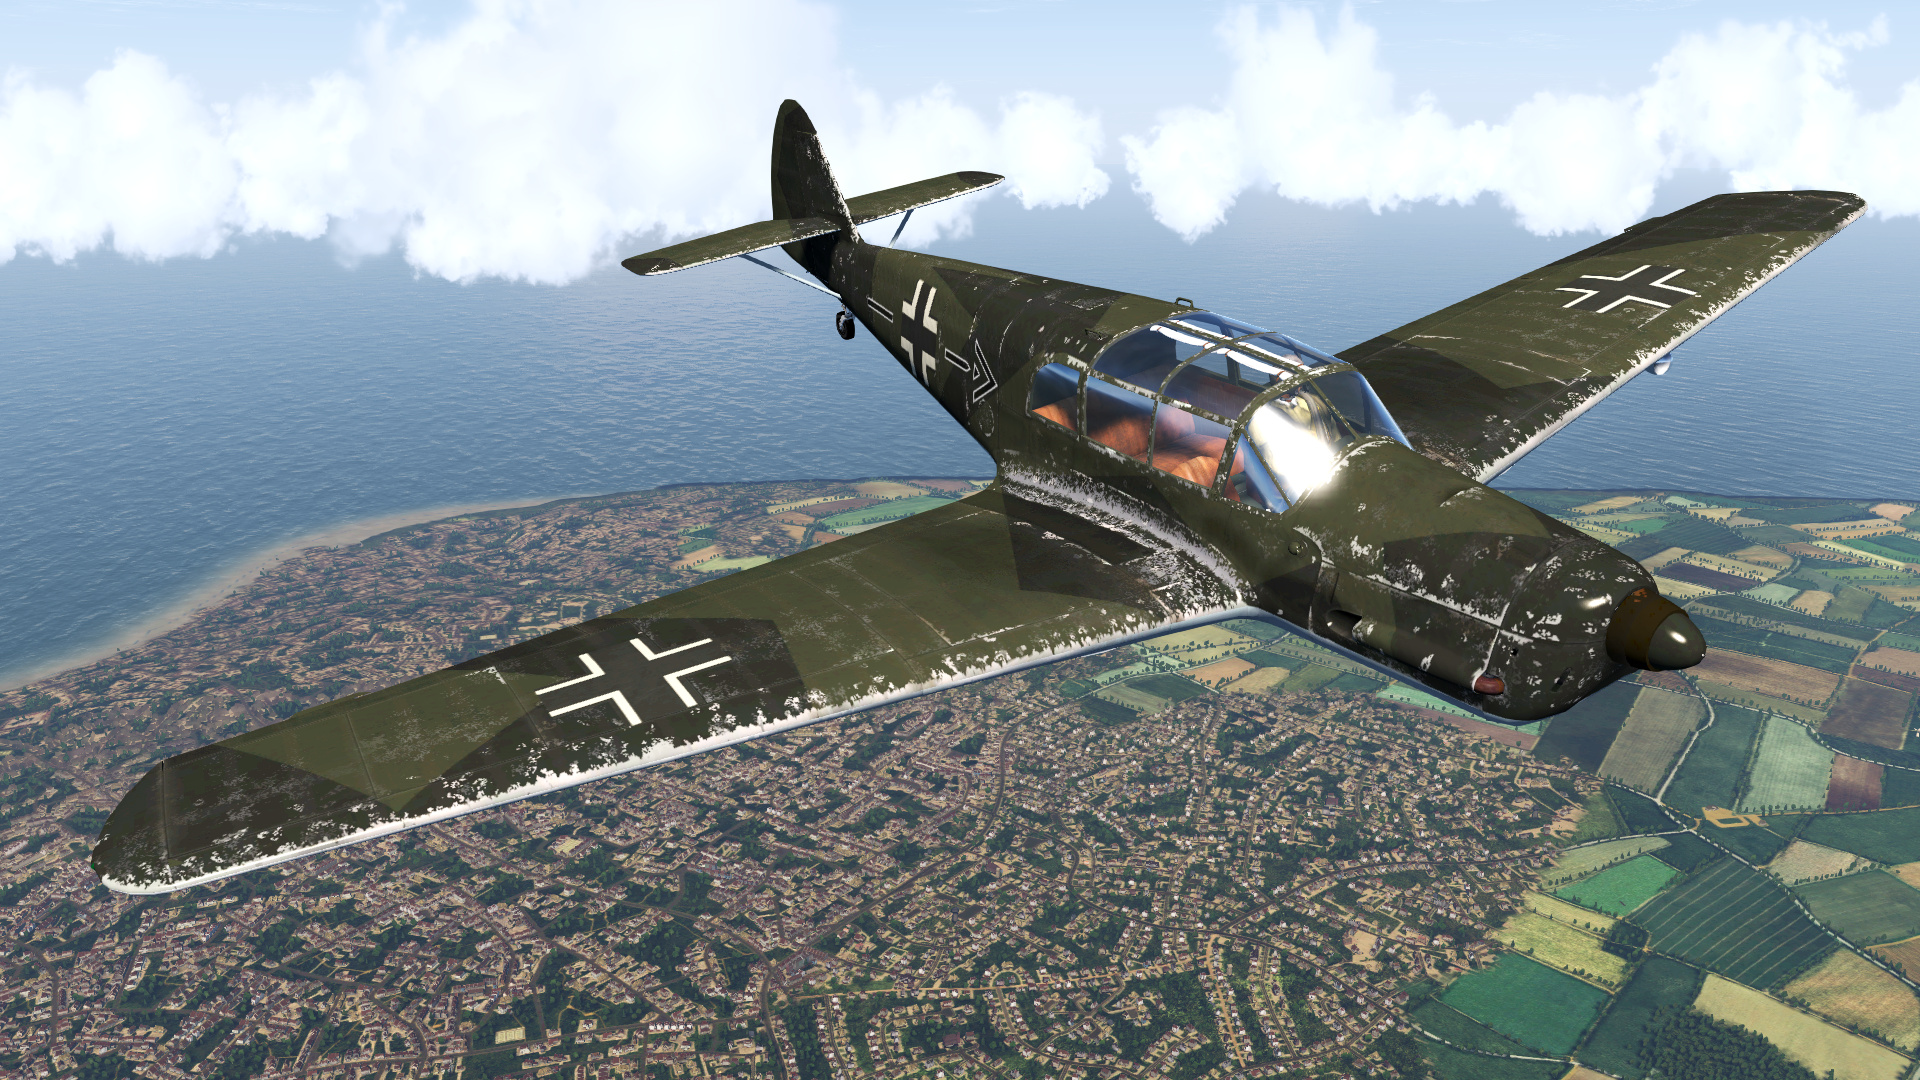
This is yet another one of Team Fusion’s new planes. The Messerschmitt Bf 108 Taifun was a German single-engine sport and touring aircraft. It was adopted into Luftwaffe service at the onset of the Second World War, where it was primarily used as a personnel transport and liaison aircraft. The aircraft involved in the Mechelen Incident was a Bf 108 (look it up, it’s a story that will blow your mind).
[caption id=“” align=“aligncenter” width=“690”]
Bf-108 from the pilot position.[/caption]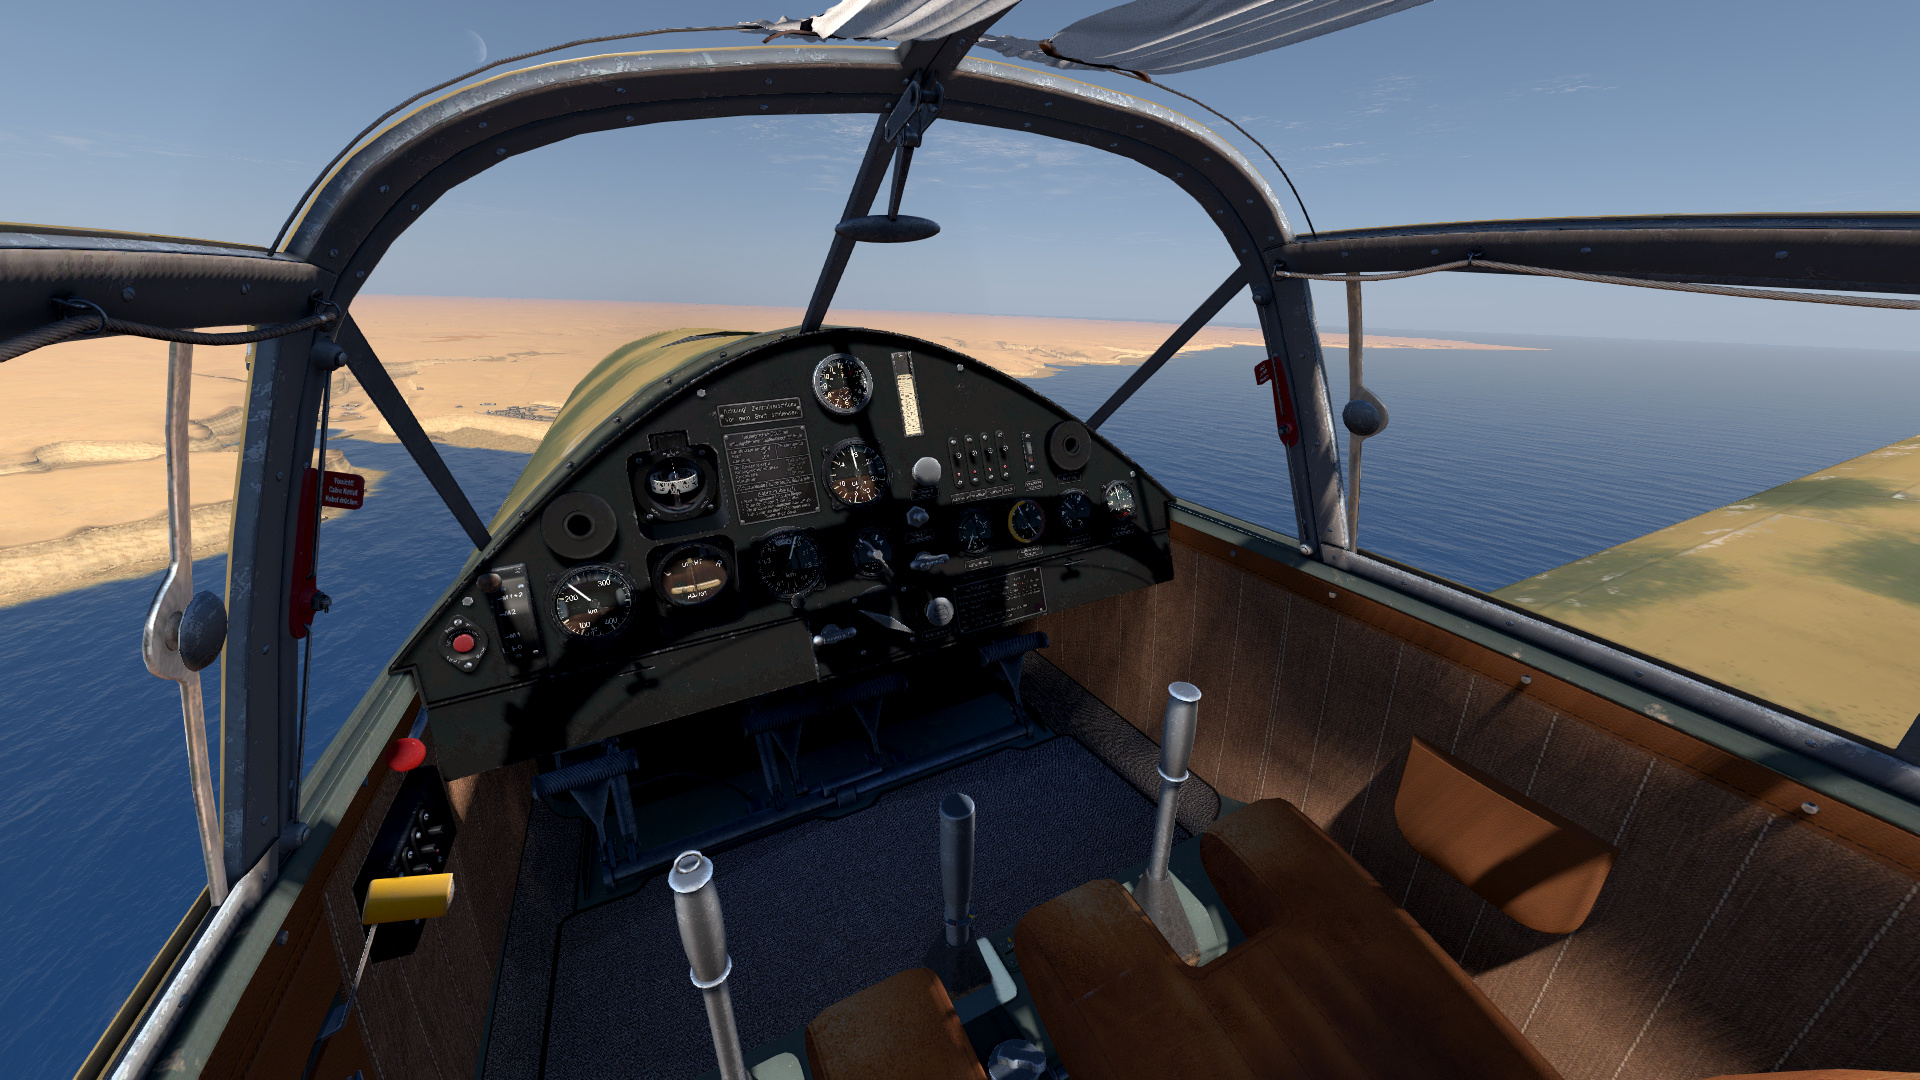
The cockpit is crisp and the aircraft itself is a nice little plane for relaxing joy rides.
[caption id=“” align=“aligncenter” width=“690”]
Bf-108 close up view of the instrument panel.[/caption]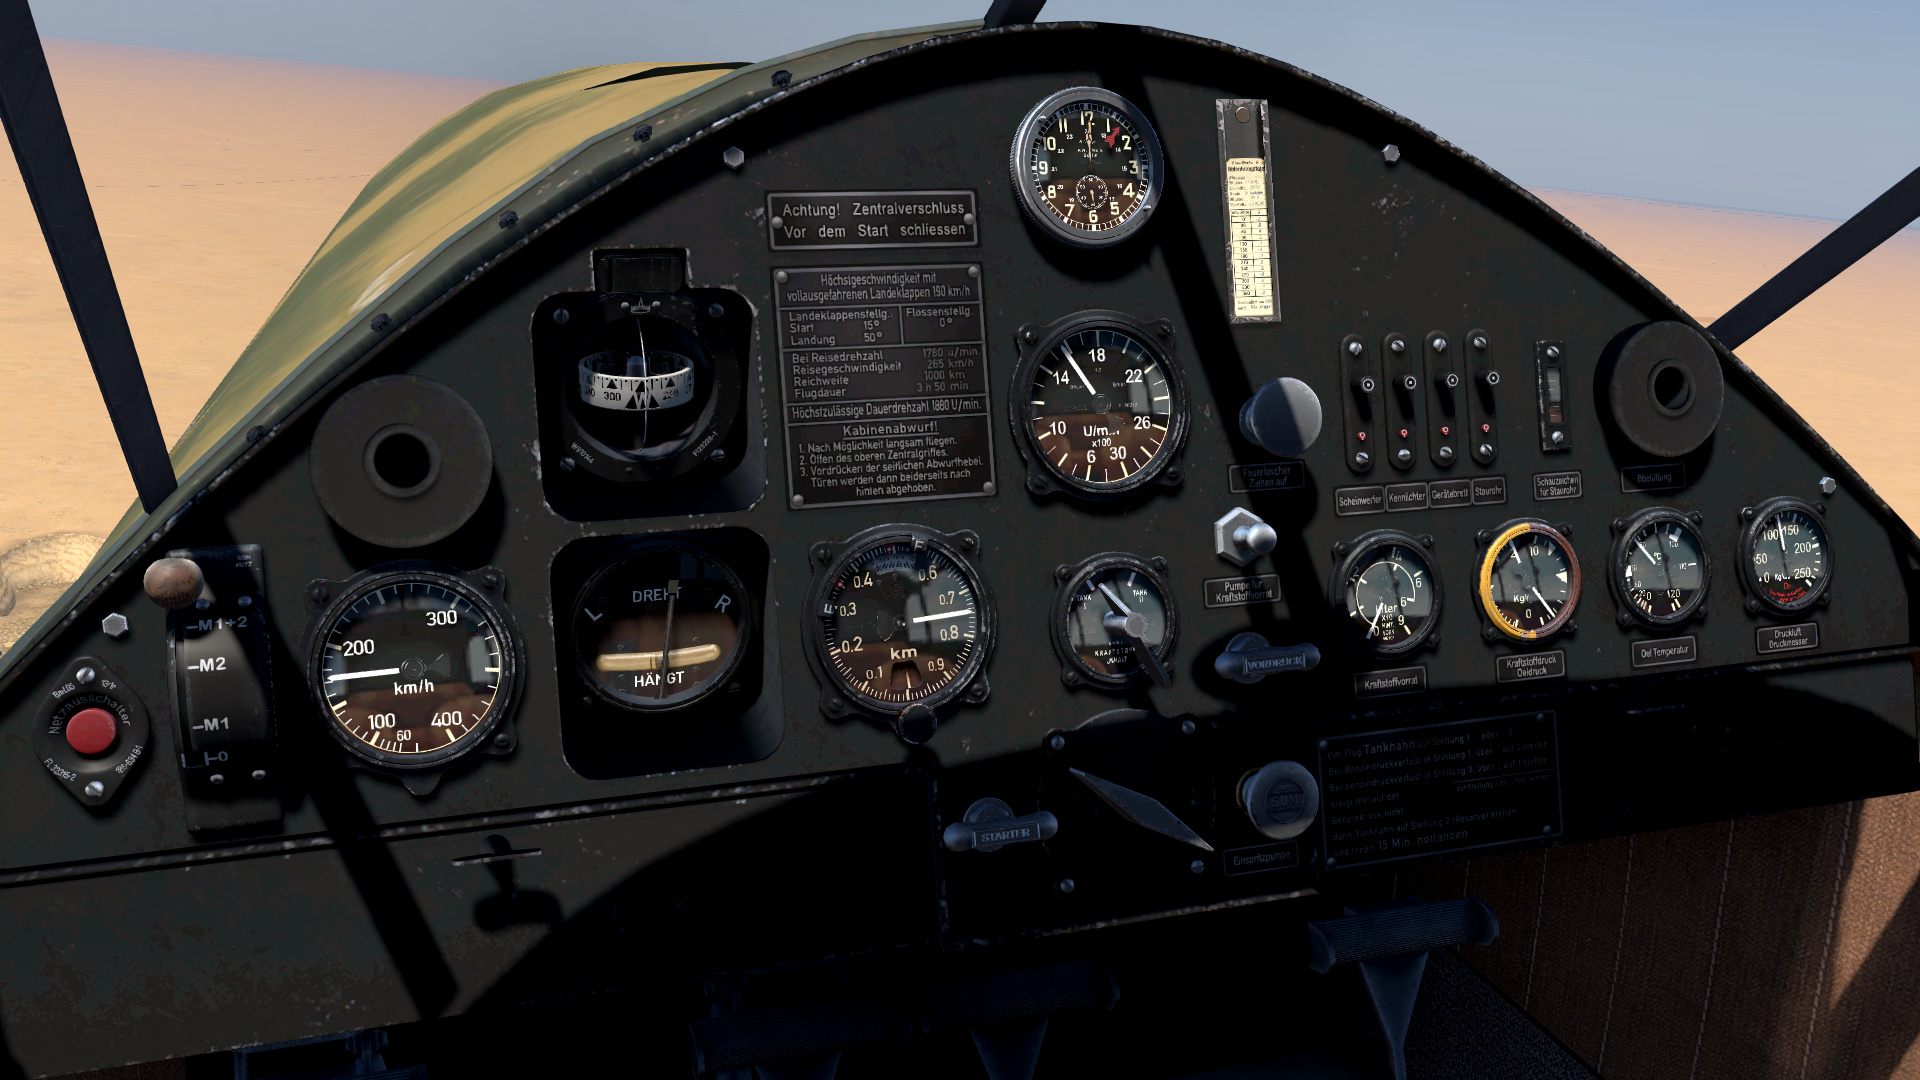
Bf 109 (E-7, F-1, F-2, F-4)
The Luftwaffe receives a few new toys in Desert Wings. The Bf109 “Emil” gets a new E-7 variant, which comes with two nose-mounted MG17 machineguns (7.92 mm) and two 20 mm cannons in the wings. The E-7 was the next major production variant after the Battle of Britain, entering service and seeing combat at the end of August 1940. One of the limitations of the earlier Bf 109E4s was their short range and limited endurance, as the design was originally conceived as a short-range interceptor. The E-7 rectified this problem as it was the first Bf 109 subtype to be able to carry a 300 Litres drop tank mounted on a centre-line rack under the fuselage. Fuel from the drop tank was pumped to the internal fuel tank via a large fuel line that ran up and along the inside starboard wall of the cockpit, with a clear sight glass located in the fuel line’s main span so the pilot could easily see the flow of fuel and know when the tank was empty. Alternatively, a bomb could be fitted and the E-7 could be used as a Jabo fighter-bomber.
[caption id=“” align=“aligncenter” width=“690”]
The Bf-109E-7.[/caption]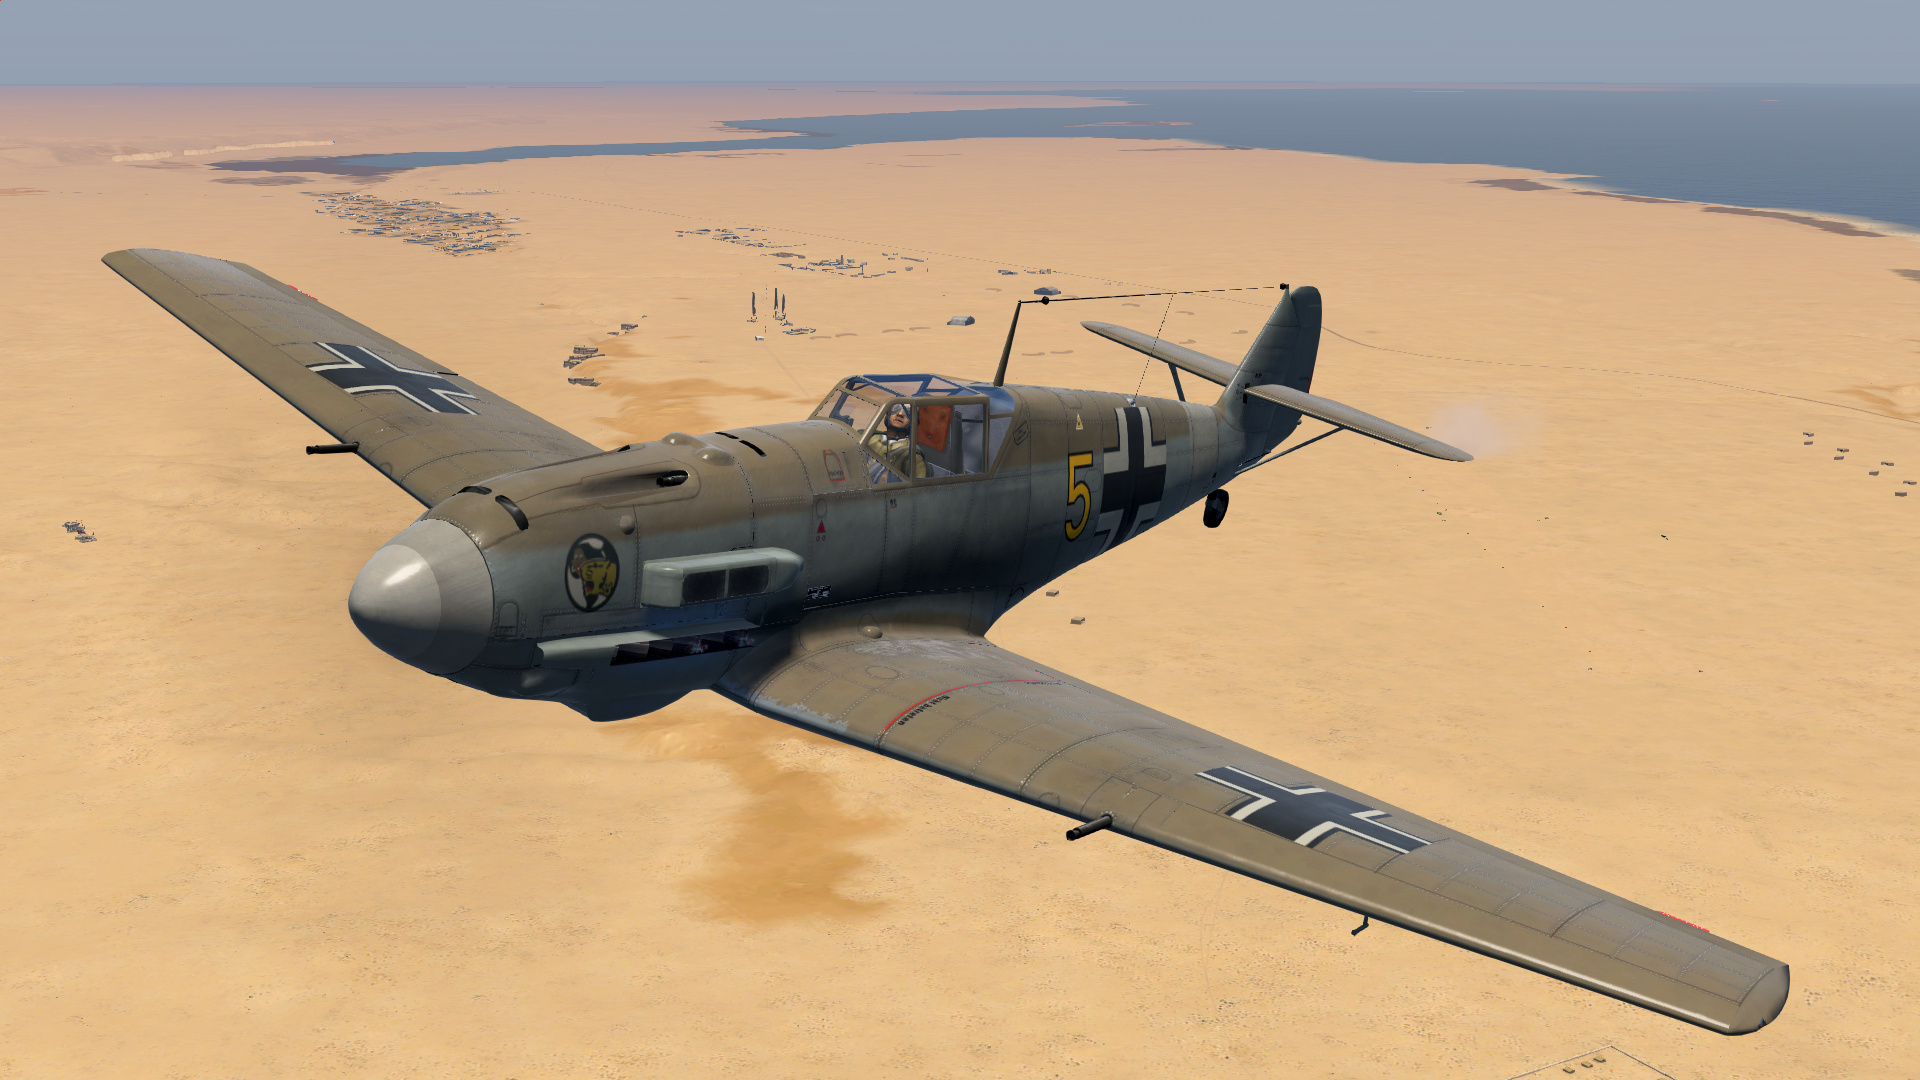
[caption id=“” align=“aligncenter” width=“690”]
Bf-109E-7 cockpit view.[/caption]
The Bf109 “Friedrich” also joins the fray.
[caption id=“” align=“aligncenter” width=“690”]
A pair of Bf-109F-4s.[/caption]
[caption id=“” align=“aligncenter” width=“690”]
Bf-109 ‘F’ model instrument panel.[/caption]
-
The F-1 is fitted with one 20 mm MG FF/M Motorkanone firing through the propeller hub, with 60 rounds. It also has two nose-mounted MG17 machineguns (7.92 mm).
-
The F-2 has one 15 mm MG FF/M Motorkanone firing through the propeller hub, with 200 rounds. It also has two nose-mounted MG17 machineguns (7.92 mm).
-
The F-4 has a better engine and is armed with the new 20 mm Mauser MG 151/20 Motorkanone with 200 rounds firing through the propeller hub. It also has two nose-mounted MG17 machineguns (7.92 mm). This is the version most German players will want to fly. Two 20 mm MG151/20 “Gondola” cannons can be installed under the wings, but it is optional since it generates significant drag.
-
A special high-altitude variant, the F-4/Z featuring GM-1 boost, was also built in the first quarter of 1942. The Göring Mischung 1 was a system for injecting nitrous oxide (laughing gas) into the engine.
[caption id=“” align=“aligncenter” width=“690”]
Bf-109 ‘F’ model with “Gondola” cannons mounted under the wings.[/caption]
Tropicalized versions include a sand filter field modifications. These filters generate additional drag and will decrease aircraft performance when compared to the non-trop counterpart.
[caption id=“” align=“aligncenter” width=“690”]
The Friedrich hunting P-40s for breakfast.[/caption]
The “Eagles over Tobruk” campaign covers the operations of the famous III./JG 27 “Afrika”. You will fly E-7 and F-4 109s after the failed British counter-offensive of Operation Brevity.
[caption id=“” align=“aligncenter” width=“690”]
A description of the Bf-109 campaign.[/caption]
Bf 110 (C-4, C-4B, C-4N, C-6, C-7)
The Messerschmitt Bf110 returns with a few new variants.
[caption id=“” align=“aligncenter” width=“690”]
Bf-110 tracking down a Wellington.[/caption]
The C-4 still has its deadly four nose-mounted MG17 machineguns (7.92 mm) and two 20 mm cannons in its wings. The C-4B variant is based on C-4, fitted with a pair of ETC 500 bomb racks and upgraded DB 601 Ba engines. The rear gunner provides rear protection with a 7.92 mm MG15 machinegun.
[caption id=“” align=“aligncenter” width=“690”]
Bf110 C-6 variant and its 30 mm MK101 cannon (insert joke about how size does not matter).[/caption]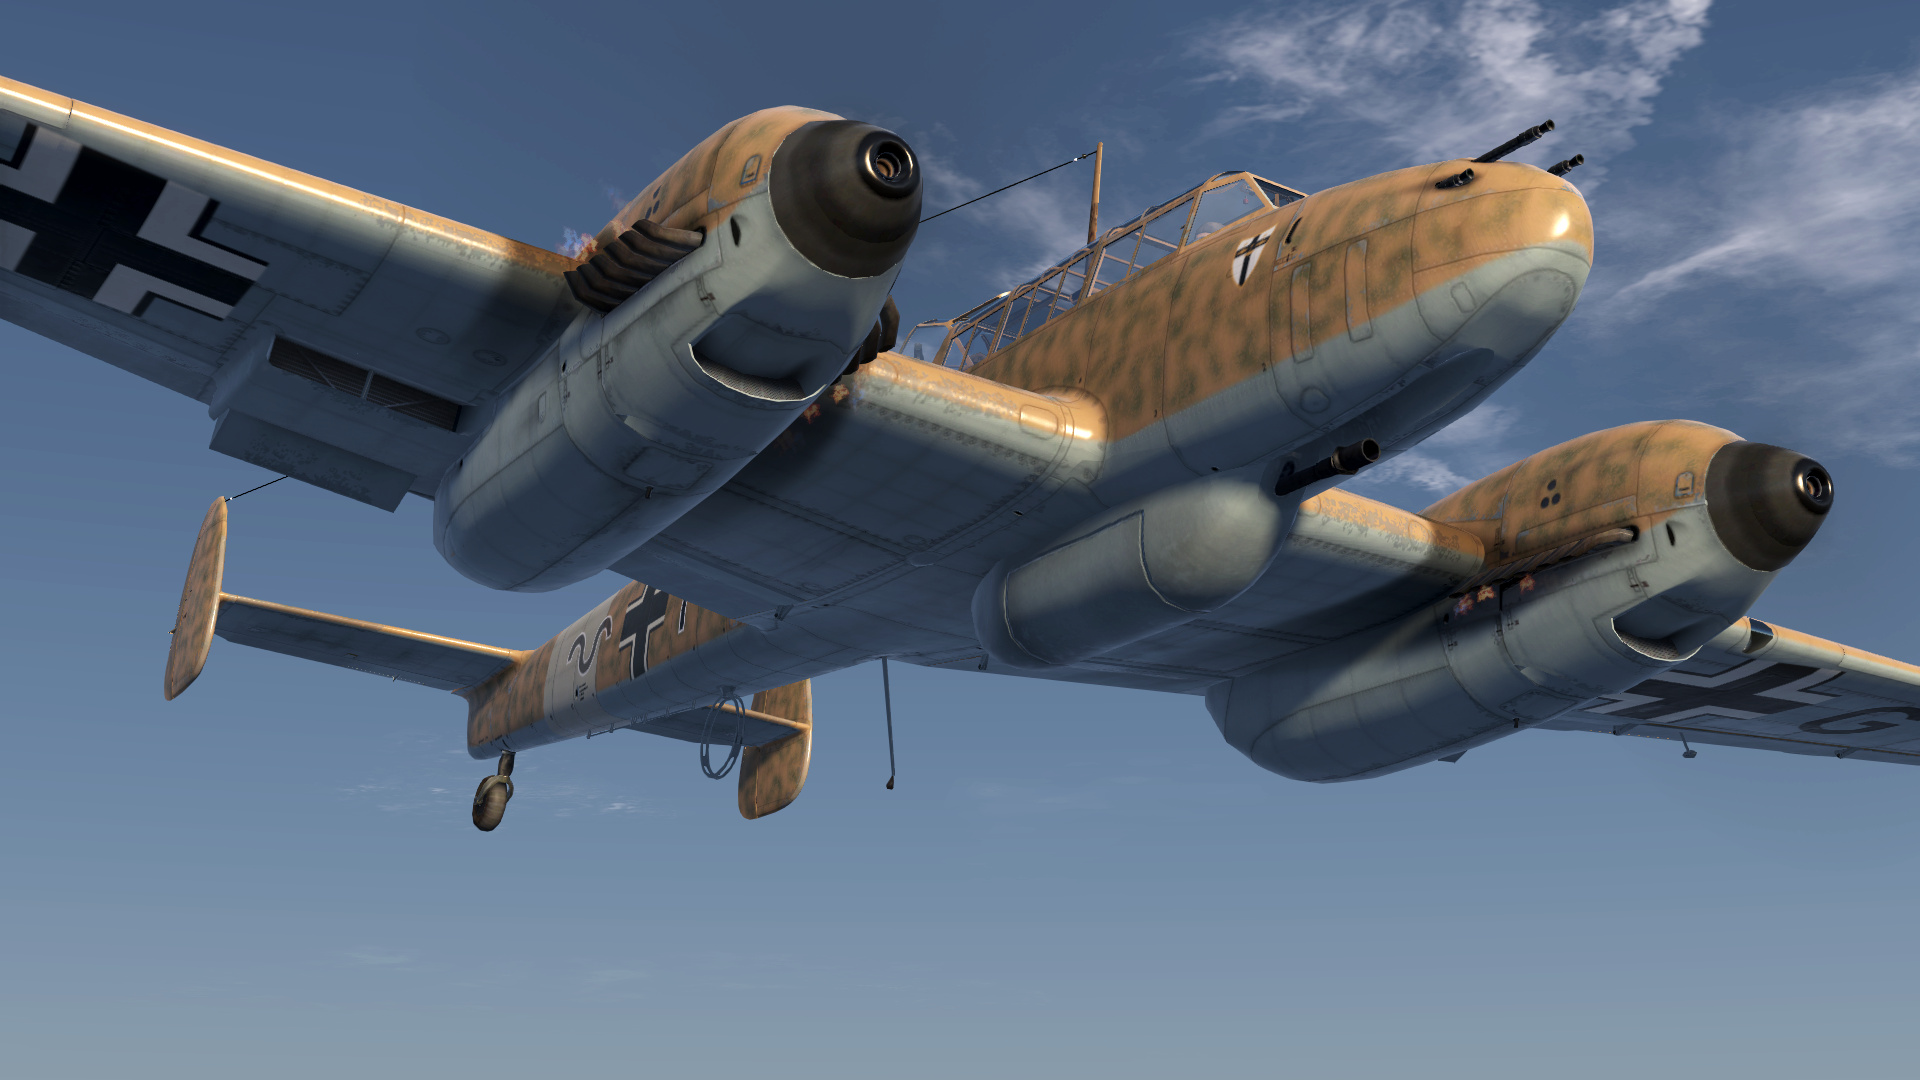
The C-6 variant is an experimental Zerstörer, replacing the wing cannons with a single 30 mm MK101 cannon installed in a mount under the fuselage. It is powered with DB 601P engines.
[caption id=“” align=“aligncenter” width=“690”]
A pair of Bf-110 C-7.[/caption]
The C-7 variant is based on the armament setup of the C-4/B. It has two centreline bomb racks capable of carrying two 250 or 500 kg bombs. It is powered with uprated DB 601P engines.
[caption id=“” align=“aligncenter” width=“690”]
A Bf-110 raid on Tobruk harbor.[/caption]
No matter which variant you choose, the Bf.110 is a great aircraft for ground strikes. It packs more than enough dakka to deal some serious damage to whatever comes in your gunsight.
Ju-88 (A-5, C-1, C-2, C-4)
The Junkers Ju-88 is probably the best German bomber available at that time. It is also my favorite German bomber, believe it or not. Fully loaded, the A-5 version can carry 18 SC50 bombs in the front ventral bay, 10 SC50 bombs in the rear ventral bay and two SC250 or SC500 bombs mounted on wing racks. All this ordnance is protected by a nose machinegun, two top rear machineguns, and a rear ventral machinegun.
[caption id=“” align=“aligncenter” width=“690”]
Ju-88 A-5 during a low level bombing run.[/caption]
The C versions of the Ju-88 are A versions converted into Zerstörer (heavy fighter-bomber). The bomb aiming station is stripped of most of its equipment (including the front bomb bay) and is replaced with three MG15 machineguns (7.92 mm).and a single 20 mm cannon.
[caption id=“” align=“aligncenter” width=“690”]
Ju-88 C version.[/caption]
[caption id=“” align=“aligncenter” width=“690”]
Ju-88 C-4 variant cockpit.[/caption]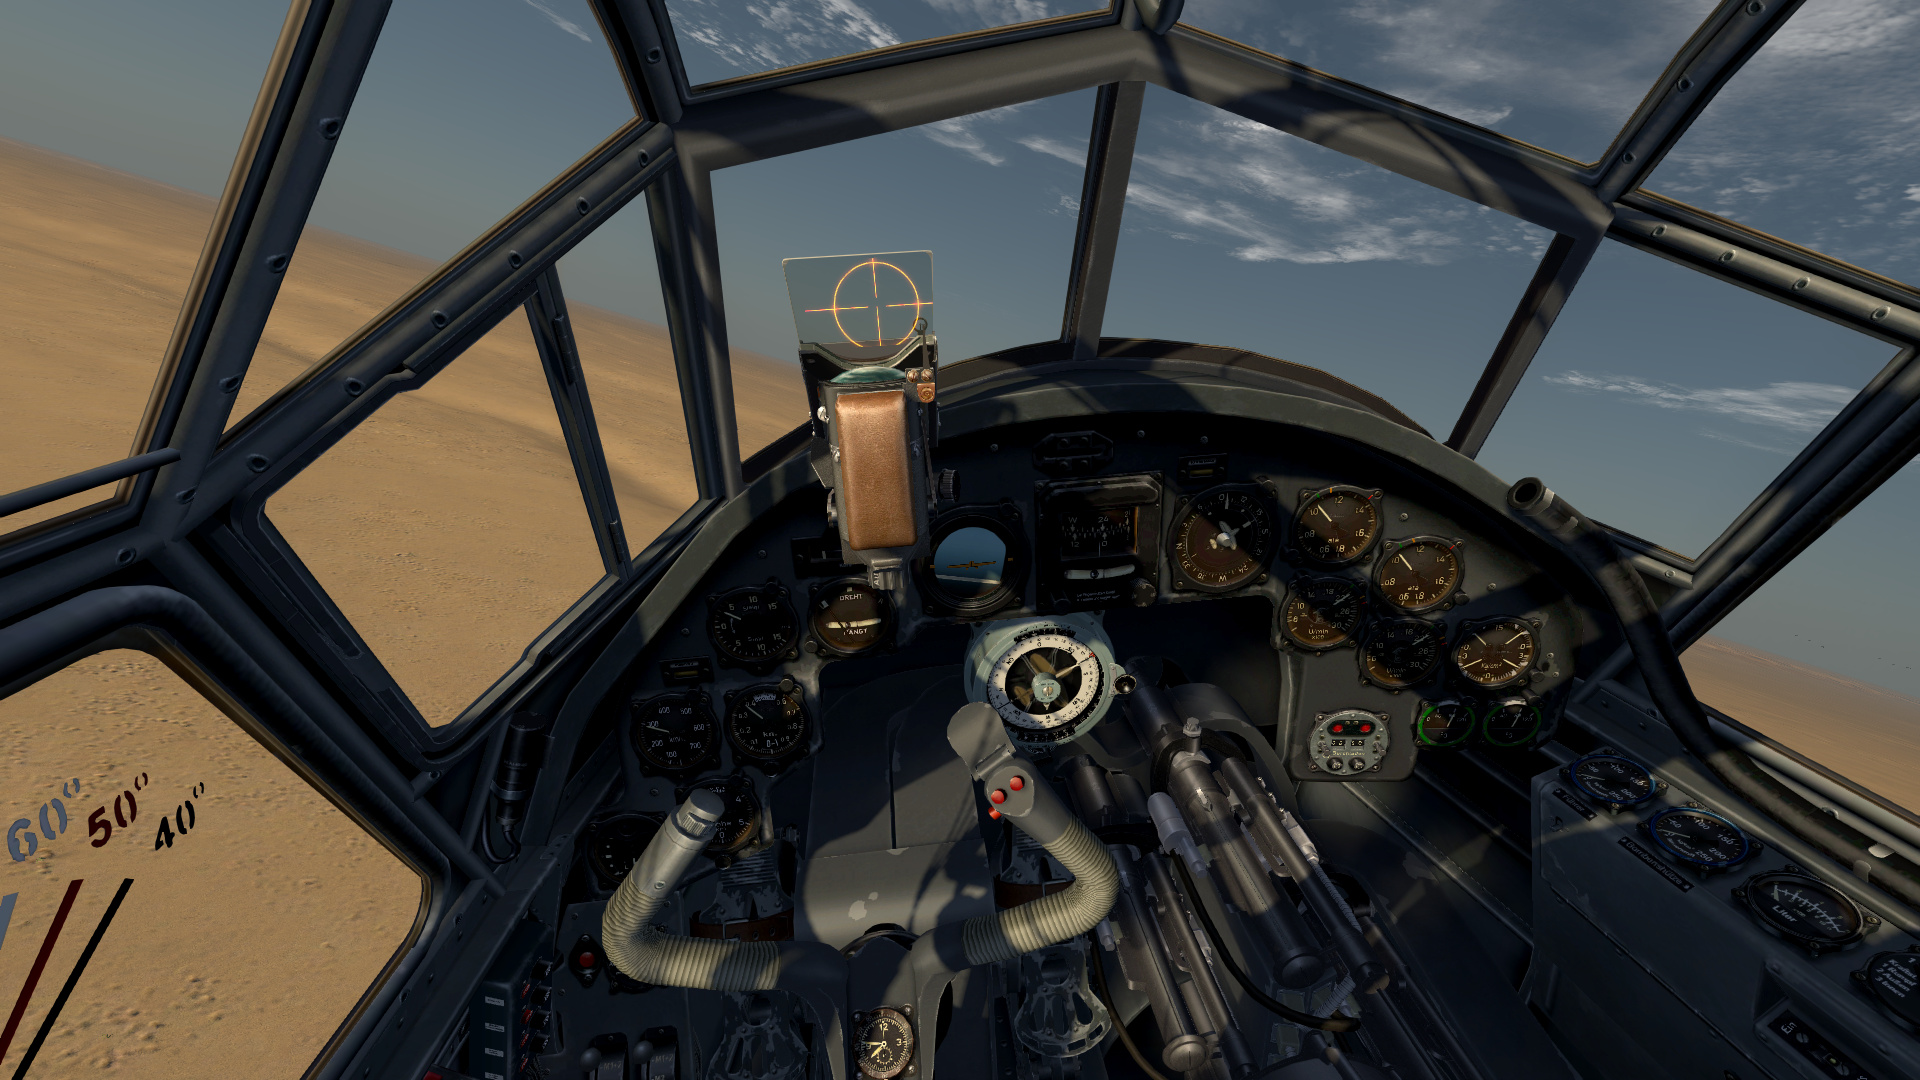
Observe the 20 mm cannon installed inside the cockpit. The cannon mechanism is even animated when firing the cannon.
[caption id=“” align=“aligncenter” width=“690”]
Witness the result of countless man-hours spent modelling the 20 mm cannon.[/caption]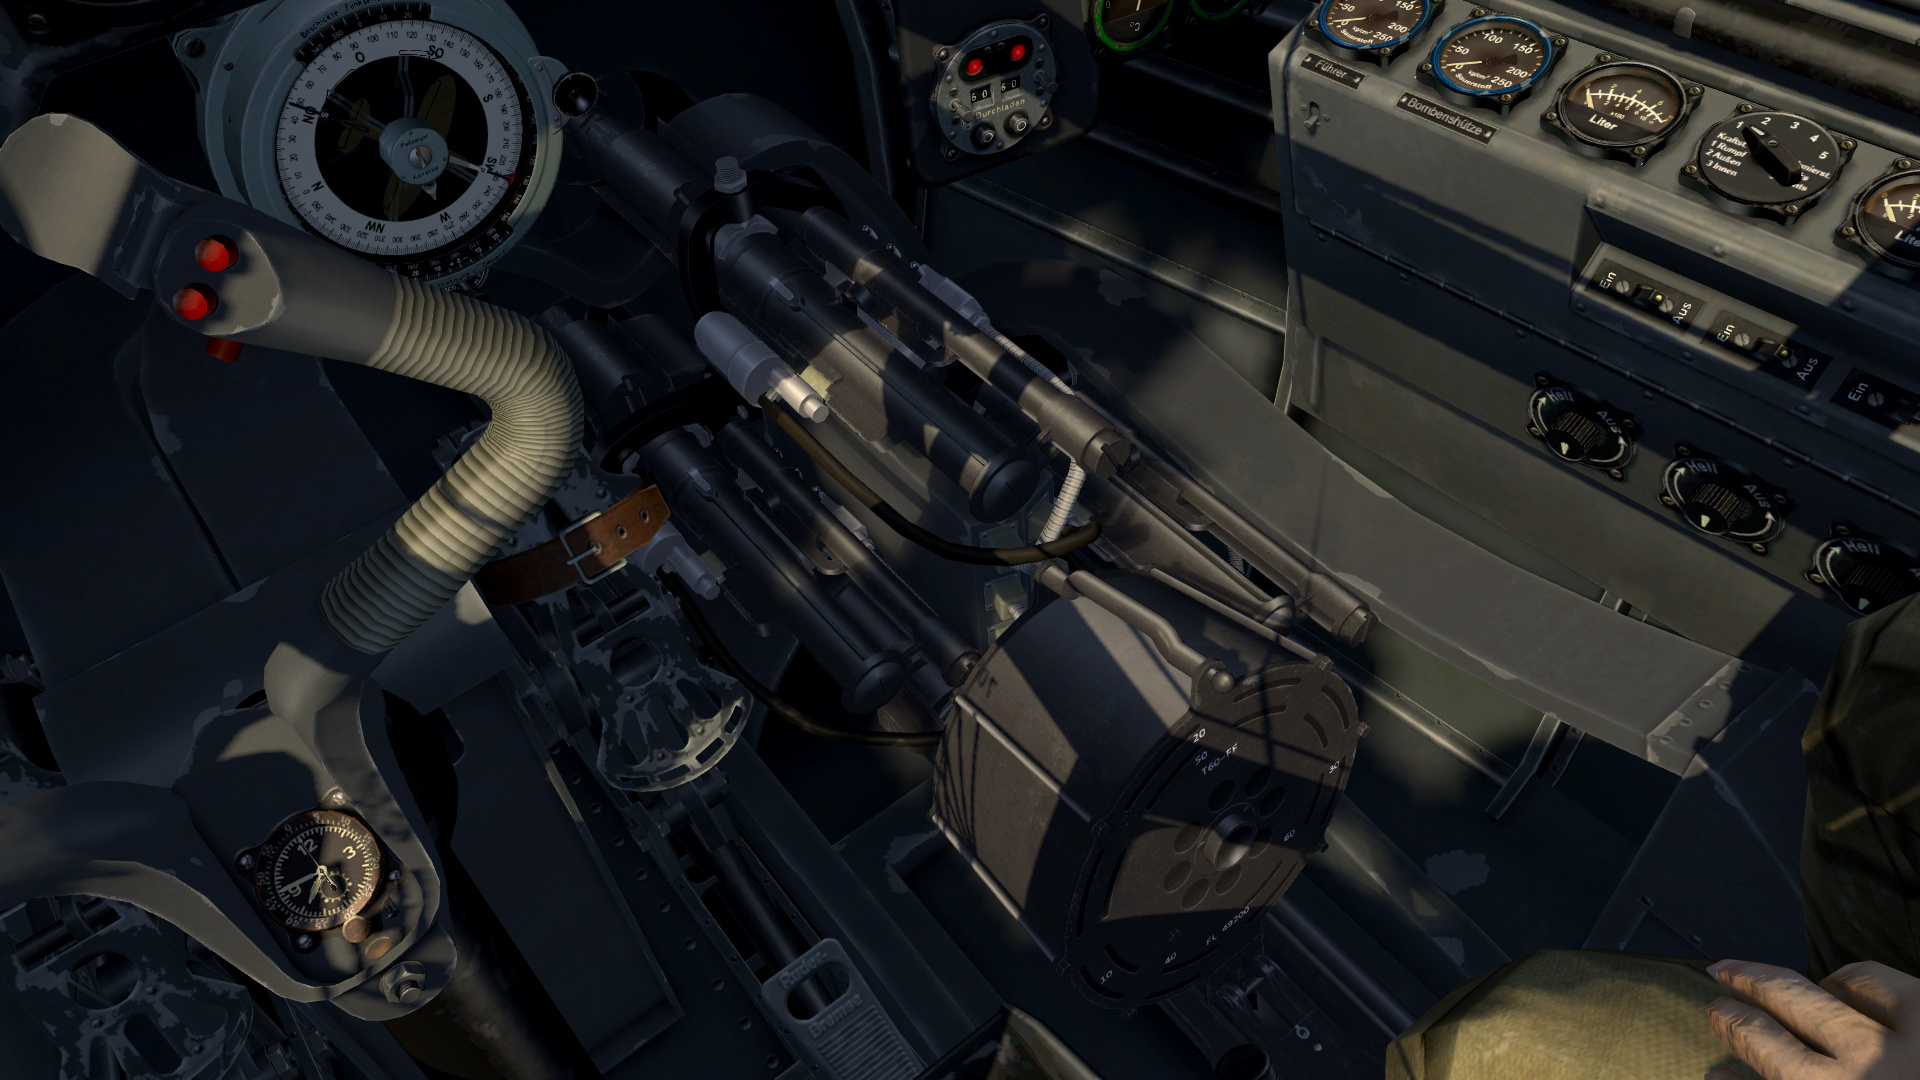
The early and late variants are included in typical Team Fusion fashion. Some versions have automatic propeller pitch control,while earlier versions have manual propeller pitch control. Both long and short wing versions are available.
[caption id=“” align=“aligncenter” width=“690”]
A chart detailing some of the differences in the Ju-88 variations.[/caption]
Ju-87 Stuka (B-2)
[caption id=“” align=“aligncenter” width=“690”]
The Stuka, bathing in the hot desert sun.[/caption]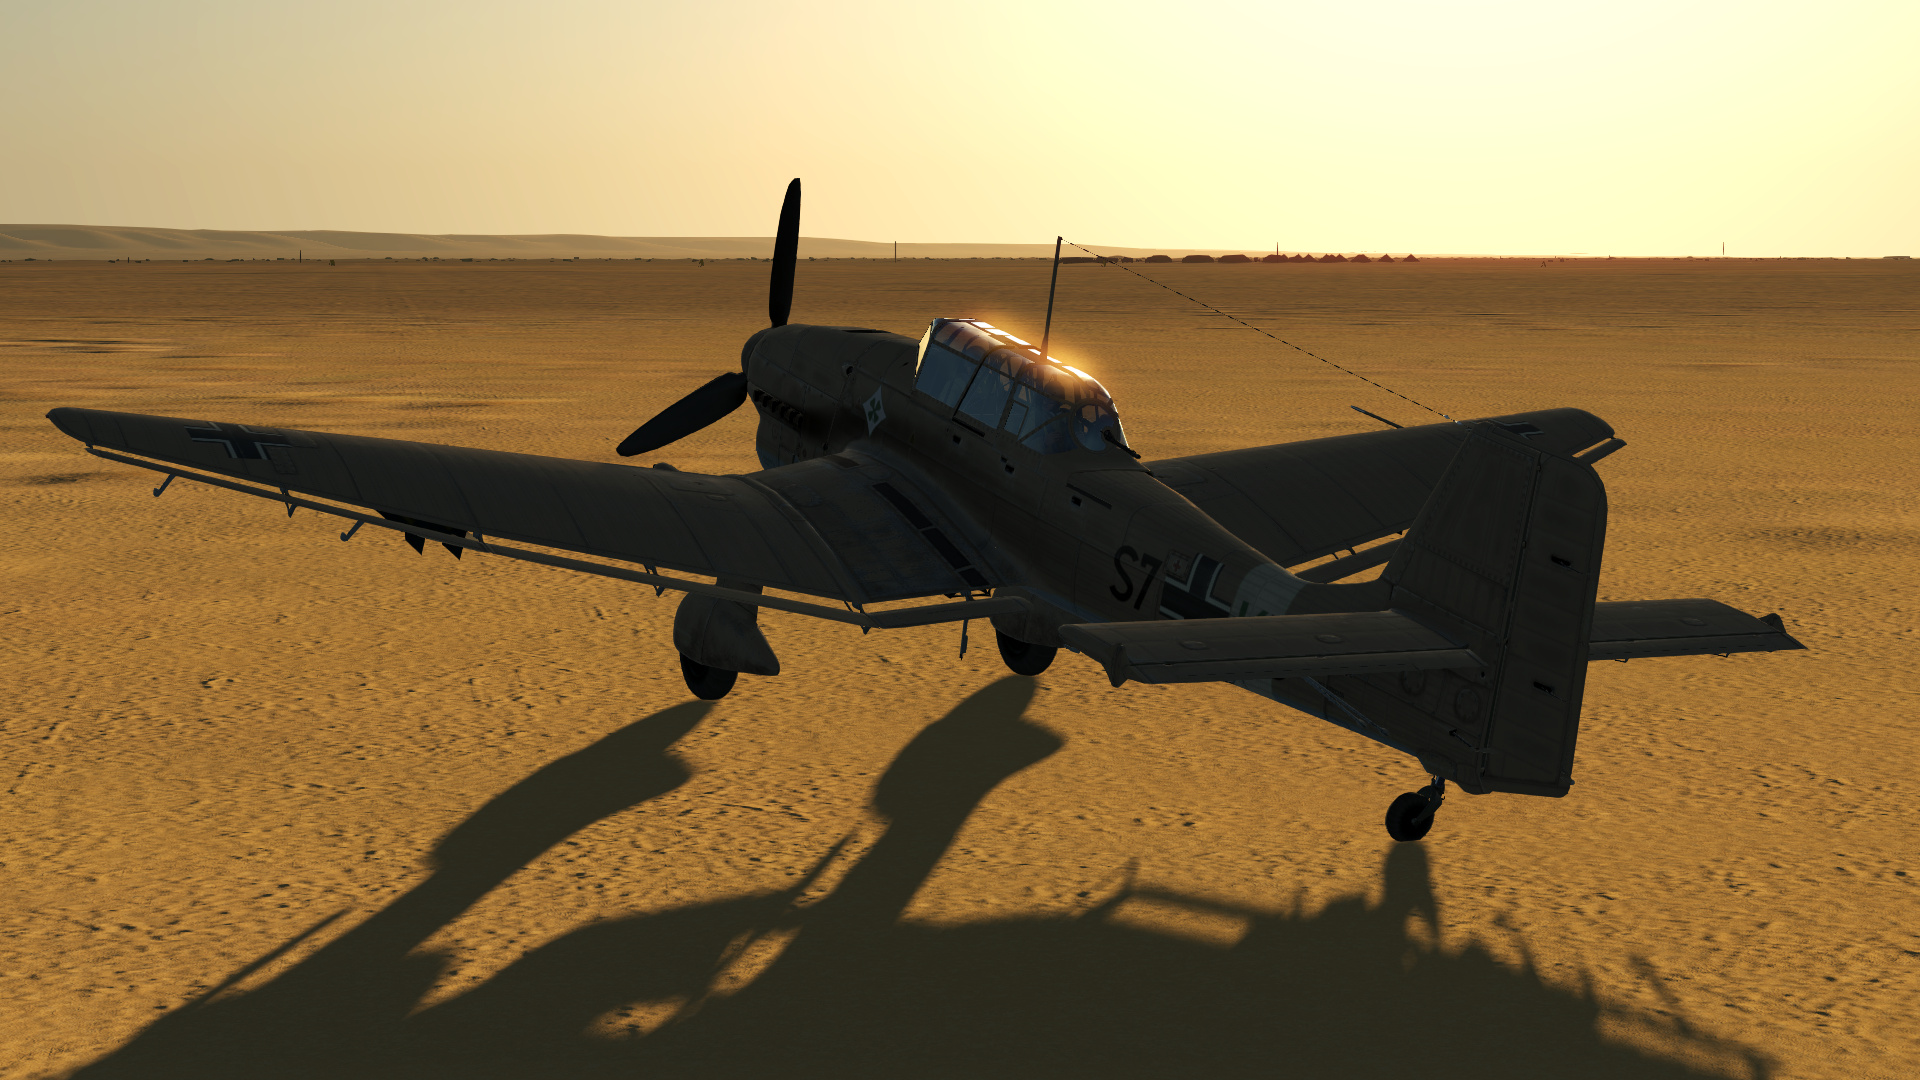
Who doesn’t remember the infamous Junkers Stuka, the dive bomber of the Blitzkrieg? Not much has changed since the Cliffs of Dover, but the plane was still heavily used during the siege of Tobruk. Dive bombing is still one of the scariest things to do (especially when ships are involved)… yet it never gets old.
[caption id=“” align=“aligncenter” width=“690”]
Stuka attack on a Royal Navy convoy.[/caption]
A six-mission campaign called “Gravity is my Friend” sends you on dangerous attacks around Tobruk in April 1941, including the “Good Friday” attack. You will be oeprating from Gazala airfield and may run into Hurricanes and various RAF bombers.
[caption id=“” align=“aligncenter” width=“690”]
A description of the Stuka campaign.[/caption]
He-111 (P-2, H-2, H-6)
The Heinkel H-2 Series is another aircraft that returns from the Battle of Britain
[caption id=“” align=“aligncenter” width=“690”]
He-111 H-2 dropping bombs.[/caption]
This time, a few improvements are available with the brand new H-6 variant. The H-6 initiated some overall improvements in design. The Jumo 211 F-1 engine increased its speed while the defensive armament was upgraded at the factory with one 20 mm cannon in the nose, two MG 15 in the ventral gondola, and one each of the fuselage side windows. Some H-6 variants carried tail-mounted MG 17 defensive armament. The performance of the H-6 was much improved. The climb rate was higher and the machine could reach a slightly higher ceiling of 8,500 m (27,200 ft). When heavy bomb loads were added, this ceiling was reduced to 6,500 m (20,800 ft).
[caption id=“” align=“aligncenter” width=“690”]
A He-111 H-6 drops torpedoes in a low level naval attack.[/caption]
The best thing about the H-6 is the fact that the central bomb bay has been removed in order to carry two torpedoes under the fuselage. I know I feel like I am repeating myself, but a torpedo run against Royal Navy ships is the stuff of nightmares. I’ve learned the very scientific tactic of crossing my fingers and praying to a higher power that nothing critical gets dinged by the AAA batteries. It’s interesting to see how the “bomber” roles of the Ju-88 and He-111 kind of overlapped in Cliffs of Dover, whereas Desert Wings allows the Ju-88 to branch out as a fighter bomber and the He-111 as a torpedo bomber.
[caption id=“” align=“aligncenter” width=“690”]
The Heinkel after a botched torpedo run.[/caption]
3.4 - Regia Aeronautica
CR.42 Falco
[caption id=“” align=“aligncenter” width=“690”]
An in game screenshot of a Falco, external from the front left in the clear sky.[/caption]
The Fiat CR.42 was an evolutionary design of the earlier CR.32 fighter, featuring a more powerful supercharged A.74R1C.38 air-cooled radial engine and aerodynamic improvements to its relatively clean exterior surfaces. The aircraft proved to be relatively agile in flight, a factor that had been attributed to its very low wing loading.
[caption id=“” align=“aligncenter” width=“690”]
Falco patrol.[/caption]
Its armament is nothing to write home about (two 12,7 mm nose machineguns), but it can carry two 50 kg bombs under its wings. You will have to aim very carefully at vital aircraft parts if you want to shoot down anything… which isn’t easy by any stretch of the imagination since the cockpit’s front visibility is pretty terrible with all the struts and upper wing blocking the view.
[caption id=“” align=“aligncenter” width=“690”]
Inside the CR.42’s cockpit.[/caption]
Initially, the Falco was pitted against the contemporary Gloster Gladiator as well as the Bristol Blenheim fast bombers of the RAF, opposing which they were able to achieve a measurable level of success. While the CR.42’s nimble nature will bring you back to the days of the First World War, it is safe to say that most players will tend to gravitate towards a more competitive plane such as the Macchi C.202.
[caption id=“” align=“aligncenter” width=“690”]
Ready for takeoff.[/caption]
The “Tempesta sull’Africa” campaign takes place in December 1940 during Operation Compass. Prepare to face a good number of your RAF nemesis: the Gladiator. Be advised, some of the furballs you will get tangled in may or may not require a puke bag.
[caption id=“” align=“aligncenter” width=“690”]
A description of the Falco campaign.[/caption]
G.50 Freccia
The Fiat G.50 is part of the original Cliffs of Dover roster. A tropicalized version of it is available for Tobruk. The aircraft had already been considered obsolete by the end of the Battle of Britain… so you can imagine how good Italian pilots had to be in order to get any victories in it. Armed with two 12.7 mm machineguns, the Freccia required a lot of talent to be effective.
[caption id=“” align=“aligncenter” width=“690”]
An in game screenshot of a Freccia, external from the front right as it flies over the African desert.[/caption]
Although the G.50s were mainly outperformed by Desert Air Force fighters, their pilots sometimes managed to shoot down the faster and better-armed Hurricanes and P-40s. In the hands of expert pilots, the G.50 was even capable of scoring multiple kills during a single sortie. Will you be that expert?
[caption id=“” align=“aligncenter” width=“690”]
The G.50’s instrument panel.[/caption]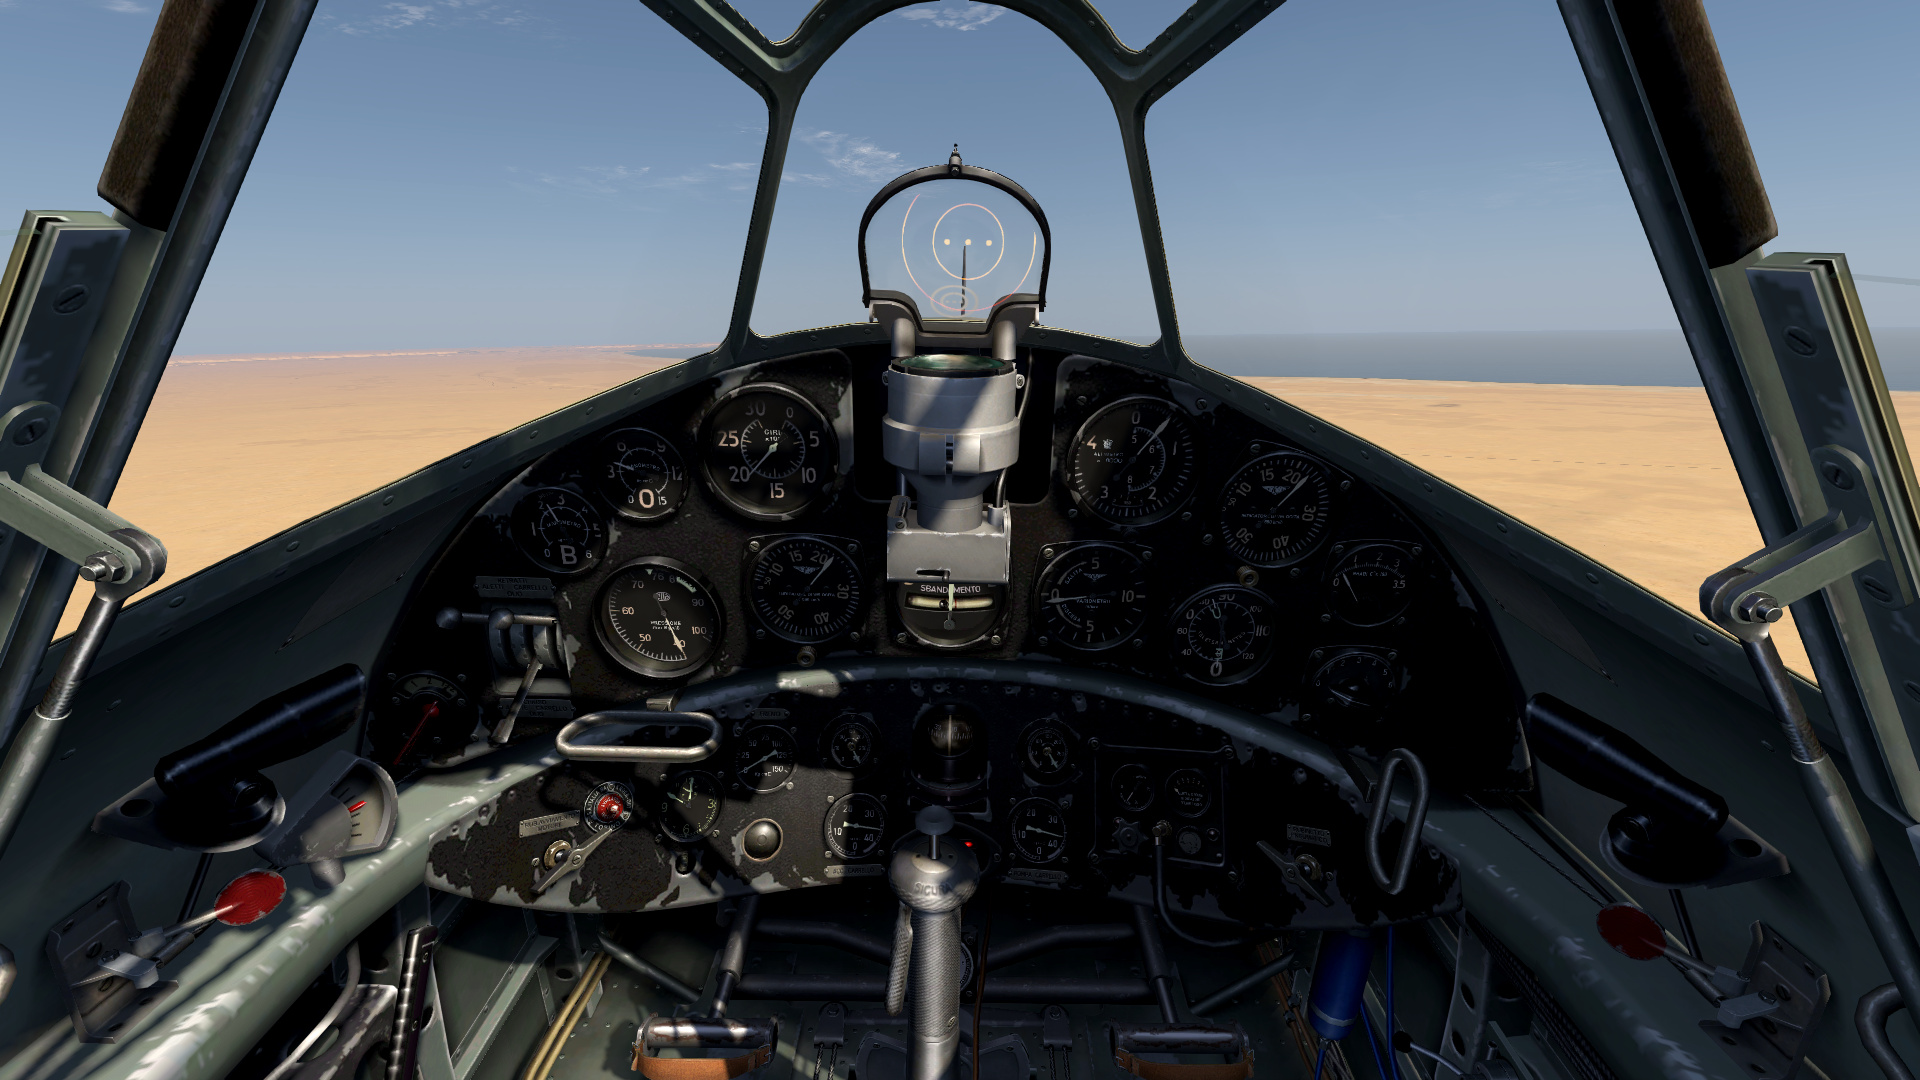
BR.20M Cicogna
The Fiat BR.20 “Stork” is also part of the original Cliffs of Dover roster. By the beginning of the war, the aircraft was already close to being completely obsolete. During summer 1937, the BR.20 received its baptism of fire when a number were operated by the Aviazione Legionaria during the Spanish Civil War; the BR-20 came to form the backbone of Nationalist bombing operations, along with the German-built Heinkel He 111.
[caption id=“” align=“aligncenter” width=“690”]
The Cicogna’s cockpit.[/caption]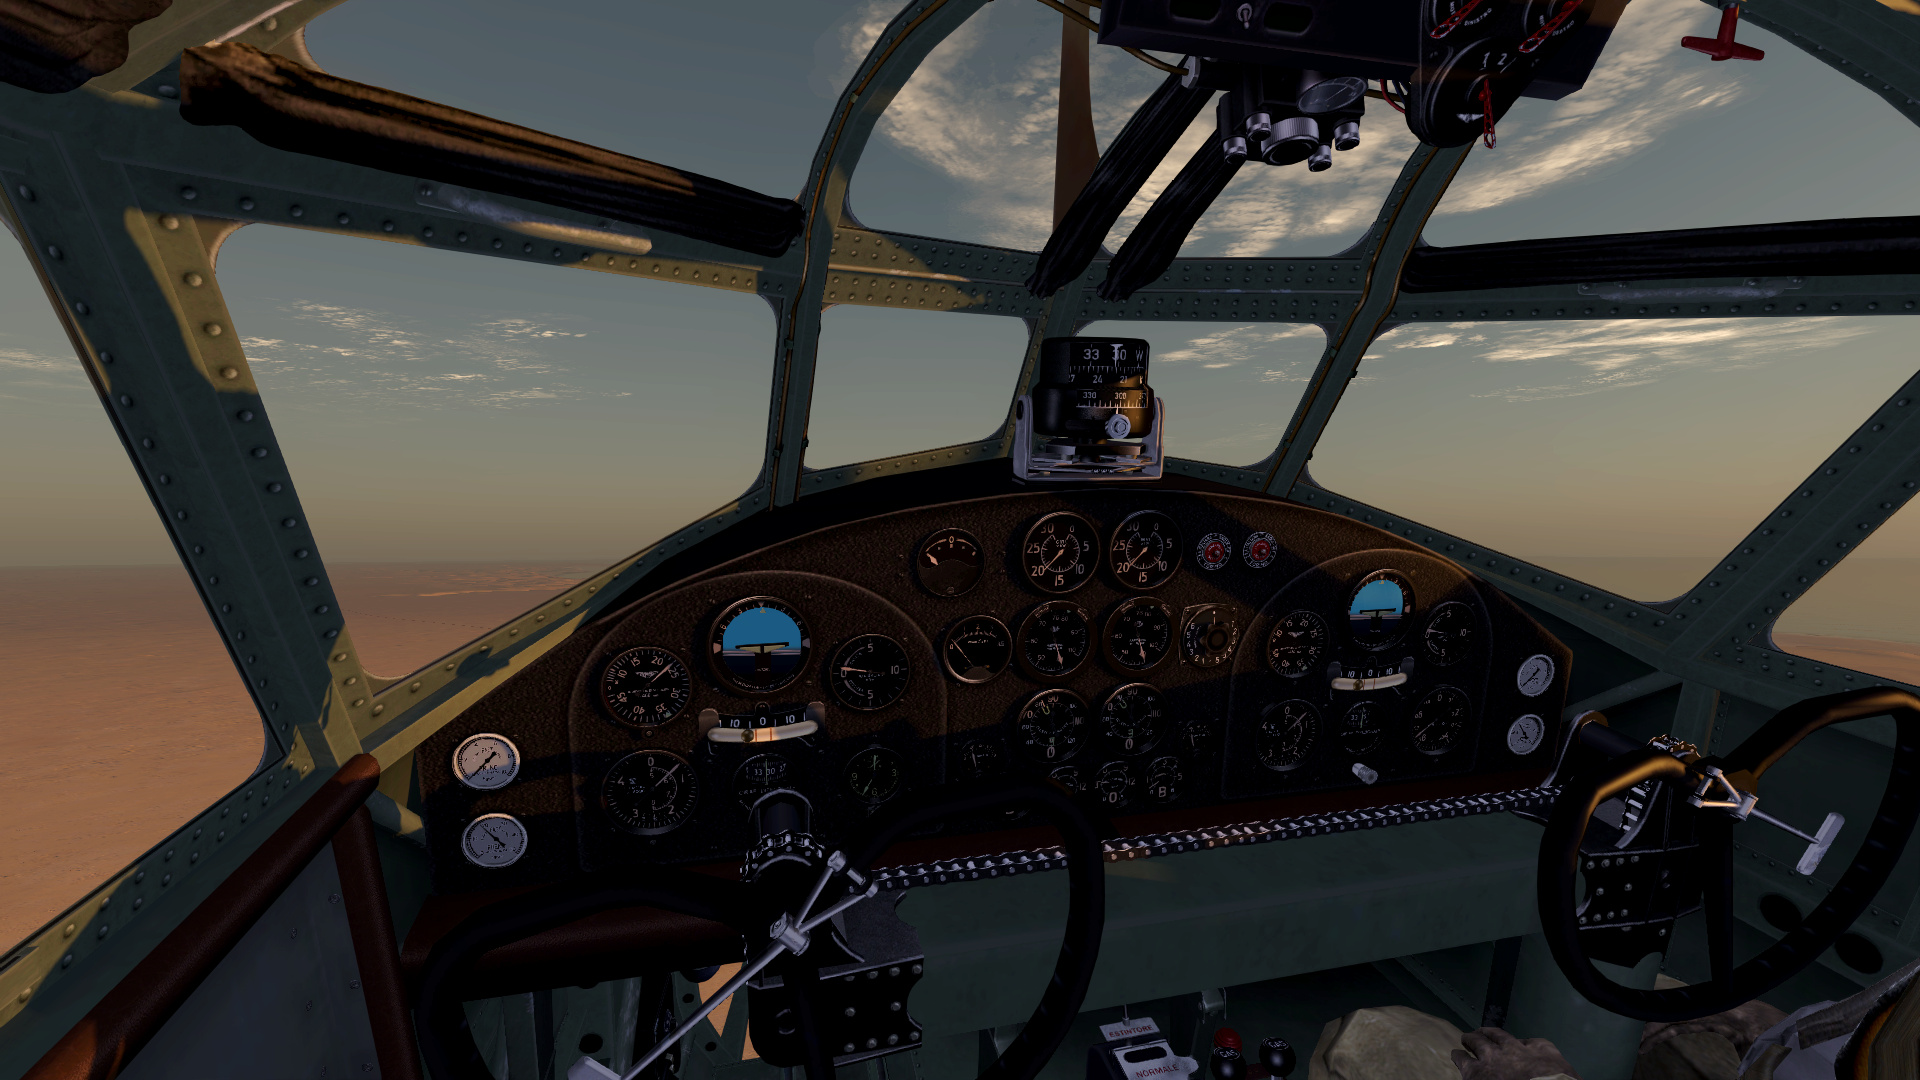
While North Africa was never considered to have been a primary theatre for the Cicogna, 13 Stormo (Wing) was deployed there to continue the night attacks against the British between July 1941 and April 1942. However, due to Italian industry struggling to produce aircraft to meet demands, the strategic capabilities of the Regia Aeronautica was increasingly restricted from mid-1941 onwards.
[caption id=“” align=“aligncenter” width=“690”]
External view of the BR.20.[/caption]
C.202 Folgore
The Italian air force gets yet another brand new plane: the Macchi C.202 Folgore. Interestingly, the aircraft’s fuselage was asymmetrical and one wing is shorter than the other. The principle was that the offset in lift between wings would counter engine torque and minimize the need for trim compensation. However, engine torque varies as the pilot throttles up or down the optimal power setting, so the aircraft could be excessively unstable certain combinations of power regime and manoeuvers, entering a deadly spin.
[caption id=“” align=“aligncenter” width=“690”]
C.202 Series III.[/caption]
The Series III is armed with two 12.7 mm nose-mounted machineguns. It is powered by an Italian-built version of the German Daimler-Benz DB 601Aa engine.
[caption id=“” align=“aligncenter” width=“690”]
C.202 Series VII.[/caption]
The Series VII, on the other hand, has two additional 7.7 mm wing machineguns. For both Series, an AQ (Alta Quota, High Altitude) version exists which has an engine with a higher compression ratio.
[caption id=“” align=“aligncenter” width=“690”]
Folgore’s cockpit.[/caption]
Following Italian design standards, the cockpit looks luxurious and stylish. The Folgore was well liked by its pilots and provided great stability during steep dives. The Hurricane and P-40 were quite outclassed by the C202, which had an impressive combat record against them. However, it suffered from its anemic armament, unreliable radios and oxygen system defects.