My VR SimPit

Yes, very little friction.
It’s a stock Thrustmaster Warthog grip. The Cougar grip can also be used.
The adapter is a VKB design. You have to open the Warthog grip and remove the stock ‘ring’ adapter and replace it with the VKB adapter. 15 minute job, perhaps.

If I remember correctly, the joystick (base and plastic grip), the extension, and the adapter, had to be purchased individually. It came with the original ‘pincher’ gimbal, but I bought the cam gimbal when it was released later on.

1 Like

Yes please. My warthog stick is showing some wear and tear and I have been considering a replacement but it seems a waste to get another warthog to replace my working (yet worn) one.

I have been looking at the VKB options but waiting to see if they have a new one coming up.

2 Likes

The Mamba series is out of production.
I believe the Gunfighter Pro is in the pipeline.
Noticed GoStratojet.com closed its doors and no longer sell VKB in the US. Don’t know the story there.

I find it generally very hard to get an overlook over their current portfolio and grip compatibility arrangements. It seems that only the company site in russian is somewhat up to date, but i know neither cyrillic letters nor the russian language, hence my bothersome behaviour in this thread. :wink:

Hey @Troll Does the eject cord work? I.E. do you have it engineered to send the eject command to the game? Seems like a great addition to VR and knowing you I would assume that is why it is there.

Yes! VKB have been focusing on the russian market. I found someone on a forum, who had the stick, and got an email address directly to VKB.

There is this european dealership, Where I bought the cam gimbal upgrade, but they are at the mercy of VKB production schedule, which seems quite irregular.

https://flightsimcontrols.com/store/

1 Like

You bet! :smiley:

Eject! Eject! Eject!

2 Likes

This is my main simpit. The right side swings out in suicide door fashion. I also built a second, stowable simpit that collapses to about the size of a mini-fridge. Happy to snap a few pics and upload them, if anyone is interested.

4 Likes

I am! Always interested in others ideas!

1 Like

5 Likes

I made the seat longer than necessary so that it can house the PC. I installed USB powered fans in the top of the seat to create airflow. There is an intake vent at the front of the seat, under the stick.

The PC, powerstrip and subwoofer are contained inside the seat and all cables route through the armrests or under the simpit. Some day I am going to paint the inside zine-chromate green…

This is an older photo, taken before I added the MFD panels to each arm rest. There is a JetSeat installed in the seat cushion. The TV mount rotates, so theoretically, I can rotate the TV vertical, remove the armrests (two bolts each) and make the simput slightly more compact for storage. It is also on wheels.

Below are a series of schematics that I drew to give myself something to work on as I built the pit. Needless to say, no plan survived first contact with the enemy, so the schematics are about 50% representative of the finished project.

My main complaint with the design is that the keyboard tray is difficult to reach, however I plan to remedy that by buying a couple of cabinet sliders and making tray that pulls forward once you’re in the seat.

I’ll take some photos of my second simpit soon. It is much more compact, and collapses into a 25" by 20" footprint.

6 Likes

Wow. That’s pretty impressive!

Very nice @SierraAlphaMike - it reminds me…I need to build a garage first… :laughing:

2 Likes

I have been meaning to post as well.

I started off my home flight sim cockpit building many years ago)with an ABC (My Modified ABC Cockpit - SimHQ Forums - this isn’t mine but it is a good example of the plywood 3D puzzle construction used) pit. It was a good start and lasted a few years but had a couple of serious design flaws: 1. I looked like crap and was not helping me in my quests with the ladies; 2. The joystick and throttle positions either interfered with the keyboard or had poor ergonomics that would result in wrist cramps after any significant play.

That lead me to my Mk.II pit where I replaced the chair portion of the ABC with a modified desk chair - keeping the monitor/keyboard table of the ABC. The Mk.II was designed and built around 2005 using a surplus office chair from the office. I added a wooden frame to the bottom after removing the stock (connected to the base and the wheels) and added arms to hold the joystick and throttle at a somewhat ergonomic space. It worked well (and mas much more comfortable than the previous Mk but still was marginal on the presentable-furniture spectrum.

Here is the only picture I have of the Mk.II. At some point I had ditched the plywood parts for some … creative table making :slight_smile:

https://goo.gl/photos/YUHQJ4KU3oCJoQ6x5

I have stuck with this design through the years and iterated as new surplus office chairs became available.

Here is the Mk.III under construction:

https://goo.gl/photos/BkEHfPhpA11BnWwT7

Followed by the Mk.IV which used monitor arms off of the compaion desk. This was also the phase where I was using Helios and a central touch screen on the A-10C. This picture was taken some time after the Mk.IV was already in ‘service’ and I had upgraded to the Warthog.

https://goo.gl/photos/QsPQXQWT81tcgY2h6

Then we get to the current model: the Mk.V. This is the model I am most happy with. All of the other models allowed me to explore and expand my knowledge of building things from wood. With the Mk.V I decided to spend a little bit of money to make something that was much closer to real furniture that something that appeared slapped together from what might have been lying around :slight_smile:

If you don’t mind, I am going to put it together here has best I can from the pictures I have. I am proud of this one.

It starts with the chair from a 2010 VW Golf from a salvage yard - one that does not have any side curtain air bags.
https://goo.gl/photos/QNJfvPn5MLVyiXXe6

Strip out the bits underneath and add a frame to attach the follow-on bits to.
https://goo.gl/photos/tgu4163mTqXqbRP98

Stain it so that it will eventually look good.
https://goo.gl/photos/MB7PqSrRbS5yJp2G9

Build the arm base, both of them.
https://goo.gl/photos/mxtx7eqoni5pwFFg8

Add the modular top to each arm.
https://goo.gl/photos/HaRnL36wEmt7xUKW6

And attach them to the seat.
https://goo.gl/photos/n4gcXU4AarG1nbKj7

Take a break and spend a 6-8 months trying to decide how the rest should go. Then start with a base.

Figure out how the top is going to go on; those square bits match up to the two ‘posts’ that sit above the surface of the table for the monitor arms and the blank bit around the trim is where a small shelf goes and allows the MFDs to have a home.

Then we attach the top.

And add the hardware to get the final product.

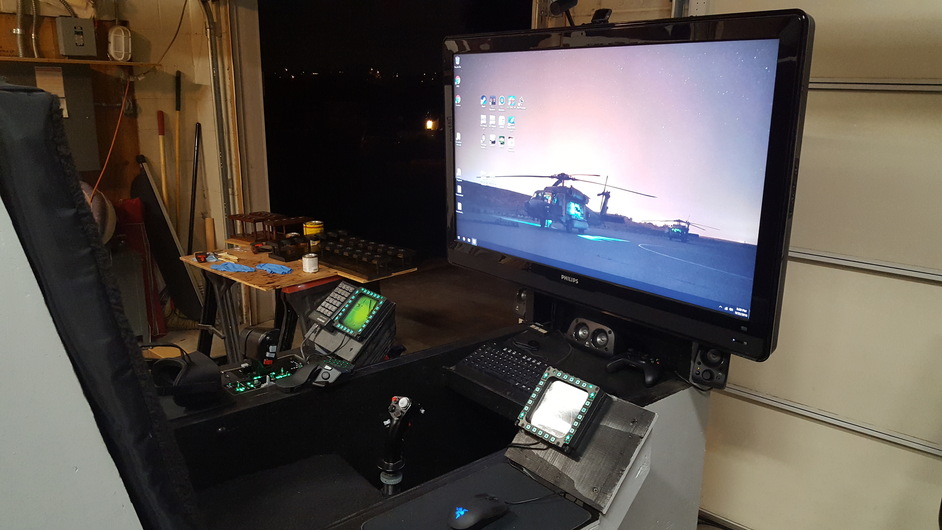
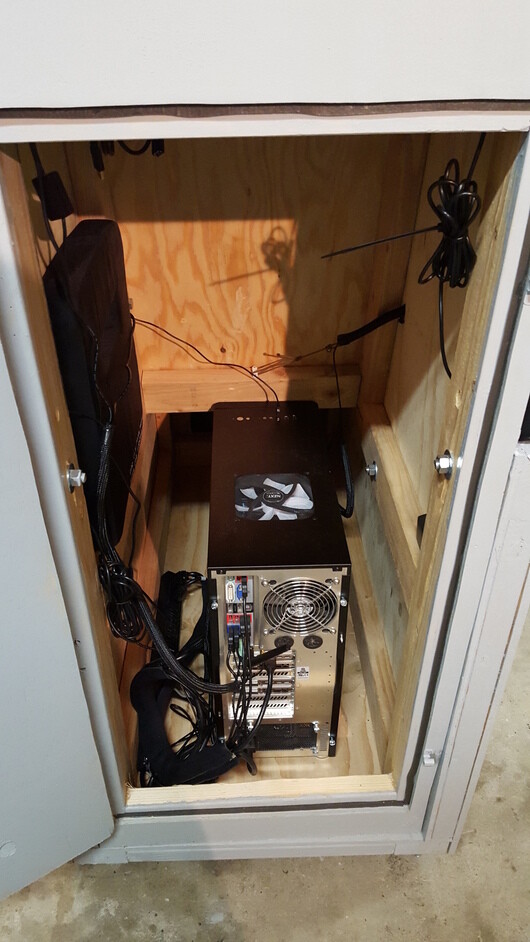
I am very happy with how everything turned out. The CHProducts MFD panel from that first picture has a home where the tablet sits in the last picture. The keyboard is sitting on a modified monitor arm that sits under the desk tabletop, allowing the keyboard to ‘telescope’ out or be tucked away underneath. The PC sits behind the monitors between the two monitor arm poles and he throttle and stick sit down in their little recessed platforms. The MFD bases slide in on the top of that little shelf unit. Everything has a home :slight_smile:

I think that might be the closest I can make it to the realm of full-on acceptable furniture. I have a lot of pictures of chair and desk, so if anyone has any questions about any part of the design or build I can probably illustrate it. I have ‘plans’ but they follow no standard :slight_smile:

The only design drawbacks that I have at the moment concern adding additional pieces. If I want to add anything, I need to re-built parts but luckily I have built the set to be modifyable. I would like to have a place to put a helicopter collective but that would be the most challenging part of any future modification.

Well, that and Thrustmaster or some third party coming out with a new stick/throttle combination.

5 Likes

How do you stand a side mounted extended stick? How does your arm not fatigue?

MIND = BLOWN

Bah ya baby! Its fine. I can actually rest my elbow on that part behind it as it sloped about 4 degrees down, back to front. I would put the stick in the center but that screws with the necessary keyboard (which you could put on the desk but that is too far away to type/code comfortably).

It is a design problem that I keep rolling over in my head. The choice is either center stick or center keyboard and panels.

Hmm, Mr Tickle really isn’t so politically correct anymore. Nice hat though.

3 Likes

I wish I could fit a bigger simpit… But I have a model building workshop, and get to keep my stow-away simpit in the guest bedroom. And I get to hang some of my RC model aircraft in the stairwell as well as several aviation themed pictures on the walls. I think I would be pushing my luck if I asked for more space for my hobbies. :wink:

1 Like

Could we please make a dedicated ‘show your simpit’ thread? My OT derail of Trolls thread is getting drowned in pictures of simpits. :wink:

2 Likes

By the way, if any of you are considering buying a JetSeat, I HIGHLY recommend it! I considered the ButtKicker, or going custom and wiring in seperate shakers around the seat of my pit, but in the end I elected to try the JetSeat after reading the DCS forum posts.

I want to say it cost me about $150 all told, but it showed up in about a week (covered in Russian stamps). It was super easy to set up and the software worked for DCS right out of the gate with no issues. You could set it on top of a chair, but I elected to redo the cushions of my simpit. I took out the 2" foam and sandwiched the JetSeat in between 1" and a .5" foam sections (with the .5" section “up”, or closest to the body).

The effect is really prominent and brings a whole new level of tactile feel to DCS, especially in the helicopters. There is a little bit of ambient rumble noise, but with the sound turned up on the sim, it’s barely noticeable. Coupled with VR, it’s amazing. Definitely money well spent. If I find I started a mission in DCS without enabling the JetSeat software, I’ll quit out and reload everything… it’s that good, haha.

1 Like