ED Forums user DeltaAlphaLima1 has one availble. It basically uses the same electronics as an Xbox controller:
Thread over at the ED forums:
Pre-order link:
Have mine pre-ordered. Will report back post field test ![]()
ED Forums user DeltaAlphaLima1 has one availble. It basically uses the same electronics as an Xbox controller:
Thread over at the ED forums:
Pre-order link:
Have mine pre-ordered. Will report back post field test ![]()
FINALLY!!! I have been waiting for something like this for YEARS.
Looks great! Little expensive though but the quality is there and the force sensor isn’t cheap.
Looks very nice! I am impressed!
Whoo-boy this is one of those things I really wanna do, but am also deathly afraid of trying to do.
Still working up the courage. Someone may tell me “don’t worry it’s easy”, but those same people have no idea how I can screw up the most basic diy tasks.
Come on it’s just like rocket surgery!
No, trust me, it’s that easy. Just follow the instructions. I’ve messed up quite a few projects in my life, and am ALWAYS the guy who has that odd issue they post about on the forum that no one seems to have a clue how to solve. Not the case here.
Only thing I’ll say, is be sure to line things up as he notes in the instructions, as for mine it took a tad more force than I thought it would to push the unit through.
And he is open for preordering!
Just ordered mine, woohoo
So, I finally received it, install took a good hour or so, including calibration and everything just fit right in. The 3d printed parts look really good and durable. In fact you can’t really tell they are printed, thanks to using the sls process and not fdm.
Only unexpected snag was I had to update the throttle to the latest TM firmware, for it to recognize the ministick axis.
And the result? Smooooth and precise radar cursor control like never before, and a push button on the stick even.
Got any pics? Would love to see the details!
No, I didn’t think of taking any pictures unfortunately. However, Deltasim has a nice PDF with install instructions and plenty of pics on his website.
Oh, and Ugene posted a couple further up in this thread.
Pristine job! Will check with my She-boss if I am allowed to do that! ![]()
Received mine in the mail a couple of days ago. I am pretty impressed with the quality of the part and how easy it was to replace.
For reference here are the installation instructions and the app for calibrating the throttle after hardware installation.
At the start of the upgrade process. My always curious assistant was wondering what I was up to and why she couldn’t be involved.
It is much better than what the Warthog comes with. I had been using a ‘hot glue’ mod: where-in I cut up a broken XBox controller and hot glued one of the analog sticks tops to the little useless Warthog nub.
The process went relatively by the book.
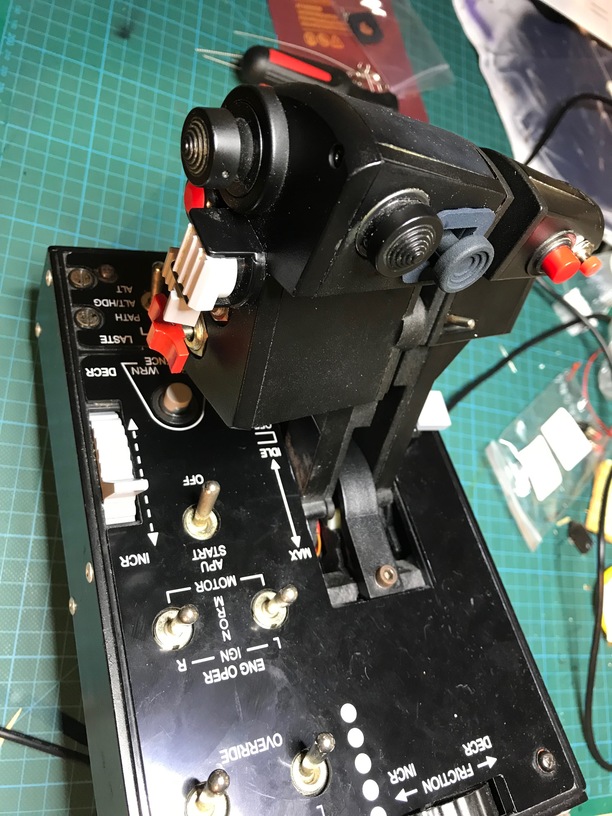
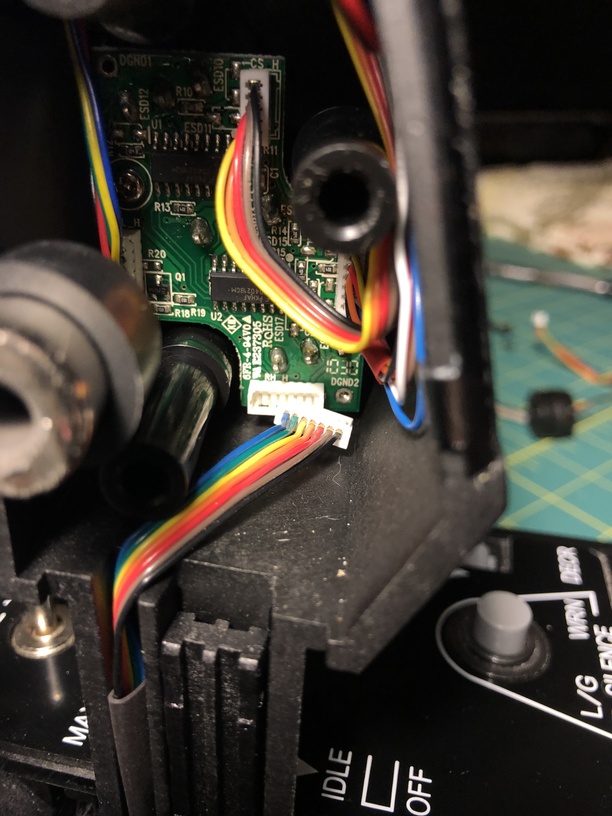
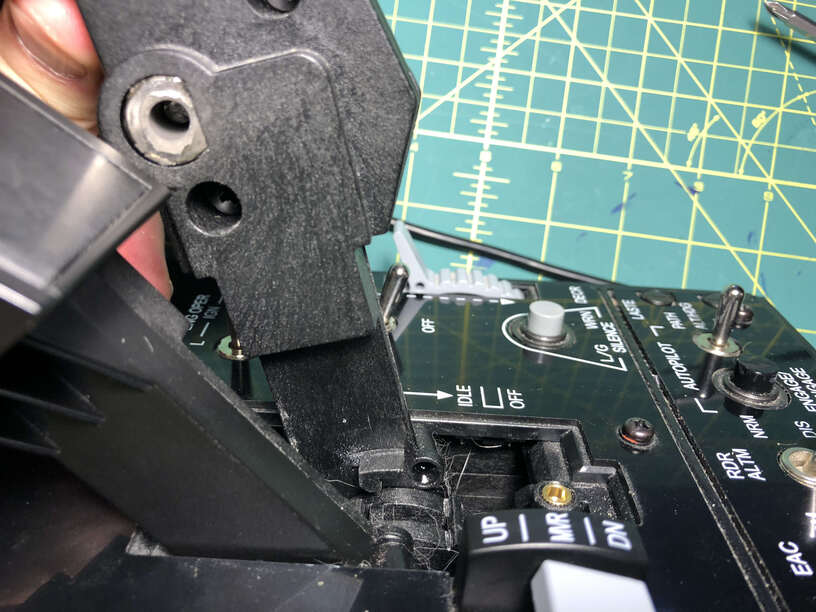
Note in the next picture that the cable that connects the circuit board to the base came lose in this step. you can see it detached in this picture. We will come back to this later.
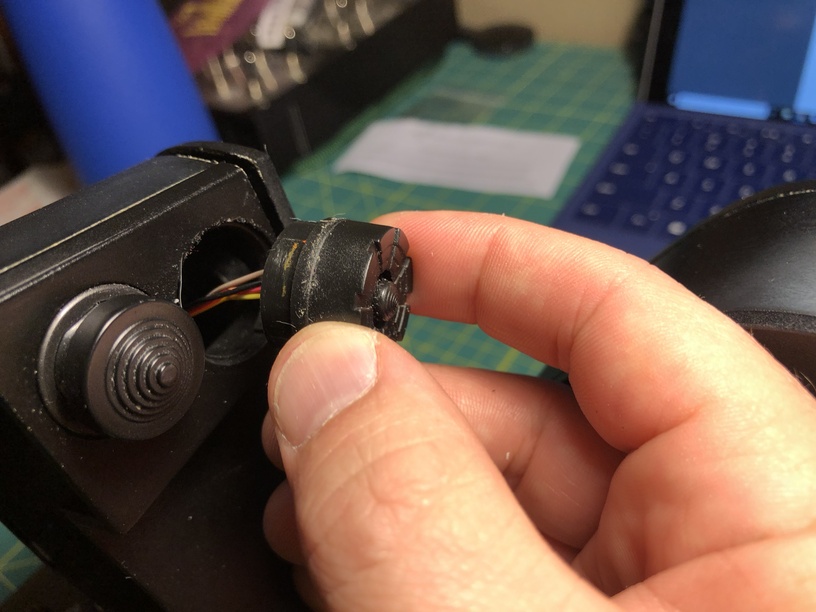
The little tabs that you have to depress are a little deep in the cavity. If I had taken the other side off it would have been easier but they are not hard to spot (you can easily see the tab for the hat switch in the picture below (don’t take that one out, but look behind it for the one you want to remove).
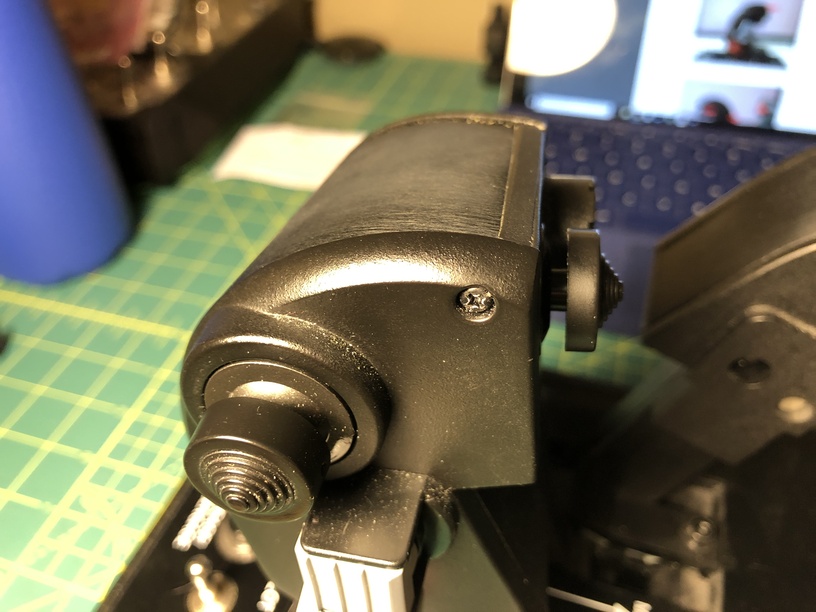
And out it comes. Very easy.
Note the notch (sorry for the potato quality picture)
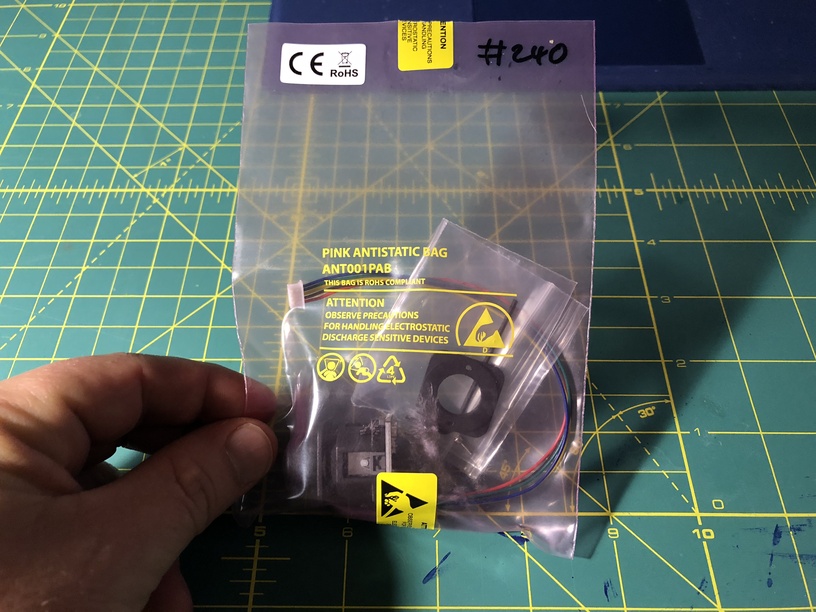
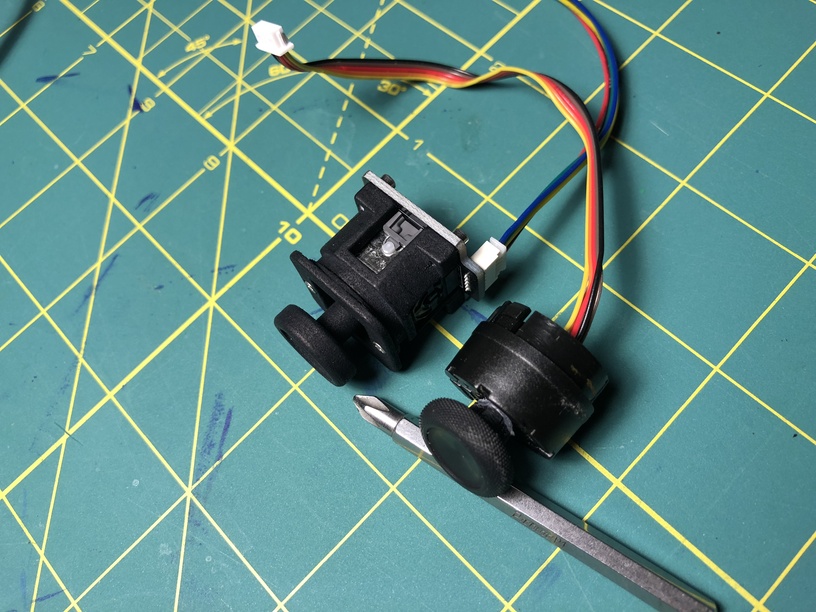
New versus old.
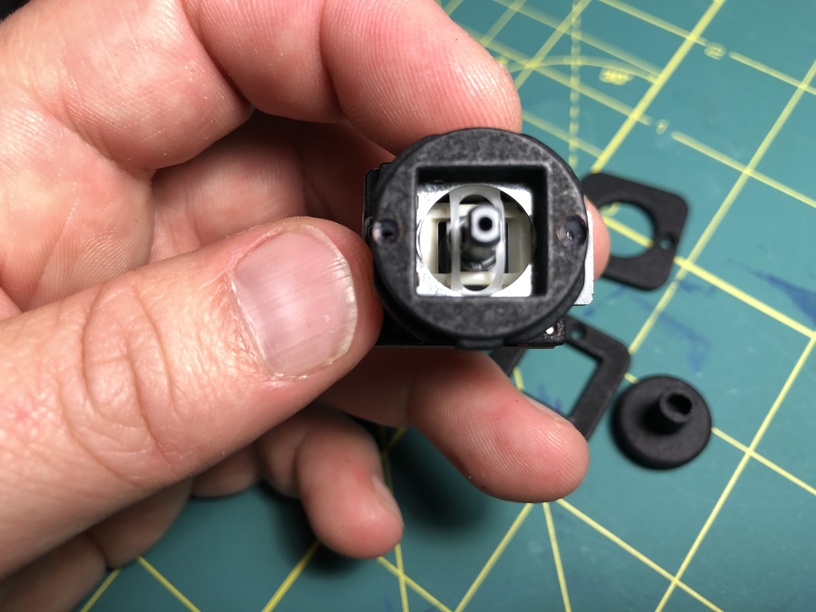
Line up the tab (bottom) when you put the new part in, after removing all of the pieces that had been pre-attached for packaging.
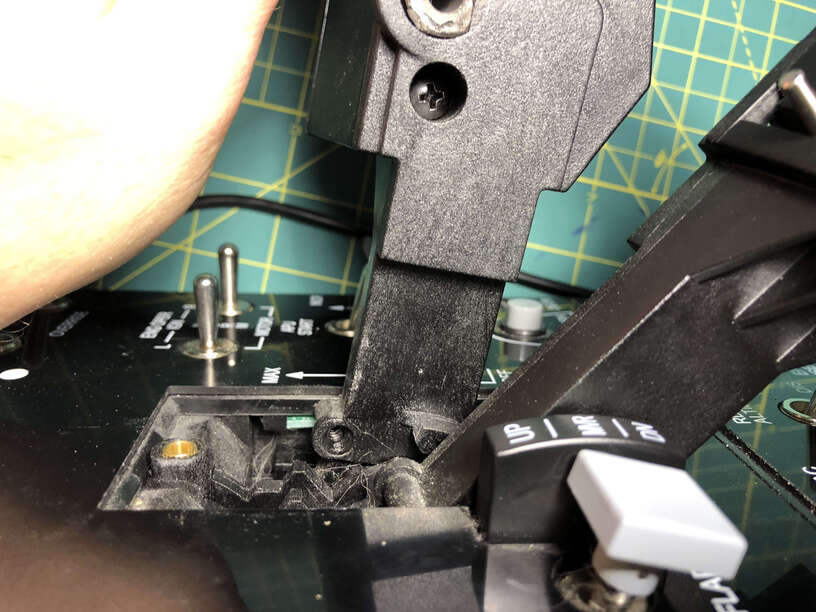
And it fits nicely in place (but doesn’t push all the way through - remember that. It is supposed to just sit in there, flush and is held in place by the plate you put on next).
The only snag I hit was how to reattach the cable that connects the circuit board to the base. This is the cable that I mentioned above. The only solution that I could see was to either shrink someone down put them inside the enclosure and have them reconnect the cable and … well die of dehydration or to take off the panel on the other side of the throttle. I already have most of the screws on that side removed, just have to remove the extra two screws at the bottom - which are in a really inconvenient spot. Be careful not to strip the heads!
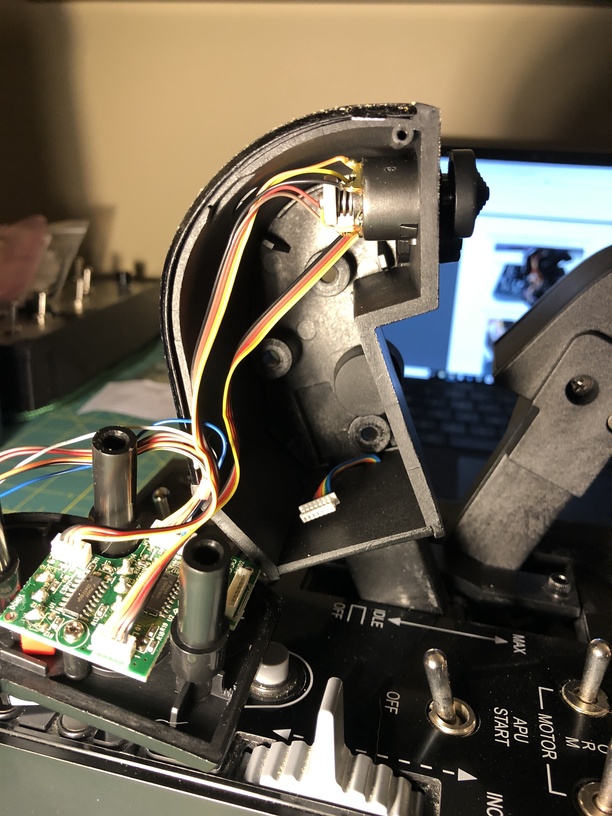
Reattach the wires.
And then finish reassembly. Here are the two screw locations that were hard to get to. You have to hold the throttle away from the base (you know how you have to ‘lift’ the throttle over the A-10C engine start detente? do that).
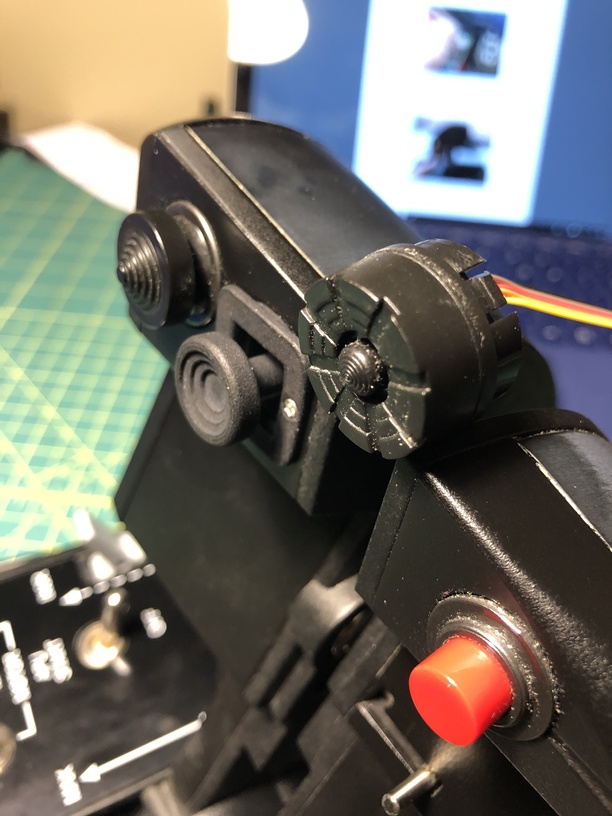
Looking good!
And the last hardware step:
Next comes the software calibration. Make sure that you have updated the throttle to the latest firmware or the calibration will not work. Follow the steps in the docs linked above (clear any old calibration, run the app, do the steps and it works).
It was a easy process to accomplish in about 30 minutes and it adds to the quality of the throttle. I have no idea why Thrustmaster didn’t do this themselves.
Any questions, feel free to ask ![]()
I’m so tempted…
Do you find this mod increases your precision when utilizing this control for selecting targets on the radar of the F18 for example?
This is timely, I just received mine a few days ago and installed it yesterday!
My experience was very similar, but the other throttles cables were long enough that I could leave the circuit board resting on the throttle deck while I replace the slew housing.
As for precision, I’ve tried it out in Falcon BMS and found it much easier to slew and lock up targets. Much less tricky, I’m happy with my purchase.
I would have to say that it would be hard not to have better precision, even by accident. ![]()
Do it! Mine is in the next production batch.
I ordered one a few weeks ago but it hasn’t shipped yet. Glad to see that your install went well.